Lexmark X748 Email Guide
Lexmark X748 Manual
 |
View all Lexmark X748 manuals
Add to My Manuals
Save this manual to your list of manuals |
Lexmark X748 manual content summary:
- Lexmark X748 | Email Guide - Page 1
guide Page 1 of 4 E-mail guide The printer can be used to e-mail scanned documents to one or more recipients. You can send an e-mail from the printer by typing the e-mail address, using a shortcut number, or using the address book. Sending an e-mail using the printer adjust the paper guides. 3 Press - Lexmark X748 | Email Guide - Page 2
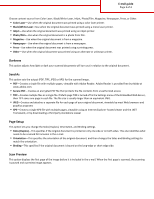
mail guide Page is set to Mixed Sizes, you can scan an original document that contains mixed paper sizes. Resolution Adjusts the output quality of your or line art. • Graphics-Use when the original document is mostly business‑type graphics such as pie charts, bar charts, and animations. • Text/Photo- - Lexmark X748 | Email Guide - Page 3
E-mail guide Page 3 of 4 Choose content source from Color Laser, Black/White Laser, Inkjet, Photo/Film, Magazine, Newspaper, Press, or Other. • Color Laser-Use when the original document was printed using a color laser printer. • Black/White Laser-Use when the original document was printed using a - Lexmark X748 | Email Guide - Page 4
document. You can choose to eliminate an equal area around all four sides of the paper, or pick a particular edge. Edge Erase will erase whatever is within the area selected, leaving nothing on that portion of the scan. • Transmission Log-Use to print the transmission log or transmission error log.
-
 1
1 -
 2
2 -
 3
3 -
 4
4
 |
 |
E-mail guide
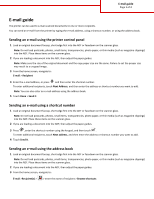
The printer can be used to e-mail scanned documents to one or more recipients.
You can send an e-mail from the printer by typing the e-mail address, using a shortcut number, or using the address book.
Sending an e-mail using the printer control panel
1
Load an original document faceup, short edge first into the ADF or facedown on the scanner glass.
Note:
Do not load postcards, photos, small items, transparencies, photo paper, or thin media (such as magazine clippings)
into the ADF. Place these items on the scanner glass.
2
If you are loading a document into the ADF, then adjust the paper guides.
Note:
Make sure the size of the original document and the copy paper size are the same. Failure to set the proper size
may result to a cropped image.
3
From the home screen, navigate to:
E-mail
>
Recipient
4
Enter the e
‑
mail address, or press
and then enter the shortcut number.
To enter additional recipients, touch
Next Address
, and then enter the address or shortcut number you want to add.
Note:
You can also enter an e
‑
mail address using the address book.
5
Touch
Done
>
Send It
.
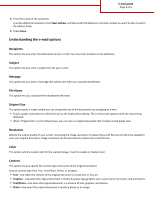
Sending an e
‑
mail using a shortcut number
1
Load an original document faceup, short edge first into the ADF or facedown on the scanner glass.
Note:
Do not load postcards, photos, small items, transparencies, photo paper, or thin media (such as magazine clippings)
into the ADF. Place these items on the scanner glass.
2
If you are loading a document into the ADF, then adjust the paper guides.
3
Press
, enter the shortcut number using the keypad, and then touch
.
To enter additional recipients, touch
Next address
, and then enter the address or shortcut number you want to add.
4
Touch
Send It
.
Sending an e
‑
mail using the address book
1
Load an original document faceup, short edge first into the ADF or facedown on the scanner glass.
Note:
Do not load postcards, photos, small items, transparencies, photo paper, or thin media (such as magazine clippings)
into the ADF. Place these items on the scanner glass.
2
If you are loading a document into the ADF, then adjust the paper guides.
3
From the home screen, navigate to:
E-mail
>
Recipient(s)
>
> enter the name of recipient >
Browse shortcuts
E-mail guide
Page 1 of 4