Lexmark X748 FTP Guide
Lexmark X748 Manual
 |
View all Lexmark X748 manuals
Add to My Manuals
Save this manual to your list of manuals |
Lexmark X748 manual content summary:
- Lexmark X748 | FTP Guide - Page 1
guide The scanner lets you scan documents directly to an FTP server. You can scan documents to only one FTP address at a time. Scanning to an FTP address using the printer then adjust the paper guides. 3 From the home screen, navigate to: FTP > FTP > type the FTP address > Send It Scanning to an FTP - Lexmark X748 | FTP Guide - Page 2
guide Page 2 of 3 Original Size This option opens a screen where you can choose the size of the documents for FTP sending. • Touch a paper of the Embedded Web Server, then TIFF saves one page in each printed on one page) or duplex (printed on both sides). This also identifies what needs to be scanned - Lexmark X748 | FTP Guide - Page 3
an equal area around all four sides of the paper, or pick a particular edge. Edge Erase will erase whatever is within the area selected, leaving nothing on that portion of the scan. • Transmission Log-Use to print the transmission log or transmission error log. • Custom Job-Use to combine multiple
-
 1
1 -
 2
2 -
 3
3
 |
 |

FTP guide
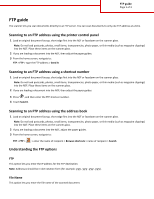
The scanner lets you scan documents directly to an FTP server. You can scan documents to only one FTP address at a time.
Scanning to an FTP address using the printer control panel
1
Load an original document faceup, short edge first into the ADF or facedown on the scanner glass.
Note:
Do not load postcards, photos, small items, transparencies, photo paper, or thin media (such as magazine clippings)
into the ADF. Place these items on the scanner glass.
2
If you are loading a document into the ADF, then adjust the paper guides.
3
From the home screen, navigate to:
FTP
>
FTP
> type the FTP address >
Send It
Scanning to an FTP address using a shortcut number
1
Load an original document faceup, short edge first into the ADF or facedown on the scanner glass.
Note:
Do not load postcards, photos, small items, transparencies, photo paper, or thin media (such as magazine clippings)
into the ADF. Place these items on the scanner glass.
2
If you are loading a document into the ADF, then adjust the paper guides.
3
Press
, and then enter the FTP shortcut number.
4
Touch
Send It
.
Scanning to an FTP address using the address book
1
Load an original document faceup, short edge first into the ADF or facedown on the scanner glass.
Note:
Do not load postcards, photos, small items, transparencies, photo paper, or thin media (such as magazine clippings)
into the ADF. Place these items on the scanner glass.
2
If you are loading a document into the ADF, adjust the paper guides.
3
From the home screen, navigate to:
FTP
>
FTP
>
> enter the name of recipient >
Browse shortcuts
> name of recipient >
Search
Understanding the FTP options
FTP
This option lets you enter the IP address for the FTP destination.
Note:
Addresses should be in dot notation form (for example:
yyy.yyy.yyy.yyy
).
File Name
This option lets you enter the file name of the scanned document.
FTP guide
Page 1 of 3