Lexmark X925 Maintenance Guide - Page 12
Using both hands, push the sides of the internal cover firmly until the cover - imaging unit
 |
View all Lexmark X925 manuals
Add to My Manuals
Save this manual to your list of manuals |
Page 12 highlights
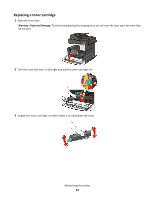
3 Push the imaging unit lock lever up and pull out the imaging unit with the toner cartridge attached to it. 4 Unpack the replacement imaging unit. 5 Peel off the black protective sheet and the toner sealing tape. 6 Insert the imaging unit into the printer until it clicks it into place. 7 Using both hands, push the sides of the internal cover firmly until the cover clicks into place. Maintaining the printer 12
-
 1
1 -
2
-
3
-
4
-
5
-
6
-
 7
7 -
 8
8 -
 9
9 -
 10
10 -
 11
11 -
 12
12 -
 13
13 -
 14
14 -
 15
15 -
 16
16 -
 17
17 -
18
 |
 |

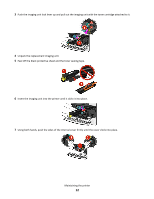
3
Push the imaging unit lock lever up and pull out the imaging unit with the toner cartridge attached to it.
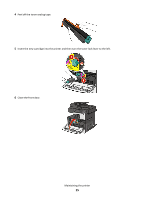
4
Unpack the replacement imaging unit.
5
Peel off the black protective sheet and the toner sealing tape.
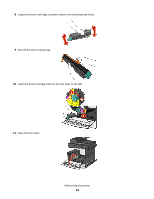
6
Insert the imaging unit into the printer until it
clicks
it into place.
7
Using both hands, push the sides of the internal cover firmly until the cover
clicks
into place.
Maintaining the printer
12