LiftMaster 8557 8557 Manual - Page 12
Install the door bracket, Wood Doors
 |
View all LiftMaster 8557 manuals
Add to My Manuals
Save this manual to your list of manuals |
Page 12 highlights
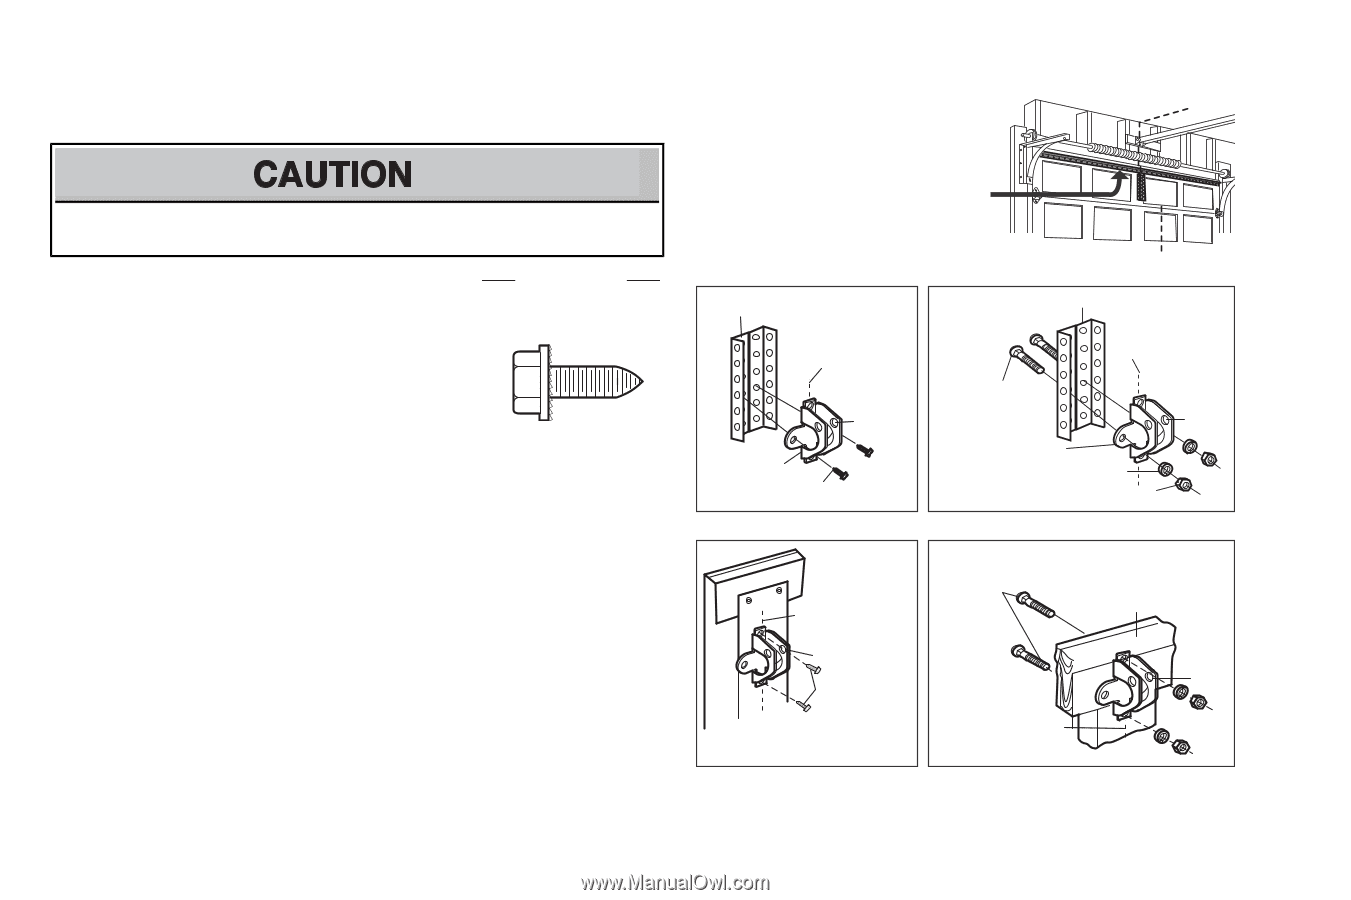
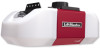
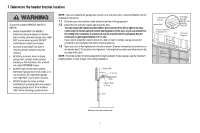
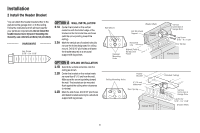
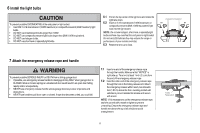
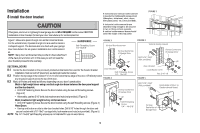
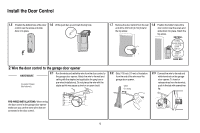
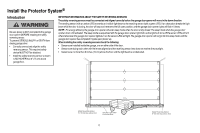
Installation 8 Install the door bracket Fiberglass, aluminum or lightweight steel garage doors WILL REQUIRE reinforcement BEFORE installation of door bracket. Contact your door manufacturer for reinforcement kit. A horizontal and vertical reinforcement is needed for lightweight garage doors (fiberglass, aluminum, steel, doors with glass panel, etc.) (not provided). A horizontal reinforcement brace should be long enough to be secured to two or three vertical supports. A vertical reinforcement brace should cover the height of the top panel. FIGURE 1 Figure 1 shows one piece of angle iron as the horizontal brace. For the vertical brace, 2 pieces of angle iron are used to create a U-shaped support. The best solution is to check with your garage door manufacturer for an opener installation door reinforcement kit. NOTE: Many door reinforcement kits provide for direct attachment of the clevis pin and door arm. In this case you will not need the door bracket; proceed to the next step. HARDWARE Self-Threading Screw 1/4"-14x5/8" FIGURE 2 Vertical Reinforcement Vertical Centerline of Garage Door UP FIGURE 3 Vertical Reinforcement Vertical Centerline of Garage Door Bolt 5/16"-18x2" (Not provided) UP SECTIONAL DOORS 8.1 Center the door bracket on the previously marked vertical centerline used for the header bracket Door Bracket installation. Note correct UP placement, as stamped inside the bracket. 8.2 Position the top edge of the bracket 2"-4" (5-10 cm) below the top edge of the door, OR directly below Self-Threading Screw 1/4" - 14x 5/8" any structural support across the top of the door. FIGURE 4 8.3 Mark, drill holes and install as follows, depending on your door's construction: Metal or light weight doors using a vertical angle iron brace between the door panel support and the door bracket: • Drill 3/16" fastening holes. Secure the door bracket using the two self threading screws. (Figure 2) Vertical Centerline of Garage Door • Alternately, use two 5/16" bolts, lock washers and nuts (not provided). (Figure 3) UP Metal, insulated or light weight factory reinforced doors: • Drill 3/16" fastening holes. Secure the door bracket using the self-threading screws. (Figure 4) Wood Doors: • Use top and bottom or side to side door bracket holes. Drill 5/16" holes through the door and Self-Threading Screw 1/4" - 14x 5/8" secure bracket with 5/16"-18x2" carriage bolts, lock washers and nuts (not provided). (Figure 5) NOTE: The 1/4"-14x5/8" self-threading screws are not intended for use on wood doors. Door Bracket Lock Washer 5/16" Nut 5/16"-18 FIGURE 5 Bolt 5/16"-18x2" (Not provided) Inside Edge of Door or Reinforcement Board UP Vertical Centerline of Garage Door 12
-
 1
1 -
2
-
3
-
4
-
5
-
6
-
 7
7 -
 8
8 -
 9
9 -
 10
10 -
 11
11 -
 12
12 -
 13
13 -
 14
14 -
 15
15 -
 16
16 -
 17
17 -
18
-
19
-
20
-
21
-
22
-
23
-
24
-
25
-
26
-
27
-
28
-
29
-
30
-
31
-
32
-
33
-
34
-
35
-
36
-
37
-
38
-
39
-
40
-
41
-
42
-
43
-
44
-
45
-
46
-
47
-
48
-
49
-
50
-
51
-
52
-
53
-
54
-
55
-
56
-
57
-
58
-
59
-
60
-
61
-
62
-
63
-
64
-
65
-
66
-
67
-
68
-
69
-
70
-
71
-
72
-
73
-
74
-
75
-
76
-
77
-
78
-
79
-
80
-
81
-
82
 |
 |