Linksys WET54GS5 User Guide - Page 21
Wireless Settings, Network Mode, IP Settings, Subnet Mask. - drops
 |
UPC - 745883559022
View all Linksys WET54GS5 manuals
Add to My Manuals
Save this manual to your list of manuals |
Page 21 highlights
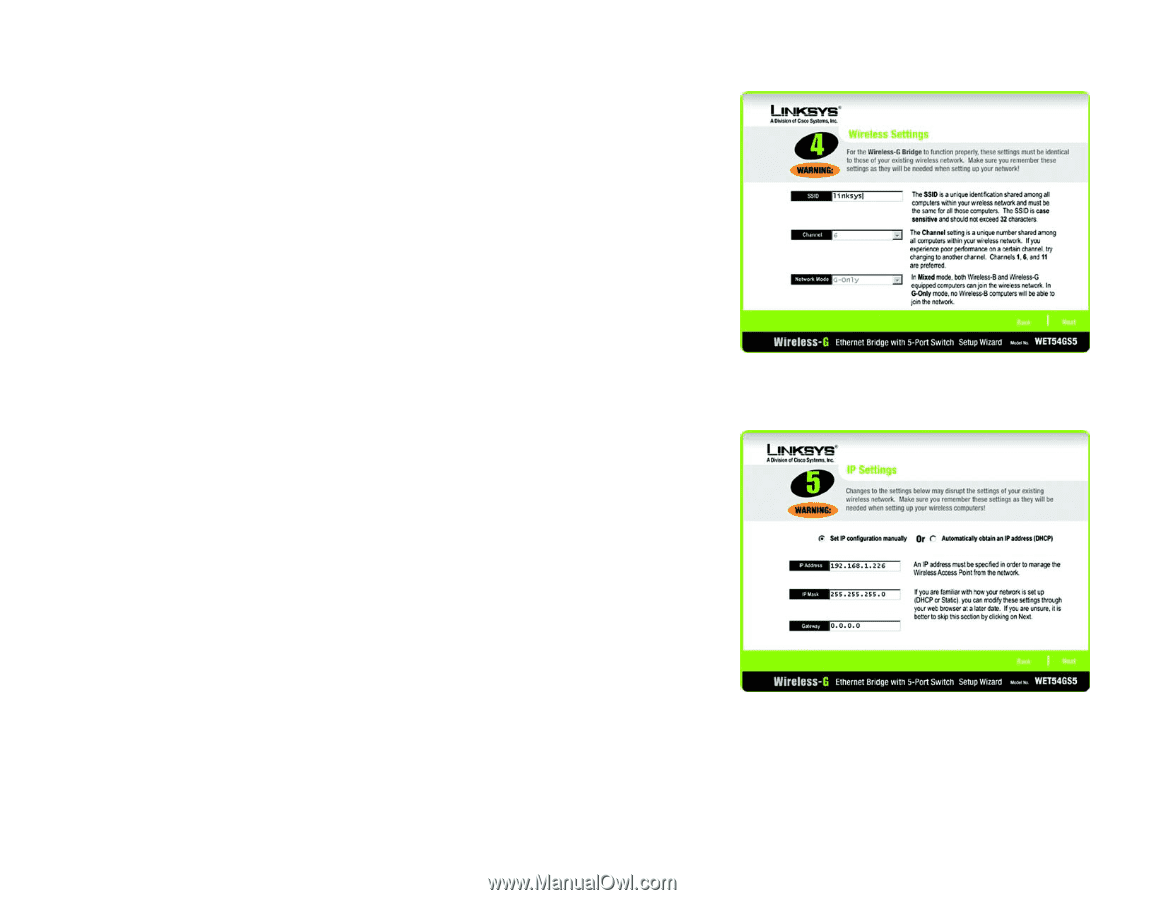
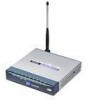
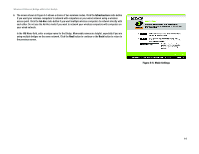
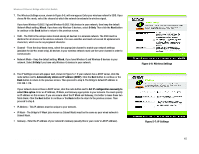
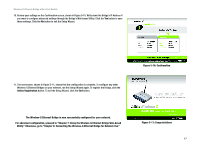
Wireless-G Ethernet Bridge with 5-Port Switch 7. The Wireless Settings screen, shown in Figure 5-6, will now appear. Enter your wireless network's SSID. If you chose Ad-Hoc mode, select the channel at which the network broadcasts its wireless signal. If you have Wireless-G (802.11g) and Wireless-B (802.11b) devices in your network, then keep the default Network Mode setting, Mixed. If you have only Wireless-G devices, select G-Only. Then click the Next button to continue or the Back button to return to the previous screen. • SSID - The SSID is the unique name shared among all devices in a wireless network. The SSID must be identical for all devices in the wireless network. It is case-sensitive and must not exceed 32 alphanumeric characters, which can be any keyboard character. • Channel - From the drop-down menu, select the appropriate channel to match your network settings (available for Ad-Hoc mode only). All devices in your wireless network must use the same channel in order to communicate. • Network Mode - Keep the default setting, Mixed, if you have Wireless-G and Wireless-B devices in your network. Select G-Only if you have only Wireless-G devices in your network. 8. The IP Settings screen will appear next, shown in Figure 5-7. If your network has a DHCP server, click the radio button next to Automatically obtain an IP address (DHCP). Click the Next button to continue or the Back button to return to the previous screen. Then proceed to step 9. The Bridge's default IP address is 192.168.1.116. If your network does not have a DHCP server, click the radio button next to Set IP configuration manually to select this option. Enter an IP Address, IP Mask, and Gateway appropriate to your network. You must specify an IP address on this screen. If you are unsure about the IP Mask and Gateway, it is better to leave these two fields blank. Click the Next button to continue or the Back button to return to the previous screen. Then proceed to step 9. • IP Address - This IP address must be unique to your network. • IP Mask - The Bridge's IP Mask (also known as Subnet Mask) must be the same as your wired network's Subnet Mask. • Gateway - Enter the IP address of your network's Gateway (usually this is your router's LAN IP address). Chapter 5: Setting Up the Wireless-G Ethernet Bridge Figure 5-6: Wireless Settings Figure 5-7: IP Settings 15
-
 1
1 -
2
-
3
-
4
-
5
-
6
-
7
-
8
-
9
-
10
-
11
-
12
-
13
-
14
-
15
-
 16
16 -
 17
17 -
 18
18 -
 19
19 -
 20
20 -
 21
21 -
 22
22 -
 23
23 -
 24
24 -
 25
25 -
 26
26 -
27
-
28
-
29
-
30
-
31
-
32
-
33
-
34
-
35
-
36
-
37
-
38
-
39
-
40
-
41
-
42
-
43
-
44
-
45
-
46
-
47
-
48
-
49
-
50
-
51
-
52
-
53
-
54
-
55
-
56
-
57
-
58
-
59
-
60
-
61
-
62
-
63
-
64
-
65
-
66
-
67
-
68
-
69
 |
 |