Linksys WIP310 Cisco SPA9000 Voice System Administration Guide - Page 112
Setup, tab >, Preferred Codec, Packetization, Administration, Reboot OK
 |
UPC - 745883580927
View all Linksys WIP310 manuals
Add to My Manuals
Save this manual to your list of manuals |
Page 112 highlights
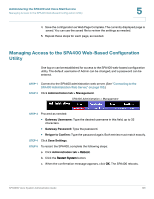
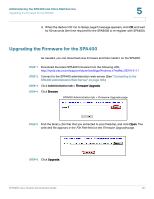
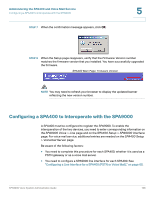
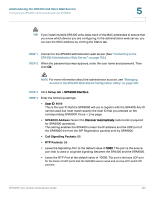
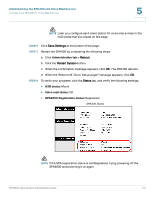
Administering the SPA400 and Voice Mail Service Configuring a SPA400 to Interoperate with the SPA9000 5 • Leave the Session Timer fields at the default values: Enabled with 0 seconds in both Refresh Time fields. STEP 5 Click Save Settings at the bottom of the page. STEP 6 Click Setup tab > Voice. STEP 7 Enter the following settings: • Preferred Codec: Select G.711u. • Packetization: Choose 30ms from the Packetization drop-down list for G.711U. • VAD: Choose OFF from the VAD drop-down list for G.711U. SPA400 Setup > Voice STEP 8 Click Save Settings at the bottom of the page. STEP 9 To restart the SPA400, complete the following steps: a. Click Administration tab > Reboot. b. Click the Restart System button. c. When the confirmation message appears, click OK. The SPA400 reboots. d. When the Reboot OK. Go to Setup page? message appears, click OK. STEP 10 If you are using this SPA400 as a PSTN gateway, connect the RJ11 cables from the SPA400 to the wall outlet for PSTN access. STEP 11 To verify your progress, perform the following tasks: • Click the Status tab, and confirm that the SIP registration status is Registered. • If you connected PSTN lines to the ports on the SPA400, confirm that you can place an external call to the phone number that is associated with the PSTN SPA9000 Voice System Administration Guide 110
-
 1
1 -
2
-
3
-
4
-
5
-
6
-
7
-
8
-
9
-
10
-
11
-
12
-
13
-
14
-
15
-
16
-
17
-
18
-
19
-
20
-
21
-
22
-
23
-
24
-
25
-
26
-
27
-
28
-
29
-
30
-
31
-
32
-
33
-
34
-
35
-
36
-
37
-
38
-
39
-
40
-
41
-
42
-
43
-
44
-
45
-
46
-
47
-
48
-
49
-
50
-
51
-
52
-
53
-
54
-
55
-
56
-
57
-
58
-
59
-
60
-
61
-
62
-
63
-
64
-
65
-
66
-
67
-
68
-
69
-
70
-
71
-
72
-
73
-
74
-
75
-
76
-
77
-
78
-
79
-
80
-
81
-
82
-
83
-
84
-
85
-
86
-
87
-
88
-
89
-
90
-
91
-
92
-
93
-
94
-
95
-
96
-
97
-
98
-
99
-
100
-
101
-
102
-
103
-
104
-
105
-
106
-
 107
107 -
 108
108 -
 109
109 -
 110
110 -
 111
111 -
 112
112 -
 113
113 -
 114
114 -
 115
115 -
 116
116 -
 117
117 -
118
-
119
-
120
-
121
-
122
-
123
-
124
-
125
-
126
-
127
-
128
-
129
-
130
-
131
-
132
-
133
-
134
-
135
-
136
-
137
-
138
-
139
-
140
-
141
-
142
-
143
-
144
-
145
-
146
-
147
-
148
-
149
-
150
-
151
-
152
-
153
-
154
-
155
-
156
-
157
-
158
-
159
-
160
-
161
-
162
-
163
-
164
-
165
-
166
-
167
-
168
-
169
-
170
-
171
-
172
-
173
-
174
-
175
-
176
-
177
-
178
-
179
-
180
-
181
-
182
-
183
-
184
-
185
-
186
-
187
-
188
-
189
-
190
-
191
-
192
-
193
-
194
-
195
-
196
-
197
-
198
-
199
-
200
-
201
-
202
-
203
-
204
-
205
-
206
-
207
-
208
-
209
-
210
-
211
-
212
-
213
-
214
-
215
-
216
-
217
-
218
-
219
-
220
-
221
-
222
-
223
-
224
-
225
-
226
-
227
-
228
-
229
-
230
-
231
-
232
-
233
-
234
-
235
-
236
-
237
-
238
-
239
-
240
-
241
-
242
-
243
-
244
-
245
-
246
-
247
-
248
-
249
-
250
-
251
-
252
-
253
-
254
-
255
-
256
-
257
-
258
-
259
-
260
-
261
-
262
-
263
-
264
-
265
-
266
-
267
-
268
-
269
-
270
-
271
-
272
-
273
-
274
-
275
-
276
-
277
-
278
-
279
-
280
-
281
-
282
-
283
-
284
-
285
-
286
 |
 |
