Linksys WVC54GC User Guide
Linksys WVC54GC - Wireless-G Compact Internet Video Camera Network Manual
 |
UPC - 745883566754
View all Linksys WVC54GC manuals
Add to My Manuals
Save this manual to your list of manuals |
Linksys WVC54GC manual content summary:
- Linksys WVC54GC | User Guide - Page 1
® A Division of Cisco Systems, Inc. Compact 2.4GHz 802.11g Wireless-G Internet Video Camera User Guide WIRELESS Model No. WVC54GC - Linksys WVC54GC | User Guide - Page 2
Compact Wireless-G Internet Video Camera Copyright and Trademarks Specifications are subject to change without notice. Linksys is a Guide The user guide to the Compact Wireless-G Internet Video Camera has been designed to make understanding networking with the Access section. WVC54GC-UG-50816NC JL - Linksys WVC54GC | User Guide - Page 3
and Mounting the Compact Wireless-G Internet Video Camera 10 Setup Wizard 10 Placement Options 19 Chapter 6: Installing and Using the Compact Wireless-G Internet Video Camera Multi-Camera Viewer & Recorder Utility 21 Overview 21 Installing the Multi-Camera Viewer & Recorder Utility 21 - Linksys WVC54GC | User Guide - Page 4
DDNS Service 33 SoloLink Registration of Additional Cameras 43 Chapter 8: Using the Compact Wireless-G Internet Video Camera's Web-based Utility 45 Overview 45 How to Access the Web-based Utility 45 View Video 46 Setup 47 Help 60 Appendix A: Troubleshooting 61 Common Problems and - Linksys WVC54GC | User Guide - Page 5
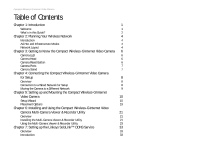
Compact Wireless-G Internet Video Camera List of Figures Figure 3-1: Camera LED 6 Figure 3-2: Camera Tilting Feature 6 Figure 3-3: Reset Button 6 Figure 3-4: Camera in Standing Position 7 Figure 3-5: Camera in Wall-Mounting Position 7 Figure 4-1: Connect the Ethernet Network Cable 8 - Linksys WVC54GC | User Guide - Page 6
Compact Wireless-G Internet Video Camera Figure 5-22: Camera in Wall-Mounting Position 20 Figure 5-23: Wall-Mount Slots 20 Figure 6-1: Install Viewer & Recorder Utility Screen 21 Figure 6-2: Install Viewer & Recorder Utility - Welcome Screen 21 Figure 6-3: Choose Destination Location Screen - Linksys WVC54GC | User Guide - Page 7
: Successful Setup Screen 42 Figure 7-21: Port Forwarding Information 43 Figure 7-22: Web-based Utility Welcome 43 Figure 7-23: Web Utility Login Screen 43 Figure 7-24: SoloLink DDNS Screen 44 Figure 7-25: Find Available Port Screen 44 Figure 8-1: Camera's Default IP Address 45 Figure - Linksys WVC54GC | User Guide - Page 8
Compact Wireless-G Internet Video Camera Figure 8-15: SoloLink DDNS Screen 54 Figure 8-16: New User Registration Screen 54 Figure 8-17: Password Request Screen 54 Figure 8-18: SoloLink Screen, continued 55 Figure 8-19: Manage Your SoloLink DDNS Account 55 Figure 8-20: Device Removal - Linksys WVC54GC | User Guide - Page 9
The SoloLink DDNS Service (trial sign-up included) lets you access your Camera using an easy-to-remember "name", even if your home Internet connection uses a dynamic IP address. You can also turn on Security Mode, which tells the Camera to send you an e-mail message with a short video attached to up - Linksys WVC54GC | User Guide - Page 10
up and Mounting the Compact Wireless-G Internet Video Camera This chapter instructs you on how to use the Setup Wizard for setup and configuration of the Camera, as well as how to mount the Camera. • Chapter 6: Installing and Using the Compact Wireless-G Internet Video Camera Utility This chapter - Linksys WVC54GC | User Guide - Page 11
Compact Wireless-G Internet Video Camera • Appendix C: Upgrading Firmware This appendix explains how you can upgrade the Camera's firmware. • Appendix D: Windows Help This appendix describes how you can use Windows Help for instructions about networking, such as installing the TCP/IP protocol. • - Linksys WVC54GC | User Guide - Page 12
Compact Wireless-G Internet Video Camera Chapter 2: Planning Your Wireless Network Introduction A wireless local area network (WLAN) is exactly like a regular local area network (LAN), except that each computer in the WLAN uses a wireless device to connect to the network. Computers and other - Linksys WVC54GC | User Guide - Page 13
Compact Wireless-G Internet Video Camera Notebook Adapters for your laptop computers, Wireless-B and Wireless-G PCI Adapters for your desktop PCs, and Wireless-B and Wireless-G USB Adapters for your computers when you want to enjoy USB connectivity. With these, and many other Linksys products, your - Linksys WVC54GC | User Guide - Page 14
the factory default settings of the Camera. default IP address: 192.168.1.115 user name: admin password: admin Hole for Attaching Stand (Stand Option) Chapter 3: Getting to Know the Compact Wireless-G Internet Video Camera Camera LED Figure 3-1: Camera LED Figure 3-2: Camera Tilting Feature RESET - Linksys WVC54GC | User Guide - Page 15
Compact Wireless-G Internet Video Camera Camera Ports The Camera features two ports on its back panel. POWER ETHERNET The POWER port is where you will connect the power adapter. The ETHERNET port is where you will connect the Ethernet network cable. Camera Stand Hole for Attaching Stand (Wall- - Linksys WVC54GC | User Guide - Page 16
Cable NOTE: You MUST connect the Camera to a PC, router, or switch using the Ethernet network cable BEFORE powering on the Camera. Otherwise, the Camera will not function. Chapter 4: Connecting the Compact Wireless-G Internet Video Camera for Setup Overview Figure 4-2: Connect the Power Adapter 8 - Linksys WVC54GC | User Guide - Page 17
. The Camera's power LED flashes while the Camera is initializing. The Camera is ready for use when the LED is solidly lit. Proceed to "Chapter 5: Setting up and Mounting the Compact Wireless-G Internet Video Camera." Chapter 4: Connecting the Compact Wireless-G Internet Video Camera for Setup - Linksys WVC54GC | User Guide - Page 18
Compact Wireless-G Internet Video Camera Chapter 5: Setting up and Mounting the Compact Wireless-G Internet Video Camera Setup Wizard The Compact Wireless-G Internet Video Camera Setup Wizard will guide you through the installation and configuration procedure. 1. Insert the Setup CD-ROM into your - Linksys WVC54GC | User Guide - Page 19
the other end of the network cable to the Camera's ETHERNET port. Click the Next button. Figure 5-3: Connect the Network Cable to the Router or Switch Screen Chapter 5: Setting up and Mounting the Compact Wireless-G Internet Video Camera Setup Wizard Figure 5-4: Connect the Network Cable to the - Linksys WVC54GC | User Guide - Page 20
LED is lit on the Camera's front panel. If it is not lit, make sure the cables are properly connected to the Camera. Click the Next button. Figure 5-5: Power on the Camera Screen Chapter 5: Setting up and Mounting the Compact Wireless-G Internet Video Camera Setup Wizard Figure 5-6: Check the LED - Linksys WVC54GC | User Guide - Page 21
. Enter the current time in the fields provided. When you have finished making your changes, click the Next button. Chapter 5: Setting up and Mounting the Compact Wireless-G Internet Video Camera Setup Wizard Figure 5-8: Login Screen Figure 5-9: Basic Settings Screen 13 - Linksys WVC54GC | User Guide - Page 22
at least one DNS address, which can be obtained from your ISP. When you have finished making your changes, click the Next button. Chapter 5: Setting up and Mounting the Compact Wireless-G Internet Video Camera Setup Wizard Figure 5-10: Network Settings Screen Figure 5-11: IP Settings Screen 14 - Linksys WVC54GC | User Guide - Page 23
devices in your wireless ad-hoc network must use the same channel in order to function correctly. Then click the Next button. Figure 5-12: Mode Settings Screen Figure 5-13: Wireless Settings Screen Chapter 5: Setting up and Mounting the Compact Wireless-G Internet Video Camera 15 Setup Wizard - Linksys WVC54GC | User Guide - Page 24
of your other wireless network devices and is compatible with Linksys wireless products only. (If you have any non-Linksys wireless products, enter the WEP key manually on those products.) -Bit) Screen Chapter 5: Setting up and Mounting the Compact Wireless-G Internet Video Camera 16 Setup Wizard - Linksys WVC54GC | User Guide - Page 25
to continue. Figure 5-16: Review New Settings Screen 17. Click OK to confirm that you want to save the new settings. If you want to cancel your changes, click Cancel. Chapter 5: Setting up and Mounting the Compact Wireless-G Internet Video Camera Setup Wizard Figure 5-17: Confirm New Settings - Linksys WVC54GC | User Guide - Page 26
Compact Wireless-G Internet Video Camera 18. After the files have been successfully copied, the Congratulations screen will appear. Install Viewer & Recorder Utility. Click this button to install the Camera's Utility on your PC. Setup SoloLink DDNS Service. Click the Setup SoloLink DDNS Service - Linksys WVC54GC | User Guide - Page 27
panel. 2. Tighten the screw end and then the gray thumbscrew. 3. Place the Camera, and adjust the tilt of its head accordingly. Figure 5-19: Stand Option Chapter 5: Setting up and Mounting the Compact Wireless-G Internet Video Camera Placement Options Figure 5-20: Camera in Standing Position 19 - Linksys WVC54GC | User Guide - Page 28
of its head accordingly. The installation of the Compact Wireless-G Internet Video Camera is complete. Go to "Chapter 6: Installing the Compact Wireless-G Internet Video Camera Multi-Camera Viewer & Recorder Utility." If advanced users wish to access the Camera through its Web-based Utility, then - Linksys WVC54GC | User Guide - Page 29
Setup Wizard, click the Install Viewer & Recorder Utility button. 2. The Welcome screen will appear. Click the Next button to proceed. Figure 6-1: Install Viewer & Recorder Utility Screen Chapter 6: Installing and Using the Compact Wireless-G Internet Video Camera Multi-Camera Viewer & Recorder - Linksys WVC54GC | User Guide - Page 30
-G Internet Video Camera Web-based Utility." Figure 6-4: Ready to Install the Program Screen Chapter 6: Installing and Using the Compact Wireless-G Internet Video Camera Multi-Camera Viewer & Recorder Utility Installing the Multi-Camera Viewer & Recorder Utility Figure 6-5: InstallShield Wizard - Linksys WVC54GC | User Guide - Page 31
indicates the status of the Camera's video transmissions. Chapter 6: Installing and Using the Compact Wireless-G Internet Video Camera Multi-Camera Viewer & Recorder Utility Using the Multi-Camera Viewer & Recorder Utility Figure 6-6: Multi-Camera Viewer & Recorder Utility Icon Figure 6-7: Main - Linksys WVC54GC | User Guide - Page 32
. Click the OK button. To close this screen, click the X button in the upper right-hand corner. Chapter 6: Installing and Using the Compact Wireless-G Internet Video Camera Multi-Camera Viewer & Recorder Utility Using the Multi-Camera Viewer & Recorder Utility Figure 6-8: Add Camera - LAN Screen 24 - Linksys WVC54GC | User Guide - Page 33
Compact Wireless-G Internet Video Camera Internet The Internet screen shows the Camera found on the Internet, along with the status information for it. Test Results First, go to the Camera Data section. Enter the Camera's IP Address, Port Number, and login information (if required). Then click the - Linksys WVC54GC | User Guide - Page 34
window with the Channel setting you want.) If you want to make the viewing window twice as large, click this icon. Figure 6-10: View Video Screen Chapter 6: Installing and Using the Compact Wireless-G Internet Video Camera Multi-Camera Viewer & Recorder Utility 26 Using the Multi-Camera Viewer - Linksys WVC54GC | User Guide - Page 35
Password. Click the Save button to save the new settings. To close this screen, click the X button in the upper right-hand corner. Figure 6-11: Delete Camera Screen Figure 6-12: Change Settings Screen Chapter 6: Installing and Using the Compact Wireless-G Internet Video Camera Multi-Camera Viewer - Linksys WVC54GC | User Guide - Page 36
File Size 430MB 330MB 240MB 230MB 225MB 380MB 270MB 230MB 220MB 210MB Chapter 6: Installing and Using the Compact Wireless-G Internet Video Camera Multi-Camera Viewer & Recorder Utility Using the Multi-Camera Viewer & Recorder Utility Figure 6-13: Scheduled Recordings Screen NOTE: In order for the - Linksys WVC54GC | User Guide - Page 37
upper right-hand corner. Chapter 6: Installing and Using the Compact Wireless-G Internet Video Camera Multi-Camera Viewer & Recorder Utility Using the Multi-Camera Viewer & Recorder Utility Figure 6-14: Files Screen Figure 6-15: Recorded Files Screen NOTE: Use Windows Media Player 7 or higher to - Linksys WVC54GC | User Guide - Page 38
Compact Wireless-G Internet Video Camera Snapshots Click the Snapshot Pictures button, and a Windows Explorer window will appear and display the available SnapShot folders. The name of each folder is the MAC address of the Camera that took that folder's snapshots. Double-click a folder to see a list - Linksys WVC54GC | User Guide - Page 39
directory. The default is C:\Program Files\Linksys\Wireless-G Internet Video Camera\Motion. Click the ... button to designate a different directory. Snapshot Directory. Snapshots will be saved in this directory. The default is C:\Program Files\Linksys\Wireless-G Internet Video Camera\Snapshot. Click - Linksys WVC54GC | User Guide - Page 40
up the Linksys SoloLink DDNS Service." If you want to use the Camera's Web-based Utility, go to "Chapter 8: Using the Compact Wireless-G Internet Video Camera Web-based Utility." Chapter 6: Installing and Using the Compact Wireless-G Internet Video Camera Multi-Camera Viewer & Recorder Utility - Linksys WVC54GC | User Guide - Page 41
some DDNS services require your PC to continuously run software that lets them keep track of your IP address. If your PC isn't powered on when your IP address changes, you won't be able to find the Camera on the Internet. The SoloLink service keeps track of where the Camera is. Setup Wizard for the - Linksys WVC54GC | User Guide - Page 42
Compact Wireless-G Internet Video Camera 2. This screen explains why you would want to use the SoloLink DDNS Service if your network is using a dynamic IP address. Click the Next button. Figure 7-3: SoloLink for Dynamic IP Address Screen 3. This screen explains why you would find the SoloLink DDNS - Linksys WVC54GC | User Guide - Page 43
of Compact Wireless-G Internet Video Cameras on your network and their status information. In the Selection box, click the name of the Camera you are currently setting up. Click Next. Figure 7-5: Check Connections Screen Chapter 7: Setting up the Linksys SoloLink™ DDNS Service Setup Wizard for - Linksys WVC54GC | User Guide - Page 44
Compact Wireless-G Internet Video Camera 6. To ensure security, you will be asked to enter a user name and password before you can access the Camera. If you have not changed the Camera's user name and password, then enter admin in the User name and Password fields (admin is the default). Then click - Linksys WVC54GC | User Guide - Page 45
Compact Wireless-G Internet Video Camera 8. Make sure your network has an active Internet connection. Click Continue. 9. On the Welcome to the SoloLink DDNS Service screen, click Set up a NEW Account. Figure 7-9: Confirm Active Internet Connection Screen Chapter 7: Setting up the Linksys SoloLink - Linksys WVC54GC | User Guide - Page 46
Compact Wireless-G Internet Video Camera 10. On the Sign Up screen, enter the Access ID for your free trial offer. It is provided on the Promotion Card included with the Camera. (If you don't have an Access ID, then leave the Access ID field blank.) Then enter your account and user information. - Linksys WVC54GC | User Guide - Page 47
Compact Wireless-G Internet Video Camera 11. Review your information on the Camera's Device Name and ourlinksys.com to create a convenient URL you can use to access the Camera. Click Continue. Chapter 7: Setting up the Linksys SoloLink™ DDNS Service Setup Wizard for the SoloLink DDNS Service - Linksys WVC54GC | User Guide - Page 48
Compact Wireless-G Internet Video Camera 13. On the Confirm your Location ID screen, verify that the Location ID is correct. Then click Continue. 14. On the Payment screen, choose one of two payment plans, Bill me now or Bill me later. (If you did not enter an Access ID, then you have one choice, - Linksys WVC54GC | User Guide - Page 49
Compact Wireless-G Internet Video Camera 16. On the Create Links screen, click Continue. The SoloLink DDNS Service will send your account information to the Camera. Figure 7-17: Create Links Screen 17. A pop-up screen will inform you that you have successfully registered your account. Click OK. At - Linksys WVC54GC | User Guide - Page 50
Compact Wireless-G Internet Video Camera 18. A confirmation page will display the link or address you will use to access the Camera and the port number the SoloLink DDNS Service will use to find the Camera. Click Continue. 19. A pop-up screen will inform you that you have successfully set up the - Linksys WVC54GC | User Guide - Page 51
Compact Wireless-G Internet Video Camera 20. Set up port forwarding on your network router, so the SoloLink DDNS Service will be able to track the Compact Wireless-G Internet Video Camera. Go to www.linksys.com/portfwd for instructions on how to configure a Linksys router. For other routers, refer - Linksys WVC54GC | User Guide - Page 52
itself with your SoloLink account. 10. Set up port forwarding on your network router, so the SoloLink DDNS Service will be able to track the Compact Wireless-G Internet Video Camera. Go to www.linksys.com/portfwd for instructions on how to configure a Linksys router. For other routers, refer to your - Linksys WVC54GC | User Guide - Page 53
this User Guide, and download Acrobat Reader. Go to the "Help" section for more information. • Exit. To close the Utility, click the Exit tab. Figure 8-1: Camera's Default IP Address Figure 8-2: Web-based Utility Welcome Chapter 8: Using the Compact Wireless-G Internet Video Camera's Web-based - Linksys WVC54GC | User Guide - Page 54
Compact Wireless-G Internet Video Camera View Video Follow these instructions to view the Camera's video. 1. Click the View Video tab on the Welcome screen. 2. A Security Warning screen about an OCX plug-in may appear. To enable your computer to see the Camera's video, click the Yes button. 3. A - Linksys WVC54GC | User Guide - Page 55
Compact Wireless-G Internet Video Camera Setup Click the Setup tab on the Welcome screen to alter the Camera's settings. A login screen will pop up. (Windows XP users will see a similar screen.) Enter admin (the default user name and password) in the User Name and Password fields. Then click the OK - Linksys WVC54GC | User Guide - Page 56
Compact Wireless-G Internet Video Camera Basic The Basic screen allows you to alter the Camera's settings, including the network and wireless configuration. Device Settings Device ID. Displayed here is the Camera's identification name, which is based on its MAC address. Camera Name. You may assign - Linksys WVC54GC | User Guide - Page 57
match the one on your network's access point or wireless router. To save your changes, click the Apply button. To cancel your changes, click the Cancel button. Chapter 8: Using the Compact Wireless-G Internet Video Camera's Web-based Utility Setup Figure 8-9: Wireless Security - WPA Personal Screen - Linksys WVC54GC | User Guide - Page 58
voltage. Select 50 Hz if your fluorescent lighting uses 50 Hz line voltage. Chapter 8: Using the Compact Wireless-G Internet Video Camera's Web-based Utility Setup Figure 8-11: Image Screen NOTE: Video quality and/or performance may be affected by the number of users connected to the Camera. 50 - Linksys WVC54GC | User Guide - Page 59
for the Camera's video. The range varies from -3 (underexposed) to +3 (overexposed). Sharpness. The default is Normal. Select the level of sharpness you want for the Camera's video. The range the Help tab. Chapter 8: Using the Compact Wireless-G Internet Video Camera's Web-based Utility 51 Setup - Linksys WVC54GC | User Guide - Page 60
Compact Wireless-G Internet Video Camera Administrator Use this screen to change the administrator login settings, restore factory defaults, and upgrade firmware. Login Changing the default name and password is recommended to secure access to the Camera's settings. Login Name. Complete this field - Linksys WVC54GC | User Guide - Page 61
Compact Wireless-G Internet Video Camera Users The Users screen allows you to designate access rights for Camera users. User Access Allow access by. The default is All users. If you keep the default setting, then all users will be allowed to view the Camera's video Password, and Confirm Password - Linksys WVC54GC | User Guide - Page 62
Compact Wireless-G Internet Video Camera SoloLink DDNS The SoloLink DDNS screen allows you to set up and configure your SoloLink DDNS Service. DDNS (Dynamic Domain Name System) lets you assign a fixed host and domain name to a dynamic Internet IP address. If you have already set up your SoloLink - Linksys WVC54GC | User Guide - Page 63
Compact Wireless-G Internet Video Camera WAN Port. Enter the number of the port you will use to remotely access the Camera. If you need to find an available port, click Find Available Port and follow the on-screen instructions. DDNS Service Update. Depending on how often you want the DDNS service to - Linksys WVC54GC | User Guide - Page 64
itself with your SoloLink account. 6. Set up port forwarding on your network router, so the SoloLink DDNS Service will be able to track the Compact Wireless-G Internet Video Camera. Go to www.linksys.com/portfwd for instructions on how to configure a Linksys router. For other routers, refer to your - Linksys WVC54GC | User Guide - Page 65
more sensitive) to adjust the Threshold (sensitivity) level. Click the Save button to save your changes. Chapter 8: Using the Compact Wireless-G Internet Video Camera's Web-based Utility Setup Figure 8-22: Options Screen Figure 8-23: Options Screen, continued Figure 8-24: Motion Detection Screen 57 - Linksys WVC54GC | User Guide - Page 66
in the Port Number field. To save your changes, click the Apply button. To cancel any unsaved changes, click the Cancel button. To get additional information about the screen's features, click the Help tab. Chapter 8: Using the Compact Wireless-G Internet Video Camera's Web-based Utility 58 Setup - Linksys WVC54GC | User Guide - Page 67
Wireless-G Internet Video Camera Status The Status screen allows you to view the Camera's status information. System Status Firmware Version. The version number of the firmware currently installed is displayed here. Firmware should only be upgraded from the Help screen if you experience problems - Linksys WVC54GC | User Guide - Page 68
link to the Linksys support page for downloading the latest Multi-Camera Viewer & Recorder Utility, as well as view information about the View Video feature. NOTE: The appearance and features of the Help screen will vary depending on whether you have logged in first to access the Setup. If you first - Linksys WVC54GC | User Guide - Page 69
Internet Video Camera Appendix A: Troubleshooting This appendix consists of two parts: "Common Problems and Solutions" and "Frequently Asked Questions." This appendix provides solutions to problems that may occur during the installation and operation of the Compact Wireless-G Internet Video Camera - Linksys WVC54GC | User Guide - Page 70
on-screen instructions. For more information, see "Chapter 7: Setting up the Linksys SoloLink DDNS Service." Important: To allow remote access to the Camera, you will also have to use the port forwarding feature on your network router. Appendix A: Troubleshooting 62 Common Problems and Solutions - Linksys WVC54GC | User Guide - Page 71
the Setup button and follow the on-screen instructions. When you see the IP Settings screen, make sure the Camera's Default Gateway and Primary DNS addresses are correct. For more information, refer to "Chapter 5: Setting up and Mounting the Compact Wireless-G Internet Video Camera." Frequently - Linksys WVC54GC | User Guide - Page 72
Compact Wireless-G Internet Video Camera Do I need to install the Linksys Multi-Camera Viewer and Recorder Utility? Installation is optional. You can view video using Microsoft Internet Explorer 5.5 or higher. If you don't want to use the recording function, then you don't need to install the Multi- - Linksys WVC54GC | User Guide - Page 73
Compact Wireless-G Internet Video Camera What IEEE 802.11g features are supported? The product supports the following IEEE 802.11g functions: • CSMA/CA plus Acknowledge protocol • OFDM protocol • Multi-Channel Roaming • Automatic Rate Selection • RTS/CTS feature • Fragmentation • Power Management - Linksys WVC54GC | User Guide - Page 74
Compact Wireless-G Internet Video Camera Appendix B: Wireless Security Linksys wants to make wireless networking as safe and easy for you as possible. The current generation of Linksys products provide several network security features, but they require specific action on your part for - Linksys WVC54GC | User Guide - Page 75
Compact Wireless-G Internet Video Camera SSID. There are several things to keep in mind about the SSID: 1. Disable Broadcast 2. Make it unique 3. Change it often Most wireless networking devices will give you the option of broadcasting the SSID. While this option may be more convenient, it allows - Linksys WVC54GC | User Guide - Page 76
Compact Wireless-G Internet Video Camera Implementing encryption may have a negative impact on your network's performance, but if you are mind at ease while you are enjoying the most flexible and convenient technology Linksys has to offer. Appendix B: Wireless Security 68 Security Threats Facing - Linksys WVC54GC | User Guide - Page 77
Compact Wireless-G Internet Video Camera Appendix C: Upgrading Firmware NOTE: Linksys recommends that you upgrade the Camera's firmware within your network; in other words, use a computer within the Camera's local network. If you attempt to upgrade the Camera's firmware from a remote location-using - Linksys WVC54GC | User Guide - Page 78
Compact Wireless-G Internet Video Camera Appendix D: Windows Help Almost all wireless products require Microsoft Windows. Windows is the most used operating system in the world and comes with many features that help make networking easier. These features can be accessed through Windows Help and are - Linksys WVC54GC | User Guide - Page 79
Compact Wireless-G Internet Video Camera Appendix E: Glossary 802.11b - An IEEE wireless networking standard that specifies a maximum data transfer rate of 11Mbps and an operating frequency of 2.4GHz. 802.11g - An IEEE wireless networking standard that specifies a maximum data transfer rate of - Linksys WVC54GC | User Guide - Page 80
Compact Wireless-G Internet Video Camera Cable Modem - A device that connects a computer to the cable television network, which in turn connects to the Internet. CSMA/CA (Carrier Sense Multiple Access/Collision Avoidance) - A method of data transfer that is used to prevent data collisions. CTS ( - Linksys WVC54GC | User Guide - Page 81
device on a network. IPCONFIG - A Windows 2000 and XP utility that displays the IP address for a particular networking device. ISM band - Radio bandwidth utilized in wireless transmissions. ISP (Internet Service Provider) - A company that provides access to the Internet. Appendix E: Glossary 73 - Linksys WVC54GC | User Guide - Page 82
Compact Wireless-G Internet Video Camera LAN - The computers and networking products that make up your local network. MAC (Media Access Control) Address - The unique address that a manufacturer assigns to each networking device. Mbps (MegaBits Per Second) - One million bits per second; a unit of - Linksys WVC54GC | User Guide - Page 83
-G Internet Video Camera Preamble - Part of the wireless signal that synchronizes network traffic. RJ-45 (Registered Jack-45) - An Ethernet connector that holds up to eight wires. Roaming - The ability to take a wireless device from one access point's range to another without losing the connection - Linksys WVC54GC | User Guide - Page 84
Compact Wireless-G Internet Video Camera TCP/IP (Transmission Control Protocol/Internet Protocol) - A set of instructions PCs use to communicate over a network. Telnet - A user command and TCP/IP protocol used for accessing remote PCs. TFTP (Trivial File Transfer Protocol) - A version of the TCP/IP - Linksys WVC54GC | User Guide - Page 85
Compact Wireless-G Internet Video Camera Appendix F: Specifications Standards IEEE 802.11b, IEEE 802.11g, IEEE 802.3, IEEE 802.3u Ports One 10/100 Auto Crossover (MDI/MDI-X) port, Power port Protocols TCP/IP, HTTP, DHCP, NTP, SMTP, UPnP (Discovery only) Button One Reset Button Cabling Type - Linksys WVC54GC | User Guide - Page 86
Compact Wireless-G Internet Video Camera Record File Format ASF Brightness Auto/Manual Adjustment Dimensions (W x H x D) 3.54" x 4.02" x 1.46" (90 mm x 102 mm x 37 mm) Unit Weight 0.29 lbs. (0.13 kg) Power 5V DC External Certifications FCC Operating Temp. 0ºC to 40ºC (32ºF to 104ºF) - Linksys WVC54GC | User Guide - Page 87
Compact Wireless-G Internet Video Camera Appendix G: Warranty Information LIMITED WARRANTY Linksys warrants to You that, for a period of three years (the "Warranty Period"), your Linksys Product will be substantially free of defects in materials and workmanship under normal use. Your exclusive - Linksys WVC54GC | User Guide - Page 88
Compact Wireless-G Internet Video Camera installation. This equipment generates, uses, and can radiate radio frequency energy and, if not installed and used according to the instructions antenna Increase the separation between the equipment or devices Connect the equipment to an outlet other than the - Linksys WVC54GC | User Guide - Page 89
Compact Wireless-G Internet Video Camera SOFTWARE LICENSE AGREEMENT THIS LICENSE AGREEMENT IS BETWEEN YOU AND CISCO-LINKSYS, LLC ("Linksys"). BY DOWNLOADING OR INSTALLING THE SOFTWARE, OR USING THE PRODUCT CONTAINING THE SOFTWARE, YOU ARE CONSENTING TO BE BOUND BY THIS AGREEMENT. IF YOU DO NOT - Linksys WVC54GC | User Guide - Page 90
Compact Wireless-G Internet Video Camera (INCLUDING NEGLIGENCE), ARISING OUT OF OR RELATED TO THE USE OF OR INABILITY TO USE THE SOFTWARE, EVEN IF LINKSYS HAS BEEN ADVISED OF THE POSSIBILITY OF SUCH DAMAGES. IN NO EVENT WILL LINKSYS' LIABILITY EXCEED THE AMOUNT PAID BY YOU FOR THE PRODUCT. The - Linksys WVC54GC | User Guide - Page 91
Compact Wireless-G Internet Video Camera Appendix I: Contact Information Need to contact Linksys? Visit us online for information Information section in this Guide.) http://www.linksys.com or ftp.linksys.com 800-546-5797 (LINKSYS) 949-823-3002 800-326-7114 [email protected] 949-823-3000
-
 1
1 -
 2
2 -
 3
3 -
 4
4 -
 5
5 -
 6
6 -
 7
7 -
8
-
9
-
10
-
11
-
12
-
13
-
14
-
15
-
16
-
17
-
18
-
19
-
20
-
21
-
22
-
23
-
24
-
25
-
26
-
27
-
28
-
29
-
30
-
31
-
32
-
33
-
34
-
35
-
36
-
37
-
38
-
39
-
40
-
41
-
42
-
43
-
44
-
45
-
46
-
47
-
48
-
49
-
50
-
51
-
52
-
53
-
54
-
55
-
56
-
57
-
58
-
59
-
60
-
61
-
62
-
63
-
64
-
65
-
66
-
67
-
68
-
69
-
70
-
71
-
72
-
73
-
74
-
75
-
76
-
77
-
78
-
79
-
80
-
81
-
82
-
83
-
84
-
85
-
86
-
87
-
88
-
89
-
90
-
91
 |
 |
A Division of Cisco Systems, Inc.
®
Model No.
Internet Video Camera
Wireless-
G
WVC54GC
User Guide
WIRELESS
GHz
2.4
802.11g
Compact