Logitech 915-000074 User Manual - Page 13
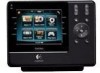
Setting up your Harmony 1100 for the, rst time
 |
UPC - 097855054081
View all Logitech 915-000074 manuals
Add to My Manuals
Save this manual to your list of manuals |
Page 13 highlights
Setting up your Harmony 1100 for the first time Overview of the setup process When you insert the Harmony remote CD in your computer, the guided online setup launches. Follow the easy setup instructions to install the Harmony Remote Software. For more information on installing the Harmony Remote Software, refer to the Installation Guide. After the software installs, start the Harmony Remote Software. When you start the Harmony Remote Software, it automatically checks for updates and downloads them if necessary. After you install the Harmony Remote Software and gather your device information using the Device Worksheet, the setup process guides you through five steps in which you answer a series of questions about how your entertainment system is set up. 1. Create Account: the setup walks you through creating a user account on the Harmony Remote Software. Guided online setup 2. Check connection: the software ensures your computer and Harmony 1100 are communicating with each other. 3. Set up Devices: the software walks you through entering the manufacturer and model numbers of your entertainment system that you collected using the Device Worksheet. 4. Set up Activities: the software asks you questions about how your entertainment system is set up, and then saves the settings. 5. Update Remote: the software transfers the information from your PC to the remote. Gathering your device information To simplify the setup process, we recommend you fill out the Device Worksheet so that all the device information is at hand when you need it. Locating manufacturer and model number on your devices Manufacturer names and model numbers are typically found at the front of a device, on a label on the back of the device, or in the User Manual for that device. 13
-
 1
1 -
2
-
3
-
4
-
5
-
6
-
7
-
 8
8 -
 9
9 -
 10
10 -
 11
11 -
 12
12 -
 13
13 -
 14
14 -
 15
15 -
 16
16 -
 17
17 -
 18
18 -
19
-
20
-
21
-
22
-
23
-
24
-
25
-
26
-
27
-
28
-
29
-
30
-
31
-
32
-
33
-
34
-
35
-
36
-
37
-
38
-
39
-
40
-
41
-
42
-
43
-
44
-
45
-
46
-
47
-
48
 |
 |
