Mackie 24.8Bus Owner's Manual - Page 3
Important Sensitivity, Adjustment Procedure, Please! Save The, Shipping Box - 24 8 8 bus
 |
View all Mackie 24.8Bus manuals
Add to My Manuals
Save this manual to your list of manuals |
Page 3 highlights
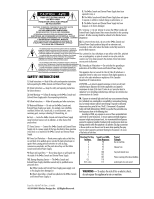
IMPORTANT SENSITIVITY ADJUSTMENT PROCEDURE! To fully achieve the Mackie 8•Bus console's impressive headroom and specs, you should "tune" channel sensitivity for each channel. FOLLOW THIS PROCEDURE FOR EACH CHANNEL IN USE: 1. Assign signal to channel fader: I If channel will be used with a micro- phone, MIC/LINE switch should be up & FLIP switch should be up. I If channel will be used with line input, MIC/LINE switch should be down & FLIP switch should be up. I If channel will be used with a tape input keep the FLIP switch down. 2. Set channel strip controls as follows: I TRIM pot all the way counterclockwise (+4dB) I AUX SEND controls all the way counterclockwise (off) I EQ switch up I LOW-CUT switch either on or off (on recommended for mic inputs) I Pan hard left or right I Channel fader at UNITY I SOLO switch down 3. I Make appropriate "noise" into the channel input. For example, have a performer play/ sing/strike something or someone, etc., at the level at which they're going to record or perform. Don't just play a single sustained note, but rather, jam away as you would be during recording or performance. If the channel is being used for a tape input during mixdown, roll an already-recorded track from your recorder. 4. The channel's -20dB LED may light. The L/R main meters will show the actual internal operating level of soloed signals. Now you will optimize levels. 5. I For mic or line inputs, adjust the TRIM control clockwise to get peaks that regularly hit 0dB on the L/R meters. For mic inputs this may require full CW rotation depending on the sensitivity of the mic. 6. If desired (optional): I Press the EQ switch in. I Adjust the channel strip's EQ to about what you will be using during the session. I Re-perform Step 5. 7. I Return the channel strip's SOLO button to its up position. 8. I Repeat Steps 1-7 on the next channel that is being used. Please put your serial number here for future reference (i.e., insurance claims, tech support, return authorization, gloating privileges, etc.): Serial # PLEASE! SAVE THE SHIPPING BOX! Yes, we know it's only slightly smaller than a doublewide mobile home, but you will need the entire carton and internal foam if your console ever needs service at some time in the future. If your kids make the box into a fort and cut holes in it - or if you stuff it in the dumpster of the fast-food place next door to your studio, we may have to sell and ship you another packing box later on. Don't end up buying an empty box! 1 24•8 32•8 Owner's Manual Version Rev. A 06/03
-
 1
1 -
 2
2 -
 3
3 -
 4
4 -
 5
5 -
 6
6 -
 7
7 -
 8
8 -
 9
9 -
10
-
11
-
12
-
13
-
14
-
15
-
16
-
17
-
18
-
19
-
20
-
21
-
22
-
23
-
24
-
25
-
26
-
27
-
28
-
29
-
30
-
31
-
32
-
33
-
34
-
35
-
36
-
37
-
38
-
39
-
40
-
41
-
42
-
43
-
44
-
45
-
46
-
47
-
48
-
49
-
50
-
51
-
52
-
53
-
54
-
55
-
56
-
57
-
58
-
59
-
60
-
61
-
62
-
63
-
64
 |
 |
