Maytag MED6300TQ Use and Care Guide - Page 14
Requi, Rements - reviews
 |
UPC - 883049060958
View all Maytag MED6300TQ manuals
Add to My Manuals
Save this manual to your list of manuals |
Page 14 highlights
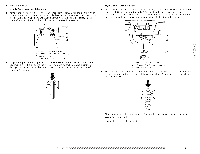
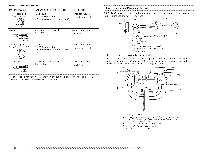
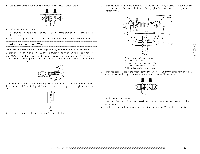
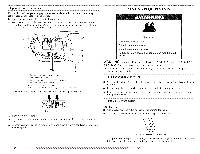
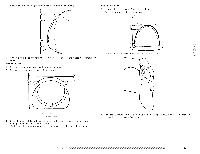
Optional 3-wire connection Use for direct wire or power supply cord where local codes do not permit cabinet-ground conductor to neutral wire. 1. Remove center silver-colored terminal block screw. connecting 2. Remove neutral ground wire from external ground conductor screw. Connect neutral ground wire and the neutral wire (white or center wire) of power supply cord/cable under center, silver-colored terminal block screw. Tighten screw. VENTI NG REQUI REMENTS E F A. Fxt_'rnal ground colTductol screw B. Neutral ground wir_" C. C_'nter silver-colored t_'rminal block screw D. Neutral wire (white or center wir_') E. _" (1.9 cm) UL listed strain r_'li_'f F. Grounding path determined by a qualifi_'d electrician 3. Connect the other wires to outer terminal block screws. Tighten screws. !! !! 4. Tighten strain relief screws. 5. Insert tab of terminal block cover into slot of dryer rear paneh Secure cover with hold- down screw. 6. Connect a separate copper ground wire from the external ground conductor screw to an adequate ground. 14 Fire Hazard Use a heavy metal vent, Do not use a plastic vent. Do not use a metal foil vent. Failure to follow these instructions or fire. can result in death WARNING: lo reduce the risk of fire, this dryer MUST BE EXHAUSTED OUTDOORS. IMPORTANT: Observe all governing codes and ordinances. The dryer exhaust must not be connected into any gas vent, chimney, wall, ceiling or a concealed space of a building. If using an existing vent system • Clean lint from the entire length of the system and make sure exhaust hood is not plugged with lint. • Replace any plastic or metal foil vent with rigid or flexible heavy metal vent. • Review Vent system chart. Modify existing vent system if necessary to achieve the best drying performance. If this is a new vent system Vent material • Use a heavy metal vent. [90 not use plastic or metal foil vent. • 4" (10.2 cm) heavy metal exhaust vent and clamps must be used. 4" ( 10.2 cm) heavy metal exhaust v_'nt Vent products can be purchased from your dealer or by calling Maytag Services. For more information, see the "Assistance or Service" section of this manual.
-
 1
1 -
2
-
3
-
4
-
5
-
6
-
7
-
8
-
 9
9 -
 10
10 -
 11
11 -
 12
12 -
 13
13 -
 14
14 -
 15
15 -
 16
16 -
 17
17 -
 18
18 -
 19
19 -
20
-
21
-
22
-
23
-
24
-
25
-
26
-
27
-
28
-
29
-
30
-
31
-
32
-
33
-
34
-
35
-
36
-
37
-
38
-
39
-
40
-
41
-
42
-
43
-
44
-
45
-
46
-
47
-
48
-
49
-
50
-
51
-
52
-
53
-
54
-
55
-
56
-
57
-
58
-
59
-
60
-
61
-
62
-
63
-
64
-
65
-
66
-
67
-
68
-
69
-
70
-
71
-
72
-
73
-
74
-
75
-
76
-
77
-
78
-
79
-
80
-
81
-
82
-
83
-
84
-
85
-
86
-
87
-
88
 |
 |
