Maytag MMV5165BAW Installation Instructions
Maytag MMV5165BAW - 1.6 cu. Ft. Microwave Manual
 |
View all Maytag MMV5165BAW manuals
Add to My Manuals
Save this manual to your list of manuals |
Maytag MMV5165BAW manual content summary:
- Maytag MMV5165BAW | Installation Instructions - Page 1
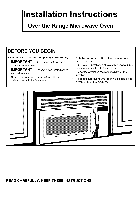
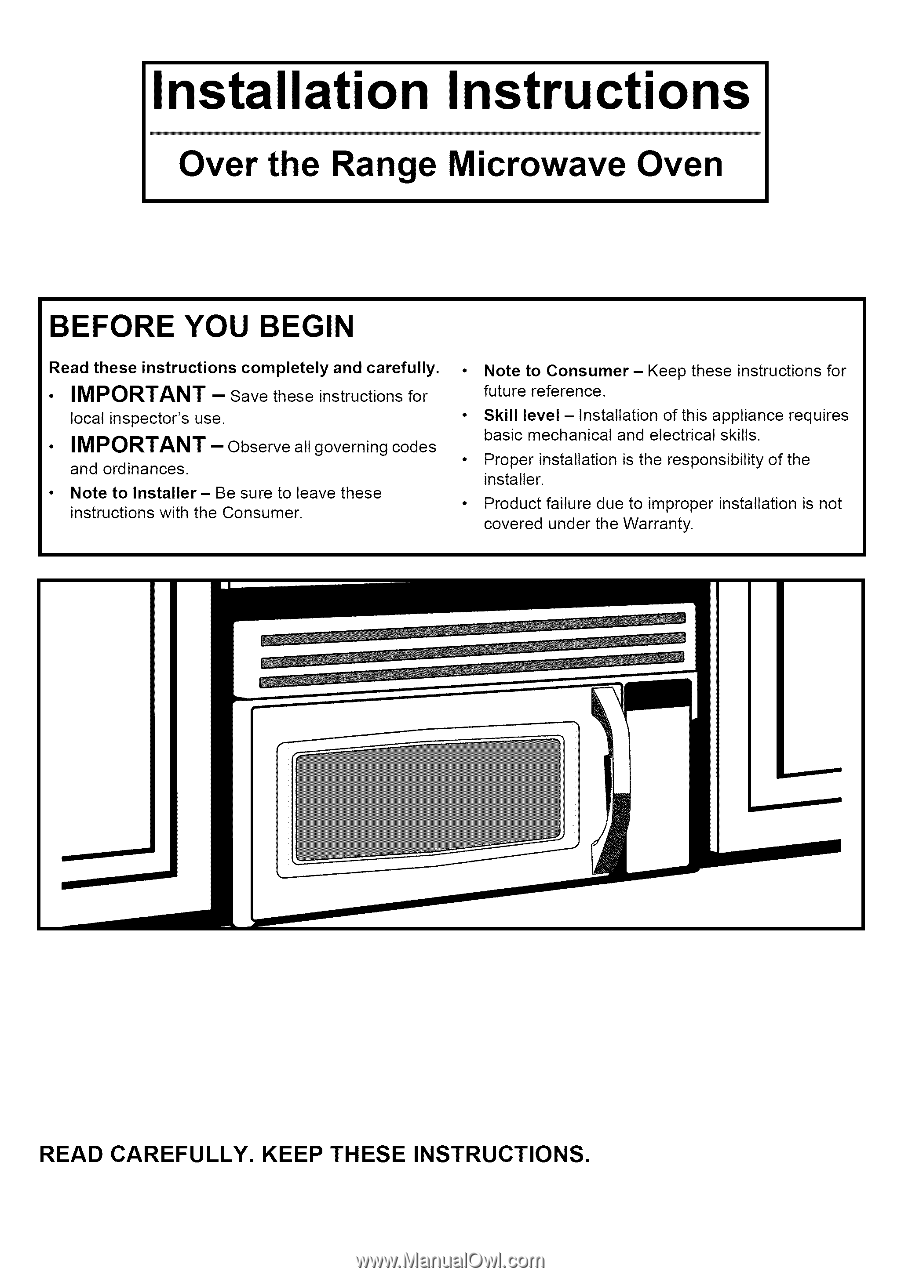
Installation Instructions Over the Range Microwave Oven BEFORE YOU BEGIN Read these instructions completely and carefully. • IMPORTANT -- Save these instructions for local inspector's use. • IMPORTANT -- Observe all governing codes and ordinances. • Note to Installer- Be sure to leave these - Maytag MMV5165BAW | Installation Instructions - Page 2
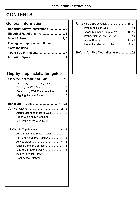
Oven 20, 21 Before You Use Your Microwave 22 Step-by-step installation guide Placement of Mounting Plate 8-10 Removing the Mounting Plate 8 Finding the Wall Studs 8 Determining Wall Plate Location 9 Aligning the Wall Plate 10 Installation Types 11-21 A Recircutating 12-13 Attach - Maytag MMV5165BAW | Installation Instructions - Page 3
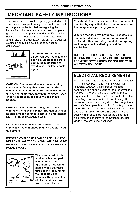
brought to a separate 20 ampere branch circuit single grounded outlet. The outlet box should be located in the cabinet above the microwave oven. The outlet box and supply circuit should be installed by a qualified electrician and conform to the National Electrical Code or the prevailing local code - Maytag MMV5165BAW | Installation Instructions - Page 4
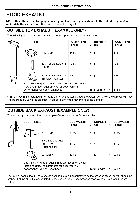
Installation Instructions HOOD EXHAUST NOTE: Read these next two pages . OUTSIDE TOP EXHAUST (EXAMPLE ONLY) The following chart describes an example of one possible ductwork installation. DUCT PIECES EQUIVALENT LENGTH NUMBER x USED EQUIVALENT = LENGTH Roof Cap 24 Ft. x (1) = 24 Ft. 12 Ft - Maytag MMV5165BAW | Installation Instructions - Page 5
Instructions NOTE: If you need to install ducts, note that the total duct length of 3¼" x 10" rectangular or 6" diameter round duct should not exceed 60 equivalent feet. Outside ventilation requires a HOOD EXHAUST DUCT. Read the following carefully. NOTE: It is important that venting be installed - Maytag MMV5165BAW | Installation Instructions - Page 6
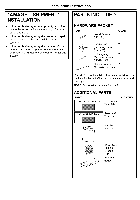
with the unit. Check to make sure you have all these parts. NOTE: Some extra parts are included. ADDITIONAL PARTS PART TOP CABINET TEMPLATE Top Cabinet Template QUANTITY 1 REAR WALL TEMPLATE Rear Wall Template Installation Instructions Separately Packed Grease Filter Exhaust adaptor 6 - Maytag MMV5165BAW | Installation Instructions - Page 7
over cooking surface ranges up to 33" wide. • If you are going to vent your microwave oven to the outside, see Hood Exhaust Backsplash Section for exhaust duct preparation. • When installing the microwave oven beneath smooth flat cabinets be careful to follow the instructions on the top - Maytag MMV5165BAW | Installation Instructions - Page 8
REMOVING THE MICROWAVE OVEN FROM THE CARTON/ REMOVING THE MOUNTING PLATE 1, Remove the installation instructions, Exhaust adaptor, filters, glass mounting surface to find a solid sound. This will indicate a stud location. 2, After locating the stud(s), find the center by probing the wall with a small - Maytag MMV5165BAW | Installation Instructions - Page 9
Installation Instructions C. DETERMINING WALL PLATE LOCATION UNDER YOUR CABINET Plate position - beneath flat decorative trim that interferes with the microwave installation. Remove the decorative trim to install the microwave properly and to make it level. THE MICROWAVE MUST BE LEVEL. Use a level - Maytag MMV5165BAW | Installation Instructions - Page 10
Installation Instructions D. ALIGNING THE WALL PLATE of "Rear Wall Template". 3. Drill 5/8" holes for toggle bolts on 3 locations (Hole A, Hole B, Hole C) but if the location of hole is same as that of stud, drill a 3/16" hole to support the weight of the microwave. Set the mounting plate aside. 10 - Maytag MMV5165BAW | Installation Instructions - Page 11
for your installation and proceed to that section. A.__R. ECIRCULATING (NON-VENTED DUCTLESS) A Charcoal Filter Accessory Kit is required for the nonvented iiii_ii!i_i!_i!_i!_i!_!_!_!i_i_!_!_!_!ii!ii!i_!ii!_!_i!e_xhia!_usit!._i(!S_eei!_yoi!u_r i!O_win!e_r'is!_i!_i!_i Manual for the kit number - Maytag MMV5165BAW | Installation Instructions - Page 12
Installation Instructions A. RECIRCULATING (Non-Vented Ductless) INSTALLATION OVERVIEW A1. Attach Mounting Plate to Wall A2. Prepare Top Cabinet A3. Mount the Microwave holes for the top support screws and a hole large enough for the power cord to fit through. • Read the instructions on the TOP - Maytag MMV5165BAW | Installation Instructions - Page 13
Installation Instructions MOUNT THE MICROWAVE OVEN FOR EASIER INSTALLATION SAFETY, WE RECOMMEND INSTALL THIS MICROWAVE AND PERSONAL THAT TWO PEOPLE OVEN. IMPORTANT: Do not grip or use handle during installation. NOTE: If your cabinet is metal, use the nylon grommet around the power cord hole to - Maytag MMV5165BAW | Installation Instructions - Page 14
Installation Instructions B. OUTSIDE TOP EXHAUST (Vertical Duct) INSTALLATION OVERVIEW B1. Attach Mounting Plate to Walt B2. Prepare Top Cabinet B3. Adjust Blower B4. Check Damper Operation B5. Mount Microwave Oven B6. Adjust Exhaust Adaptor B7. Connect Ductwork Blm ATTACH THE MOUNTING PLATE TO THE - Maytag MMV5165BAW | Installation Instructions - Page 15
Installation Instructions B2. USE TOP CABINET TEMPLATE FOR PREPARATION OF TOP CABINET You need to drill holes for the top support screws, a hole door retaining screw. Blower Back of Microwave Blower Motor Screw 2, Open the blower motor door by lifting it up at the back side of the microwave. - Maytag MMV5165BAW | Installation Instructions - Page 16
PROPER DAMPER OPERATION Exhaust Adaptor (absent on models shipped for recirculation exhaust) - Damper FOR EASIER INSTALLATION SAFETY, WE RECOMMEND INSTALL THIS MICROWAVE AND PERSONAL THAT TWO PEOPLE OVEN. IMPORTANT: Do not grip or use handle during installation. NOTE: If your cabinet is metal - Maytag MMV5165BAW | Installation Instructions - Page 17
oven. (While tightening screws, hold the microwave oven in place against the wall and the top cabinet.) 1. Extend the house duct down to connect to the exhaust adaptor. 2, Seal exhaust duct joints using duct tape. 7. Install grease filter. See the Owner's Manual packed with the microwave oven. 17 - Maytag MMV5165BAW | Installation Instructions - Page 18
Installation Instructions C, OUTSIDE BACK EXHAUST (Horizontal Duct) INSTALLATION OVERVIEW C1. Prepare Rear Wall C2. Attach Mounting Plate to Wall C3. Prepare Top Cabinet C4. Adjust Blower C5. Mount the Microwave Oven ÷ ...... I Clm PREPARING THE REAR WALL FOR OUTSIDE BACK EXHAUST You need to cut an - Maytag MMV5165BAW | Installation Instructions - Page 19
Installation Instructions C2.__A. TTACH THE MOUNTING TO THE WALL (cont.) To use toggle bolts" PLATE Spacing for Toggles More Than Wall Thickness Mounting Plate I Toggle Wings C4. ADAPTING MICROWAVE BLOWER FOR OUTSIDE BACK EXHAUST 1. Remove the back top center blower motor door support screws - Maytag MMV5165BAW | Installation Instructions - Page 20
Installation Instructions INSTALLATION SAFETY, WE RECOMMEND INSTALL THIS MICROWAVE AND PERSONAL THAT TWO PEOPLE OVEN. IMPORTANT: Do not grip or use handle during installation Attach the exhaust adaptor to the rear of the microwave by sliding it into the guides at the top center of the back of the - Maytag MMV5165BAW | Installation Instructions - Page 21
holes. Turn two full turns on each screw. Right Screw. 6, Tighten the outer two screws to the top of the microwave oven. (While tightening screws, hold the microwave oven in place against the wall and the top cabinet.) i 1/_/1 7. Install grease filter. See the Owner's Manual packed with the - Maytag MMV5165BAW | Installation Instructions - Page 22
MICROWAVE 1, Make sure the microwave oven has been installed according to instructions. 6. Read the Owner's Manual. 2, Remove all packing material from the microwave oven. 3. Install turntable and ring in cavity. 4. Replace house fuse or turn breaker back on. 7, KEEP INSTALLATION INSTRUCTIONS - Maytag MMV5165BAW | Installation Instructions - Page 23
NOTE Installation Instructions 23 - Maytag MMV5165BAW | Installation Instructions - Page 24
Part No. : 8101 P679-60 Form No. : A/08/05 Code No. : DE68-03141A
-
 1
1 -
 2
2 -
 3
3 -
 4
4 -
 5
5 -
 6
6 -
 7
7 -
8
-
9
-
10
-
11
-
12
-
13
-
14
-
15
-
16
-
17
-
18
-
19
-
20
-
21
-
22
-
23
-
24
 |
 |
Installation
Instructions
Over the Range Microwave
Oven
BEFORE YOU BEGIN
Read
these
instructions
completely
and carefully.
•
IMPORTANT
--
Save
these
instructions
for
local
inspector's
use.
•
IMPORTANT
-- Observe
all governing
codes
and ordinances.
•
Note
to
Installer-
Be sure
to leave
these
instructions
with
the Consumer.
•
Note
to Consumer-
Keep
these
instructions
for
future
reference.
•
Skill
level
-
Installation
of this appliance
requires
basic
mechanical
and electrical
skills.
•
Proper
installation
is the responsibility
of the
installer.
•
Product
failure
due
to improper
installation
is not
covered
under
the Warranty.
READ CAREFULLY.
KEEP
THESE
INSTRUCTIONS.