Maytag MTF1842EEW User Instructions
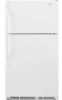
Maytag MTF1842EEW - 18 cu. Ft. Refrigerator Manual
 |
View all Maytag MTF1842EEW manuals
Add to My Manuals
Save this manual to your list of manuals |
Maytag MTF1842EEW manual content summary:
- Maytag MTF1842EEW | User Instructions - Page 1
, visite: www.maytag.com. Necesitara su nOmero de modelo y de serie, ubicado en el interior del compartimiento del refrigerador. Table of Contents / Table des rnati_res REFRIGERATOR SAFETY 1 INSTALLATION INSTRUCTIONS 2 REFRIGERATOR USE 9 REFRIGERATOR CARE 10 TROUBLESHOOTING 11 ACCESSORIES 12 - Maytag MTF1842EEW | User Instructions - Page 2
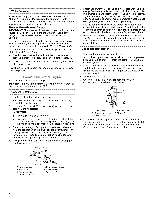
climb inside. INSTALLATION INSTRUCTIONS Excessive Weight Hazard Use two or more people to move and install refrigerator. Failure to do so can result in back or other injury. When Moving "{our Refrigerator: Your refrigerator is heavy. When moving the refrigerator for cleaning or service, be sure - Maytag MTF1842EEW | User Instructions - Page 3
source and reset the control (Thermostat, Refrigerator or Freezer Control depending on the model) to the desired setting. See "Using the Controls." 2"(5.08 cm} / Gather the required tools and parts before starting installation. Read and follow the instructions provided with any tools listed here - Maytag MTF1842EEW | User Instructions - Page 4
system going to the water inlet valve of the refrigerator needs to be between 30 and 120 psi ( washer is under the pipe clamp. Tighten the packing nut. Tighten the pipe clamp screws slowly and evenly so washer . Obtain a water strainer from your nearest appliance dealer. A. Cold water pipe B. Pipe - Maytag MTF1842EEW | User Instructions - Page 5
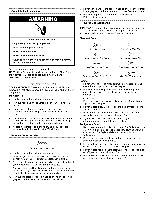
instructions refrigerator door and keep both doors closed until you are ready to lift them free from the cabinet. NOTE: Provide additional support for the doors while the hinges are being moved. Do not depend on the door magnets to hold the doors in place while you are working. 4. Remove the parts - Maytag MTF1842EEW | User Instructions - Page 6
and Hinges NOTE: Graphic may be reversed if door swing is reversed. 1. Replace the parts for the bottom hinge as shown. Tighten screws. See Bottom Hinge graphic. Replace the refrigerator door. NOTE: Provide additional support for the doors while the hinges are being moved. Do not depend on the door - Maytag MTF1842EEW | User Instructions - Page 7
StandardDoors Top Hinge A, Top Hinge Cover B, s/_ ,, Hex-Head Hinge C. Top Hinge Screws Center Hinge A, Center Hinge B. s/_, Hex-Head Hinge Screws Bottom Hinge A. Cabinet Hinge Hole Plugs A. Door Hinge Hole Plug A ....... A. Flat-Head Handle Screws B. Freezer Door Handle _o_'- _i_\ I A. - Maytag MTF1842EEW | User Instructions - Page 8
Contour Doors Top Hinge A. sire" Hex-Head Hinge Screws A. Top Hinge Cover B. 5/1/' Hex-Head Hinge Screws C. Top Hinge Center Hinge A. Center Hinge B. 5/f6" Hex-Head Hinge Screws Bottom Hinge A. Bottom Hinge B. 5/_6"Hex-Head Hinge Screws A. Cabinet Hinge Hole Plugs A. Door Hinge Hole Plug - Maytag MTF1842EEW | User Instructions - Page 9
refrigerator's tilt using the instructions below. 1. Remove the base grille. See the Base Grille graphic in "Refrigerator Doors." The two leveling screws are part of the front roller assemblies which are at the base of the refrigerator guide. On models with two controls, adjust the refrigerator - Maytag MTF1842EEW | User Instructions - Page 10
. Water softener chemicals (such as salt) can damage parts of the ice maker and lead to poor quality ice ice maker ON, simply lower the wire shutoff arm. To manually turn the ice maker OFF, lift the wire shutoff arm using the following cleaning instructions. To Clean Your Refrigerator: NOTE: Do not - Maytag MTF1842EEW | User Instructions - Page 11
it with an appliance bulb of the same wattage. 3. Plug in refrigerator or reconnect power. TROUBLESHOOTING First try the solutions suggested here or visit our website and reference FAQs (Frequently Asked Questions) to possibly avoid the cost of a service call. In the U.S.A., www.maytag.com In - Maytag MTF1842EEW | User Instructions - Page 12
pushed in, so that the back rests on the supports. The door is difficult to open Explosion Hazard • Refrigerator connected to a water supply and the supply shutoff valve turned on? Connect refrigerator to ask for the part number listed below or contact your authorized MAYTAG ® appliance dealer. In - Maytag MTF1842EEW | User Instructions - Page 13
of your major appliance, to instruct you on how to use your major appliance, to replace or repair house fuses, or to correct house wiring or plumbing. 3. Service calls to repair or replace appliance light bulbs, air filters or water filters. Consumable parts are excluded from warranty coverage - Maytag MTF1842EEW | User Instructions - Page 14
1-800-688-99A00u.Canadav,isiteznotresiteWebwww.maytag.coau tel6phonez-noauus1-800-807- risque de blessure et ce qui peut se produire en cas de non-respect des instructions. IlViPORTANTES INSTRUCTIONS DE SECURITi_ AVERTISSEMENT : Pour r6duire les risques d'incendie, de choc 61ectrique ou des - Maytag MTF1842EEW | User Instructions - Page 15
votre vieux r_frig_rateur. Le non=respect de cette instruction peut causer un d_c_s ou des I_sions c_r_brales. I'etouffement des enfants ne sont pas un probleme du passe. Les refrigerateurs jetes ou abandonnes du refrigerateur pour le nettoyage ou le service, veiller & proteger le plancher. Toujours - Maytag MTF1842EEW | User Instructions - Page 16
pas enlever la broche de liaison/_ la terre. Ne pas utiliser un adaptateur. Ne pas utiliser un cglble de rallonge. Le non=respect de ces instructions peut causer un d_c_s, un incendie ou un choc _lectrique. Avant de placer le refrigerateur a son emplacement final, il est important de vous assurer - Maytag MTF1842EEW | User Instructions - Page 17
pas enlever la broche de liaison a la terre. Ne pas utiliser un adaptateur. Ne pas utilJser un c&ble de rallonge. Le non=respect de ces instructions peut causer un d_c_s, un incendie ou un choc _lectrique. 1. Brancher sur une prise a 3 alveoles reliee a la terre. REMARQUE : Attendre 24 heures pour - Maytag MTF1842EEW | User Instructions - Page 18
les separer de la caisse de I'appareil. REMARQUE : Prevoir un support additionnel des portes pendant le demontage des charnieres. La force d'attraction vis. Conserver la porte & part jusqu'& la mise en place des charnieres de la porte du compartiment de refrigeration. Porte du compartiment de - Maytag MTF1842EEW | User Instructions - Page 19
Reinstaller la porte du compartiment de refrigeration. REMARQUE : Prevoir un support additionnel des portes pendant la reinstallation des adaptateur. Ne pas utiliser un c&ble de rallonge. Le non-respect de ces instructions peut causer un d_c_s, un incendie ou un choc _lectrique. 3. Brancher sur une - Maytag MTF1842EEW | User Instructions - Page 20
Portes standard Grille de la base A. Bouchons obturateurs de chamiere de caisse Charni_re sup_rieure A. Bouchon obturateur de chamiere de porte A. Couvercle de chamiere sup#rieure B. Vis de charniere a t#te hexagonale de s/_6" C. Chamiere superieure Charni_re centrale A. Charniere centrale B. - Maytag MTF1842EEW | User Instructions - Page 21
Portes _ contour Grille de la base Charni_re sup4rieure A A. Couvercle de charniere superieure B. Vis de charniere _ t#te hexagonale de 5/_,, C. Charniere superieure Charni_re centrale A. Charniere centrale B. Vis de charniere de 5/_,, _ t#te hexagonale Charni_re inf4rieure A. Charniere - Maytag MTF1842EEW | User Instructions - Page 22
la grille de la base. Alignement des portes Si I'espace entre les portes semble inegal, on peut faire le reglage en suivant les instructions ci-dessous • 1. Soulever et enlever le couvercle sur la charniere superieure. 2. Degager les vis de la charniere superieure en utilisant une douille de - Maytag MTF1842EEW | User Instructions - Page 23
S'il est necessaire d'ajuster les temperatures, utiliser les reglages indiqu6s au tableau ci-dessous comme guide. Sur les modeles deux commandes, ajuster d'abord la temperature du refrigerateur. Attendre au moins 24 heures entre les ajustements, puis reverifier les temperatures. CONDITION/RAISON : - Maytag MTF1842EEW | User Instructions - Page 24
Risque d'expiosion Utiliser un produit de nettoyage ininf(ammable. Le non=respect de cette instruction peut causer un d_c_s, une explosion ou un incendie. Les compartiments de refrigeration et de congelation se degivrent automatiquement. Toutefois, nettoyer les deux compartiments environ une fois - Maytag MTF1842EEW | User Instructions - Page 25
de service. Aux I_.-U, www.maytag.com Au Canada, www.maytag.ca reenclencher le disjoncteur. Si le probleme persiste, appeler un electricien. refrigerant, supports. La porte est difficile _ ouvrir Risque d'explosion Utiliser un produit de nettoyage ininflammable. Le non=respect de cette instruction - Maytag MTF1842EEW | User Instructions - Page 26
Pour commander le nettoyant pour acier inoxydable, composer le 1-877-232-6771 et demander le numero de piece indiqu_ cidessous ou contacter votre marchand autorise MAYTAG ®.Au Canada, composer le 1-800-807-6777. Nettoyant et poli pour acier inoxydable : Commander la piece N ° 20000008 26 - Maytag MTF1842EEW | User Instructions - Page 27
. Une preuve de la date d'achat d'origine est exigee pour obtenir un service dans le cadre de la presente garantie limitee. I_LI_MENTS EXCLUS DE LA GARANTIE endroit inaccessible ou n'est pas installe conformement aux instructions d'installation fournies par Maytag. 11. Les pieces de rechange ou la - Maytag MTF1842EEW | User Instructions - Page 28
service aux €:.-U., composez le 1-800-688-9900. Au Canada, composez le 1-800-807-6777. Si vous avez besoin de plus d'assistance, suivante : Aux €:tats-Unis : Maytag Brand Home Appliances a Maytag en soumettant toute question ou probleme a I'adresse Au Canada : Maytag Brand Home Appliances Centre
-
 1
1 -
 2
2 -
 3
3 -
 4
4 -
 5
5 -
 6
6 -
 7
7 -
8
-
9
-
10
-
11
-
12
-
13
-
14
-
15
-
16
-
17
-
18
-
19
-
20
-
21
-
22
-
23
-
24
-
25
-
26
-
27
-
28
 |
 |
THANK YOU for purchasing this high-quality product. If you should experience a problem not covered in TROUBLESHOOTING,
please visit our website at www.maytag.com
for additional information. If you still need assistance, call us at 1-800-688-9900.
In Canada, visit our website at www.maytag.ca
or call us at 1-800-807-6777.
You will need your model and serial number, located on the inside wall of the refrigerator compartment.
Para obtener acceso a "lnstrucciones para el usuario del refrigerador" en espa_ol, o para obtener informaci6n adicional acerca de
su producto, visite: www.maytag.com.
Necesitara su nOmero de modelo y de serie, ubicado en el interior del compartimiento
del refrigerador.
Table of Contents
/
Table des rnati_res
REFRIGERATOR
SAFETY
.......................................................
1
INSTALLATION
INSTRUCTIONS
............................................
2
REFRIGERATOR
USE
..............................................................
9
REFRIGERATOR
CARE
.........................................................
10
TROUBLESHOOTING
............................................................
11
ACCESSORIES
.......................................................................
12
WAR RANTY
............................................................................
13
SECURITE
DU REFRIGERATEUR
.......................................
14
INSTRUCTIONS
D'INSTALLATION
.....................................
15
UTILISATION
DU REFRIGERATEUR
..................................
22
ENTRETIEN
DU RI:!:FRIGI:!:RATEUR
.....................................
24
DI:!:PANNAGE
.........................................................................
25
ACCESSOIRES
......................................................................
26
GARANTIE
.............................................................................
27
REFRIGERATOR
SAFETY
Your safety and the safety of others are very important.
We have provided
many important
safety messages
in this manual and on your appliance.
Always read and obey all safety
messages.
This is the safety alert symbol.
This symbol
alerts you to potential
hazards that can kill or hurt you and others.
All safety
messages
will follow the safety alert symbol and either the word "DANGER"
or "WARNING."
These words mean:
You can be killed or seriously
injured if you don't immediately
follow
instructions.
You can be killed or seriously
injured
if you don't
follow
instructions.
All safety messages
will
tell you
what
the potential
hazard is, tell you how to reduce the chance
of injury, and tell you
what
can
happen
if the instructions
are not followed.
W10208846A