Memorex MVDP1077 User Guide - Page 9
Battery Pack Insertion/removal, Charging The Battery Pack
 |
View all Memorex MVDP1077 manuals
Add to My Manuals
Save this manual to your list of manuals |
Page 9 highlights
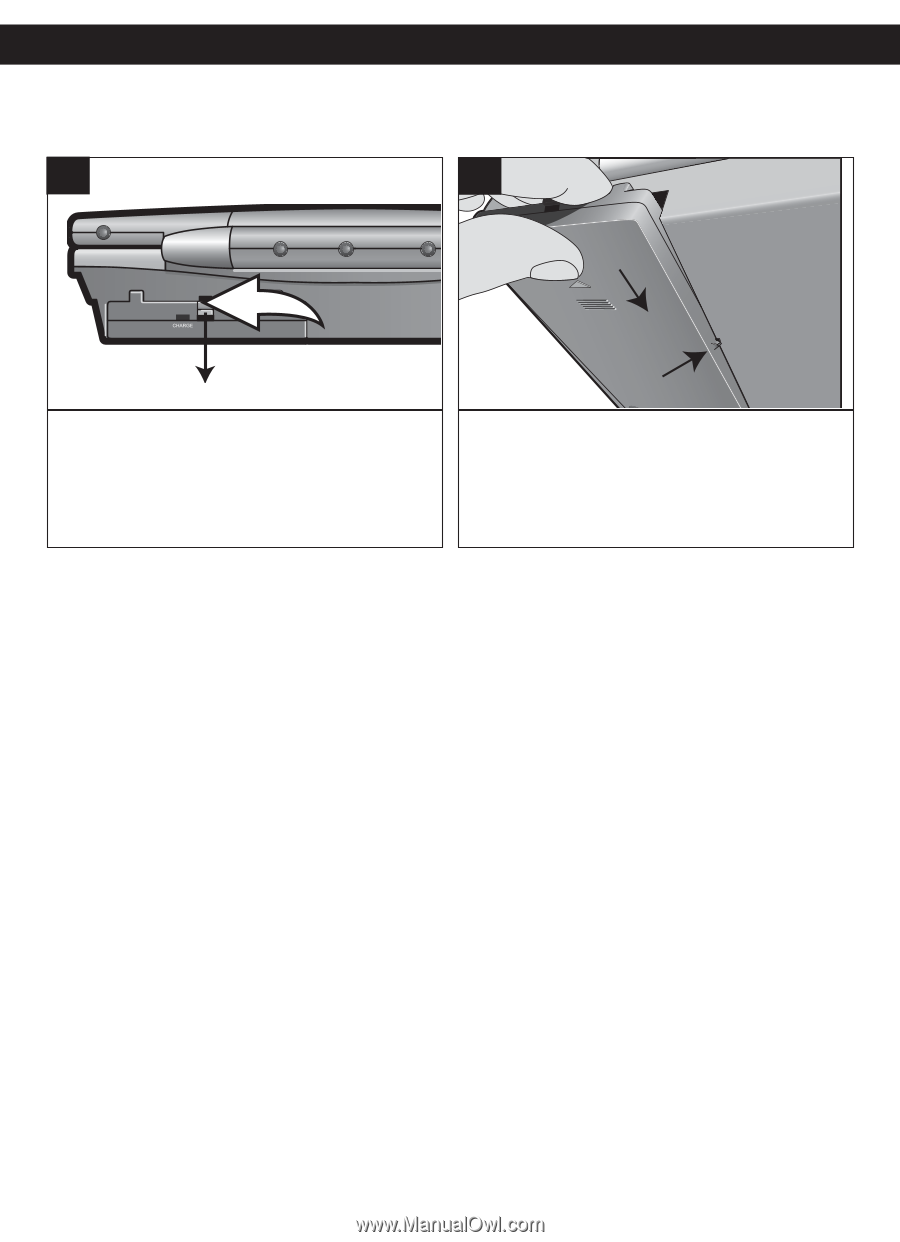
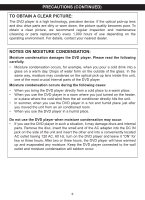
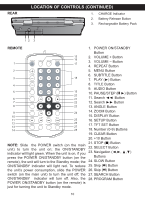
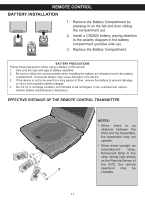
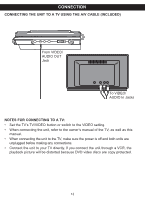
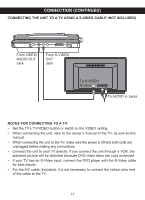
POWER SOURCES (CONTINUED) BATTERY PACK INSERTION/REMOVAL Follow the diagram below to insert or remove the Battery Pack. 1 2 TO REMOVE: Press down the Battery Release button on the rear of the Battery Pack, then slide the Battery Pack out towards the rear of the unit. TO INSERT: Align the tabs from the Battery Pack into the holes on the middle of the main unit. Then, slide the Battery Pack into the main unit until it clicks into place. CHARGING THE BATTERY PACK The Low Battery indicator will blink at the top left-hand corner of the screen when the Battery Pack is low and needs recharging. With the Battery Pack attached to the unit, insert the small end of the AC adapter into the DC IN jack on the side of the unit. Insert the other end (with the 2 blades) into a conveniently-located AC outlet having 120V AC, 60Hz. The CHARGE indicator on the Battery Pack will blink red as the Battery Pack is charging and light solid red when charging has completed. Remove both the DC plug and the AC-IN plug to disconnect the AC adapter when charging has finished. NOTES: • Fully charge the Battery Pack for 12 hours before using it for the first time. After the initial charge, it should take approximately four hours to charge. • A fully-charged Battery Pack can operate for about 2 and a half hours. 8
-
 1
1 -
2
-
3
-
 4
4 -
 5
5 -
 6
6 -
 7
7 -
 8
8 -
 9
9 -
 10
10 -
 11
11 -
 12
12 -
 13
13 -
 14
14 -
15
-
16
-
17
-
18
-
19
-
20
-
21
-
22
-
23
-
24
-
25
-
26
-
27
-
28
-
29
-
30
-
31
-
32
-
33
-
34
-
35
-
36
-
37
-
38
-
39
-
40
-
41
 |
 |