Motorola DTR650 User Manual
Motorola DTR650 - FHSS Digital Radio Manual
 |
View all Motorola DTR650 manuals
Add to My Manuals
Save this manual to your list of manuals |
Motorola DTR650 manual content summary:
- Motorola DTR650 | User Manual - Page 1
Title Page DTR Series® DTR550 & DTR650 User Guide 550 Motorola, Inc. 8000 West Sunrise Boulevard Fort Lauderdale, Florida 33322 9980384R89-O - Motorola DTR650 | User Manual - Page 2
information and operating instructions in the Product Safety and RF Exposure booklet enclosed with your radio (Motorola Publication part number 6881095C98) to ensure compliance with RF energy exposure limits. For a list of Motorola-approved antennas, batteries, and other accessories, visit the - Motorola DTR650 | User Manual - Page 3
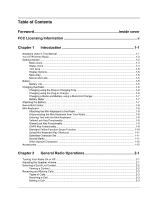
the Plug-in Charger 1-6 Charging a Radio and Battery using a Multi-Unit Charger 1-7 Battery Meter ...1-7 Attaching the Battery ...1-7 Swivel Belt Holster...1-8 Mini Keyboard...1-8 Attaching the Mini Keyboard to the Radio 1-8 Disconnecting the Mini Keyboard from Your Radio 1-8 Entering Text with - Motorola DTR650 | User Manual - Page 4
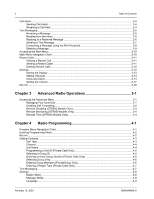
the Mini Keyboard 2-8 Radio Programming 4-1 Program Menu Navigation Chart ...4-1 Entering Programming Mode...4-2 My Info ...4-2 Adding Contacts ...4-3 Call Type...4-3 Channel...4-4 Unit Name ...4-4 Programming a Unit ID (Private Calls Only 4-5 Selecting a Group ID...4-5 Entering a Home Group - Motorola DTR650 | User Manual - Page 5
Chapter 5 Cloning Mode 5-1 Entering Cloning Mode ...5-1 Cloning Using the Cloning Cable...5-1 Cloning by Sending a Contact ...5-3 Chapter 6 Troubleshooting 6-1 Chapter 7 Motorola Limited Warranty for the United States and Canada 7-3 What Does this Warranty Cover?...7-3 Products and Accessories - Motorola DTR650 | User Manual - Page 6
iv Table of Contents February 10, 2005 9980384R89-O - Motorola DTR650 | User Manual - Page 7
Information DTR Series® professional two-way radios operate in the license-free 900 MHz ISM band and are subject to the Rules and Regulations of the Federal Communications Commission (FCC) This device complies with part 15 of the FCC rules. Operation is subject to the following two conditions - Motorola DTR650 | User Manual - Page 8
vi : Notes February 10, 2005 9980384R89-O - Motorola DTR650 | User Manual - Page 9
more. Motorola professional two-way radios are the perfect communications solution for all of today's fast-paced industries. Please read this manual carefully to ensure you know how to properly operate the radio before use. This User's Guide covers operation and maintenance of your DTR Series radio - Motorola DTR650 | User Manual - Page 10
to 20 (2 default) Up to 10 Yes 5 Quick Notes (15 available) Yes Yes Yes Yes Receive Only Receive Only Receive Only 14.5 Hours (5/5/90) Up to 3 Hours Yes DTR 650 Up to 50 (5 default) Up to 20 Yes 10 Quick Notes (25 available) Yes Yes Yes Yes Yes Yes Yes 19 Hours (5/5/90) Up - Motorola DTR650 | User Manual - Page 11
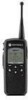
Radio Your DTR Series Radio Volume Controls Push-to-Talk (PTT) Button Menu Key Speaker Plug-in Charging and Connect Data Accessories 1-3 Antenna Audio Jack Connect audio accessories 550 Option Keys Use to select display options Home Key Use to exit the current menu and return to the idle screen - Motorola DTR650 | User Manual - Page 12
Text Input Main Menu. Indicates you are entering text. The mini keyboard must be attached to the radio Battery Status More bars on the battery indicate a greater charge. When the battery is flashing, it is time to charge the radio. New Message You have a new unopened text message. February 15 - Motorola DTR650 | User Manual - Page 13
rate discharge (for example, a paper clip placed accidentally across the battery contacts) may permanently damage the battery, void the battery warranty, and create a burn or fire hazard. Motorola batteries are designed specifically to be used with a Motorola charger and vice versa. Charging in non - Motorola DTR650 | User Manual - Page 14
an AC outlet. 4. Insert the radio (with battery installed) into the charging tray. NOTE: The charging tray has been designed to charge the radio with or without the holster. Charging using the Plug-in Charger 1. Plug the charger into an AC outlet. 2. Open the accessory connector cover. 3. Plug the - Motorola DTR650 | User Manual - Page 15
the Battery 1-7 Charging a Radio and Battery using a Multi-Unit Charger A Multi-Unit Charger (MUC) is available separately (RPN4040) which will charge up to 6 radios, batteries, or a combination of the two at the same time. When charging a radio in the MUC, the battery icon on the radio display - Motorola DTR650 | User Manual - Page 16
of loss, please contact your point-of-sale to request replacement part number RLN5713. Mini Keyboard A mini keyboard accessory (NNTN5491) is available separately that can be attached to your radio. The mini keyboard allows you to customize Private and Group names, write text messages, and create - Motorola DTR650 | User Manual - Page 17
Introduction: Mini Keyboard 1-9 Entering Text with the Mini Keyboard If you have attached the mini keyboard correctly and the keyboard bezel is installed on the keyboard base you can begin. Here are some important points to remember when using the mini keyboard. • Your radio accepts a maximum of - Motorola DTR650 | User Manual - Page 18
1-10 Standard Yellow Function Green Function Introduction: Mini Keyboard Standard Q W E R T Y U I O P A S D F G H J K L Z X C V B N M Yellow Function 1 2 3 4 5 6 7 8 9 0 Green Function APOSTROPHE " ~ ACCENT UP ARROW DOWN ARROW LEFT ARROW RIGHT ARROW I ¿ February 10, 2005 9980384R89-O - Motorola DTR650 | User Manual - Page 19
Introduction: Mini Keyboard 1-11 Using Mini Keyboard Key Shortcuts You can perform most of your radio's functions using the keys on the Motorola mini keyboard. Radio Key Left Option Right Option Action Chooses current left display option Chooses current right display option Keyboard Equivalent - Motorola DTR650 | User Manual - Page 20
Green + Z L o c k Green Accessories The DTR Series radios comes with a High Capacity Lithium-Ion battery and a Drop-in Charging Tray. Various accessories are available for use with your DTR Series radio, including holsters, hands-free accessories, headset accessories, a mini keyboard, and more. To - Motorola DTR650 | User Manual - Page 21
or Off Press to turn your radio on. The radio chirps and the display briefly shows Motorola. The display shows the radio Unit ID or Name, current Scroll list setting, time, date, and the available Option key selections. If the radio has been assigned a unique Unit Name, the name will display rather - Motorola DTR650 | User Manual - Page 22
5:49pm 11/14 Contcs Mesgs The Contact List screen appears with the first contact highlighted in the list. Contacts Mike Jones Receiving Security Alert Back 2. Scroll to highlight the desired contact. 3. To view the contact, press under View for Group contacts or press and press under View for - Motorola DTR650 | User Manual - Page 23
Contact List then cloning the group (either over the air or with the RRDN5378 cloning cable) to member radios. Offers a higher level of privacy than a PublicGroup. Receiving a Call When a call is received, the radio chirps and the display shows the call type and transmitting caller's user ID or name - Motorola DTR650 | User Manual - Page 24
When you send a call alert, the recipient's radio emits a series of beeps, or vibrates, and displays your Unit Name or ID along with the time and date. successful, the radio you are trying to reach is either in a call, on another channel, has the radio turned off, or is out of range. Receiving a - Motorola DTR650 | User Manual - Page 25
Group contacts. Your radio must be on and within range to receive text messages. Receiving a Message When you receive a text message, "New Message Received" appears on the display. The sender and group Inbox. 2. If the message fills more than one screen, scroll to read the entire message. 3. To - Motorola DTR650 | User Manual - Page 26
/ deleted with the mini keyboard by selecting Text Messaging while in Programming Mode. 1. To reply to the message, press under Reply. Detailed View From:Jones Are you at wo.. Reply Back 2. The Send Message screen appears. NOTE: If the mini keyboard is connected to the radio, the [Write Mesg - Motorola DTR650 | User Manual - Page 27
text messages to Private or Group contacts, and has several pre-programmed Quick Notes available. The mini keyboard can be used to change, add additional, or delete these messages while in Programming Mode. This accessory can also be used to write new messages from User Mode. 1. Press under Mesgs - Motorola DTR650 | User Manual - Page 28
2-8 General Radio Operations: Text Messaging 5. Press under Select to choose the . If the message fills more than one screen, scroll to read it. under 8. Press under Send to send the message. Composing a Message Using the Mini Keyboard The mini keyboard can be used to type either new messages - Motorola DTR650 | User Manual - Page 29
General Radio Operations: Text Messaging 2-9 4. Scroll to highlight the Mesg: option. Press under Change. 5. The Mesg: screen appears. Use the mini keyboard to enter your message. A C B Mesg: Done Delete NOTE: The under Delete can be used to erase characters. Holding message. will - Motorola DTR650 | User Manual - Page 30
Radio Operations: Accessing the Main Menu Accessing the Main Menu 1. Press to access the Main Menu. The Main Menu appears. Main Menu Recent Calls Settings My Info Select Back 2. Scroll through the available only appear on the DTR650 radio when Manager Mode is enabled. February 10, 2005 - Motorola DTR650 | User Manual - Page 31
Radio Operations: Recent Calls 2-11 Recent Calls This menu lists recent calls received and allows the user under View. NOTE: The graphic to the left of the user/group name or ID indicates whether the call was received (pointing screen appears. If the alert was not successful, an unsuccessful - Motorola DTR650 | User Manual - Page 32
Advance features are for managing your Scroll List, Call Forwarding, Remote Disable, Remote Monitor, and Remote Time. Refer to Chapter 3 - Advanced Radio Operations to operate the Advance features. From the Main Menu, scroll to highlight Settings and press appears. under Select. The Settings menu - Motorola DTR650 | User Manual - Page 33
General Radio Operations: Settings 2-13 Setting the Display From the Settings menu, the Backlight 1. From the Display menu, scroll to highlight Backlight and press under Change. The Backlight screen appears. The presently selected value will have a check mark on the left side. Backlight Off - Motorola DTR650 | User Manual - Page 34
will briefly vibrate and appears on the display. Clock and Alarm Your radio requires that the current time and date be set in order to fully utilize the digital features. This can be set manually or by using the Remote Time feature (see page 3-5) From the Settings menu, scroll to highlight Clock - Motorola DTR650 | User Manual - Page 35
General Radio Operations: Settings Setting the Time 1. From the Clock/Alarm Menu scroll to highlight Time and press Time screen is displayed. 2-15 the Date 1. From the Clock/Alarm menu, scroll to highlight Date and press Date screen is displayed. under Change. The < > Date: THU 03 / 31 / 05 - Motorola DTR650 | User Manual - Page 36
Operations: Settings Setting the Alarm Your DTR Series radio has an alarm feature that can be set to remind you of a recurring daily event. From the Clock/Alarm menu, scroll to highlight Set Alarm - Motorola DTR650 | User Manual - Page 37
General Radio Operations: Settings 2-17 7. After completing the time setting press Volume. Setting the Ringer Volume 1. From the Volume menu, scroll to highlight Ringer and press Ringer screen appears. under Change. The Ringer 3 OK Cancel 2. Use the Volume Control keys to adjust the - Motorola DTR650 | User Manual - Page 38
menu. My Info The My Info screen displays your Unit Name, ID and Channel. From the Main Menu, scroll to highlight My Info and press under Select. NOTE: The Unit Name defaults to Unit ID unless it is customized in programming mode using the mini keyboard. My Info Joe Smith 17179869143 Channel - Motorola DTR650 | User Manual - Page 39
. NOTE: Remote Disable, Remote Monitor, and Remote Time are not available, unless Manager Mode has been enabled in Programming Mode (DTR650 model only). From the Settings menu, scroll to highlight Advanced and press screen appears. under Select. The Advanced Advanced Scroll List Call Forward - Motorola DTR650 | User Manual - Page 40
available and suggest a manager or third party to be contacted in their absence. The user contacting them can then choose to transmit to the third party by simply pressing the PTT button. NOTE: Your radio must be on and within range screen 3. Scroll to select the desired function and press screen. - Motorola DTR650 | User Manual - Page 41
Remote Disabling (DTR650 Models Only) NOTE: Manager Mode must be enabled in order for a user to use this feature. Refer to page 4-9. Remote Disabling allows a user to remotely enable or disable another DTR Series radio on their channel. The selected radio must be turned on and within range in order - Motorola DTR650 | User Manual - Page 42
. The screen Remote Time (DTR650 Models Only) Remote Time synchronizes the date and time to all other radios on your channel. Any receiving radio must have the transmitting radio User ID in their contact list to accept the time/date update. NOTE: Radios must be turned on and within range to receive - Motorola DTR650 | User Manual - Page 43
Chapter 4 Radio Programming Program Menu Navigation Chart Contacts Program Menu Text Messaging Settings or to scroll through list to select display option to exit Program menu * DTR650 radio only. Display VibraCall Clock/Alarm Volume Advanced Scroll List Call Forward Radio History Manager - Motorola DTR650 | User Manual - Page 44
and access manager features (DTR650 only) such as Remote Disable and Remote Monitoring. A mini keyboard (NNTN5491) is used to enter text into contacts and to modify saved text messages. The RRDN5378A Cloning Cable allows easier programming as one radio can be programmed with all contact information - Motorola DTR650 | User Manual - Page 45
Radio Programming: Adding Contacts Adding Contacts 1. From the Program Menu, scroll to select Contacts and press tacts screen appears. 4-3 under Select. The Con- Contacts [New Contact] Office Security Select Back 2. Scroll to select [New Contact] and press under Select. The Private screen - Motorola DTR650 | User Manual - Page 46
the previous Unit Name Unit ID is transmitted with all voice and text messages. Programming a unique unit name to an ID will cause the radio to recognize any incoming calls from that user or group and display their unit name. NOTE: A mini keyboard (NNTN5491) must be connected to the radio to enter - Motorola DTR650 | User Manual - Page 47
other radio press Home 3 times then PTT Cancel 2. Use the mini keyboard to enter an 11 digit ID. When the mini keyboard is connected, the left becomes Change. After entering the ID, press under Ok to confirm the entry and to return to the previous screen with the ID entered. Selecting a Group - Motorola DTR650 | User Manual - Page 48
4-6 Radio Programming: Adding Contacts Selecting Group Only NOTE: Selecting Group Only on a radio prohibits the user from initiating PrivateCalls. 1. Scroll to select Group Only and press appears. under Change. The Group Only screen Group Only NYoense ! No Select Back NOTE: A next to an - Motorola DTR650 | User Manual - Page 49
or changing the Quick Notes requires the use of the mini keyboard (NNTN5491) which must be attached to the connector on the bottom of the radio. 1. From the Program Menu, scroll to select Text Messages and press Quick Notes screen appears. under Select. The Quick Notes [Create Quick.. Are you - Motorola DTR650 | User Manual - Page 50
4-8 Radio Programming: Settings 2. Scroll to select [Create Quick.. and press Select. The Quick Note screen appears. A C B Quick Note: Cancel 3. Use the mini keyboard to enter the new message. When the first letter is entered, the left changes to Save and the right changes to Delete. 4. - Motorola DTR650 | User Manual - Page 51
the radio has been turned on but not receiving or transmitting. Manager Mode Manager Mode provides access to Remote Disable, Remote Monitor, and Remote Time functions in the User Menu. Enabling Manager Mode also allows the user to view and communicate with PrivateGroups not on their home channel - Motorola DTR650 | User Manual - Page 52
4-10 Radio Programming: Settings February 10, 2005 9980384R89-O - Motorola DTR650 | User Manual - Page 53
the Cloning Cable 1. From the Clone menu, scroll to select Duplicate Radio and press under Select. The fol- lowing screen is displayed indicating the target radio must now be connected to the source radio to be cloned using the cloning cable. Connect Clone Cable and Press Clone Clone Back - Motorola DTR650 | User Manual - Page 54
the Cloning Cable 2. Connect the cloning cable to both radios. NOTE: The target radio must be turned on, but does not need to be in cloning mode. 3. Press under Clone to start the cloning. The "Cloning in Progress" screen is displayed followed by the "Cloning Successful" screen. If a problem - Motorola DTR650 | User Manual - Page 55
Cloning Mode: Cloning by Sending a Contact Cloning by Sending a Contact 1. From the Clone menu scroll to select Send Contact. Press Contact screen is displayed. 5-3 under Select. The Send Send Contact Add:Invalid To:Invalid Change Prgm 2. Scroll to select ADD:. 3. Press under Change to - Motorola DTR650 | User Manual - Page 56
, the display shows each target radio individually. If cloning was successful, both the source and targets radios indicated "Programming Successful". If over-the-cloning to a PrivateGroup fails, the radio displays the failed clone list. The user can attempt cloning again to any members of this - Motorola DTR650 | User Manual - Page 57
temperatures affect battery life. Manager Mode must be enabled to see PrivateGroups not on your home channel or of which you are not a member. Make sure clone cable is properly connected. The radio is busy. Try calling again. Check to see if the Private contact is set to Group Only. A Private - Motorola DTR650 | User Manual - Page 58
6-2 Troubleshooting: February 10, 2005 9980384R89-O - Motorola DTR650 | User Manual - Page 59
for the United States and Canada What Does this Warranty Cover? Subject to the exclusions contained below, Motorola, Inc. warrants its telephones, pagers, and consumer and professional two-way radios (excluding commercial, government or industrial radios) that operate via Family Radio Service or - Motorola DTR650 | User Manual - Page 60
to Obtain Warranty Service or Other Information? Contact your point of purchase. Software Copyright Notice The Motorola products described in this manual may include copyrighted Motorola and third party software stored in semiconductor memories or other media. Laws in the United States and other - Motorola DTR650 | User Manual - Page 61
Motorola Limited Warranty for the United States and Canada: Patent Notice 7-5 Patent Notice This product is covered by one or more of the following United States patents. 5896277 5894292 5864752 5699006 5742484 D408396 D399821 D387758 D389158 5894592 5893027 5789098 5734975 5861850 D395882 D383745 - Motorola DTR650 | User Manual - Page 62
7-6 Motorola Limited Warranty for the United States and Canada: Export Law Assurances Notes February 10, 2005 9980384R89-O - Motorola DTR650 | User Manual - Page 63
Alerts 2-4 Receiving an Alert 2-4 Sending an Alert 2-4 Attaching the Mini Keyboard to the Radio 1-8 Attaching the Battery 1-6 . B Battery 1-5 Battery, Attaching 1-7 Battery Charging using a Multi-Unit Charger 1-7 Battery Life 1-5 Battery Meter 1-7 C CAPS Key Functionality 1-9 Cloning 5-1 - Motorola DTR650 | User Manual - Page 64
Charging Tray 1-6 Multi-Unit Charger 1-7 Plug-in Charger 1-6 Charging a Radio and Battery using a Multi-Unit Charger 1-7 Charging the Radio 1-6 Charging using the Drop-in Charging Tray 1-6 Charging using the Plug-in Charger 1-6 Composing a Message Using the Mini Keyboard 2-8 Contacts, Adding - Motorola DTR650 | User Manual - Page 65
1-9 Green/Lock Key Functionality 1-9 CAPS Key Functionality 1-9 Standard Yellow Function Green Function 1-10 Using Mini Keyboard Key Shortcuts 1-11 Extended Character Set 1-11 Accent Marks 1-11 Other Special Characters 1-12 My Info 2-18 Program Mode 4-2 9980384R89-O February 10, 2005 - Motorola DTR650 | User Manual - Page 66
4 INDEX: N Navigation Keys 1-5 Notations Used in This Manual 1-1 O Other Special Characters 1-12 P Patent Notice 5-9 Plug-in Charger 1-6 Products and Accessories 5-7 Program Menu Navigation Chart 4-1 Q R Radio History 4-8 Receiving and Making a Call 2-3 Making a Call 2-3 Receiving a - Motorola DTR650 | User Manual - Page 67
Software 5-8 Speaker Volume Adjustment 2-1 Standard Yellow Function Green Function 1-10 Status Icons 1-4 Swivel Belt Holster 1-8 T Text Area 1-4 Text Messaging 4-7 Troubleshooting 6-1 Turning Your Radio On or Off 2-1 Types of Calls 2-3 U Using the Cloning Cable 5-1 Using Mini Keyboard - Motorola DTR650 | User Manual - Page 68
6 INDEX: Y Yellow/Lock Key Functionality 1-9 Your DTR series Radio 1-1 Z February 10, 2005 9980384R89-O
-
 1
1 -
 2
2 -
 3
3 -
 4
4 -
 5
5 -
 6
6 -
 7
7 -
8
-
9
-
10
-
11
-
12
-
13
-
14
-
15
-
16
-
17
-
18
-
19
-
20
-
21
-
22
-
23
-
24
-
25
-
26
-
27
-
28
-
29
-
30
-
31
-
32
-
33
-
34
-
35
-
36
-
37
-
38
-
39
-
40
-
41
-
42
-
43
-
44
-
45
-
46
-
47
-
48
-
49
-
50
-
51
-
52
-
53
-
54
-
55
-
56
-
57
-
58
-
59
-
60
-
61
-
62
-
63
-
64
-
65
-
66
-
67
-
68
 |
 |
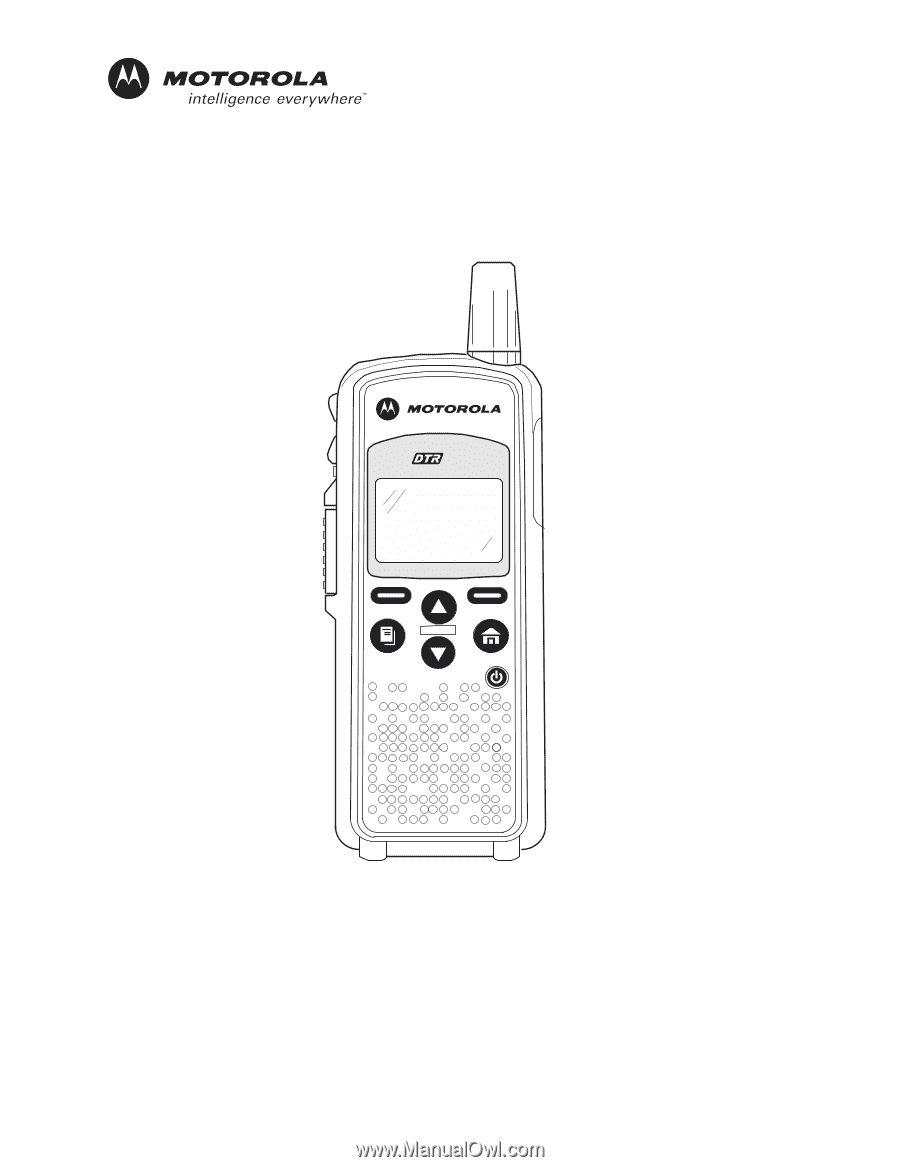
Title Page
DTR Series
fi
DTR550 & DTR650
User Guide
Motorola, Inc.
8000 West Sunrise Boulevard
Fort Lauderdale, Florida 33322
9980384R89-O
550