Motorola T5720 User Manual - Page 19
Attaching/Removing the Belt Clip, Turning Radio On/Off, Setting the Volume, Eliminator Codes.
 |
UPC - 723755565401
View all Motorola T5720 manuals
Add to My Manuals
Save this manual to your list of manuals |
Page 19 highlights
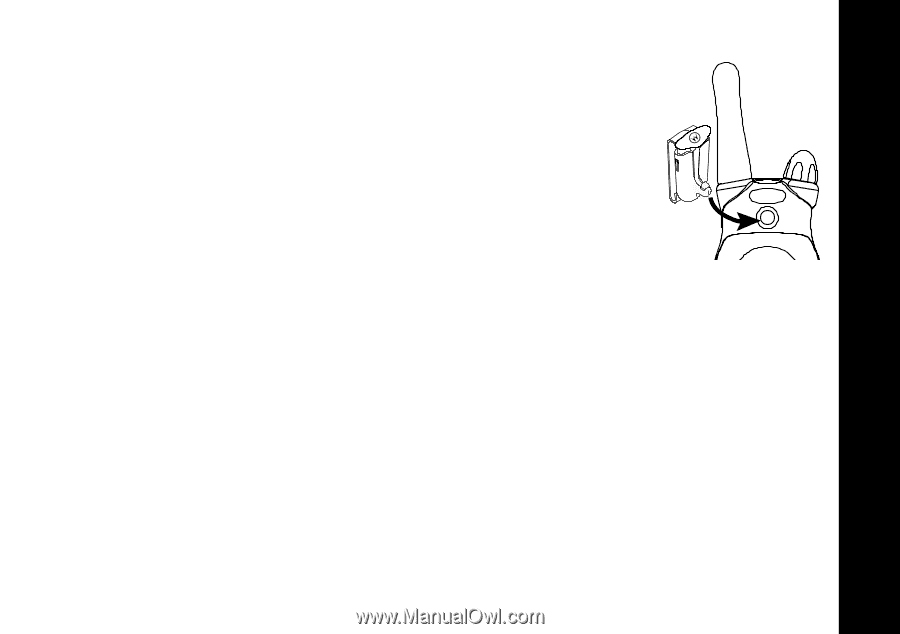
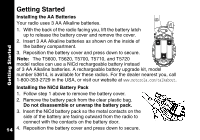
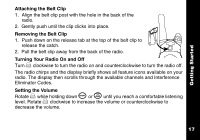
Getting Started Attaching the Belt Clip 1. Align the belt clip post with the hole in the back of the radio. 2. Gently push until the clip clicks into place. Removing the Belt Clip 1. Push down on the release tab at the top of the belt clip to release the catch. 2. Pull the belt clip away from the back of the radio. Turning Your Radio On and Off Turn P clockwise to turn the radio on and counterclockwise to turn the radio off. The radio chirps and the display briefly shows all feature icons available on your radio. The display then scrolls through the available channels and Interference Eliminator Codes. Setting the Volume Rotate P while holding down Q or J until you reach a comfortable listening level. Rotate P clockwise to increase the volume or counterclockwise to decrease the volume. 17
-
 1
1 -
2
-
3
-
4
-
5
-
6
-
7
-
8
-
9
-
10
-
11
-
12
-
13
-
 14
14 -
 15
15 -
 16
16 -
 17
17 -
 18
18 -
 19
19 -
 20
20 -
 21
21 -
 22
22 -
 23
23 -
 24
24 -
25
-
26
-
27
-
28
-
29
-
30
-
31
-
32
-
33
 |
 |