Navigon 7200T User Guide
Navigon 7200T - Automotive GPS Receiver Manual
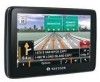 |
UPC - 812619010024
View all Navigon 7200T manuals
Add to My Manuals
Save this manual to your list of manuals |
Navigon 7200T manual content summary:
- Navigon 7200T | User Guide - Page 1
NAVIGON 7200T User's Guide English (US) December 2008 Version 1.1 - Navigon 7200T | User Guide - Page 2
of NAVIGON, INC, nor transmitted in any form either electronically or mechanically, including photocopying and recording. All technical specifications, drawings, etc., are subject to copyright law. © 2008, NAVIGON, INC All rights reserved. ii NAVIGON 7200T User's Guide December 2008 NAVIGON, INC - Navigon 7200T | User Guide - Page 3
changes) be downloaded into your Hardware Device to receive applicable updates. These software upgrades may potentially change your user experience. 2.3 All rights not expressly granted are hereby reserved by NAVIGON. December 2008 NAVIGON 7200T User's Guide iii Version 1.1 NAVIGON, INC. - Navigon 7200T | User Guide - Page 4
THE CONTROL OF MASS TRANSIT OR MEDICAL APPLICATIONS OR IN ANY OTHER INHERENTLY DANGEROUS APPLICATION. NAVIGON AND ITS SUPPLIERS DISCLAIM ANY EXPRESS OR IMPLIED WARRANTY OF FITNESS FOR SUCH USES AND SHALL NOT BE LIABLE FOR ANY iv NAVIGON 7200T User's Guide December 2008 NAVIGON, INC. Version 1.1 - Navigon 7200T | User Guide - Page 5
THAT MAY BE OBTAINED FROM THE USE OF THE SOFTWARE OR CONTENT WILL BE ACCURATE OR RELIABLE, OR (iv) ANY ERRORS IN THE SOFTWARE OR CONTENT WILL BE CORRECTED; AND (B) NO ADVICE OR INFORMATION, WHETHER ORAL OR WRITTEN, OBTAINED BY December 2008 NAVIGON 7200T User's Guide v Version 1.1 NAVIGON, INC. - Navigon 7200T | User Guide - Page 6
including, but not limited to, failure of electronic or mechanical equipment or communication lines; telephone or other interconnection problems; bugs, errors, configuration problems or incompatibility of computer hardware or vi NAVIGON 7200T User's Guide December 2008 NAVIGON, INC. Version 1.1 - Navigon 7200T | User Guide - Page 7
software; problems with equipment or services relating to your computers; problems with intermediate computer or communications networks or facilities; problems with data transmission facilities or your telephone or telephone services 2008 NAVIGON 7200T User's Guide vii Version 1.1 NAVIGON, INC. - Navigon 7200T | User Guide - Page 8
ARISING FROM A COURSE OF DEALING OR USAGE OF TRADE. D. TOTAL TRAFFIC NETWORK WILL NOT BE LIABLE TO YOU FOR ANY INDIRECT, SPECIAL, CONSEQUENTIAL, EXEMPLARY, OR INCIDENTAL LOS ANGELES METRO AND CALTRANS. ALL RIGHTS RESERVED. viii NAVIGON 7200T User's Guide December 2008 NAVIGON, INC. Version 1.1 - Navigon 7200T | User Guide - Page 9
to, version changes) be downloaded into your device to receive NAVIGON FreshMaps updates. These software upgrades may potentially change your user experience. Retain proof of purchase to assist with future customer support. December 2008 NAVIGON 7200T User's Guide ix Version 1.1 NAVIGON, INC. - Navigon 7200T | User Guide - Page 10
This page intentionally left blank. x NAVIGON 7200T User's Guide December 2008 NAVIGON, INC. Version 1.1 - Navigon 7200T | User Guide - Page 11
the Navigation Device in the cradle 12 Powering the navigation device 12 Connecting an Optional GPS Antenna (Not Included 12 Optional Accessory Services 13 Activate Accessory Services 13 Activating NAVIGON FreshMaps Accessory Service 13 December 2008 NAVIGON 7200T User's Guide xi Version - Navigon 7200T | User Guide - Page 12
keys 27 Using menus 27 Security The Password Window 29 Setting a password 29 Changing a password 30 Cancelling password protection 30 Forgotten your password 31 xii NAVIGON 7200T User's Guide December 2008 NAVIGON, INC. Version 1.1 - Navigon 7200T | User Guide - Page 13
of Interest (POI) destination 56 POIs nearby 56 POIs in a specified city 58 Statewide POIs 61 Selecting a Direct Access POI 63 Specify Direct Access POI categories 64 Information about the POI 65 Searching for POIs Near a Selected Location 66 December 2008 NAVIGON 7200T User's Guide xiii - Navigon 7200T | User Guide - Page 14
Saving the current location using GPS 78 Saving your home address as a Favorite Destination 78 Navigating Home 80 Importing Destinations from Outlook 81 Download and Install the NAVIGON Sync Software 81 Copy Outlook Contact Information to the NAVIGON 7200T 83 Delete Outlook Contact Information - Navigon 7200T | User Guide - Page 15
Flow Severity Indicators 117 Event or Incident Icons 118 Displaying traffic messages 119 Select Reroute Settings 120 Reroutes 121 Requesting a route recalculation 121 December 2008 NAVIGON 7200T User's Guide xv Version 1.1 NAVIGON, INC. - Navigon 7200T | User Guide - Page 16
the navigation device 127 Establishing a connection from the mobile phone 128 Terminating the connection between the NAVIGON 7200T and the mobile phone 129 Troubleshooting Hands- Volume 141 Setting Bluetooth Options 142 xvi NAVIGON 7200T User's Guide December 2008 NAVIGON, INC. Version 1.1 - Navigon 7200T | User Guide - Page 17
NOTICE TO DRIVERS IN CALIFORNIA AND MINNESOTA ......... 151 GPS 151 Technical Data Specifications 153 Compliance Notices 155 Federal Communication Commission Interference Statement........ 155 Canada C Request 155 Index December 2008 NAVIGON 7200T User's Guide xvii Version 1.1 NAVIGON, INC. - Navigon 7200T | User Guide - Page 18
This page intentionally left blank. xviii NAVIGON 7200T User's Guide December 2008 NAVIGON, INC. Version 1.1 - Navigon 7200T | User Guide - Page 19
tabs, input fields and other elements on the screen. Symbols The following symbols refer to specific passages of text: Warnings. Instructions and tips for operating the software. More detailed information and explanations. December 2008 NAVIGON 7200T User's Guide 1 Version 1.1 NAVIGON, INC. - Navigon 7200T | User Guide - Page 20
manual does not imply that the brand is not subject to the rights of a third party. NAVIGON, DirectHelp, and Reality View Pro are trademarks of NAVIGON, INC. DirectHelp and NAVIGON Lifetime Traffic are service marks of NAVIGON 2 NAVIGON 7200T User's Guide December 2008 NAVIGON, INC. Version 1.1 - Navigon 7200T | User Guide - Page 21
database for frequently asked questions. • Download navigation software updates. • Send an e-mail to the NAVIGON support team. • Call Customer Service. • View or download User Guides. • Report a problem. • Report a map inaccuracy. Telephone Support Telephone: Service Hours: (888) 848-0701 (Toll - Navigon 7200T | User Guide - Page 22
Introduction The NAVIGON Shop The NAVIGON Shop If you need accessories or accessory services for your device, please visit the NAVIGON web store at www.navigonusa.com/store/. 4 NAVIGON 7200T User's Guide December 2008 NAVIGON, INC. Version 1.1 - Navigon 7200T | User Guide - Page 23
map updates. 1 On/Standby/Off 2 Touch screen 3 MicroSD memory card slot 4 Reset 5 LED 6 Power Connector Port (with integrated TMC antenna) 7 Socket for Optional External Headphone 8 Socket for Optional External GPS antenna (On Back) December 2008 NAVIGON 7200T User's Guide - Navigon 7200T | User Guide - Page 24
may affect the accuracy and performance of all GPS equipment, including your personal navigation device. Caution! Ordinances or laws may restrict use of certain abilities of your navigation device on public or private land. 6 NAVIGON 7200T User's Guide December 2008 NAVIGON, INC. Version 1.1 - Navigon 7200T | User Guide - Page 25
purchased product includes: • NAVIGON 7200T navigation device • Car cradle, device holder, and mounting disk • Car charger cable (12 volt adapter) with integrated TMC antenna. • Quick Start Guide • Warranty and Safety Flyer December 2008 NAVIGON 7200T User's Guide 7 Version 1.1 NAVIGON, INC. - Navigon 7200T | User Guide - Page 26
secured and adjusted properly before each journey. Note: If you have not understood the spoken instructions, or you're not sure about what to do next, you can briefly refer to the map or arrow view of your navigation system. 8 NAVIGON 7200T User's Guide December 2008 NAVIGON, INC. Version 1.1 - Navigon 7200T | User Guide - Page 27
of time see "Turning the NAVIGON 7200T Off" on page 16. Caution! Do not open the navigation device's casing under any circumstances. Caution! Do not attempt to replace the battery. For problems related to the battery, contact NAVIGON Customer Support. Caution! Always follow local regulations - Navigon 7200T | User Guide - Page 28
use Preparing your NAVIGON 7200T for use Charging the battery Note: A 12 volt car charger cable is included with your device. An A/C wall charger is also available as an optional accessory. Visit our web store www.navigonusa.com/store/. • Connect the car charger cable to the navigation device and to - Navigon 7200T | User Guide - Page 29
of the mount. These areas must be dry and free of dirt and grease. 1. Open the lever on the suction cup as far a possible. 2. Place the cradle suction cup against the mounting surface. 3. Press the suction cup lever down towards the mounting surface. December 2008 NAVIGON 7200T User's Guide 11 - Navigon 7200T | User Guide - Page 30
clicks into place in the bottom of the mount. 3. Adjust the navigation device so that it can be seen easily. Powering the navigation device Included with the NAVIGON 7200T is a car charger cable with which power can be supplied to the navigation device using the vehicle's cigarette lighter or - Navigon 7200T | User Guide - Page 31
date of the device. Software upgrades that could potentially change the user experience may be required to be downloaded in order to receive updates. NAVIGON FreshMaps updates are dependent on the updating of the product's underlying map database provided to NAVIGON by a third party. Therefore - Navigon 7200T | User Guide - Page 32
This page intentionally left blank. 14 NAVIGON 7200T User's Guide December 2008 NAVIGON, INC. Version 1.1 - Navigon 7200T | User Guide - Page 33
Basic Operations Starting the NAVIGON 7200T • Press and hold the (On/Standby/Off) button for two (2) seconds MAIN WINDOW displays. Note: If you do not accept these instructions, tap Cancel to exit the navigation software. December 2008 NAVIGON 7200T User's Guide 15 Version 1.1 NAVIGON, INC. - Navigon 7200T | User Guide - Page 34
Basic Operations Starting the NAVIGON 7200T Turning the NAVIGON 7200T Off Note: When your device is not in use for an extended period, use this procedure to turn off your device and conserve battery power. After the device has been turned off, the splash screen re-displays when the device is - Navigon 7200T | User Guide - Page 35
OK. The selected options will be used by the device. The following message displays: Basic Operations Starting the NAVIGON 7200T 4. After you have read and fully understood the text, tap OK. Note: If you do not accept these instructions, tap Cancel to exit the navigation software. The MAIN WINDOW - Navigon 7200T | User Guide - Page 36
support. Version information is also useful when NAVIGON offers software and map updates. In the MAIN WINDOW: 1. Tap Options > Settings. On the SETTINGS WINDOW: 2. Tap Options > Product Information. 3. Use (Up) and (Down) to view all of the information. 18 NAVIGON 7200T User's Guide December - Navigon 7200T | User Guide - Page 37
will be unused for a very short time. If left in Standby mode for an extended period, battery drain can occur as the GPS receiver continues to draw power. For longer periods of inactivity, see "Turning the NAVIGON 7200T Off" on page 16. Note: To further conserve battery power, the device resets - Navigon 7200T | User Guide - Page 38
Basic Operations Starting the NAVIGON 7200T The Main Window The MAIN WINDOW opens when the navigation software starts. You can reach all of the navigation software functions from this window. New Destination Tap this button to: • Select an address as a destination. (See page 53.) • Select a POI as - Navigon 7200T | User Guide - Page 39
Basic Operations Starting the NAVIGON 7200T The Options Button Tap this button to: Activate an accessory service: • Activate NAVIGON FreshMaps. Access the Route Planning window to: • Create a route. (See page 91.) • Save a route. (See page 94.) • Load a saved route. (See page 94.) • Run a - Navigon 7200T | User Guide - Page 40
The volume bar closes. Note: When you mute the volume, an icon appears in the upper right corner of the screen, next to the Bluetooth, battery, traffic, and GPS icons. The icon disappears when the volume mute is turned off. 22 NAVIGON 7200T User's Guide December 2008 NAVIGON, INC. Version 1.1 - Navigon 7200T | User Guide - Page 41
icon displays, the battery has no power remaining. The device will soon turn off. See "Charging the battery" on page 12. Caution! Do not attempt to replace the battery. For problems related to the battery, con- tact NAVIGON Customer Support. December 2008 NAVIGON 7200T User's Guide 23 Version - Navigon 7200T | User Guide - Page 42
Viewing device status Traffic Information (TMC) The NAVIGON 7200T, with a car charger cable with integrated TMC antenna, provides the navigation system with up to date traffic messages. traffic messages" on page 119. 24 NAVIGON 7200T User's Guide December 2008 NAVIGON, INC. Version 1.1 - Navigon 7200T | User Guide - Page 43
phone. Connected The NAVIGON 7200T is paired to a mobile phone and can be used for making and receiving calls. In Use The NAVIGON 7200T is paired to a mobile phone and is currently in use making or receiving a phone call. December 2008 NAVIGON 7200T User's Guide 25 Version 1.1 NAVIGON, INC. - Navigon 7200T | User Guide - Page 44
Keyboards Using Keyboards Software keyboards appear on the screen when text entries are necessary. All entries can be made on the software keyboard using the character, the Alphabetic key- board reappears automatically. 26 NAVIGON 7200T User's Guide December 2008 NAVIGON, INC. Version 1.1 - Navigon 7200T | User Guide - Page 45
selected. To open a menu: • Tap on a button to show the menu options. To close a menu without selecting a function: • Tap on the button again. December 2008 NAVIGON 7200T User's Guide 27 Version 1.1 NAVIGON, INC. - Navigon 7200T | User Guide - Page 46
This page intentionally left blank. 28 NAVIGON 7200T User's Guide December 2008 NAVIGON, INC. Version 1.1 - Navigon 7200T | User Guide - Page 47
a password, you can protect your navigation system from unauthorized use. Note: Password protection takes effect the next time the NAVIGON 7200T is switched to standby mode. See Confirm new password field. 6. Tap Activate. December 2008 NAVIGON 7200T User's Guide 29 Version 1.1 NAVIGON, INC. - Navigon 7200T | User Guide - Page 48
. The SETTINGS WINDOW opens. 2. Tap Options > Password Lock. The PASSWORD LOCK WINDOW opens. 3. Type the current password in the Enter Password field. 4. Tap Deactivate. 30 NAVIGON 7200T User's Guide December 2008 NAVIGON, INC. Version 1.1 - Navigon 7200T | User Guide - Page 49
the device number shown on your device. 2. Call our customer support at: (888) 848-0701 (Toll Free) Monday through Friday, 7 a.m. to 9 p.m. CT (except official holidays) 3. Follow the instructions to reset your password. December 2008 NAVIGON 7200T User's Guide 31 Version 1.1 NAVIGON, INC. - Navigon 7200T | User Guide - Page 50
This page intentionally left blank. 32 NAVIGON 7200T User's Guide December 2008 NAVIGON, INC. Version 1.1 - Navigon 7200T | User Guide - Page 51
known GPS position. If the device is located: On an Unnamed Road Unnamed Road appears with the distance and direction to the nearest navigable intersection. Off Road Off Road appears with the distance and direction to the nearest navigable intersection. December 2008 NAVIGON 7200T User's Guide - Navigon 7200T | User Guide - Page 52
crosshairs indicate the center of the map. The name of the POI closest to the center of the map is shown. DirectHelp buttons Four DirectHelp POI categories are available: Roadside Assistance Police Station Hospital Pharmacy 34 NAVIGON 7200T User's Guide NAVIGON, INC. December 2008 Version 1.1 - Navigon 7200T | User Guide - Page 53
returns up to 10 POIs within a 30 mile radius of your location, with the closest POI shown first. If no POIs are found, the following message displays: If no emergency POIs are found, seek assistance in the usual manner. December 2008 NAVIGON 7200T User's Guide 35 Version 1.1 NAVIGON, INC. - Navigon 7200T | User Guide - Page 54
the (Map) button to show the location of the selected emergency POI. 5. Tap the Start Navigation button to calculate a route to the POI. Note: If GPS reception has been lost, the route is calculated from the last recorded GPS location. 36 NAVIGON 7200T User's Guide December 2008 NAVIGON, INC - Navigon 7200T | User Guide - Page 55
DirectHelp" on page 36 to select an emergency POI. 3. Tap (Call) to call the selected emergency POI. Note: The Call Direct Help POI button is not available if a phone number for the selected emergency POI is not available. December 2008 NAVIGON 7200T User's Guide 37 Version 1.1 NAVIGON, INC. - Navigon 7200T | User Guide - Page 56
This page intentionally left blank. 38 NAVIGON 7200T User's Guide December 2008 NAVIGON, INC. Version 1.1 - Navigon 7200T | User Guide - Page 57
Instructions When using voice destination entry, always: • Speak at a normal rate and clearly say each syllable in the city and street names. • Speak directly toward the NAVIGON 7200T. : English Spanish English French Spanish December 2008 NAVIGON 7200T User's Guide 39 Version 1.1 NAVIGON, INC. - Navigon 7200T | User Guide - Page 58
Street, Highway, Route Names Note: See "House Numbers" on page 40 for instructions on entering house numbers. When using voice destination entry, consider the guidelines below: Three Zero Two One Four Zero Three Zero 40 NAVIGON 7200T User's Guide December 2008 NAVIGON, INC. Version 1.1 - Navigon 7200T | User Guide - Page 59
Using Voice Destination Entry Background Noise NAVIGON 7200T voice destination entry works best in an environment with a minimal amount of traffic noise • Radio/CDs Reducing background noise improves spoken entry performance. December 2008 NAVIGON 7200T User's Guide 41 Version 1.1 NAVIGON, INC. - Navigon 7200T | User Guide - Page 60
AUDIO ASSISTANT PAGE TWO displays. 4. After the tone, speak the words displayed on the window. 5. Continue speaking until the AUDIO ASSISTANT PAGE THREE displays. 42 NAVIGON 7200T User's Guide December 2008 NAVIGON, INC. Version 1.1 - Navigon 7200T | User Guide - Page 61
You can now start using voice entry to select destinations. Restarting Audio Assistant If you reset your NAVIGON 7200T or if another person will be using the and start at the lowest volume setting. 4. When finished, tap OK. December 2008 NAVIGON 7200T User's Guide 43 Version 1.1 NAVIGON, INC. - Navigon 7200T | User Guide - Page 62
by tapping a button and entering the information. Before using Voice entry, see "Setting Up Voice Destination Entry to Recognize Your Voice" on page 42. 44 NAVIGON 7200T User's Guide December 2008 NAVIGON, INC. Version 1.1 - Navigon 7200T | User Guide - Page 63
Entry On the MAIN WINDOW: 1. Tap Voice Entry. 2. Review the displayed information. To hide the message from showing next time (List). The STATE OR COUNTRY WINDOW displays. This screen lists states in the U.S. and provinces in Canada. The NAVIGON 7200T User's Guide 45 Version 1.1 NAVIGON, INC. - Navigon 7200T | User Guide - Page 64
prompted for the house number. 9. After the tone, say the house number. The NAVIGON 7200T calculates and returns the address that most closely matches your spoken address information on the VOICE ENTRY CONFIRMATION WINDOW. 46 NAVIGON 7200T User's Guide December 2008 NAVIGON, INC. Version 1.1 - Navigon 7200T | User Guide - Page 65
prompt, if the address is: • Correct, say "Yes". A route is calculated and navigation begins. • Incorrect, say "No" to display the VOICE ENTRY SELECTION WINDOW. 11. After and enter the address manually, tap (Manual entry). December 2008 NAVIGON 7200T User's Guide 47 Version 1.1 NAVIGON, INC. - Navigon 7200T | User Guide - Page 66
SELECTION WINDOW displays. 13. Follow steps for selecting the destination manually. Note: For more information on manually entering a location, see "Enter an Address" on page 52 • Tap Options > Enter a different destination. 48 NAVIGON 7200T User's Guide December 2008 NAVIGON, INC. Version 1.1 - Navigon 7200T | User Guide - Page 67
New destinations for the NAVIGON 7200T are destinations that you have not yet navigated to or those that you have not yet stored. You can enter an address, select a POI, or select a feature is not available for all locations. December 2008 NAVIGON 7200T User's Guide 49 Version 1.1 NAVIGON, INC. - Navigon 7200T | User Guide - Page 68
for the first time, the tab appears blank. The (Search Area) tab, used to select a map area, is located at the top left corner of the destination selection window. Once an area is located. For example, tap "I" for Idaho. 50 NAVIGON 7200T User's Guide December 2008 NAVIGON, INC. Version 1.1 - Navigon 7200T | User Guide - Page 69
AREA TAB. 3. Tap (Area List). A list of search areas displays. 4. Tap on the state/province in which your destination is located. 5. Tap (OK). December 2008 NAVIGON 7200T User's Guide 51 Version 1.1 NAVIGON, INC. - Navigon 7200T | User Guide - Page 70
entry. Tap on the Map You may indicate a destination directly on the map. In addition to towns and streets, you may also select POIs. Note: Only areas that are represented in the currently loaded map can be selected. 52 NAVIGON 7200T User's Guide December 2008 NAVIGON, INC. Version 1.1 - Navigon 7200T | User Guide - Page 71
On the Intersection tab, enter the name of a nearby cross street and the navigation system calculates a route to the intersection of the specified streets. In the MAIN Canadian postal code are supported. The STREET TAB opens. December 2008 NAVIGON 7200T User's Guide 53 Version 1.1 NAVIGON, INC. - Navigon 7200T | User Guide - Page 72
Start Navigation to route to just the street. If more than one location is found that matches your destination selection info, the NAVIGON 7200T will have specified street name with any directional indicator. 5. Tap on a location to select it. 54 NAVIGON 7200T User's Guide December 2008 NAVIGON, - Navigon 7200T | User Guide - Page 73
Destination Selection Entering an address 6. Tap Start Navigation. The map opens in Preview mode. For more information, see "Starting navigation" on page 71. December 2008 NAVIGON 7200T User's Guide 55 Version 1.1 NAVIGON, INC. - Navigon 7200T | User Guide - Page 74
3. Tap on the subcategory from which you would like to select a POI. The DESTINATION TAB opens. If more than one location is found that matches your destination selection info, the NAVIGON 7200T displays a list of locations. 56 NAVIGON 7200T User's Guide December 2008 NAVIGON, INC. Version 1.1 - Navigon 7200T | User Guide - Page 75
Interest (POI) destination 4. Tap on the name of the destination. Information for the selected POI displays. 5. Tap Start Navigation. The map opens in Preview mode. For more information, see "Starting navigation" on page 71. December 2008 NAVIGON 7200T User's Guide 57 Version 1.1 NAVIGON, INC - Navigon 7200T | User Guide - Page 76
MAIN WINDOW: 1. Tap New Destination > Search for POI > in a City. The DESTINATION SELECTION WINDOW opens. supported. The CATEGORY TAB displays. . 3. Tap on the category from which you would like to select a POI. The SUB CATEGORY TAB displays. 58 NAVIGON 7200T User's Guide December 2008 NAVIGON - Navigon 7200T | User Guide - Page 77
info, the NAVIGON 7200T displays a list of locations. 6. Tap on the location you want. The DESTINATION TAB displays information on the selected POI. For more on POI information, see "Information about the POI" on page 65. December 2008 NAVIGON 7200T User's Guide 59 Version 1.1 NAVIGON, INC. - Navigon 7200T | User Guide - Page 78
Destination Selection Selecting a Point of Interest (POI) destination 7. Tap Start Navigation. The map opens in Preview mode. For more information, see "Starting navigation" on page 71. 60 NAVIGON 7200T User's Guide December 2008 NAVIGON, INC. Version 1.1 - Navigon 7200T | User Guide - Page 79
. If more than one location is found that matches your destination selection info, the NAVIGON 7200T displays a list of locations. 3. Tap on the name of the POI. The DESTINATION TAB displays information on the selected POI. December 2008 NAVIGON 7200T User's Guide 61 Version 1.1 NAVIGON, INC. - Navigon 7200T | User Guide - Page 80
Point of Interest (POI) destination For more on POI information, see "Information about the POI" on page 65. 4. Tap Start Navigation. The map opens in Preview mode. For more information, see "Starting navigation" on page 71. 62 NAVIGON 7200T User's Guide December 2008 NAVIGON, INC. Version 1.1 - Navigon 7200T | User Guide - Page 81
which you would like to select a POI. The Name of the Destination list opens. It contains the nearest POIs in the specified category, sorted by distance. 3. Tap on the name of the destination. The map opens in Preview mode. December 2008 NAVIGON 7200T User's Guide 63 Version 1.1 NAVIGON, INC. - Navigon 7200T | User Guide - Page 82
Access POI For more information, see "Starting navigation" on page 71. Specify Direct Access POI categories POI category. 4. Repeat the above step in the Direct Access 2 and Direct Access 3 fields. 5. When finished, tap OK to save the changes. 64 NAVIGON 7200T User's Guide December 2008 NAVIGON - Navigon 7200T | User Guide - Page 83
available when the NAVIGON 7200T is connected to a mobile phone using Bluetooth. See "Connecting (Pairing) with a Mobile Phone" on page 127 for more information. Calculate a route and start navigation to the selected POI. December 2008 NAVIGON 7200T User's Guide 65 Version 1.1 NAVIGON, INC. - Navigon 7200T | User Guide - Page 84
the location. (See the corresponding section of "Destination Selection" on page 49.) 2. Tap Show on Map. The map displays the selected POI centered on the map and the street name of the POI appears below it. 3. Tap (OK). 66 NAVIGON 7200T User's Guide December 2008 NAVIGON, INC. Version 1.1 - Navigon 7200T | User Guide - Page 85
TAB opens. 5. Select the POI category The SUB CATEGORY tab opens. 6. Tap on the subcategory from which you would like to select a POI. The DESTINATION TAB opens. The distance from your current location and the POI is shown. December 2008 NAVIGON 7200T User's Guide 67 Version 1.1 NAVIGON, INC. - Navigon 7200T | User Guide - Page 86
want. The DESTINATION TAB displays information on the selected POI. For more on POI information, see "Information about the POI" on page 65. 8. Tap Start Navigation. For more information, see "Starting navigation" on page 71. 68 NAVIGON 7200T User's Guide December 2008 NAVIGON, INC. Version 1.1 - Navigon 7200T | User Guide - Page 87
general map area you are interested in. 4. Tap on the point to which you wish to navigate. The name of the location displays. The selected destination is centered in the map and appears under the cross hairs. 5. Tap (OK). December 2008 NAVIGON 7200T User's Guide 69 Version 1.1 NAVIGON, INC - Navigon 7200T | User Guide - Page 88
upper left-hand corner. 6. Tap the Take Me There button. The map opens in Preview mode and shows the route calculated from your current location to this destination. For more information, see "Starting navigation" on page 71. 70 NAVIGON 7200T User's Guide December 2008 NAVIGON, INC. Version 1.1 - Navigon 7200T | User Guide - Page 89
, the street name is also given. Your current position (indicated by an orange triangle) is shown on the map. If the destination has a house number, the NAVIGON 7200T announces which side of the street the destination is on. December 2008 NAVIGON 7200T User's Guide 71 Version 1.1 NAVIGON, INC. - Navigon 7200T | User Guide - Page 90
This page intentionally left blank. 72 NAVIGON 7200T User's Guide December 2008 NAVIGON, INC. Version 1.1 - Navigon 7200T | User Guide - Page 91
: 26 - 30 Extraordinary to Perfection. 20 - 25 Very Good to Excellent. 16 - 19 Good to Very Good. 10 - 15 Fair to Good. 0 - 9 Poor to Fair. Price Ranges VE E M I Very Expensive. Expensive. Moderate. Inexpensive. December 2008 NAVIGON 7200T User's Guide 73 Version 1.1 NAVIGON, INC. - Navigon 7200T | User Guide - Page 92
ZAGAT POIs ZAGAT POIs are returned with any POI search. Note: ZAGAT POI information is not available for all locations. ZAGAT categories appear first in the list of returned locations. A appears in front of a ZAGAT category. (ZAGAT POI) 74 NAVIGON 7200T User's Guide December 2008 NAVIGON, INC - Navigon 7200T | User Guide - Page 93
DETAIL WINDOW opens and displays detail information for the POI including hours of operation, costs, offered services, etc. 5. Use the (Down) and 6. When finished, tap Close. (Up) buttons to view all of the information. December 2008 NAVIGON 7200T User's Guide 75 Version 1.1 NAVIGON, INC. - Navigon 7200T | User Guide - Page 94
This page intentionally left blank. 76 NAVIGON 7200T User's Guide December 2008 NAVIGON, INC. Version 1.1 - Navigon 7200T | User Guide - Page 95
last locations your performed a search for. These lists can be useful if you often navigate to particular locations. Saving a destination to the Favorites List 1. Enter a destination. ( name for the destination. 4. Tap Save. December 2008 NAVIGON 7200T User's Guide 77 Version 1.1 NAVIGON, INC. - Navigon 7200T | User Guide - Page 96
: 1. Tap the Take Me Home button. The following message displays: Note: If you do not have any addresses saved in your FAVORITES LIST, the message will ask if you want to enter your home address directly. 78 NAVIGON 7200T User's Guide December 2008 NAVIGON, INC. Version 1.1 - Navigon 7200T | User Guide - Page 97
Home Address. The selected destination is saved as your home address. On the FAVORITES LIST, a house icon displays next to your home address. December 2008 NAVIGON 7200T User's Guide 79 Version 1.1 NAVIGON, INC. - Navigon 7200T | User Guide - Page 98
Destination" on page 78. In the MAIN WINDOW: 2. Tap the Take Me Home button. Navigation, using the current route profile information to calculate the route, begins. For more information, "Starting navigation" on page 71. 80 NAVIGON 7200T User's Guide December 2008 NAVIGON, INC. Version 1.1 - Navigon 7200T | User Guide - Page 99
LANGUAGE WINDOW displays. 3. Click on the appropriate language to be used during the installation procedure, then click OK. The NAVIGON SYNC SETUP WELCOME PAGE displays. 4. Follow the instructions, then click Next >. December 2008 NAVIGON 7200T User's Guide 81 Version 1.1 NAVIGON, INC. - Navigon 7200T | User Guide - Page 100
not accept these instructions, tap Cancel to exit the NAVIGON Sync setup. The CHOSE INSTALL LOCATION PAGE displays. 6. Specify the location on your computer where the NAVIGON Sync software will be installed, then click Install. 82 NAVIGON 7200T User's Guide December 2008 NAVIGON, INC. Version - Navigon 7200T | User Guide - Page 101
small end of the cable to your NAVIGON 7200T. On your computer: 3. Navigate to the location where you installed the NAVIGON Sync software. (See page 81) and double click on the Sync.exe file. The NAVIGON SYNC WINDOW displays. December 2008 NAVIGON 7200T User's Guide 83 Version 1.1 NAVIGON, INC. - Navigon 7200T | User Guide - Page 102
> Contact Folder. The SETTINGS WINDOW displays. 5. Click on the Contacts folder that contains the information you want, then click OK. 6. On the NAVIGON SYNC WINDOW, at the top of the left hand pane, click Read from Outlook. 84 NAVIGON 7200T User's Guide December 2008 NAVIGON, INC. Version 1.1 - Navigon 7200T | User Guide - Page 103
last contact in the range. • Individual contacts - Hold the Ctrl key down and click on each contact. 8. After selecting contacts, click the button. December 2008 NAVIGON 7200T User's Guide 85 Version 1.1 NAVIGON, INC. - Navigon 7200T | User Guide - Page 104
sure that your computer and your NAVIGON 7200T are powered on. 2. Connect the large end of a USB cable to your computer and the small end of the cable to your NAVIGON 7200T. On your computer: 3. Navigate to the location where you installed the NAVIGON Sync software (see page 81) and double click - Navigon 7200T | User Guide - Page 105
the Ctrl key down and click on each contact. 6. Click the Remove button. 7. To remove all contacts from the device, click Remove all. December 2008 NAVIGON 7200T User's Guide 87 Version 1.1 NAVIGON, INC. - Navigon 7200T | User Guide - Page 106
. The FAVORITES WINDOW displays. 2. Tap the destination to which you would like to navigate. 3. Tap the Start Navigation button. The map opens in Preview mode. For more information, see "Starting navigation" on page 71. 88 NAVIGON 7200T User's Guide NAVIGON, INC. December 2008 Version 1.1 - Navigon 7200T | User Guide - Page 107
The LAST DESTINATIONS WINDOW displays. 2. Tap the destination to which you would like to navigate. 3. Tap the Start Navigation button. The map opens in Preview mode. For more information, see "Starting navigation" on page 71. December 2008 NAVIGON 7200T User's Guide 89 Version 1.1 NAVIGON, INC. - Navigon 7200T | User Guide - Page 108
The LAST DESTINATIONS WINDOW displays. 2. Tap the destination to which you would like to navigate. 3. Tap the Start Navigation button. The map opens in Preview mode. For more information, see "Starting navigation" on page 71. 90 NAVIGON 7200T User's Guide December 2008 NAVIGON, INC. Version 1.1 - Navigon 7200T | User Guide - Page 109
navigation, your current location is used as the starting point for the route calculation. Route calculation to the first route point is shown as flow number "1". On the ROUTE PLANNING WINDOW: 1. Tap the Specify Starting Point button. The STARTING POINT menu opens. December 2008 NAVIGON 7200T User - Navigon 7200T | User Guide - Page 110
Starting Point) button. The STARTING POINT menu opens. 2. Select a different starting point by following the above steps. Entering route points Route points are destinations on the route that you want to navigate your route. 92 NAVIGON 7200T User's Guide December 2008 NAVIGON, INC. Version 1.1 - Navigon 7200T | User Guide - Page 111
route points can be varied as you wish. Note: The starting point (flow number "0") cannot be moved or deleted. To change the starting point, create a route point and move the new route window prompts you to confirm deletion. December 2008 NAVIGON 7200T User's Guide 93 Version 1.1 NAVIGON, INC. - Navigon 7200T | User Guide - Page 112
before navigation can begin. You can load, rename or delete stored routes. Saving routes You can save a route after you have entered the starting point displays the starting point and the route points of the selected route. 94 NAVIGON 7200T User's Guide December 2008 NAVIGON, INC. Version - Navigon 7200T | User Guide - Page 113
. 3. Tap the Start Navigation button. The REASON FOR THE TRIP TAB opens. 4. Select a reason. The LOGBOOK ENTRY TAB opens. 5. Type the name or reason of the trip (enter at least one character). 6. Tap Mileage to open the MILEAGE TAB opens. December 2008 NAVIGON 7200T User's Guide 95 Version - Navigon 7200T | User Guide - Page 114
3. Tap the Start Navigation button. The REASON FOR THE TRIP TAB opens. 4. Tap . The following message displays. 5. Tap OK. Logbook is not recording for this trip. However, recording will start again for all subsequent routes. 96 NAVIGON 7200T User's Guide December 2008 NAVIGON, INC. Version - Navigon 7200T | User Guide - Page 115
route. On the ROUTE PLANNING WINDOW: 2. Tap the Show Route button. The map opens in Preview mode and displays the calculated route. 3. Tap the Start Navigation button or start driving. The map changes to Navigation mode. December 2008 NAVIGON 7200T User's Guide 97 Version 1.1 NAVIGON, INC. - Navigon 7200T | User Guide - Page 116
Routes Navigation 4. When navigating with your NAVIGON 7200T on a controlled access roadway, tap the screen. The NAVIGATION MODE MAP FUNCTIONS WINDOW displays. 5. Tap Exit Guide. The EXIT POI WINDOW displays POI categories for the exit. Only categories with one or more POIs at the next exit can be - Navigon 7200T | User Guide - Page 117
the exit, the NAVIGON 7200T provides navigation instructions to the POI. Note: If an exit POI interim destination is added after you have passed the exit, the NAVIGON 7200T will take you off the originally calculated route and navigate you back to the POI. Remove an Exit POI from your Route If - Navigon 7200T | User Guide - Page 118
Navigation You can view and, if necessary, change any of the displayed options. Note: Once options are changed, they remain in effect for all subsequent routes. You can get information regarding changing individual route profiles by tapping the corresponding (Help) button. 100 NAVIGON 7200T User - Navigon 7200T | User Guide - Page 119
a simulation of a calculated route. Note: GPS signal reception is not required for simulation. Routes Simulating routes Starting a route simulation You have calculated and displayed The ROUTE PLANNING WINDOW re-displays. December 2008 NAVIGON 7200T User's Guide 101 Version 1.1 NAVIGON, INC. - Navigon 7200T | User Guide - Page 120
The navigation system calculates an alternative route avoiding (if possible) the route sections selected. The new driving instructions are displayed in the TURN-BYTURN LIST WINDOW. 3. Tap (Back) to close the TURN-BY-TURN LIST WINDOW. 102 NAVIGON 7200T User's Guide December 2008 NAVIGON, INC - Navigon 7200T | User Guide - Page 121
Removing blocks and using original routes Section blocks can be removed at anytime. On the TURN-BY-TURN LIST WINDOW: • Tap Options > Calculate the Original Route. Routes Viewing a Turn-by-Turn List December 2008 NAVIGON 7200T User's Guide 103 Version 1.1 NAVIGON, INC. - Navigon 7200T | User Guide - Page 122
This page intentionally left blank. 104 NAVIGON 7200T User's Guide December 2008 NAVIGON, INC. Version 1.1 - Navigon 7200T | User Guide - Page 123
13 Canadian provinces/territories). North America Map View information on the current map On the MAIN WINDOW: 1. Tap Options > Settings > Map Display. The MAP DISPLAY WINDOW opens. 2. Use (Next Page) to go to PAGE TWO. December 2008 NAVIGON 7200T User's Guide 105 Version 1.1 NAVIGON, INC. - Navigon 7200T | User Guide - Page 124
The Start Navigation button to begin the journey. When you display a planned or loaded route, the route may be recalculated. Starting point for the calculation is your current location. Once the route is calculated, you are guided to the first route point. 106 NAVIGON 7200T User's Guide December - Navigon 7200T | User Guide - Page 125
for the route. (See "Viewing a Turn-by-Turn List" on page 102.) • (Destination search) to view the map in Destination search mode. For more information on using this feature, see "Destination Search mode" on page 111. December 2008 NAVIGON 7200T User's Guide 107 Version 1.1 NAVIGON, INC. - Navigon 7200T | User Guide - Page 126
Maps Map Navigation mode Map Navigation mode After the route has been viewed in Preview mode, navigation starts. Navigation is shown in Navigation mode. 1. Signage to be followed is street you are currently traveling on. 108 NAVIGON 7200T User's Guide December 2008 NAVIGON, INC. Version 1.1 - Navigon 7200T | User Guide - Page 127
for the route. (See "Viewing a Turn-by-Turn List" on page 102.) • Tap (Destination search) to view the map in Destination Search mode. (See "Destination Search mode" on page 111.) • Tap (Back) to quit navigation. December 2008 NAVIGON 7200T User's Guide 109 Version 1.1 NAVIGON, INC. - Navigon 7200T | User Guide - Page 128
to the nearest services. A destination shown here can be added as an interim destination by tapping the (Interim Destination) button to the right of its entry in the list. The three POI categories selected for Direct Access are available. 110 NAVIGON 7200T User's Guide December 2008 NAVIGON, INC - Navigon 7200T | User Guide - Page 129
is active, you can move the map section with your finger. Tap on the map and drag it in the desired direction. Zooms the map so that the entire route is visible. Current Position Show your current position on the map. December 2008 NAVIGON 7200T User's Guide 111 Version 1.1 NAVIGON, INC. - Navigon 7200T | User Guide - Page 130
Maps Destination Search mode Operating in Destination Search mode 1. Tap on the point to which you wish to navigate. The POI NEARBY WINDOW. Here you can search for destinations near the specified point. (See "POIs nearby" on page 56.) 112 NAVIGON 7200T User's Guide December 2008 NAVIGON - Navigon 7200T | User Guide - Page 131
is dependent on the map data currently in use. Turning on Reality View Pro 1. Tap Options > Settings > Map Display. 2. In the Reality View 3D field, select Yes (to show) or No (to hide). 3. Tap OK to save the changes. December 2008 NAVIGON 7200T User's Guide 113 Version 1.1 NAVIGON, INC. - Navigon 7200T | User Guide - Page 132
available in all locations. Turning on Landmarks View 3D From the any window: 1. Tap Options > Settings > Map Display. 2. In the Landmark View 3D field, select Yes (to show) or No (to hide). 3. Tap OK to save the changes. 114 NAVIGON 7200T User's Guide December 2008 NAVIGON, INC. Version 1.1 - Navigon 7200T | User Guide - Page 133
to the vehicle's cigarette lighter or power outlet for the antenna to be operational. Note: If the car charger/antenna is not attached to the device, TMC messages may not be received when the device is operating on battery power only. Accessing the NAVIGON Lifetime Traffic Window All currently - Navigon 7200T | User Guide - Page 134
based on TMC antenna reception. Not on route: weather warnings Information on weather warnings not occurring on the route, based on TMC antenna reception. Specify the type of traffic messages to display On the MAIN WINDOW: 1. Tap Options > Traffic. 116 NAVIGON 7200T User's Guide December 2008 - Navigon 7200T | User Guide - Page 135
NAVIGON Lifetime Traffic Window The NAVIGON LIFETIME TRAFFIC INFORMATION WINDOW opens. On the Navigation map, the (TMC shortcut) button can also be used to display the NAVIGON traffic. None Minor impact to traffic flow. December 2008 NAVIGON 7200T User's Guide 117 Version 1.1 NAVIGON, INC. - Navigon 7200T | User Guide - Page 136
flow. Lane closures. Slippery road due to weather (snow, ice, rain, etc.). Wind. Flooding. Road closed or blocked. Ramp problems. On- or offramp closures, etc. Informational only. No negative affect on traffic flow. 118 NAVIGON 7200T User's Guide December 2008 NAVIGON, INC. Version 1.1 - Navigon 7200T | User Guide - Page 137
windows. On the MAIN WINDOW: 1. Tap Options > Traffic. The NAVIGON LIFETIME TRAFFIC INFORMATION WINDOW opens. Above the list, the Traffic information tap the Cancel button to return to the NAVIGON LIFETIME TRAFFIC WINDOW. December 2008 NAVIGON 7200T User's Guide 119 Version 1.1 NAVIGON, INC. - Navigon 7200T | User Guide - Page 138
Each received traffic message displays on screen. You can specify whether to calculate an alternative route. 3. Tap (Toggle) to switch between options. The selected value is in bold. 4. Tap OK to save your changes. 120 NAVIGON 7200T User's Guide December 2008 NAVIGON, INC. Version 1.1 - Navigon 7200T | User Guide - Page 139
navigation software NAVIGON LIFETIME TRAFFIC WINDOW re-displays. An icon for the selected action ( (Detour) or (Ignore) appears next to the traffic segment. 2. Tap (Back) to close the NAVIGON LIFETIME TRAFFIC INFORMATION WINDOW. December 2008 NAVIGON 7200T User's Guide 121 Version 1.1 NAVIGON - Navigon 7200T | User Guide - Page 140
the navigation software to avoid an event and calculate another route, you can cancel the reroute request by tapping (Detour) next to the event. The icon changes to (Ignore) and the route is not recalculated. To change the icon back to Detour, tap the Ignore icon again. 122 NAVIGON 7200T User - Navigon 7200T | User Guide - Page 141
NAVIGON Lifetime Traffic TMC Status Window TMC Status Window In the TMC STATUS WINDOW, you can set and configure the TMC receiver. These settings determine how received traffic messages will event is identified on the route. December 2008 NAVIGON 7200T User's Guide 123 Version 1.1 NAVIGON, INC. - Navigon 7200T | User Guide - Page 142
This page intentionally left blank. 124 NAVIGON 7200T User's Guide December 2008 NAVIGON, INC. Version 1.1 - Navigon 7200T | User Guide - Page 143
the device is connected to a supported mobile phone. Four speed dial buttons can be specified. They can be set manually or imported from a mobile navigation application. To re-display the HANDS-FREE MAIN WINDOW, tap (Phone). December 2008 NAVIGON 7200T User's Guide 125 Version 1.1 NAVIGON, - Navigon 7200T | User Guide - Page 144
, set the volume louder or softer. Show/Hide the Hands-Free Main Window On the HANDS-FREE MAIN WINDOW: • Tap • Tap (Navigation) to move the navigation application to the foreground. (Back) to return to the MAIN WINDOW. 126 NAVIGON 7200T User's Guide December 2008 NAVIGON, INC. Version 1.1 - Navigon 7200T | User Guide - Page 145
Me", etc. On your NAVIGON 7200T: 3. On the HANDS-FREE MAIN WINDOW, tap Settings > Mobile Phone Connection > New Connection. The navigation device scans for Bluetooth devices. When finished, a list of Bluetooth devices in the area is shown. December 2008 NAVIGON 7200T User's Guide 127 Version - Navigon 7200T | User Guide - Page 146
Settings and in the Discoverable by Others field select Yes. On your mobile phone: 3. Search for other Bluetooth devices. The navigation device is detected as NAVIGON. 4. Initiate a connection to the detected NAVIGON device. 128 NAVIGON 7200T User's Guide December 2008 NAVIGON, INC. Version 1.1 - Navigon 7200T | User Guide - Page 147
provided to the navigation device in order to complete the pairing. 5. Enter a four-digit PIN code. On the navigation device: The NAVIGON 7200T prompts you to manually. (See "Connecting (Pairing) with a Mobile Phone" on page 127). December 2008 NAVIGON 7200T User's Guide 129 Version 1.1 NAVIGON - Navigon 7200T | User Guide - Page 148
7200T powered on, use a stylus or paper clip to press the reset button located on the bottom of the case. Note: If the NAVIGON 7200T is still unable to establish a Bluetooth connection to your mobile phone, contact your mobile phone manufacturer's customer support. 130 NAVIGON 7200T User's Guide - Navigon 7200T | User Guide - Page 149
• Tap No. To take the call: • Tap Yes. The name and the number of the caller will be displayed if this information is available. The CALL IN PROGRESS WINDOW opens. Note: Spoken navigation instructions continue during a call. December 2008 NAVIGON 7200T User's Guide 131 Version 1.1 NAVIGON, INC. - Navigon 7200T | User Guide - Page 150
numbers. Note: Spoken navigation instructions continue during a call. Dialing a telephone number In the Navigation software: 1. Tap (Phone In the navigation software: 1. Tap (Phone). The HANDS-FREE MAIN WINDOW appears. 132 NAVIGON 7200T User's Guide December 2008 NAVIGON, INC. Version 1.1 - Navigon 7200T | User Guide - Page 151
navigation device is connected to the mobile phone. 2. Tap on the contact you want to call. If more than one phone number is saved for this contact, a list with all the phone numbers saved for the contact will open. 3. Tap on the number you want to dial. December 2008 NAVIGON 7200T User's Guide - Navigon 7200T | User Guide - Page 152
while the navigation device is connected to the mobile phone. Transferring a call from your mobile telephone The NAVIGON 7200T takes calls automatically from the mobile phone as soon as a Bluetooth connection is established between the two devices. 134 NAVIGON 7200T User's Guide December 2008 - Navigon 7200T | User Guide - Page 153
map in the foreground during a call when the NAVIGON 7200T is in the process of navigating. • Tap (Navigation). While a mobile phone is connected to the navigation : Spoken navigation instructions continue during a call. December 2008 NAVIGON 7200T User's Guide 135 Version 1.1 NAVIGON, INC. - Navigon 7200T | User Guide - Page 154
) Ending the call Placing the Microphone on Mute During a call you can place the NAVIGON 7200T microphone on mute. To mute the microphone: • Tap (Mute). The mute button displays IN PROGRESS WINDOW: • Tap End Call. 136 NAVIGON 7200T User's Guide December 2008 NAVIGON, INC. Version 1.1 - Navigon 7200T | User Guide - Page 155
Settings Window On the HANDS-FREE SETTINGS WINDOW, you can: Select this button to connect your NAVIGON 7200T to your mobile phone. See "Connecting (Pairing) with a Mobile Phone" on page 127 , see "Customization" on page 145. December 2008 NAVIGON 7200T User's Guide 137 Version 1.1 NAVIGON, INC. - Navigon 7200T | User Guide - Page 156
(Bluetooth) The Hands-Free Settings Window Adding a New Speed Dial Number The NAVIGON 7200T hands-free module has four Speed Dial buttons that can be set for frequently displays on the MODIFY SPEED DIAL WINDOW. 6. Tap OK. 138 NAVIGON 7200T User's Guide December 2008 NAVIGON, INC. Version 1.1 - Navigon 7200T | User Guide - Page 157
The Hands-Free Settings Window Adding an Address Book Number to Speed Dial Note: The NAVIGON 7200T must be connected to the mobile phone to add a Speed Dial number from the The MODIFY SPEED DIAL WINDOW displays. 3. Tap Edit. December 2008 NAVIGON 7200T User's Guide 139 Version 1.1 NAVIGON, INC. - Navigon 7200T | User Guide - Page 158
. 4. Enter the new information for the Speed Dial button. 5. When finished, tap OK. The updated entry displays on the MODIFY SPEED DIAL WINDOW. 6. Tap OK. Deleting a Speed Dial Number On the appear on the Speed Dial button. 140 NAVIGON 7200T User's Guide December 2008 NAVIGON, INC. Version 1.1 - Navigon 7200T | User Guide - Page 159
Volume of the Ring Tone The volume of the call can be adjusted independent of the volume of the navigation application. The volume of the ring tone can be adjusted independent of the volume of the navigation application. December 2008 NAVIGON 7200T User's Guide 141 Version 1.1 NAVIGON, INC. - Navigon 7200T | User Guide - Page 160
Bluetooth-capable devices (in particular mobile phones) should be able to detect the NAVIGON 7200T (Yes or No). Reconnect Automatically Select whether the connection to the last as soon as you approach the vehicle again. 142 NAVIGON 7200T User's Guide December 2008 NAVIGON, INC. Version 1.1 - Navigon 7200T | User Guide - Page 161
record a trip. The NAVIGON 7200T supports various types of trips for which one could record mileage. You can record mileage for Business, Personal, Commutes to work, etc. Note: When logbook recording starts, every movement of the vehicle is recorded, even when you are not navigating on-route. The - Navigon 7200T | User Guide - Page 162
This page intentionally left blank. 144 NAVIGON 7200T User's Guide December 2008 NAVIGON, INC. Version 1.1 - Navigon 7200T | User Guide - Page 163
populated or rural areas. Options are to never warn, or to display a warning when 5, 10, 15 or 20 mph over the posted speed limit. Only supported in areas where speed limit data is available. December 2008 NAVIGON 7200T User's Guide 145 Version 1.1 NAVIGON, INC. - Navigon 7200T | User Guide - Page 164
map. Show either the estimated time of arrival or the remaining time to the destination (or an interim destination, if applicable). Show or hide a small compass on screen during navigation Reality View Pro displays a visual 146 NAVIGON 7200T User's Guide December 2008 NAVIGON, INC. Version 1.1 - Navigon 7200T | User Guide - Page 165
for the POI on route functions. Select a second POI category to display for use with the POI direct access and for the POI on route functions. Select a third POI category to display for use with the POI direct access and for the POI on route December 2008 NAVIGON 7200T User's Guide 147 Version - Navigon 7200T | User Guide - Page 166
voice to be used with spoken navigation instructions. Select this option to view NAVIGON 7200T software and hardware versions, as well as, information on the maps, traffic, and ZAGAT POIs. Select this option to recalibrate the touchscreen. Select this option to reset the device to default values - Navigon 7200T | User Guide - Page 167
Selecting options Customization Selecting options Moving between pages Some NAVIGON 7200T settings require several windows, as shown in the example above (Page 2 of 4). (Toggle) to alternate between the potential values. December 2008 NAVIGON 7200T User's Guide 149 Version 1.1 NAVIGON, INC. - Navigon 7200T | User Guide - Page 168
Customization Selecting options Changing an option setting After changing an option setting: • To save the change, tap the OK button. • To discard the change, tap the Cancel button. The SETTINGS WINDOW re-displays. 150 NAVIGON 7200T User's Guide December 2008 NAVIGON, INC. Version 1.1 - Navigon 7200T | User Guide - Page 169
or reliability of the GPS hardware and GPS operating software. UL MAKES NO REPRESENTATIONS, WARRANTIES OR CERTIFICATIONS WHATSOEVER REGARDING THE PERFORMANCE OR RELIABILITY OF ANY GPS RELATED FUNCTIONS OF THIS PRODUCT. December 2008 NAVIGON 7200T User's Guide 151 Version 1.1 NAVIGON, INC. - Navigon 7200T | User Guide - Page 170
This page intentionally left blank. 152 NAVIGON 7200T User's Guide December 2008 NAVIGON, INC. Version 1.1 - Navigon 7200T | User Guide - Page 171
antenna Built-in (GNS FM6) No Software keyboard Built-in Built-in 2 GB Built-in MicroSD USB 2.0 CSR Bluecore 4 USB socket LiPo/LiIon 1.5Ah, non removable Up to 3 hours1 Built-in approx. 4-5 hours With integrated TMC antenna ( 12V DC 1A, 5V DC -10°C to 60°C December 2008 NAVIGON 7200T User's Guide - Navigon 7200T | User Guide - Page 172
Technical Data Specifications 1. Some features can reduce battery operation time. These include NAVIGON Lifetime Traffic, GPS antenna reception, Daytime viewing mode, Hands-Free, etc. 154 NAVIGON 7200T User's Guide December 2008 NAVIGON, INC. Version 1.1 - Navigon 7200T | User Guide - Page 173
the instructions, may cause harmful interference to radio communications. However, there is no guarantee that interference will and its antenna(s) must not be co-located or operating in conjunction with any other antenna or transmitter NAVIGON 7200T User's Guide 155 Version 1.1 NAVIGON, INC. - Navigon 7200T | User Guide - Page 174
This page intentionally left blank. 156 NAVIGON 7200T User's Guide December 2008 NAVIGON, INC. Version 1.1 - Navigon 7200T | User Guide - Page 175
used in the user guide 1 customer support 3 e-mail 3 telephone 3 D Day/Night viewing mode setting the 17 description 5 destination arriving at your 71 new location select by city 53 quit navigation 71 search for ZAGAT POI 74 select a map area 50 start navigation 71 no GPS reception 71 - Navigon 7200T | User Guide - Page 176
20 main window 15, 17 manual conventions 1 symbols 1 map modes destination search map 111 using 112 navigation map 108 functions 110 preview map 106 Reality View Pro 113 maps 105, 106, 108, 110, 111, 112, 113 Index-2 NAVIGON 7200T User's Guide NAVIGON, INC. December 2008 Version 1.1 - Navigon 7200T | User Guide - Page 177
99 start 71 no GPS reception 71 turn-by-turn list 102 blocking route sections 102 removing route section blocking 103 navigation device safety 9 navigation map mode 108 functions 110 navigation mode 108 functions 110 navigation safety 8 NAVIGON Freshmaps activation 13 NAVIGON Lifetime - Navigon 7200T | User Guide - Page 178
keys 27 start navigation 71 no GPS reception 71 starting a route simulation 101 starting with password 15 startup first time 16 using a password 15 switching the device back on 19 symbols used in the user guide 1 T Take Me Home 80 tapping the map 69 technical data 153 specifications - Navigon 7200T | User Guide - Page 179
noise 41 general instructions 39 house numbers POIs 52 entering an address 52 search for POIs 52 tap the map 52 webshop The NAVIGON 4 what's included 7 windows accessing the TMC 115 DirectHelp 33 Hands-Free Main 125 Main 20 December 2008 Version 1.1 NAVIGON 7200T User's Guide NAVIGON - Navigon 7200T | User Guide - Page 180
This page intentionally left blank. Index-6 NAVIGON 7200T User's Guide NAVIGON, INC. December 2008 Version 1.1
-
 1
1 -
 2
2 -
 3
3 -
 4
4 -
 5
5 -
 6
6 -
 7
7 -
8
-
9
-
10
-
11
-
12
-
13
-
14
-
15
-
16
-
17
-
18
-
19
-
20
-
21
-
22
-
23
-
24
-
25
-
26
-
27
-
28
-
29
-
30
-
31
-
32
-
33
-
34
-
35
-
36
-
37
-
38
-
39
-
40
-
41
-
42
-
43
-
44
-
45
-
46
-
47
-
48
-
49
-
50
-
51
-
52
-
53
-
54
-
55
-
56
-
57
-
58
-
59
-
60
-
61
-
62
-
63
-
64
-
65
-
66
-
67
-
68
-
69
-
70
-
71
-
72
-
73
-
74
-
75
-
76
-
77
-
78
-
79
-
80
-
81
-
82
-
83
-
84
-
85
-
86
-
87
-
88
-
89
-
90
-
91
-
92
-
93
-
94
-
95
-
96
-
97
-
98
-
99
-
100
-
101
-
102
-
103
-
104
-
105
-
106
-
107
-
108
-
109
-
110
-
111
-
112
-
113
-
114
-
115
-
116
-
117
-
118
-
119
-
120
-
121
-
122
-
123
-
124
-
125
-
126
-
127
-
128
-
129
-
130
-
131
-
132
-
133
-
134
-
135
-
136
-
137
-
138
-
139
-
140
-
141
-
142
-
143
-
144
-
145
-
146
-
147
-
148
-
149
-
150
-
151
-
152
-
153
-
154
-
155
-
156
-
157
-
158
-
159
-
160
-
161
-
162
-
163
-
164
-
165
-
166
-
167
-
168
-
169
-
170
-
171
-
172
-
173
-
174
-
175
-
176
-
177
-
178
-
179
-
180
 |
 |
NAVIGON 7200T
User’s Guide
English (US)
December 2008
Version 1.1