Netgear AX11000 User Manual - Page 6

Use Dynamic DNS to Access USB Storage Devices

Page 6 highlights

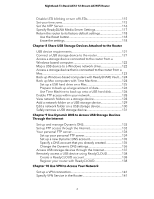
Nighthawk Tri-Band AX12 12-Stream AX WiFi Router Disable LED blinking or turn off LEDs 115 Set your time zone 115 Set the NTP Server 116 Specify ReadyDLNA Media Server Settings 117 Return the router to its factory default settings 118 Use the Reset button 118 Erase the settings 118 Chapter 8 Share USB Storage Devices Attached to the Router USB device requirements 121 Connect a USB storage device to the router 121 Access a storage device connected to the router from a Windows-based computer 122 Map a USB device to a Windows network drive 122 Access a storage device that is connected to the router from a Mac...123 Back up Windows-based computers with ReadySHARE Vault....124 Back up Mac computers with Time Machine 124 Set up a USB hard drive on a Mac 125 Prepare to back up a large amount of data 126 Use Time Machine to back up onto a USB hard disk 126 Enable FTP access within your network 128 View network folders on a storage device 128 Add a network folder on a USB storage device 129 Edit a network folder on a USB storage device 130 Safely remove a USB storage device 131 Chapter 9 Use Dynamic DNS to Access USB Storage Devices Through the Internet Set up and manage Dynamic DNS 133 Set up FTP access through the Internet 133 Your personal FTP server 134 Set up your personal FTP server 134 Set up a new Dynamic DNS account 135 Specify a DNS account that you already created 135 Change the Dynamic DNS settings 136 Access USB storage devices through the Internet 137 Remotely access a USB device using ReadyCLOUD 138 Create a ReadyCLOUD account 138 Register your router with ReadyCLOUD 138 Chapter 10 Use VPN to Access Your Network Set up a VPN connection 141 Specify VPN Service in the Router 141 6

  • 1
  • 2
  • 3
  • 4
  • 5
  • 6
  • 7
  • 8
  • 9
  • 10
  • 11
  • 12
  • 13
  • 14
  • 15
  • 16
  • 17
  • 18
  • 19
  • 20
  • 21
  • 22
  • 23
  • 24
  • 25
  • 26
  • 27
  • 28
  • 29
  • 30
  • 31
  • 32
  • 33
  • 34
  • 35
  • 36
  • 37
  • 38
  • 39
  • 40
  • 41
  • 42
  • 43
  • 44
  • 45
  • 46
  • 47
  • 48
  • 49
  • 50
  • 51
  • 52
  • 53
  • 54
  • 55
  • 56
  • 57
  • 58
  • 59
  • 60
  • 61
  • 62
  • 63
  • 64
  • 65
  • 66
  • 67
  • 68
  • 69
  • 70
  • 71
  • 72
  • 73
  • 74
  • 75
  • 76
  • 77
  • 78
  • 79
  • 80
  • 81
  • 82
  • 83
  • 84
  • 85
  • 86
  • 87
  • 88
  • 89
  • 90
  • 91
  • 92
  • 93
  • 94
  • 95
  • 96
  • 97
  • 98
  • 99
  • 100
  • 101
  • 102
  • 103
  • 104
  • 105
  • 106
  • 107
  • 108
  • 109
  • 110
  • 111
  • 112
  • 113
  • 114
  • 115
  • 116
  • 117
  • 118
  • 119
  • 120
  • 121
  • 122
  • 123
  • 124
  • 125
  • 126
  • 127
  • 128
  • 129
  • 130
  • 131
  • 132
  • 133
  • 134
  • 135
  • 136
  • 137
  • 138
  • 139
  • 140
  • 141
  • 142
  • 143
  • 144
  • 145
  • 146
  • 147
  • 148
  • 149
  • 150
  • 151
  • 152
  • 153
  • 154
  • 155
  • 156
  • 157
  • 158
  • 159
  • 160
  • 161
  • 162
  • 163
  • 164
  • 165
  • 166
  • 167
  • 168
  • 169
  • 170
  • 171
  • 172
  • 173
  • 174
  • 175

Disable LED blinking or turn off LEDs
............................................
115
Set your time zone
............................................................................
115
Set the NTP Server
...........................................................................
116
Specify ReadyDLNA Media Server Settings
..................................
117
Return the router to its factory default settings
............................
118
Use the Reset button
...................................................................
118
Erase the settings
.........................................................................
118
Chapter 8 Share USB Storage Devices Attached to the Router
USB device requirements
................................................................
121
Connect a USB storage device to the router
................................
121
Access a storage device connected to the router from a
Windows-based computer
..............................................................
122
Map a USB device to a Windows network drive
...........................
122
Access a storage device that is connected to the router from a
Mac
.....................................................................................................
123
Back up Windows-based computers with ReadySHARE Vault
....
124
Back up Mac computers with Time Machine
................................
124
Set up a USB hard drive on a Mac
.............................................
125
Prepare to back up a large amount of data
..............................
126
Use Time Machine to back up onto a USB hard disk
..............
126
Enable FTP access within your network
.........................................
128
View network folders on a storage device
....................................
128
Add a network folder on a USB storage device
...........................
129
Edit a network folder on a USB storage device
............................
130
Safely remove a USB storage device
.............................................
131
Chapter 9 Use Dynamic DNS to Access USB Storage Devices
Through the Internet
Set up and manage Dynamic DNS
.................................................
133
Set up FTP access through the Internet
.........................................
133
Your personal FTP server
................................................................
134
Set up your personal FTP server
................................................
134
Set up a new Dynamic DNS account
.........................................
135
Specify a DNS account that you already created
.....................
135
Change the Dynamic DNS settings
...........................................
136
Access USB storage devices through the Internet
.......................
137
Remotely access a USB device using ReadyCLOUD
...................
138
Create a ReadyCLOUD account
................................................
138
Register your router with ReadyCLOUD
...................................
138
Chapter 10 Use VPN to Access Your Network
Set up a VPN connection
.................................................................
141
Specify VPN Service in the Router
..................................................
141
6
Nighthawk Tri-Band AX12 12-Stream AX WiFi Router