Netgear DGFV338 VPN configuration with ProSafe Client
Netgear DGFV338 - ProSafe Wireless ADSL Modem VPN Firewall Router Manual
 |
View all Netgear DGFV338 manuals
Add to My Manuals
Save this manual to your list of manuals |
Netgear DGFV338 manual content summary:
- Netgear DGFV338 | VPN configuration with ProSafe Client - Page 1
Safe VPN client in order to allow a Virtual Private Network to be established over the internet. NOTE: This document assumes that your router is either receiving a public IP address on the WAN interface or that the gateway device(s) have the correct port forwarding or DMZ configured so that port 500 - Netgear DGFV338 | VPN configuration with ProSafe Client - Page 2
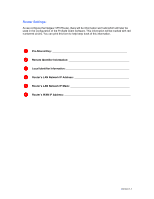
Settings: As we configure the Netgear VPN Router, there will be information we'll add which will later be used in the configuration of the ProSafe Client Software. This information will be marked with red numbered circles. You can print this form to help keep track of this information. ➊ Pre-Shared - Netgear DGFV338 | VPN configuration with ProSafe Client - Page 3
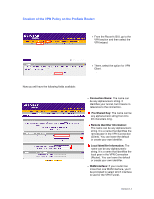
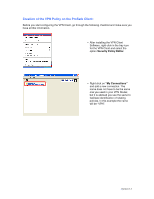
Creation of the VPN Policy on the ProSafe Router: • From the Router's GUI, go to the VPN section and then select the VPN wizard. • There, select the option for VPN Client. . Now you will have the following fields available: • Connection Name: The name can be any alphanumeric string. It identifies - Netgear DGFV338 | VPN configuration with ProSafe Client - Page 4
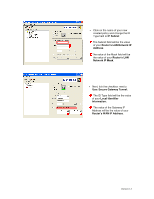
the "Local" box. In our screenshot described as 255.255.255.0 - but may change depending on the setup of your router. NOTE: The values you used for the fields marked with red circles will be referenced them with the same circled numbers while configuring the ProSafe VPN Client software. Version 1.1 - Netgear DGFV338 | VPN configuration with ProSafe Client - Page 5
Creation of the VPN Policy on the ProSafe Client: Before you start configuring the VPN Client, go through the following checklist and make sure you have all this information. • After installing the VPN Client Software, right click in the tray icon for the VPN Client and select the option Security - Netgear DGFV338 | VPN configuration with ProSafe Client - Page 6
of your new created policy and change the ID Type field to IP Subnet ➎➏ ➎ The Subnet field will be the value of your Router's LAN Network IP Address. ➏The value of the Mask field will be the value of your Router's LAN Network IP Mask. • Next, tick the checkbox next to Use: Secure Gateway Tunnel - Netgear DGFV338 | VPN configuration with ProSafe Client - Page 7
• Click on the plus sign next to your policy name and then on My Identity. • Change the Select Certificate field from "Automatically during IKE Negotiation" to "None", and click on the Pre-Shared Key button that will appear on the top right. • On the box that will pop up, click on the Enter Key - Netgear DGFV338 | VPN configuration with ProSafe Client - Page 8
• Input the Pre-Shared Key that you have used when creating the VPN Policy on the Router and click on the OK Button. • Next, change the ID Type to Domain name. ➋ ➋ In the field that will open, add the value of your Remote Identifier Information. Version 1.1 - Netgear DGFV338 | VPN configuration with ProSafe Client - Page 9
• In the left box, click now on Security Policy. • Select Aggressive Mode and tick the Enable Perfect Forward Secrecy (PFS) checkbox. • Leave the PFS Key Group as Diffie-Hellman Group 2. • For last, click on the Save button at the top left of the Security Policy Editor: Version 1.1 - Netgear DGFV338 | VPN configuration with ProSafe Client - Page 10
Connecting: To connect, right click on the tray icon of the Netgear VPN client with your mouse, select connect and select the connection you just created. If your settings are correct you'll receive a message confirming the connection. Version 1.1
-
 1
1 -
 2
2 -
 3
3 -
 4
4 -
 5
5 -
 6
6 -
 7
7 -
8
-
9
-
10
 |
 |
Version 1.1
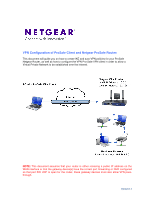
VPN Configuration of ProSafe Client and Netgear ProSafe Router:
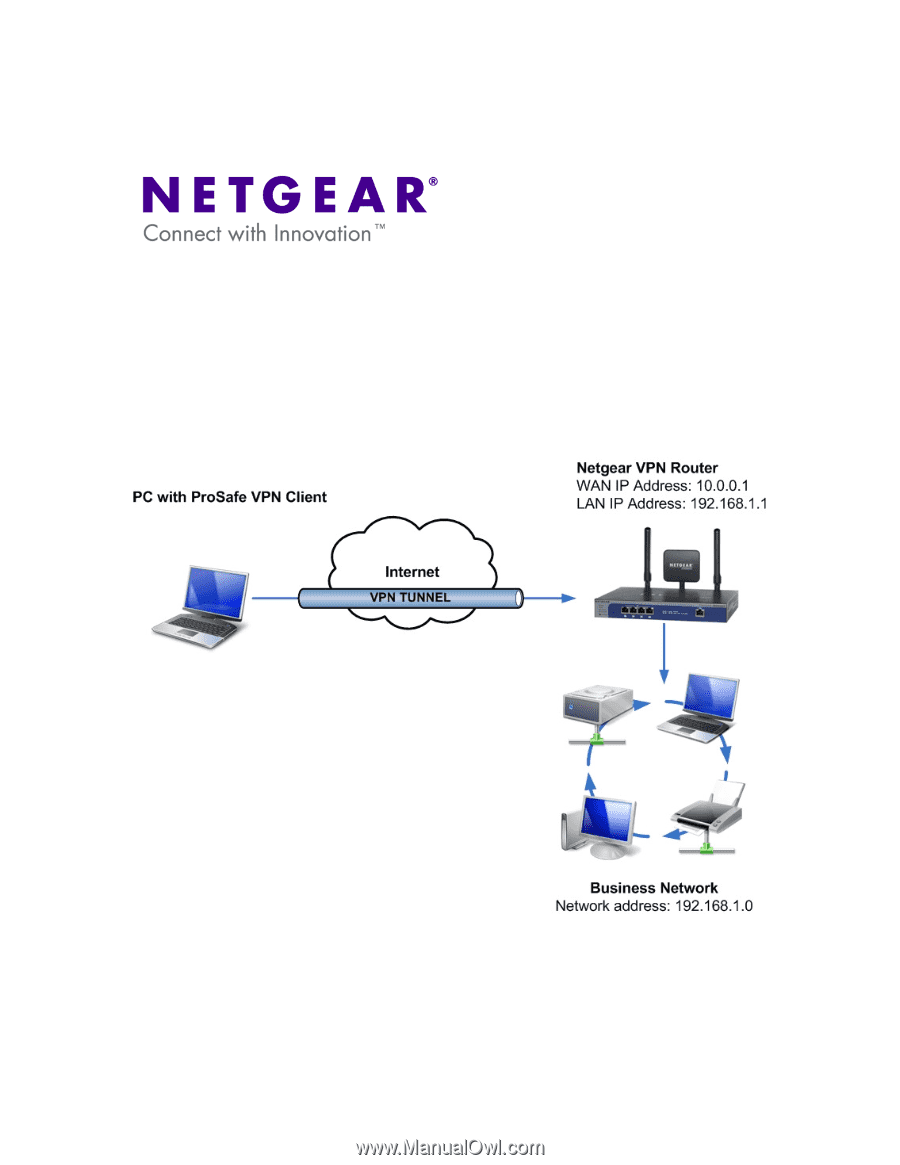
This document will guide you on how to create IKE and auto-VPN policies for your ProSafe
Netgear Router, as well as how to configure the VPN Pro-Safe VPN client in order to allow a
Virtual Private Network to be established over the internet.
NOTE:
This document assumes that your router is either receiving a public IP address on the
WAN interface or that the gateway device(s) have the correct port forwarding or DMZ configured
so that port 500 UDP is open for the router, these gateway devices must also allow VPN pass-
through.