Netgear HR314 HR314 Reference Manual - Page 32
Enabling DHCP to Automatically Con TCP/IP Settings, Selecting Windows’ Internet Access Method
 |
UPC - 606449024241
View all Netgear HR314 manuals
Add to My Manuals
Save this manual to your list of manuals |
Page 32 highlights
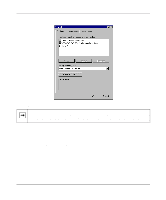
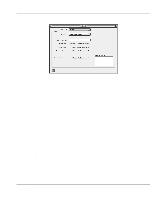
Reference Manual for the Model HR314 802.11a Hi-Speed Wireless Router a. Click the Add button. b. Select Client, and then click Add. c. Select Microsoft. d. Select Client for Microsoft Networks, and then click OK. 3. Restart your PC for the changes to take effect. Enabling DHCP to Automatically Configure TCP/IP Settings After the TCP/IP protocol components are installed, each PC must be assigned specific information about itself and resources that are available on its network. The simplest way to configure this information is to allow the PC to obtain the information from the internal DHCP server of the HR314. To use DHCP with the recommended default addresses, follow these steps: 1. Connect all PCs to the router, then restart the router and allow it to boot. 2. On each attached PC, open the Network control panel (refer to the previous section) and select the Configuration tab. 3. From the components list, select TCP/IP->(your Ethernet adapter) and click Properties. 4. In the IP Address tab, select "Obtain an IP address automatically". 5. Select the Gateway tab. 6. If any gateways are shown, remove them. 7. Click OK. 8. Restart the PC. Repeat steps 2 through 8 for each PC on your network. Selecting Windows' Internet Access Method 1. On the Windows taskbar, click the Start button, point to Settings, and then click Control Panel. 2. Double-click the Internet Options icon. 3. Select "I want to set up my Internet connection manually" or "I want to connect through a Local Area Network" and click Next. 4. Select "I want to connect through a Local Area Network" and click Next. 5. Uncheck all boxes in the LAN Internet Configuration screen and click Next. 6. Proceed to the end of the Wizard. 3-4 Preparing Your Network
-
 1
1 -
2
-
3
-
4
-
5
-
6
-
7
-
8
-
9
-
10
-
11
-
12
-
13
-
14
-
15
-
16
-
17
-
18
-
19
-
20
-
21
-
22
-
23
-
24
-
25
-
26
-
 27
27 -
 28
28 -
 29
29 -
 30
30 -
 31
31 -
 32
32 -
 33
33 -
 34
34 -
 35
35 -
 36
36 -
 37
37 -
38
-
39
-
40
-
41
-
42
-
43
-
44
-
45
-
46
-
47
-
48
-
49
-
50
-
51
-
52
-
53
-
54
-
55
-
56
-
57
-
58
-
59
-
60
-
61
-
62
-
63
-
64
-
65
-
66
-
67
-
68
-
69
-
70
-
71
-
72
-
73
-
74
-
75
-
76
-
77
-
78
-
79
-
80
-
81
-
82
-
83
-
84
-
85
-
86
-
87
-
88
-
89
-
90
-
91
-
92
-
93
-
94
-
95
-
96
-
97
-
98
-
99
-
100
-
101
-
102
-
103
-
104
-
105
-
106
-
107
-
108
-
109
-
110
-
111
-
112
-
113
-
114
-
115
-
116
-
117
-
118
-
119
-
120
-
121
-
122
-
123
 |
 |
