Netgear RN102 Hardware Manual - Page 46
Backup button, USB and backup status LED
 |
View all Netgear RN102 manuals
Add to My Manuals
Save this manual to your list of manuals |
Page 46 highlights
ReadyNAS OS 6 Desktop Storage Systems Front and Side Panels The following figure shows the front and side panels of the ReadyNAS 212. 1 2 3 8 Figure 14. ReadyNAS 212 front and side panels 1. Power button and LED 2. Disk activity LED 3. Exhaust vent 4. USB 3.0 port 5. Backup button 6. USB and backup status LED 7. Disk 1 and Disk 2 LEDs 8. Drive bay door 4 567 NETGEAR ReadyNAS 212 46
-
 1
1 -
2
-
3
-
4
-
5
-
6
-
7
-
8
-
9
-
10
-
11
-
12
-
13
-
14
-
15
-
16
-
17
-
18
-
19
-
20
-
21
-
22
-
23
-
24
-
25
-
26
-
27
-
28
-
29
-
30
-
31
-
32
-
33
-
34
-
35
-
36
-
37
-
38
-
39
-
40
-
 41
41 -
 42
42 -
 43
43 -
 44
44 -
 45
45 -
 46
46 -
 47
47 -
 48
48 -
 49
49 -
 50
50 -
 51
51 -
52
-
53
-
54
-
55
-
56
-
57
-
58
-
59
-
60
-
61
-
62
-
63
-
64
-
65
-
66
-
67
-
68
-
69
-
70
-
71
-
72
-
73
-
74
-
75
-
76
-
77
-
78
-
79
-
80
-
81
-
82
-
83
-
84
-
85
-
86
-
87
-
88
-
89
-
90
-
91
-
92
-
93
-
94
-
95
-
96
-
97
-
98
-
99
-
100
-
101
-
102
-
103
-
104
-
105
-
106
-
107
-
108
-
109
-
110
-
111
-
112
-
113
-
114
-
115
-
116
-
117
-
118
-
119
-
120
-
121
-
122
-
123
-
124
-
125
-
126
-
127
-
128
-
129
-
130
-
131
-
132
-
133
-
134
-
135
-
136
-
137
-
138
-
139
-
140
-
141
-
142
-
143
-
144
-
145
 |
 |

NETGEAR ReadyNAS 212
46
ReadyNAS OS 6 Desktop Storage Systems
Front and Side Panels
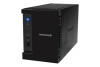
The following figure shows the front and side panels of the ReadyNAS 212.
3
8
4
5
6
1
2
7
Figure 14. ReadyNAS 212 front and side panels
1. Power button and LED
2. Disk activity LED
3. Exhaust vent
4. USB 3.0 port
5. Backup button
6. USB and backup status LED
7. Disk 1 and Disk 2 LEDs
8. Drive bay door