Nextar ME ME Hardware Manual
Nextar ME - Automotive GPS Receiver Manual
 |
UPC - 714129881579
View all Nextar ME manuals
Add to My Manuals
Save this manual to your list of manuals |
Nextar ME manual content summary:
- Nextar ME | ME Hardware Manual - Page 1
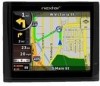
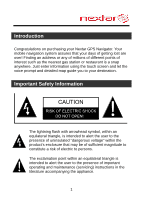
Congratulations on purchasing your Nextar GPS Navigator. Your mobile the touch screen and let the voice prompt and detailed map guide you to your destination. Important Safety Information The lightning flash with and maintenance (servicing) instructions in the literature accompanying the appliance. 1 - Nextar ME | ME Hardware Manual - Page 2
Important Safety Information Read and keep these instructions Failure to heed the following warnings could result obstruct the driver's view of the road or interfere with vehicle operating controls. This GPS unit is designed to provide you with route suggestions. It does not reflect road closures - Nextar ME | ME Hardware Manual - Page 3
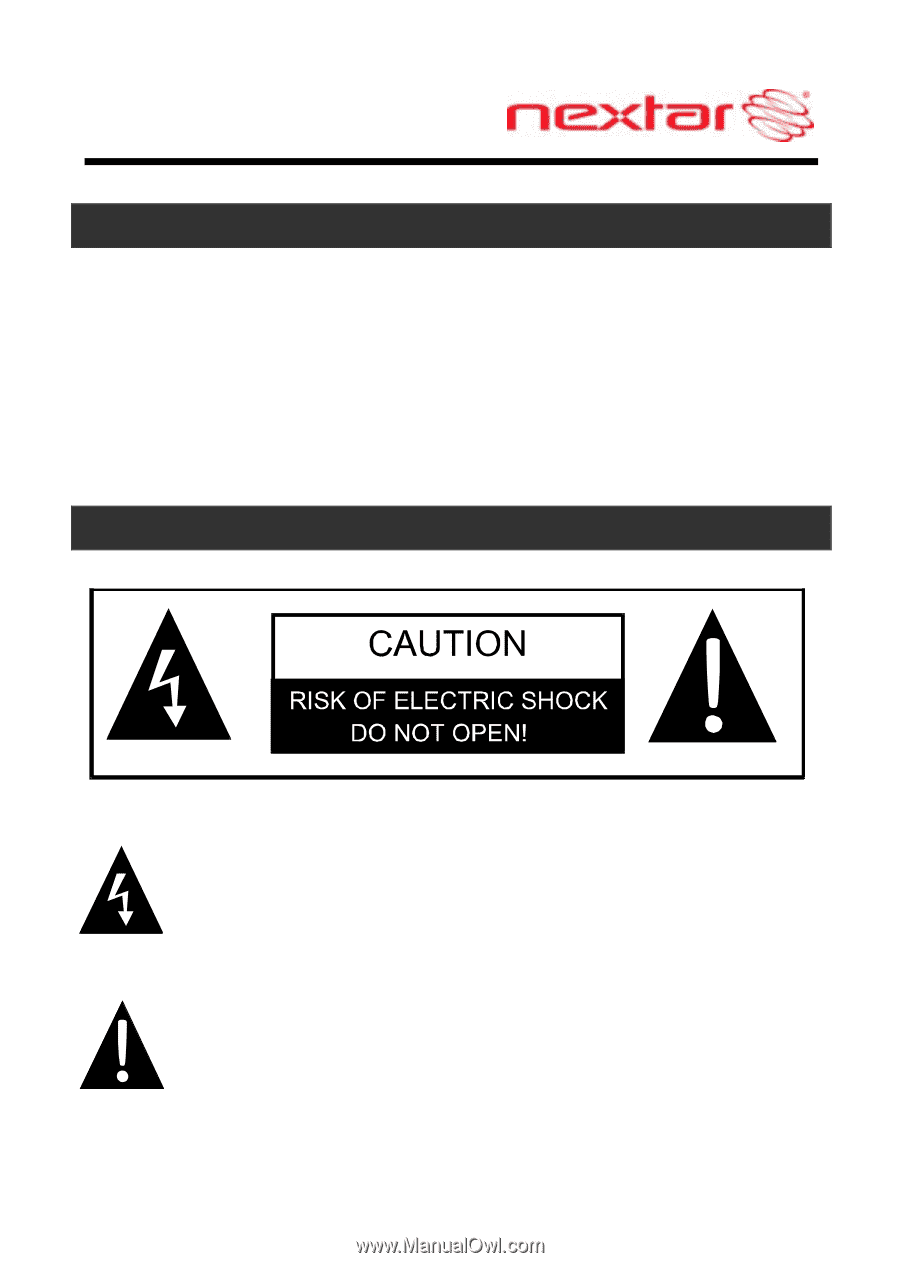
risk of electric shock, do not remove cover or back. No user serviceable parts inside. Refer servicing to qualified service personnel. Do not use harsh chemicals (such as alcohol, benzene, thinners, etc.) or detergents to clean your GPS. This could damage the unit or cause a fire. Do not drop - Nextar ME | ME Hardware Manual - Page 4
or seriously damage your GPS. Spilled beverages are a common problem in moving vehicles. Do GPS device. Only use attachments / accessories specified by the manufacturer. Unplug the unit from the DC car adaptor when not in use. Refer all servicing to qualified service personnel. Servicing - Nextar ME | ME Hardware Manual - Page 5
Important Safety Information Important: Some states have restrictions on locating your GPS unit on the windshield. Included with your Nextar unit is an adhesive backed Dashboard Mount Disk that can be used if attaching the windshield mounting bracket to the windshield is inconvenient or not - Nextar ME | ME Hardware Manual - Page 6
a residential installation. This equipment generates, uses and can radiate radio frequency energy and, if not installed and used in accordance with the instructions, may cause harmful interference to radio or television reception, which can be determined by turning the equipment off and on, the user - Nextar ME | ME Hardware Manual - Page 7
complies with Canadian ICES-003. CAUTION: Underwriters Laboratories Inc. ("UL") has not tested the performance or reliability of the Global Positioning System ("GPS") hardware, operating software or other aspects of this product. UL has only tested for fire, shock or casualty hazards as outlined in - Nextar ME | ME Hardware Manual - Page 8
11 Power Adaptor 12 System Connections 14 Using the Windshield Mounting Bracket 17 Using Your Navigator General Setup 19 Playing Music 27 Photo Viewer 30 Service & Support Troubleshooting 34 Specifications 37 Copyright 38 8 - Nextar ME | ME Hardware Manual - Page 9
Main Unit 1. POWER Button Press and hold for 2 seconds to enter or exit standby mode. 2. Card Slot Insert the SD card into the slot. Used for user's music or photo SD card 3. Charge Indicator When charging the battery, it is red; when the battery is fully charged, it turns green. 4. LCD Screen Tap - Nextar ME | ME Hardware Manual - Page 10
Main Unit 7. Stylus 8. ON/OFF RESET Switch Used to switch power on or off. 10 - Nextar ME | ME Hardware Manual - Page 11
Accessories The Following Items Are Included With Your GPS Unit Instruction Manual Quick-Start Guide Warranty Card Car Adaptor Windshield Mounting Bracket Magnetic Cradle Stylus Dashboard Mount Disk Carry pouch 11 - Nextar ME | ME Hardware Manual - Page 12
/ cigarette socket, as shown below. Attention Set up your destination and other settings before moving out into traffic. Do not access the controls of the GPS unit while driving. Mount the unit so that it does not obstruct your view of the road. When connected with adaptor, the LCD screen - Nextar ME | ME Hardware Manual - Page 13
Power Adaptor About Rechargeable Battery Your portable GPS device comes with a built-in rechargeable Lithium-Ion battery. A fully charged battery delivers about 2 hours of use. It is recommended to use the Car Adaptor - Nextar ME | ME Hardware Manual - Page 14
System Connections Inserting SD Card The unit is designed with an SD Card slot which allows you to insert an SD card into the unit as shown below: To remove the card, gently press the card in with your fingernail. The card unlocks and protrudes slightly. You can now remove the card. To re-insert the - Nextar ME | ME Hardware Manual - Page 15
System Connections Connecting to Earphones You may connect earphones to the right side of the unit for private listening. When earphones are connected, the speaker will automatically turn off. Note: Overly loud volume could damage your hearing. Turn down the volume before you connect the - Nextar ME | ME Hardware Manual - Page 16
System Connections USB Mode When you connect the GPS device to a computer with a USB cable, the screen will display as below: You can connect to computer for data accessing. Tap in the top right - Nextar ME | ME Hardware Manual - Page 17
the unit in the vehicle. Take the following steps to operate: 1. Slide the magnetic cradle onto the end of the windshield mounting bracket. 2. Position the GPS unit onto the cradle, by setting the bottom edge of the unit onto the magnetic cradle and the unit will be secured onto the cradle - Nextar ME | ME Hardware Manual - Page 18
, and then attach the disk to your dashboard. 4. Rotate the bracket adjuster to adjust the angle of the bracket so that you can view the GPS unit display and operate the controls safely. Warning: When you mount the device in your vehicle, ensure it has a clear line of sight to the - Nextar ME | ME Hardware Manual - Page 19
General Setup System Main Menu In the main menu, there are four items for selecting. Touch the corresponding item to enter. Tap to enter the Navigator. Tap to enter the MP3 Player. Tap to enter the Photo Viewer. Tap to enter the Setup menu. 19 - Nextar ME | ME Hardware Manual - Page 20
General Setup Setup Menu In the main menu, tap will display as below: to enter the Setup menu, the screen In the Setup menu, tap to return to the main menu. 20 - Nextar ME | ME Hardware Manual - Page 21
General Setup Language Tap in the Setup menu to enter Language setting menu for language selection, as shown below: Tap the , Then tap buttons to select language. to confirm or tap to cancel. 21 - Nextar ME | ME Hardware Manual - Page 22
General Setup Date & Time Tap in the Setup menu to enter Date & Time setting menu for changing to the current time zone, date and time, as shown below: Tap the Tap the date. Tap the time. Then tap buttons to select the proper Time Zone. buttons of Date group to change the corresponding - Nextar ME | ME Hardware Manual - Page 23
General Setup Brightness Tap in the Setup menu to enter Brightness setting menu for backlight adjustment, as shown below: Tap , to darken or increase the brightness of the display. Energy Saver: You can set the energy saver ON or OFF to determine how the backlight will behave when the - Nextar ME | ME Hardware Manual - Page 24
General Setup Volume Tap in the Setup menu to enter Volume settings menu for volume adjustment, as shown below: Tap the Tap the Then tap to decrease the volume. to increase the volume. to confirm or tap to cancel. 24 - Nextar ME | ME Hardware Manual - Page 25
General Setup Align Screen Tap in the Setup menu to align the screen, as shown below. Tap the center of the cross with your finger. When the cross moves to another position, tap and hold the center of the new target. Repeat each time to complete the calibration process. When tapping the screen - Nextar ME | ME Hardware Manual - Page 26
General Setup Power Tap below: in the Setup menu to enter Power menu, as shown The Power menu displays the unit's battery status. The values are between 0% and 100%, where 0% means the battery power has run out completely, and 100% represents a full battery power. When the battery is being - Nextar ME | ME Hardware Manual - Page 27
Music The unit is designed with an SD card slot and supports MP3 and WMA format music files. To use the music must be performed independent of the navigation unit. Insert your SD card into the side of the GPS unit. Do not attempt to use the unit to read and burn music files from an external - Nextar ME | ME Hardware Manual - Page 28
Playing Music Tap button to enter the music play list menu, as shown below: When you open the play list, the system will look for audio files on its SD memory card and create a play list automatically. If the play list consists of more than one screen, tap the up arrow for the previous page and - Nextar ME | ME Hardware Manual - Page 29
Playing Music Tap / toggle buttons to determine whether or not to play the songs in the list randomly. Tap to start the playback and return to Music Player, as shown below. Tap / toggle button to pause or resume the playback. Tap to go back to the previous song; tap next song. to skip to - Nextar ME | ME Hardware Manual - Page 30
Photo Viewer The unit is designed with an SD card slot and supports JPEG format files playback. To use the Photo Viewer, you will need to have an SD card with your JPEG picture files preloaded and then - Nextar ME | ME Hardware Manual - Page 31
Photo Viewer Viewing Photos In the folder menu, double tap the memory card icon, and the photos stored in the memory card will be listed on the screen. In the photo list, double tap a photo to display it on the LCD screen. You can also tap a photo to select it and then tap it. to display 31 - Nextar ME | ME Hardware Manual - Page 32
Photo Viewer Tap to return to the previous menu. Tap to enter the Setting menu for setting the Slide Show. When playing photos, the Photo Viewer has following playback features: Tap to go back to the previous photo; tap to switch to the next photo. Tap to rotate the photo. Tap , to zoom in or - Nextar ME | ME Hardware Manual - Page 33
Photo Viewer You can set the slide show on or off to determine whether or not to play photos in slide show mode. When the slide show is on, you can set the interval between two photos during slide show. After setting, tap to confirm or tap Next, tap a photo in the photo list to open it. to - Nextar ME | ME Hardware Manual - Page 34
Troubleshooting Before contacting customer service, review the steps below to solve simple problems. If you still suspect something wrong with this unit, immediately turn the power off, disconnect the power connector from the unit, and contact Nextar Customer Service. Never try to repair the unit - Nextar ME | ME Hardware Manual - Page 35
Troubleshooting Navigator cannot receive satellite signals or does not orient Unit may be inside a tunnel, inside a building, or tall buildings may obstruct the satellite signal Mapping - Nextar ME | ME Hardware Manual - Page 36
Troubleshooting Other possibilities Static or other external interference may cause the unit to function abnormally. In order to recover normal status, please unplug the power supply cord and then plug it into the outlet again to reset the unit. If the problems still exist, please cut off the power - Nextar ME | ME Hardware Manual - Page 37
Specifications TFT screen size Frequency Response Audio Signal-to-noise Rate Audio distortion + noise Channel Separation Dynamic Range Power Power Consumption Dimensions Weight 3.5 inches 20Hz - 20kHz ≥65dB ≤-20dB (1kHz) ≥70dB (1kHz) ≥80dB (1kHz) DC 5V < 8W 91mmX77mmX18mm (L*W*D) About 0.16Kg - Nextar ME | ME Hardware Manual - Page 38
Nextar, Inc. Any unauthorized distribution of this manual is expressly forbidden. Nextar®, is a trademark of Nextar (Hong Kong) Limited. Nextar . For instruction books, information on this product, its operation and accessories, visit us on the web at: www.nextar.com Or write to us at: Nextar, Inc. - Nextar ME | ME Hardware Manual - Page 39
Copyright We are seriously concerned about environmental protection, and we hope that you share our concern as well. For more information regarding our recycling program, please visit us at http://www.nextar.com/green or call us at 1-888-849-0846 39 - Nextar ME | ME Hardware Manual - Page 40
pour l'achat de votre système de navigation GPS de Nextar. Votre système de navigation mobile peut vous assurer que vous ne perdrez plus jamais le Nord! La recherche d'une adresse ou de l'un des millions de points d'intérêt, comme la station-service ou le restaurant le plus près, est instantan - Nextar ME | ME Hardware Manual - Page 41
route ou n'interfère pas avec les commandes du véhicule. Cet appareil GPS est conçu pour vous fournir des suggestions de trajet. Il ne tient pas compte manœuvre que vous entreprenez avec votre véhicule. Utilisez cet appareil GPS uniquement à titre d'aide à la navigation. Ne tentez pas de l' - Nextar ME | ME Hardware Manual - Page 42
pas votre GPS près d'un feu ou avec des matières dangereuses ou inflammables. Contactez le service d'élimination GPS sur ou près d'un coussin de sécurité gonflable. Si le coussin est déployé, vous pourriez subir des blessures graves. Utilisez uniquement le cordon d'alimentation fourni par NEXTAR - Nextar ME | ME Hardware Manual - Page 43
de réduire le risque d'incendie, de choc électrique ou de dommage, n'exposez pas ce produit à la pluie ou à l'humidité. N'utilisez pas votre GPS dans des endroits avec explosifs, car cet appareil peut générer des étincelles. N'endommagez pas le cordon d'alimentation en le pliant, le tortillant - Nextar ME | ME Hardware Manual - Page 44
Important : Certains États ont des restrictions concernant l'emplacement de l'appareil GPS sur le pare-brise. Votre appareil Nextar est doté d'un disque de fixation à endos adhésif qui peut être utilisé si l'installation du support de fixation pour pare-brise est problématique ou interdite. Reportez - Nextar ME | ME Hardware Manual - Page 45
résidentielle. Cet appareil génère, utilise et peut émettre une énergie de radiofréquence et, s'il n'est pas installé et utilisé conformément aux instructions, peut causer des interférences nuisibles à la réception des postes de radio ou des téléviseurs, qui peuvent être déterminées en activant et - Nextar ME | ME Hardware Manual - Page 46
ni la fiabilité du matériel du système mondial de localisation (« GPS »), ni le logiciel d'exploitation ou les autres aspects de ce produit. le rendement ou la fiabilité du matériel ou du logiciel d'exploitation du GPS. UL N'ÉMET AUCUNE REPRÉSENTATION, GARANTIE OU CERTIFICATION D'AUCUNE SORTE EN CE - Nextar ME | ME Hardware Manual - Page 47
UL 6 Familiarisation avec votre matériel Unité principale 9 Accessoires 11 Adaptateur d'alimentation 12 Raccordements du système 14 Utilisation du support de fixation 17 Utilisation de votre navigateur Réglages généraux 19 Lecture de musique 27 Visionneuse de photos 31 Dépannage et soutien - Nextar ME | ME Hardware Manual - Page 48
Unité principale 1. Touche d'ALIMENTATION Maintenez-la enfoncée pendant 2 secondes pour entrer dans le mode de veille, ou pour le quitter. 2. Fente pour carte mémoire Insérez la carte SD dans la fente. Utilisez-la pour la carte des données cartographiques ou la carte de la musique ou des photos de - Nextar ME | ME Hardware Manual - Page 49
Unité principale 5. Prise pour les écouteurs Raccordez les écouteurs fournis pour une écoute personnelle. Lorsque les écouteurs sont raccordés à cette prise, les haut-parleurs seront automatiquement désactivés. 6. Port USB Raccordez-le directement à l'adaptateur d'alimentation pour recharger l' - Nextar ME | ME Hardware Manual - Page 50
Accessoires Les articles suivants sont fournis avec votre appareil GPS Manuel d'instructions Guide de démarrage rapide Carte de garantie Adaptateur d'alimentation pour véhicule Support de fixation à ventouse socle magnétique de fixation Stylet Disque de fixation pour tableau de bord Sacoche 11 - Nextar ME | ME Hardware Manual - Page 51
V du véhicule. Attention Réglez votre destination et les autres réglages avant de vous déplacer dans la circulation. N'accédez pas aux commandes de l'appareil GPS pendant que vous conduisez. Installez votre appareil de façon à ce qu'il n'obstrue pas votre vision de la route. Lorsqu'elle est - Nextar ME | ME Hardware Manual - Page 52
Adaptateur d'alimentation À propos de la pile rechargeable Votre appareil GPS portable est doté d'une pile au lithium-Ion rechargeable. Une pile totalement chargée procure environ 2 heures d'utilisation. Il est recommandé d'utiliser l'adaptateur d'alimentation dans le vé - Nextar ME | ME Hardware Manual - Page 53
Raccordements du système Insertion d'une carte mémoire SD L'appareil est doté d'une fente pour carte SD, laquelle vous permet d'insérer une carte SD dans l'appareil, tel qu'illustré ci-dessous : Pour retirer la carte, enfoncez-la délicatement avec votre ongle. La carte se déverrouille et ressort - Nextar ME | ME Hardware Manual - Page 54
Raccordements du système Raccordement des écouteurs Vous pouvez raccorder des écouteurs sur le côté droit de l'appareil pour une écoute individuelle. Lorsque les écouteurs sont raccordés, le haut-parleur sera automatiquement désactivé. Remarque : Un niveau sonore très élevé pourrait endommager - Nextar ME | ME Hardware Manual - Page 55
Raccordements du système Mode USB Lorsque vous raccordez l'appareil GPS à un ordinateur avec un câble USB, l'écran affichera ce qui suit : Vous pouvez raccorder l'appareil à l'ordinateur pour accéder aux données. Touchez le dans - Nextar ME | ME Hardware Manual - Page 56
de bord) pour procéder à son installation. Observez les étapes suivantes : 1. Faites glisser le socle magnétique sur l'extrémité du support de fixation. 2. Installez l'appareil GPS sur le socle en fixant l'extrémité inférieure de l'appareil sur le socle magnétique; l'appareil sera fixé fermement en - Nextar ME | ME Hardware Manual - Page 57
fixez le disque sur votre pare-brise. 4. Faites pivoter le dispositif de réglage de la fixation pour ajuster l'angle du support de façon à ce que vous puissiez voir l'appareil GPS et utiliser les commandes du véhicule de façon sécuritaire. Mise en garde : Lorsque vous installez l'appareil dans votre - Nextar ME | ME Hardware Manual - Page 58
Réglages généraux Menu principal du système Dans le menu principal se trouvent quatre éléments à sélectionner. Touchez l'élément correspondant pour y accéder. Touchez Touchez Touchez Touchez pour accéder au navigateur. pour accéder au lecteur MP3. pour accéder à la visionneuse de photos. pour acc - Nextar ME | ME Hardware Manual - Page 59
Réglages généraux Menu des réglages Dans le menu principal, touchez pour accéder au menu des Réglages; l'écran ci-dessous s'affichera : Dans le menu des Réglages, touchez principal. pour retourner au menu 20 - Nextar ME | ME Hardware Manual - Page 60
Réglages généraux Langue Touchez dans le menu des Réglages pour accéder au menu de réglages de la Langue [Language] et sélectionner la langue, tel qu'illustré ci-dessous : Touchez les touches Touchez ensuite pour annuler. pour sélectionner la langue. pour confirmer ou 21 - Nextar ME | ME Hardware Manual - Page 61
Réglages généraux Date et heure Touchez dans le menu des Réglages pour accéder au menu des réglages de la Date et de l'heure afin de modifier le fuseau horaire, la date et l'heure, tel qu'illustré ci-dessous : Touchez les touches approprié. Touchez les touches date correspondante. Touchez les - Nextar ME | ME Hardware Manual - Page 62
Réglages généraux Luminosité Touchez dans le menu des Réglages pour accéder au menu des réglages de la Luminosité [Brightness] pour régler le rétroéclairage, tel qu'illustré ci-dessous : Touchez l'affichage. pour augmenter ou réduire la luminosité de Économiseur d'énergie : Vous pouvez ré - Nextar ME | ME Hardware Manual - Page 63
Réglages généraux minutes. Vous pouvez toucher l'écran pour rétablir l'intensité lumineuse. Cela aide à prolonger la durée de vie de la pile. Note : Le réglage par défaut est OFF. Après les réglages, touchez pour annuler. pour confirmer ou Volume Touchez dans le menu des Réglages pour accéder - Nextar ME | ME Hardware Manual - Page 64
Réglages généraux Alignement de l'écran Touchez dans le menu des Réglages pour aligner l'écran, tel qu'illustré ci-dessous. Touchez le centre de la croix avec votre doigt. Lorsque la croix se déplace, touchez et maintenez le centre de la nouvelle cible. Répétez chaque fois pour terminer le - Nextar ME | ME Hardware Manual - Page 65
Réglages généraux Alimentation Touchez dans le menu des Réglages pour accéder au menu de l'Alimentation [Power], tel qu'illustré ci-dessous : Le menu de l'Alimentation affiche l'état de la pile de l'appareil. Les valeurs se situent entre 0 % et 100 %, 0 % signifiant que l'alimentation de la - Nextar ME | ME Hardware Manual - Page 66
de Windows. Ce processus doit être effectué indépendamment de l'appareil de navigation. Insérez votre carte SD dans la fente sur le côté de l'appareil GPS. Ne tentez pas d'utiliser l'appareil pour lire et graver des fichiers musicaux provenant d'une source externe. 27 - Nextar ME | ME Hardware Manual - Page 67
Lecture de musique Lecture de musique Touchez dans le menu principal du système pour accéder au lecteur de musique, tel qu'illustré ci-dessous : Touchez la touche pour accéder au menu de la liste de lecture, tel qu'illustré ci-dessous : 28 - Nextar ME | ME Hardware Manual - Page 68
Lecture de musique Lorsque vous ouvrez la liste de lecture, le système recherchera des fichiers audio sur sa carte mémoire SD et créera automatiquement une liste de lecture. Si la liste de lecture remplit plus d'un écran, touchez la flèche vers le haut pour la page précédente et la touche vers le - Nextar ME | ME Hardware Manual - Page 69
Lecture de musique Touchez les touches de commutation / pour interrompre ou reprendre la lecture. Touchez pour retourner à la pièce musicale précédente; touchez pour passer à la pièce suivante. Touchez pour diminuer ou réduire le volume du haut-parleur. Touchez la barre de progression pour - Nextar ME | ME Hardware Manual - Page 70
Visionneuse de photos L'appareil est doté d'une fente pour carte SD et soutient la lecture des fichiers au format JPEG. Pour utiliser la visionneuse de photos, vous devrez avoir une carte SD contenant vos fichiers d'images JPEG déjà téléchargés. Insérez ensuite la carte SD contenant vos fichiers d' - Nextar ME | ME Hardware Manual - Page 71
Visionneuse de photos Dans le menu, touchez tel qu'illustré ci-dessous : pour accéder au menu des dossiers, Visionnement de photos Dans le menu des dossiers, touchez deux fois sur l'icône de la carte mémoire et les photos contenues sur la carte mémoire seront listées à l'écran. 32 - Nextar ME | ME Hardware Manual - Page 72
Visionneuse de photos Dans la liste des photos, touchez deux fois sur une photo pour l'afficher à l'écran ACL. Vous pouvez aussi toucher une photo pour la sélectionner et touchez ensuite pour ce faire. Touchez pour retourner au menu précédent. Touchez pour accéder au menu des Réglages afin de - Nextar ME | ME Hardware Manual - Page 73
Visionneuse de photos Utilisation du diaporama Touchez dans l'écran de la liste des photos pour accéder au menu des Réglages afin d'ajuster le diaporama. Vous pouvez activer ou désactiver la fonction de diaporama selon que vous souhaitez que vos photos soient ou non affichées en mode diaporama. - Nextar ME | ME Hardware Manual - Page 74
Visionneuse de photos Lorsque vous touchez , le diaporama sera amorcé. Pour interrompre le diaporama, touchez deux fois l'écran. 35 - Nextar ME | ME Hardware Manual - Page 75
un problème avec cet appareil, mettez-le immédiatement hors tension, débranchez l'adaptateur d'alimentation de l'appareil et contactez le service à la clientèle de Nextar. Ne tentez jamais de réparer l'appareil par vous-même. Problème Impossible de mettre l'appareil sous tension Cause possible - Nextar ME | ME Hardware Manual - Page 76
Dépannage Problème Difficulté à voir l'écran Cause possible La luminosité est peut-être au plus bas Solution possible Réglez la luminosité de l'écran ACL Impossible pour le navigateur de recevoir des signaux satellites ou de s'orienter L'appareil est peut-être à l'intérieur d'un tunnel ou d'un - Nextar ME | ME Hardware Manual - Page 77
Dépannage Problème La portée du signal satellite est instable. Ce dernier vient et repart. Cause possible La pile rechargeable est faible L'appareil se déplace trop de gauche à droite Le signal est obstrué par des édifices ou autres éléments Le logiciel du système ne fonctionne pas après avoir - Nextar ME | ME Hardware Manual - Page 78
Caractéristiques techniques Dimension de l'écran TFT Réponse en fréquence Rapport sur bruit de l'audio Distorsion audio + bruit Séparation des voies Écart dynamique Alimentation Consommationon énergétique Dimensions Poids 3.5 pouces 20 Hz - 20 kHz ≥65 dB ≤-20 dB (1 kHz) ≥70 dB (1 kHz) ≥80 dB (1 - Nextar ME | ME Hardware Manual - Page 79
des appareils vendus aux consommateurs. Pour obtenir des manuels d'instructions ou de l'information sur ce produit, son fonctionnement et ses accessoires, veuillez visiter notre site Web à : www.nextar.com Ou écrivez-nous à l'adresse suivante : Nextar, Inc. 1661 Fairplex Drive La Verne, CA 91750 - Nextar ME | ME Hardware Manual - Page 80
est une marque de commerce et une marque de service de Nextar (Hong Kong) Limited. Tous les autres noms de marques, de marques de commerce et de marques de service sont la propriété de leurs propriétaires respectifs. Nous sommes sérieusement concernés par la protection environnementale et nous
-
 1
1 -
 2
2 -
 3
3 -
 4
4 -
 5
5 -
 6
6 -
 7
7 -
8
-
9
-
10
-
11
-
12
-
13
-
14
-
15
-
16
-
17
-
18
-
19
-
20
-
21
-
22
-
23
-
24
-
25
-
26
-
27
-
28
-
29
-
30
-
31
-
32
-
33
-
34
-
35
-
36
-
37
-
38
-
39
-
40
-
41
-
42
-
43
-
44
-
45
-
46
-
47
-
48
-
49
-
50
-
51
-
52
-
53
-
54
-
55
-
56
-
57
-
58
-
59
-
60
-
61
-
62
-
63
-
64
-
65
-
66
-
67
-
68
-
69
-
70
-
71
-
72
-
73
-
74
-
75
-
76
-
77
-
78
-
79
-
80
 |
 |
1
Introduction
Congratulations on purchasing your Nextar GPS Navigator. Your
mobile navigation system assures that your days of getting lost are
over! Finding an address or any of millions of different points of
interest such as the nearest gas station or restaurant is a snap
anywhere. Just enter information using the touch screen and let the
voice prompt and detailed map guide you to your destination.
Important Safety Information
The lightning flash with arrowhead symbol, within an
equilateral triangle, is intended to alert the user to the
presence of uninsulated “dangerous voltage” within the
product’s enclosure that may be of sufficient magnitude to
constitute a risk of electric to persons.
The exclamation point within an equilateral triangle is
intended to alert the user to the presence of important
operating and maintenance (servicing) instructions in the
literature accompanying the appliance.