Nokia 002C9N1 User Guide
Nokia 002C9N1 Manual
 |
View all Nokia 002C9N1 manuals
Add to My Manuals
Save this manual to your list of manuals |
Nokia 002C9N1 manual content summary:
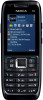
- Nokia 002C9N1 | User Guide - Page 1
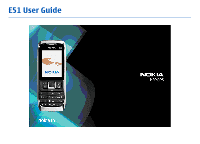
E51 User Guide 2222222 Issue 1.0 - Nokia 002C9N1 | User Guide - Page 2
of Directive 1999/5/EC. A copy of the Declaration of Conformity can be found at http://www.nokia.com/phones/ declaration_of_conformity/. © 2007 Nokia. All rights reserved. Nokia, Nokia Connecting People, Nokia Original Enhancements logos, Eseries, and E51 are trademarks or registered trademarks of - Nokia 002C9N1 | User Guide - Page 3
user guide contains any limitations on Nokia's representations, warranties, damages and liabilities, such limitations shall likewise limit any representations, warranties, damages and liabilities of Nokia's licensors. The availability of particular products and applications and services for these - Nokia 002C9N1 | User Guide - Page 4
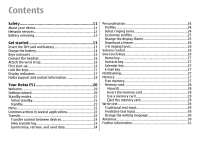
services 12 Battery removing 12 Get started 13 Insert the SIM card and battery 13 Charge the battery 14 Keys and parts 15 Connect the headset 16 Attach the wrist strap 16 First start-up 16 Lock the keys 17 Display indicators 17 Nokia support the display theme 25 Download a theme 26 3-D - Nokia 002C9N1 | User Guide - Page 5
Share a video 34 Receive a video sharing invitation 34 Net calls 34 Create a net call profile 34 Connect to the net call service 35 Make net calls 35 Net call service settings 36 Speed dialling 36 Call divert 36 Call barring 37 Bar net calls 37 Send DTMF tones 37 Voice mail 38 - Nokia 002C9N1 | User Guide - Page 6
E-mail account settings 60 Connection settings 60 User settings 61 Retrieval settings 61 Automatic retrieval settings 61 Service message settings 62 Cell broadcast settings 62 Other settings 62 Nokia Office Tools 63 Active notes 63 Create and edit notes 63 Settings for Active notes 63 - Nokia 002C9N1 | User Guide - Page 7
Clock settings 69 Notes 69 Write and send notes 69 Nokia Wireless Keyboard 69 Free time 71 Camera 71 Capture an stations 81 Internet radio settings 82 Push to talk 82 PTT settings 82 Log in to PTT service 82 Make a PTT call 83 Created PTT calls 83 Manage PTT contacts 83 Create a PTT - Nokia 002C9N1 | User Guide - Page 8
guides 88 GPS data 89 Use GPS data 89 Landmarks 89 Create a landmark 90 Edit landmarks 90 Landmark categories 90 Receive landmarks 90 Connectivity 92 Fast downloading 92 Nokia data (GPRS 99 Set up an access point for WLAN manually 99 Advanced access point settings for WLAN 100 Modem 100 - Nokia 002C9N1 | User Guide - Page 9
121 Configuration settings 121 Restrict packet data 121 Application settings 121 Shortcuts 122 General shortcuts 122 Glossary 124 Nokia original enhancements 127 Enhancements 127 Battery 127 Troubleshooting 128 Battery and charger information 131 Battery and charger information 131 - Nokia 002C9N1 | User Guide - Page 10
environments 136 Emergency calls 137 Certification information (SAR 137 MANUFACTURER'S LIMITED WARRANTY 139 Warranty period 139 How to get warranty service 139 What is not covered 140 Other important notices 141 Limitation of Nokia's liability 141 Statutory obligations 142 Index 143 - Nokia 002C9N1 | User Guide - Page 11
guide for further information. SWITCH ON SAFELY Do not switch the device on when wireless phone QUALIFIED SERVICE Only qualified guide is approved for use on the (E)GSM 850, 900, 1800, and 1900 networks, and UMTS 900/2100 HSDPA networks. Contact your service Your device supports several use services - Nokia 002C9N1 | User Guide - Page 12
with Nokia, and Nokia does The office applications support common features of guide for detailed safety instructions. Do not connect incompatible products. The images in this guide may differ from your device display. Network services To use the device you must have service from a wireless service - Nokia 002C9N1 | User Guide - Page 13
-2 (RM-426, without camera). Hereinafter referred to as Nokia E51. Insert the SIM card and battery 1. With the back of the device facing you, press the release the corresponding connectors on the battery compartment and insert in the direction of the arrow. © 2007 Nokia. All rights reserved. 13 - Nokia 002C9N1 | User Guide - Page 14
charge the battery until it has been fully charged according to the battery level indicator. Tip: If you have old compatible Nokia chargers, you can use them with the Nokia E51 by attaching the CA-44 charger adapter to the old charger. The adapter is available as a separate enhancement. Charge the - Nokia 002C9N1 | User Guide - Page 15
talk applications. 16 - Notification light and light sensor 17 - Microphone 18 - Headset connector 19 - Wrist strap hole 20 - Mini-USB port 21 - Charger connector © 2007 Nokia. All rights reserved. 15 - Nokia 002C9N1 | User Guide - Page 16
standby mode. When you switch the device on, it may recognise the SIM card provider and configure some settings automatically. You can also contact your service provider for the correct settings. 16 © 2007 Nokia. All rights reserved. - Nokia 002C9N1 | User Guide - Page 17
> Tools > Settings > General > Security > Phone and SIM card > Keypad autolock period. To lock the keys manually in the standby mode, press the left selection and *. © 2007 Nokia. All rights reserved. Display indicators The device is being used in a GSM network (network service). The bar next to - Nokia 002C9N1 | User Guide - Page 18
service). All calls are forwarded to another number. If you have two phone lines, a number indicates the active line. A headset is connected to the device. The connection to a headset with Bluetooth connectivity has been lost. A hands-free car kit is connected to the device. 18 © 2007 Nokia - Nokia 002C9N1 | User Guide - Page 19
have an incoming or ongoing phone call. In this mode, you cannot make PTT calls. Nokia support and contact information Check www.nokia-asia.com/E51/support or your local Nokia website for the latest guides, additional information, downloads, and services related to your Nokia product. You may also - Nokia 002C9N1 | User Guide - Page 20
as contacts and calendar entries, from a compatible Nokia device. See "Transfer content between devices", p. guided through the settings configuration. If there is no SIM card inserted, you need to select the home country of your service provider, and your service provider. If the country or service - Nokia 002C9N1 | User Guide - Page 21
not able to use Settings wizard, visit the Nokia phone settings web site. Standby modes Your device has name, and press the call key again to call the number. To call your voice mailbox (network service), press and hold 1. To view calendar information, scroll right. To write and send text messages, - Nokia 002C9N1 | User Guide - Page 22
, press and hold the shift key, and select the text with the scroll key. Press and hold the shift key, and select Copy. 22 © 2007 Nokia. All rights reserved. - Nokia 002C9N1 | User Guide - Page 23
content, such as contacts, from a compatible Nokia device to your new Eseries device using Bluetooth device model. If the other device supports synchronisation, you can also synchronise data the other device, open the message, and follow the instructions on the display. On your new Eseries device, - Nokia 002C9N1 | User Guide - Page 24
in the Transfer main view: Synchronise data with a compatible device if the other device supports synchronisation. With synchronisation, you can keep the data up-to-date in both devices. from the list, or select Download sounds to open a bookmark folder 24 © 2007 Nokia. All rights reserved. - Nokia 002C9N1 | User Guide - Page 25
contact group. Phone calls coming from outside that group have a silent alert. • Profile name - You can give a name to a new profile or rename an existing profile. The General and Offline profiles cannot be renamed. Change the display theme Select Menu > Tools > Themes. To change the theme used in - Nokia 002C9N1 | User Guide - Page 26
Options > Preview. To start using the selected theme, select Options > Set. To adjust the volume of the ringing tone, select Menu > Tools > Profiles > Options > Personalise > Ringing volume. Volume control To adjust the earpiece volume during a phone call or the volume of the media applications - Nokia 002C9N1 | User Guide - Page 27
backspace key. Example: When you have an active phone call and want to check your calendar, press the home key to and open the Web application. Select a bookmark or enter the web address manually, and select Go to. To return to your message, press and hold Nokia. All rights reserved. 27 - Nokia 002C9N1 | User Guide - Page 28
data type, select Menu > Options > Memory details > Phone memory or Memory card. Tip: To ensure that you not be formatted for your device, or the card has a corrupted file system. Your Nokia device supports the FAT16 and FAT32 file system for memory cards. MicroSD This device uses a microSD memory - Nokia 002C9N1 | User Guide - Page 29
use the memory card in another device, you are asked for the password. Not all memory cards support password protection. To remove the memory card password, select Options > Remove password. When you remove the insert a number, press and hold the number key. © 2007 Nokia. All rights reserved. 29 - Nokia 002C9N1 | User Guide - Page 30
the communication quality and may cause the device to operate at a higher power level than otherwise needed and may reduce the battery life. 30 © 2007 Nokia. All rights reserved. - Nokia 002C9N1 | User Guide - Page 31
Help > Help. You can select categories for which you want to see instructions. Select a category, such as Messaging, to see what instructions (help topics) are available. While you are reading the topic, scroll left how to use it. Select Menu > Help > Tutorial. © 2007 Nokia. All rights reserved. 31 - Nokia 002C9N1 | User Guide - Page 32
service area of a cellular network. To make calls and services from your service provider may vary call waiting function (network service) is activated, press the code to activate the phone function. When the call, enter the phone number, including phone number. To end the call or cancel the call - Nokia 002C9N1 | User Guide - Page 33
network operator or service provider. While talking, you can see a real-time, two-way video between you and the recipient of the call, if the recipient has a compatible mobile phone. The video image and use the earpiece, select Options > Activate handset. © 2007 Nokia. All rights reserved. 33 - Nokia 002C9N1 | User Guide - Page 34
enter the recipient's SIP address manually to send an invitation to the .. Your device supports voice calls over phones, and between a VoIP device and a traditional telephone. To make or receive a net call, your device must be within WLAN coverage, for example. The availability of the net call service - Nokia 002C9N1 | User Guide - Page 35
profile must support secure net calls. Connect to the net call service To make or receive a net call, your device must be connected to a net call service. If you have selected automatic login, your device automatically connects to the net call service. If you login to the service manually, select an - Nokia 002C9N1 | User Guide - Page 36
speed dialling key, and select Options > Change. Call divert Select Menu > Tools > Settings > Phone > Call divert. Divert incoming calls to your voice mailbox or to another phone number. For details, contact your service provider. Select to divert voice or fax calls, and select from the following - Nokia 002C9N1 | User Guide - Page 37
Phone > Call barring. You can bar the calls that can be made or received with the device (network service ). To change the settings, you need the barring password from your service service provider. Bar net calls Select Menu > Tools > Settings > Phone or other automated phone services. Send a - Nokia 002C9N1 | User Guide - Page 38
To dial a telephone number, select Dialler. To use voice commands to make a phone call, select Voice commands. To have your received messages read aloud, select Message reader. comm.. Use voice commands to make phone calls and launch applications, profiles, or other functions on the device. 38 © - Nokia 002C9N1 | User Guide - Page 39
command, press and hold the voice key, and say the name of the profile. To change the voice command, select Profiles > Options > Change command. © 2007 Nokia. All rights reserved. 39 - Nokia 002C9N1 | User Guide - Page 40
calls only if the network supports these functions, the device is switched on and within the network service area. Call and data or web pages are shown as packet data connections. To add the phone number from a communication event to Contacts, select Options > Save to 2007 Nokia. All rights reserved. - Nokia 002C9N1 | User Guide - Page 41
", p. 23. Contacts Select Menu > Contacts. You can save and update contact information, such as phone numbers, home addresses, or e-mail addresses of your contacts. You can add a personal ringing tone contacts starting with the letters appear on the display. © 2007 Nokia. All rights reserved. 41 - Nokia 002C9N1 | User Guide - Page 42
contact, select Options > Edit. Tip: You can also use Nokia PC Suite to add and edit contacts. To send contact information You can select a ringing tone for a contact or contact group. If the caller's phone number is sent with the incoming call and your device recognises the number, the ringing tone - Nokia 002C9N1 | User Guide - Page 43
This setting is only shown if supported by your SIM card. To restrict calls from your device to selected phone numbers, select Options > Activate fixed your calendar data with a compatible computer, use Nokia PC Suite. See the Nokia PC Suite guide. Create calendar entries You can create the following - Nokia 002C9N1 | User Guide - Page 44
a response to the sender of the calendar entry by email. Select Yes, and the message is saved in Outbox to wait for sending. 44 © 2007 Nokia. All rights reserved. - Nokia 002C9N1 | User Guide - Page 45
. In the month view, you can see the entire month at one time. Each row shows one week of dates. The active month is © 2007 Nokia. All rights reserved. 45 - Nokia 002C9N1 | User Guide - Page 46
internet access point settings manually. See "Internet access points", p. 98. Check the availability of services, pricing, and fees with your service provider. Service providers also give you instructions on how to use their services. If the web page is unreadable or not supported and garbage code - Nokia 002C9N1 | User Guide - Page 47
) is secure. The service provider secures the data transmission be required for some services, such as banking services. You are notified if enter the web address manually, and select Go to. Use only services that you trust after each use. The information or services you have accessed are stored in the cache - Nokia 002C9N1 | User Guide - Page 48
contains imaging, audio, and pop-up settings. • Privacy contains settings related your privacy. • Web feeds contains settings related to web feeds and blogs. 48 © 2007 Nokia. All rights reserved. - Nokia 002C9N1 | User Guide - Page 49
, cell broadcast messages, and special messages containing data, and send service commands. Before sending or receiving messages, you may need to do the following: • Insert a valid SIM card in the device and be located in the service area of a cellular network. • Verify that the network supports the - Nokia 002C9N1 | User Guide - Page 50
reader. Edit the voice properties To set the language for the message reader, select Language. To download additional languages to your device, visit the Nokia web site or use the Download! application. To set the speaking voice, select Voice. The voice is languagedependent. To set the speaking rate - Nokia 002C9N1 | User Guide - Page 51
the e-mail settings correctly. To do this, use the mailbox guide, or define the account manually. See "E-mail account settings", p. 60. Contact your service provider for the correct settings. Set up your e-mail With the asks Connect to mailbox?, select Yes. © 2007 Nokia. All rights reserved. 51 - Nokia 002C9N1 | User Guide - Page 52
to other recipients, or the Bcc field to send a blind copy to recipients. 3. In the Subject field, enter the subject of the e-mail. 52 © 2007 Nokia. All rights reserved. - Nokia 002C9N1 | User Guide - Page 53
> Phone (header remains). To delete e-mail both from the device and the remote server, select Options > Delete > Phone and supports text messages beyond the limit for a single message. Longer messages are sent as two or more messages. Your service > Send. © 2007 Nokia. All rights reserved. 53 - Nokia 002C9N1 | User Guide - Page 54
are sure that your message centre is able to convert text messages into these other formats. Contact your service provider. 2. Select Options > Copy. 3. Select a folder and OK to begin copying. To view . To use a template, select Options > Insert > Template. 54 © 2007 Nokia. All rights reserved. - Nokia 002C9N1 | User Guide - Page 55
configured the multimedia message settings. If not, use Settings wizard, or contact your service provider for the correct settings. See "Multimedia message settings", p. 60. Create options for the current multimedia message, select Options > Sending options. © 2007 Nokia. All rights reserved. 55 - Nokia 002C9N1 | User Guide - Page 56
the recipients of the message from Contacts, or enter the recipients' phone numbers or e-mail addresses manually in the To field. 3. Enter the text of the message, may only be viewed in compatible devices that support presentations. They may appear different in different devices. 56 © 2007 - Nokia 002C9N1 | User Guide - Page 57
scrolling, and scroll to see the entire presentation. To find phone numbers and e-mail or web addresses in the presentation, select device, select Options > Forward. If the server does not support multimedia message forwarding, this option is not available. 1. In © 2007 Nokia. All rights reserved. 57 - Nokia 002C9N1 | User Guide - Page 58
must support this Service command. Enter the service request text and select Options > Send. Cell broadcast Select Menu > Messaging > Options > Cell broadcast. With the cell broadcast network service, you can receive messages on various topics from your service provider, such 58 © 2007 Nokia - Nokia 002C9N1 | User Guide - Page 59
service provider. Cell broadcast messages cannot be received when the device is in the remote SIM mode. A packet data (GPRS) connection may prevent cell broadcast reception. Cell Character encoding - Select Reduced support to use automatic character service). © 2007 Nokia. All rights reserved. 59 - Nokia 002C9N1 | User Guide - Page 60
supported by the network or the receiving device. To receive warnings about including such content, select Guided service Manual to retrieve multimedia messages from the message centre manually log (network service). Receiving service account, the mailbox guide opens and helps you your service provider - Nokia 002C9N1 | User Guide - Page 61
. • Retrieval days - Select the days on which e-mail is retrieved to your device. • Retrieval hours - Define the hours between which the e-mail is retrieved. © 2007 Nokia. All rights reserved. 61 - Nokia 002C9N1 | User Guide - Page 62
> Options > Settings > Service message. To receive service messages from service providers, select Service messages > On. To select how to download services and service message content, select Options > Settings > Service message > Download messages > Automatically or Manually. If you select - Nokia 002C9N1 | User Guide - Page 63
Office Tools Nokia Office Tools support mobile business and enable effective communication with work Settings for Active notes Select Settings. To save notes to your device memory, select Memory in use > Phone memory. To save them to a memory card, select Memory in use > Memory card. To change the - Nokia 002C9N1 | User Guide - Page 64
, Quicksheet for Microsoft Excel, Quickpoint for Microsoft PowerPoint, and Quickmanager for purchasing software. You can view Microsoft Office 2000, XP, and 2003 documents 64 © 2007 Nokia. All rights reserved. - Nokia 002C9N1 | User Guide - Page 65
. With Nokia Team Suite, you can create, edit, and delete teams, and send messages, view teams' web pages and communication history, and make phone calls to teams. Work with teams To create a new team, select Options > Team > Create new. Give a name for the team and enter the conference call service - Nokia 002C9N1 | User Guide - Page 66
edit the details of a member, select Options > Members > Edit. To see to which teams a member belongs, select Options > Members > Belongs to teams. Nokia Team Suite settings To select whether to see the team members' pictures on the display, select Options > Settings > View contact image. To define - Nokia 002C9N1 | User Guide - Page 67
a message or a file, select Options > Print. To print to a file, select Options > Printing options > Print to file, and determine the location for the file. © 2007 Nokia. All rights reserved. 67 - Nokia 002C9N1 | User Guide - Page 68
whether you want to activate the device for calls. Select No to switch off the device or Yes to make and receive calls. 68 © 2007 Nokia. All rights reserved. - Nokia 002C9N1 | User Guide - Page 69
allow the mobile phone network to update the time, date, and time zone information to your device (network service), select Network Nokia Wireless Keyboard Wireless keyboards are available as separate enhancements. To set up the Nokia Wireless Keyboard or other compatible wireless keyboard supporting - Nokia 002C9N1 | User Guide - Page 70
indicator of your keyboard blinks slowly; the keyboard is ready for use. For details on the operation and maintenance of your keyboard, see its user guide. 70 © 2007 Nokia. All rights reserved. - Nokia 002C9N1 | User Guide - Page 71
Menu > Media > Camera. Capture an image Your device supports an image capture resolution of up to 1600x1200 pixels. The image resolution in this guide may appear different. To capture an image, use the display Pause; to resume the recording, select Continue. © 2007 Nokia. All rights reserved. 71 - Nokia 002C9N1 | User Guide - Page 72
Move to folder, New folder, Move to memory card, Copy to memory card, Copy to phone mem., or Move to phone mem.. To download files into Gallery using the browser, select Downl. graphics, Downld. videos, Downld to normal view, select Options > Normal screen. 72 © 2007 Nokia. All rights reserved. - Nokia 002C9N1 | User Guide - Page 73
supported content types may vary depending on the service provider. To share files online, you must have an account with an online image sharing service. You can usually subscribe to such a service on the web page of your service provider. Contact your service © 2007 Nokia. All rights reserved. 73 - Nokia 002C9N1 | User Guide - Page 74
connection problem causes manually, select Options > Settings > Video or Streaming. Music player Select Menu > Media > Music player. With Music player, you can play music files, and create and listen to track lists. Music player supports files with extensions such as MP3 and AAC. 74 © 2007 Nokia - Nokia 002C9N1 | User Guide - Page 75
, saved, or the currently playing track list, select Options > Add to track list. To delete all tracks from a category or subcategory, select Options > Delete. © 2007 Nokia. All rights reserved. 75 - Nokia 002C9N1 | User Guide - Page 76
minutes of a voice memo, save the voice recording as a sound clip, and play the sound clip. Recorder supports the AMR file format. You can also press the voice key to open the Recorder application. If you have and the maximum length for the clip is one minute. 76 © 2007 Nokia. All rights reserved. - Nokia 002C9N1 | User Guide - Page 77
service. Service providers may differ in their support of features. If IM is not available from your service provider, it may not appear in the menu of your device. Contact your service On app. start-up. To connect to the server manually, select Manual and log into the server in the IM main view - Nokia 002C9N1 | User Guide - Page 78
groups Open IM groups. IM groups is available only if you are logged into an IM server, and the server supports IM groups. To create an IM group, select Options > Create new group. To join an IM group or to IM user from your IM contacts, or enter the user ID. 78 © 2007 Nokia. All rights reserved. - Nokia 002C9N1 | User Guide - Page 79
> Organise. Radio Select Menu > Media > Radio. The quality of the radio broadcast depends on the coverage of the radio station in that particular area. © 2007 Nokia. All rights reserved. 79 - Nokia 002C9N1 | User Guide - Page 80
manually, select Options > Manual tuning. To view available stations based on location, select Options > Station directory (network service service, contact your service visual service. If the visual radio service ID its visual service ID is service, select Options > Station > Start visual service - Nokia 002C9N1 | User Guide - Page 81
a radio station on the internet, select a station from the station directory, search stations by their name from the Nokia Internet Radio service, or select Options > Add station manually. When you have found the correct station, select Listen. To stop the playback, press the scroll key. To resume - Nokia 002C9N1 | User Guide - Page 82
of the PTT service. Log in to PTT service If you have set Application start-up on in User settings, PTT automatically logs in to the service when started. If not, you must log in manually. To log in to the PTT service manually, select Options > Switch PTT on. 82 © 2007 Nokia. All rights reserved - Nokia 002C9N1 | User Guide - Page 83
setting of your device is set to Beep once or Silent, or there is an ongoing phone call, you cannot make or receive PTT calls. Make a PTT call Warning: Do not Send invitation. To view the currently active users of a channel, select Options > Active members. © 2007 Nokia. All rights reserved. 83 - Nokia 002C9N1 | User Guide - Page 84
closed. Exit PTT To exit PTT, select Options > Exit. Select Yes to log out and close the service. Select No if you want to keep the application active in the background. About GPS and satellite signals The may take from a couple of seconds to several minutes. 84 © 2007 Nokia. All rights reserved. - Nokia 002C9N1 | User Guide - Page 85
, and save locations and send them to compatible devices. You can also purchase licences for extra services, such as travel guides, traffic information, and navigation service with voice guidance. These services are not available for all countries or regions. If you browse to an area which is not - Nokia 002C9N1 | User Guide - Page 86
> Roaming warning > On (shown only when you are online). For details and roaming costs, contact your service provider. Tip: To avoid data transfer costs, you can also use Maps without an internet connection, and partial address of the location in the search 86 © 2007 Nokia. All rights reserved. - Nokia 002C9N1 | User Guide - Page 87
car or on foot, if you have purchased a licence for these extra services, select Options > Start driving or Start walking. To save the route, can pay for the licence through a credit card or in your phone bill, if supported by your service provider. Tip: To try out navigation for three days with - Nokia 002C9N1 | User Guide - Page 88
a licence for the traffic information service, select Options > Extras > guides contain videos and audio clips. The guides must be purchased and downloaded before use. Downloading travel guides may involve the transmission of large amounts of data through your service provider's 88 © 2007 Nokia - Nokia 002C9N1 | User Guide - Page 89
To download a new guide to your device, scroll to the desired guide, and select Yes. You can pay for the guides through a credit card or in your phone bill, if supported by your service provider. GPS data Select your device for later use in different location- © 2007 Nokia. All rights reserved. 89 - Nokia 002C9N1 | User Guide - Page 90
service). Create a landmark To create a landmark, select Options > New landmark. Select Current position to make a network request for the latitude and longitude coordinates of your current location, Use map to select the location from a map, or Enter manually phone Nokia. All rights reserved. - Nokia 002C9N1 | User Guide - Page 91
To find out how to navigate to the received landmark, select Options > Show route. © 2007 Nokia. All rights reserved. 91 - Nokia 002C9N1 | User Guide - Page 92
5G, indicated by ) is a network service in UMTS networks and provides high-speed data downloads. When HSDPA support in the device is activated and the use your device as a modem. For more information about Nokia PC Suite, see the Nokia PC Suite guide. Data cable To avoid damaging the memory card, do - Nokia 002C9N1 | User Guide - Page 93
your PC to the web, connect the data cable, and select Connect PC to web. To synchronise the music in your device with Nokia Music Player, install the Nokia Music Player software on your PC, connect the data cable, and select Media transfer. To change the USB mode you normally use with - Nokia 002C9N1 | User Guide - Page 94
the vicinity. 2. Select Bluetooth > On. 3. Select My phone's visibility > Shown to all or Define period. If you select supports the File Transfer Profile Client service (for example, a laptop computer). A Bluetooth connection is disconnected automatically after sending or receiving data. Only Nokia - Nokia 002C9N1 | User Guide - Page 95
automatic, or No to confirm the connection manually every time a connection attempt is made. After enhancement user guide for the passcode and further instructions. To Bluetooth connectivity, select Bluetooth > Off or My phone's visibility > Hidden. Do not pair with Nokia. All rights reserved. 95 - Nokia 002C9N1 | User Guide - Page 96
device that supports Bluetooth wireless your device, see the Nokia web site and your car kit user guide. Use the SIM access start a search for compatible devices. For instructions, see the user guide of your car kit. 4. Select your not need network or SIM services. To make connections between your - Nokia 002C9N1 | User Guide - Page 97
point. The active WLAN connection is ended when you end the data connection. You can also end the connection manually. See "Connection manager", p. 101. You can use WLAN during a voice call or when packet data is the risk of unauthorised access to your data. © 2007 Nokia. All rights reserved. 97 - Nokia 002C9N1 | User Guide - Page 98
• Access point name - Enter the name for the access point. The name is usually provided by your service provider. • User name - Enter your user name if required by the service provider. User names are often case-sensitive and provided by your service provider. 98 © 2007 Nokia. All rights reserved. - Nokia 002C9N1 | User Guide - Page 99
service provider. The password is often case-sensitive and provided by the service your device. • Phone IP address - Enter by your service provider. service. Set up an access point for WLAN manually service set identifier (SSID), that is, the name that identifies the specific WLAN, select Enter manually - Nokia 002C9N1 | User Guide - Page 100
usually chosen automatically. To enter the channel number (1-11) manually, select User defined. • Proxy server address - Enter Nokia PC Suite. For more information, see the Nokia PC Suite guide. • You must subscribe to the appropriate network services from your service provider or internet service - Nokia 002C9N1 | User Guide - Page 101
on the connection type. To end the selected network connection, select Options > Disconnect. To end all active network connections simultaneously, select Options > Disconnect all. © 2007 Nokia. All rights reserved. 101 - Nokia 002C9N1 | User Guide - Page 102
and its contents. Important: Your device can only support one antivirus application. Having more than one application with the device has been locked, enter the lock code to activate the phone function. When the device is locked, calls may be possible to the 102 © 2007 Nokia. All rights reserved. - Nokia 002C9N1 | User Guide - Page 103
. With the fixed dialling service, you can restrict calls from your device to certain phone numbers. Not all SIM cards support the fixed dialling service. Contact your service provider for more information. When not have the correct certificate in your device. © 2007 Nokia. All rights reserved. 103 - Nokia 002C9N1 | User Guide - Page 104
, software packages, and other data. Only trusted certificates can be used to verify services and software. Important: Even if the use of certificates makes the risks involved in • Internet - E-mail and graphics. • App. installation - New Java™ application. 104 © 2007 Nokia. All rights reserved. - Nokia 002C9N1 | User Guide - Page 105
> Tools > Memory > Options > Back up phone memory. To restore information from the memory card to connect your device to a compatible computer and use Nokia PC Suite to back up data. Remote configuration . You may receive these settings from your service provider in a configuration message. If not, - Nokia 002C9N1 | User Guide - Page 106
may increase when you use these applications. Tip: When browsing web pages, you can download an installation file and install it immediately. Note, 106 © 2007 Nokia. All rights reserved. - Nokia 002C9N1 | User Guide - Page 107
has been installed and removed, and the date of the installation or removal. If you encounter problems with the device after installing a software package, use this list to find out which software package application to create a data connection to the network. © 2007 Nokia. All rights reserved. 107 - Nokia 002C9N1 | User Guide - Page 108
content, to back up both the activation keys and the content, use the backup feature of Nokia PC Suite. Other transfer methods may not transfer the activation keys which need to be restored device again. For more information, contact your service provider. 108 © 2007 Nokia. All rights reserved. - Nokia 002C9N1 | User Guide - Page 109
that you cannot send the file to another device. • Content in phone - Yes means that the file is in the device and the path service provider. The available applications you can synchronise may vary. Contact your service provider for more information. Create a synchronisation profile There is a Nokia - Nokia 002C9N1 | User Guide - Page 110
items, such as latest applications and related documents, to your device from the web. The items are categorised under catalogs and folders provided by Nokia or independent service providers. Some items may be chargeable, but you can usually preview them free of charge. Download! uses your network - Nokia 002C9N1 | User Guide - Page 111
select Options > Homepage. The available options may vary depending on your service provider, the selected item, and the view you are in. Download! confirmation query to be shown before buying an item. Software updates Nokia may produce software updates that may offer new features, enhanced - Nokia 002C9N1 | User Guide - Page 112
applications. Some settings may be preset for the device or sent to you in a special message by your service provider. You may not be able to change such settings. Select the setting you want to edit to welcome note, enter your own text, or select an image. 112 © 2007 Nokia. All rights reserved. - Nokia 002C9N1 | User Guide - Page 113
settings To set the language used on the device display, select Language > Phone language. To select the language in which you write notes and messages, select you have received a new message or when you have missed a phone call. To set the length of time you want the notification light to blink, - Nokia 002C9N1 | User Guide - Page 114
date, and time zone information automatically (network service), select Network operator time > Auto-update. . To let the device answer phone calls automatically after 5 seconds when following security settings: • Phone and SIM card - Adjust code, select Phone and SIM card > PIN code. The new code - Nokia 002C9N1 | User Guide - Page 115
to ask for the lock code when an unknown, new SIM card is inserted into your device, select Phone and SIM card > Lock if SIM card changed. The device maintains a list of SIM cards that if the function is active on the network, select Options > Check status. © 2007 Nokia. All rights reserved. 115 - Nokia 002C9N1 | User Guide - Page 116
settings Select Menu > Tools > Settings > Phone > Network. To select the network mode, Operator selection and Manual to choose from Cellular Network (MCN), select Cell info display > On. may be preset for your device by your service provider, and you may not be able to Nokia. All rights reserved. - Nokia 002C9N1 | User Guide - Page 117
services or to browse web pages, you must first define access points for these services. Some or all access points may be preset for your device by your service > Packet data. Your device supports packet data connections, such as in a supported network, provided by your service provider to manually - Nokia 002C9N1 | User Guide - Page 118
and authorises devices to access a wireless network, and prevents access if the authorisation process fails. Select WLAN security settings and from the following: 118 © 2007 Nokia. All rights reserved. - Nokia 002C9N1 | User Guide - Page 119
plug-ins make possible the use of various EAP methods (network service). You can view the EAP plug-ins currently installed in your device (network service). EAP plug-ins 1. To define the EAP plug-in settings the device help for more information on EAP plugins. © 2007 Nokia. All rights reserved. 119 - Nokia 002C9N1 | User Guide - Page 120
profile. Edit SIP profiles Select Options > Edit, and select from the following: • Profile name - Enter a name for the SIP profile. • Service profile - Select IETF or Nokia 3GPP. • Default access point - Select the access point to use for the internet connection. • Public user name - Enter your user - Nokia 002C9N1 | User Guide - Page 121
SIM card may not support the access point control service. Contact your service provider for more information. data connections to the control list, select Options > Add name manually. To enable connections to an operator-provided access point, create an . © 2007 Nokia. All rights reserved. 121 - Nokia 002C9N1 | User Guide - Page 122
and hold to call your voice mailbox. Number key (2-9) Call a phone number using speed dialling. You must first activate speed dialling at Menu > Tools > Settings > Phone > Call > Speed dialling > On. Web * # 2 5 Call key 0 Send the image. Zoom out. 122 © 2007 Nokia. All rights reserved. - Nokia 002C9N1 | User Guide - Page 123
up in the zoomed image. 8 Scroll down in the zoomed image. 3 Rotate clockwise. 1 Rotate counterclockwise. * Switch between the full screen size and normal view. © 2007 Nokia. All rights reserved. 123 - Nokia 002C9N1 | User Guide - Page 124
use of the web site, what you are interested in, what you want to read, and so on. Domain name service. An internet service that translates domain names such as www.nokia.com into IP addresses such as 192.100.124.195. Domain names are easier to remember but this translation is needed - Nokia 002C9N1 | User Guide - Page 125
service. GPRS enables wireless access for mobile phones to data networks (network service service provider. During a voice call, you cannot establish a GPRS connection, and any existing GPRS connection is put on hold unless the network supports to access certain functions supported by the SIM card. - Nokia 002C9N1 | User Guide - Page 126
that you can send to your operator or service provider with your device. Voice over internet protocol technology. VoIP is a set of protocols that facilitate phone calls over an IP network, such as method for WLAN. Wi-Fi Protected Access 2. Security method for WLAN. © 2007 Nokia. All rights reserved. - Nokia 002C9N1 | User Guide - Page 127
any approval or warranty, and may be dangerous. An extensive range of enhancements is available for your device. Please visit www.nokia-asia.com/enhancements for more details. For availability of the enhancements, please check with your local dealer. Enhancements Practical rules about accessories - Nokia 002C9N1 | User Guide - Page 128
Troubleshooting To see frequently asked questions about your device, visit the product support pages at the Nokia web site. Q: What profile is not in use in your device. The WLAN access point may use a hidden service set identifier (SSID). You can only access networks that use a hidden SSID if you - Nokia 002C9N1 | User Guide - Page 129
you can specify that your Nokia device does not scan, or > Never. You can still manually scan for available WLAN networks and connection problems. Try again closer to the access point. Q: Why do I have problems with ? A: The contact card does not have a phone number, an address, or an e-mail address. - Nokia 002C9N1 | User Guide - Page 130
problems connecting the device to my PC? A: Ensure that you have the latest version of Nokia PC Nokia PC Suite, see the help function on Nokia PC Suite or visit the support pages of the Nokia Show WLAN availability > Never. You can still manually scan for available WLAN networks and connect to WLAN - Nokia 002C9N1 | User Guide - Page 131
Battery and charger information Your device is powered by a rechargeable battery. The battery intended for use with this device is BP-6MT . Nokia may make additional battery models available for this device. This device is intended for use when supplied with power from the following chargers: AC - Nokia 002C9N1 | User Guide - Page 132
deform, puncture, or shred cells or batteries. In the you believe the battery has been damaged, take it to a service centre for inspection before continuing to use it. Use the battery believe that your battery is not an authentic, original Nokia battery, you should refrain from using it. If - Nokia 002C9N1 | User Guide - Page 133
damage to your device and its enhancements. It may also invalidate any approval or warranty applying to the device. To find out more about original Nokia batteries, visit www.nokia-asia.com/batterycheck. © 2007 Nokia. All rights reserved. 133 - Nokia 002C9N1 | User Guide - Page 134
damage electronic circuit boards. • Do not attempt to open the device other than as instructed in this guide. • Do not drop, knock, or shake the device. Rough handling can break properly, take it to the nearest authorised service facility for service. 134 © 2007 Nokia. All rights reserved. - Nokia 002C9N1 | User Guide - Page 135
of any radio transmitting equipment, including wireless phones, may interfere with the functionality of inadequately in health care facilities when any regulations posted in these areas instruct you to do so. Hospitals or health care facilities may be pocket. © 2007 Nokia. All rights reserved. 135 - Nokia 002C9N1 | User Guide - Page 136
potentially explosive atmosphere, and obey all signs and instructions. Potentially explosive atmospheres include areas where you would the device at refuelling points such as near gas pumps at service stations. Observe restrictions on the use of radio equipment in 2007 Nokia. All rights reserved. - Nokia 002C9N1 | User Guide - Page 137
user-programmed functions. If your device supports voice calls over the internet (internet calls), activate both the internet calls and the cellular phone. The device will attempt to make emergency reach the network. That amount changes depending on a number © 2007 Nokia. All rights reserved. 137 - Nokia 002C9N1 | User Guide - Page 138
values may vary depending on national reporting and testing requirements and the network band. Additional SAR information may be provided under product information at www.nokia-asia.com. 138 © 2007 Nokia. All rights reserved. - Nokia 002C9N1 | User Guide - Page 139
by a different warranty period (hereinafter "Warranty Period"). The different Warranty Periods are: How to get warranty service If you wish to make a claim under the Limited Warranty, you may call the Nokia call centre (where this is available and please note national rates apply to calls) and/or - Nokia 002C9N1 | User Guide - Page 140
does not cover user manuals or any third instructions provided by Nokia (e.g. as set out in the Product's user guide) and/or e) other acts beyond the reasonable control of Nokia the battery enclosure or the cells are broken or show by anyone other than an authorised service centre, if it is repaired - Nokia 002C9N1 | User Guide - Page 141
the SIM card and cellular and/or other network or system on which the Product operates. Therefore, Nokia will not accept responsibility under this warranty for the operation, availability, coverage, services or range of the cellular or other network or system. Before the Product can be repaired or - Nokia 002C9N1 | User Guide - Page 142
; and in the case of services: the supplying of the services again or the payment of the cost of having the services supplied again. which could be sophisticated electronic device. Nokia strongly encourages you to familiarise yourself with the user guide and instructions provided with and for - Nokia 002C9N1 | User Guide - Page 143
121 applications common actions 22 installing 107 modifying installations 107 shortcuts 113 attachments e-mail 52 multimedia messages 57 sound clips 57 © 2007 Nokia. All rights reserved. audio files details 74 sending 74 autolock period 114 B background image 25 backing up data 105 battery charge - Nokia 002C9N1 | User Guide - Page 144
clips 71 settings 72 car kit remote SIM access 95 cell broadcast 58 settings 62 certificates details 104 settings 104 charging the 27 converting currencies 67 measurements 66 currency conversions 67 customer service 19 D date settings 114 destination removing 89 setting Nokia. All rights reserved. - Nokia 002C9N1 | User Guide - Page 145
internet calls 35 Internet radio listening 81 saving stations 81 searching 81 settings 82 J jad files 107 jar files 107 Java applications 107 © 2007 Nokia. All rights reserved. K key store 105 keyguard 17 keypad lock settings 114 locking 17 tones 113 keys 15 activation keys 108 shortcuts 113 WEP - Nokia 002C9N1 | User Guide - Page 146
rejection messages 115 cell broadcast settings 62 configuration messages 121 other settings 62 sending sound clips 57 service messages 58 text 34, 121 settings 121 network settings 116 Nokia PC Suite 92 Nokia support and contact information 19 Nokia Team Suite 65 action bar settings 66 editing - Nokia 002C9N1 | User Guide - Page 147
, 25 net call profile 34, 121 selecting ringing tones 24 © 2007 Nokia. All rights reserved. PTT contacts 83 created calls 83 creating a channel 83 71 remote configuration 105 remote lock 102 remote synchronisation 109 repair services 19 restoring original settings 115 ringing tones 42, 113 3-D 26 - Nokia 002C9N1 | User Guide - Page 148
121 Calendar 46 calls 115 camera 72 cell broadcast 62 certificate 104 clock 69 date Nokia Team Suite 66 packet data 117 positioning 85 printer 68 148 PTT 82 radio 81 RealPlayer 74 recorder 76 restoring 115 service basic standby mode 21 settings 113 support information 19 switching device on and - Nokia 002C9N1 | User Guide - Page 149
text input 29 Transfer log 23 transferring data 23 trip destination 89 trip meter 89 troubleshooting 128 U UPIN code changing 114 USB data cable 92 V vibrating alert 113 video calls making a call 33 © 2007 Nokia. All rights reserved. switching to voice call 33 video clips 71 details 74 playing 73 - Nokia 002C9N1 | User Guide - Page 150
The Nokia Care web support provides you with more information on our online services. INTERACTIVE DEMONSTRATIONS Learn how to set up your phone for the first time, and find out more about its features. Interactive Demonstrations give step-by-step instructions on using your phone. USER'S GUIDE The - Nokia 002C9N1 | User Guide - Page 151
I FIND ANSWERS TO COMMON QUESTIONS? Look up the FAQ section at www.nokia-asia.com/faq for answers to your questions on your phone and other Nokia products and services. HOW DO I KEEP UP WITH NOKIA NEWS? Subscribe online at www.nokia-asia.com/signup and be the first to know about the latest products
-
 1
1 -
 2
2 -
 3
3 -
 4
4 -
 5
5 -
 6
6 -
 7
7 -
8
-
9
-
10
-
11
-
12
-
13
-
14
-
15
-
16
-
17
-
18
-
19
-
20
-
21
-
22
-
23
-
24
-
25
-
26
-
27
-
28
-
29
-
30
-
31
-
32
-
33
-
34
-
35
-
36
-
37
-
38
-
39
-
40
-
41
-
42
-
43
-
44
-
45
-
46
-
47
-
48
-
49
-
50
-
51
-
52
-
53
-
54
-
55
-
56
-
57
-
58
-
59
-
60
-
61
-
62
-
63
-
64
-
65
-
66
-
67
-
68
-
69
-
70
-
71
-
72
-
73
-
74
-
75
-
76
-
77
-
78
-
79
-
80
-
81
-
82
-
83
-
84
-
85
-
86
-
87
-
88
-
89
-
90
-
91
-
92
-
93
-
94
-
95
-
96
-
97
-
98
-
99
-
100
-
101
-
102
-
103
-
104
-
105
-
106
-
107
-
108
-
109
-
110
-
111
-
112
-
113
-
114
-
115
-
116
-
117
-
118
-
119
-
120
-
121
-
122
-
123
-
124
-
125
-
126
-
127
-
128
-
129
-
130
-
131
-
132
-
133
-
134
-
135
-
136
-
137
-
138
-
139
-
140
-
141
-
142
-
143
-
144
-
145
-
146
-
147
-
148
-
149
-
150
-
151
 |
 |

E51 User Guide
2222222
Issue 1.0