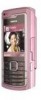
Nokia N72 User Guide
Nokia N72 - Smartphone 20 MB Manual
 |
View all Nokia N72 manuals
Add to My Manuals
Save this manual to your list of manuals |
Nokia N72 manual content summary:
- Nokia N72 | User Guide - Page 1
User's Guide Nokia N72-5 - Nokia N72 | User Guide - Page 2
at http:// www.nokia.com/phones/ declaration_of_conformity/ The crossed pending patents. T9 text input software Copyright (C) 1997-2007 Tegic Communications '. Except as required by applicable law, no warranties of any require assistance, contact your local service facility. This device complies with - Nokia N72 | User Guide - Page 3
connected 11 Your Nokia N72 12 Help 12 Tutorial 12 Useful shortcuts 12 Clock 14 Clock settings 14 World clock 14 Volume and loudspeaker control 15 File manager 15 View memory consumption 16 Memory low-free memory 16 Memory card tool 16 Format a memory card 17 Personalise your device - Nokia N72 | User Guide - Page 4
-self-timer 33 The flash 33 Adjust still image camera settings 33 Adjust color and lighting 34 Shooting modes 34 Edit images 35 Record videos 36 Edit video clips 37 Gallery 39 View images and video clips 40 Slide show 41 Albums 41 PrintOnline 42 Online sharing 43 Imaging 46 Image - Nokia N72 | User Guide - Page 5
Outbox-messages waiting to be sent 60 View messages on a SIM card 61 Messaging settings 61 Text messages 61 Multimedia messages 62 E-mail 63 Web service messages 65 Cell broadcast 65 Other settings 65 Radio 66 Listen to the radio 66 View visual content 67 Saved stations 67 Settings 67 - Nokia N72 | User Guide - Page 6
86 PC Create a new synchronisation profile Network 102 Enhancement settings 102 Voice commands 103 Application manager 103 Install applications and software 104 Remove applications and software 105 Application settings 105 Activation keys-handle copyright-protected files .105 Troubleshooting - Nokia N72 | User Guide - Page 7
Battery information 110 Charging and discharging 110 Nokia battery authentication guidelines 110 Care and maintenance 113 Additional safety information 114 Index 117 - Nokia N72 | User Guide - Page 8
or illegal. Read the complete user guide for further information. SWITCH ON SAFELY Do not switch the device on when wireless phone use is prohibited or when it SERVICE Only qualified personnel may install or repair this product. ENHANCEMENTS AND BATTERIES Use only approved enhancements and batteries - Nokia N72 | User Guide - Page 9
instructions for their use and explain what charges will apply. Some networks may have limitations that affect how you can use network services. For instance, some networks may not support all language-dependent characters and services. Your service provider may have requested that certain features - Nokia N72 | User Guide - Page 10
and information on using SIM card services, contact your SIM card vendor. This may be the service provider, network operator, or other vendor. Enhancements, batteries, and chargers Always switch the device off, and disconnect the charger before removing the battery. Check the model number of - Nokia N72 | User Guide - Page 11
technology to transfer files and connect to compatible enhancements. See 'Bluetooth connectivity', p. 83. Use a compatible USB data cable, for instance the Nokia Connectivity Cable CA-53, to connect to compatible devices, such as printers and PCs. Use a compatible memory card to transfer data - Nokia N72 | User Guide - Page 12
to as Nokia N72. Tutorial Help Your device has context-sensitive help. You can access the help from an application or from the main menu. When an application is open, to access help for the current view, select Options > Help. Example: To view instructions on how to create a contact card, start to - Nokia N72 | User Guide - Page 13
that are open, press and hold . If memory is low, the device may close some applications. The device saves any unsaved data before closing an application. Leaving applications running in the background increases the demand on battery power and reduces the battery life. • To change the profile, press - Nokia N72 | User Guide - Page 14
Your Nokia N72 Clock Press , and select Clock. To set a new alarm, type > Analogue or Digital. To allow the mobile phone network to update the time, date, and time zone information to your device (network service), cities are displayed. Select a city. You can add a maximum of 15 cities to the - Nokia N72 | User Guide - Page 15
, documents, and downloaded applications. The free memory available depends on how much data is already saved in the device memory. You can use a compatible memory card as extra storage space. Memory cards are rewritable, so you can delete and save data on a memory card. To browse files and folders - Nokia N72 | User Guide - Page 16
. Tip! To free memory from the device or from a memory card, use Image Store available in Nokia PC Suite to transfer images and video clips to a compatible PC. See the CD-ROM supplied with your device. To remove data to free memory, use File mgr., or go to the respective application. For example - Nokia N72 | User Guide - Page 17
Your Nokia N72 Keep all memory cards out of the reach of small children. Press , and select Tools > Memory. You can use a compatible memory card as extra storage space. It is also good to regularly back up the information in the device memory to a memory card. The information can be restored to the - Nokia N72 | User Guide - Page 18
network provider. This configuration may include changes in menu names, menu order, and icons. Contact your service provider for more information. • To use the standby display for fast access to your most frequently used applications Settings > Clock type > Analogue or > Settings > Phone > General > - Nokia N72 | User Guide - Page 19
, except make calls to certain emergency numbers, or use other features that require network coverage. To make calls, you must first activate the phone function by changing profiles. If the device has been locked, enter the lock code. Warning: Your device must be switched on to use Offline profile - Nokia N72 | User Guide - Page 20
Transfer application is sent to the other device as a message. 5 Open the message to install Transfer on the other device, and follow the instructions on the screen. 6 From your Nokia N72, select the content you want to copy from the other device. Content is copied from the memory and memory card of - Nokia N72 | User Guide - Page 21
standby mode is on. To change the default applications shortcuts: 1 Press , select Tools > Settings > Phone > Standby mode > Active standby apps., and press . 2 Highlight a shortcut to an application, and select Options > Change. 3 Select a new application from the list, and press . Some shortcuts - Nokia N72 | User Guide - Page 22
. Matching contacts are listed. Press to call. Select the call type Voice call. You must copy the contacts from your SIM card to Contacts before you can make a call this way. See 'Copy contacts', p. 29. To call your voice mailbox (network service), press and hold in the standby mode. See also 'Call - Nokia N72 | User Guide - Page 23
you want to assign the phone number, and select Options Your device supports enhanced voice card. To listen to the synthesized voice tag, open a contact card headset with the headset key, press and hold the headset key to start voice dialing. 2 A short tone is played, and Speak now is displayed - Nokia N72 | User Guide - Page 24
in the selected device language, and displays the name and number. After a the first available number of the following: Mobile, Mobile (home), Mobile (business), Telephone, Tel. (home), and call in progress if you have activated Call waiting (network service) in Tools > Settings > Call > Call - Nokia N72 | User Guide - Page 25
Call duration. Note: The actual time invoiced for calls by your service provider may vary, depending on network features, rounding off for billing, and so forth. To clear call duration timers, select Options > Clear timers. For this you need the lock code. See 'Security', 'Phone and SIM', p. 99. 25 - Nokia N72 | User Guide - Page 26
of the service provider, or access point. You can filter the general log to view just one type of event and create new contact cards based on the log information. Tip! If you want to see the duration of a voice call on the main display during an active call, select Options > Settings > Show call - Nokia N72 | User Guide - Page 27
Make calls Packet data counter and connection timer: To view how much data, measured in kilobytes, is transferred and how long a certain packet data connection lasts, scroll to an incoming or outgoing event indicated by Pack., and select Options > View details. 27 - Nokia N72 | User Guide - Page 28
the information, such as contacts, to the device later. See 'Memory card tool', p. 16. You can also use Nokia PC Suite to back up your contacts to a compatible PC. See the CD-ROM supplied with your device. Save names and numbers 1 Select Options > New contact. 2 Fill in the fields that you want, and - Nokia N72 | User Guide - Page 29
set as a default. Tip! You can synchronise your contacts to a compatible PC with Nokia PC Suite. See the CD-ROM supplied with your device. SIM directory and other SIM services Copy contacts If you have phone numbers stored on the SIM card, copy them to Contacts. Entries that are saved only on the - Nokia N72 | User Guide - Page 30
sent with the call and your device recognises it). 1 Press to open a contact card, or go to the groups list, and select a contact group. 2 Select contacts to the group. To rename a group, select Options > Rename, enter the new name, and select OK. Remove members from a group 1 In the groups list, - Nokia N72 | User Guide - Page 31
file format (High video quality mode). See 'Video settings', p. 37. You can also send images or a video in a multimedia message as an e-mail attachment, or by using Bluetooth connectivity. Tip! You can insert an image into a contact card. See 'Save names and numbers', p. 28. Your Nokia N72 supports - Nokia N72 | User Guide - Page 32
flash indicator (4) shows if the flash is set to Automatic ( ), On/ forced ( ), or Off ( ). • The resolution indicator (5) shows the selected image quality. See 'Adjust still image camera settings', p. 33. • The sequence mode indicator (6) shows goes into the battery saving mode if memory. You - Nokia N72 | User Guide - Page 33
setup > Flash > On/forced to use the flash. If the flash is set to Off or Automatic during bright conditions, the flash still emits a low light when an - E-mail, or Low Multimedia. The better the image quality, the more memory the image consumes. The quality of a zoomed picture is lower than that of - Nokia N72 | User Guide - Page 34
picture is, and the more memory it consumes. Add to flash', p. 33. White balance-Select the current lighting condition from the list. This allows the camera to reproduce colors more accurately. Colour tone-Select a color effect from the list. The display changes to match any settings made, showing - Nokia N72 | User Guide - Page 35
the user mode you can adjust Based on mode, Flash, White balance, Colour tone, and Reset user mode options. To copy the settings of another effect > Crop. Select Manual to crop the image size manually, or select a predefined aspect ratio from the list. If you select Manual, a cross appears on the - Nokia N72 | User Guide - Page 36
make lighting and flash effect on the resultant video. 2 To pause recording at any time, select Pause. The pause icon ( ) blinks on the display show the following: • The device memory ( ) and memory card ( ) indicators (1) show where the video is saved. • The current video length indicator (2) shows - Nokia N72 | User Guide - Page 37
view the video on a compatible TV or PC, select High video quality, which has CIF resolution (352x288) and file format .mp4. You cannot send video clips saved in the .mp4 format in a multimedia message. If you want to view the clip in mobile phones, select Normal, which has QCIF resolution (176x144 - Nokia N72 | User Guide - Page 38
from the video. Duplicate-Makes a copy of the selected sound clip. Set duration-Changes the length of the sound clip. Edit transition-There are three types of transitions: at the start of a video, at the end of a video, and transitions between video clips. A start transition can be selected when the - Nokia N72 | User Guide - Page 39
Bluetooth wireless technology or by using a memory card reader (enhancement). Gallery To store and organize your images, video clips, sound clips, playlists, and streaming links, press , and select Gallery. To open the gallery from the Camera application, select Options > Go to Gallery. In Camera - Nokia N72 | User Guide - Page 40
player application. See 'Music player', p. 77. Tip! You can transfer images from your device to a compatible PC with Nokia Phone Browser available in Nokia PC Suite. See the CD-ROM supplied with your device. To copy or move files to a compatible memory card or to device memory, select a file and - Nokia N72 | User Guide - Page 41
compatible memory card for printing, select Options > Print. See 'Image print', p. 46. To zoom an image, select Options > Zoom in. The zooming ratio is at the top of the display. The zooming ratio is not stored permanently. To delete an image or video clip, press . Slide show Use Slide show to view - Nokia N72 | User Guide - Page 42
In order to use PrintOnline, you must subscribe to the service with an online printing service provider and have at least one printing service configuration file installed. The files can be obtained from printing service providers that support PrintOnline. You can only print images that are in .jpeg - Nokia N72 | User Guide - Page 43
for details on subscribing to the service. For more information on compatible service providers, see www.nokia.com/support/ phones/N72. When you open the service for the first time in the Online sharing application, you are prompted to provide the user name and password. You can access the settings - Nokia N72 | User Guide - Page 44
the service and upload the files to the Web, select Options > Upload, or press . Open online service To view uploaded images and videos in the online service, and draft and sent entries in your device, in the Images & video folder, select Options > Online Services. If you have created a new account - Nokia N72 | User Guide - Page 45
the font size used to display text in draft and sent entries, or when you add or edit text to a new entry Advanced Service providers-to view or edit service provider settings, add a new service provider, or view details of a service provider. If you change the service provider, all the My accounts - Nokia N72 | User Guide - Page 46
a compatible USB data cable, Bluetooth connectivity, or a compatible memory card. You can only print images that are in .jpeg format. Nokia Connectivity cable CA-53, the printer is automatically displayed. If the default printer is not available, a list of available printing devices is displayed - Nokia N72 | User Guide - Page 47
content that is not compliant with 3GPP standards and, therefore, is not supported by this device. Tip! You can transfer music files from your device to a compatible memory card with Nokia Audio Manager available in Nokia PC Suite. See the CD-ROM supplied with your device. Play video or sound - Nokia N72 | User Guide - Page 48
fast forward, press and hold . • To rewind through the media file, press and hold . • To mute the sound, press and hold until is displayed. To turn on the sound, press and hold until you see . Stream content over the air Many service providers require you to use an Internet access point (IAP) for - Nokia N72 | User Guide - Page 49
muvee is saved in the Movie director muvee list. The muvee is played automatically after saving. Tip! To download new styles to your device, select Style downlds. (network service) from the Movie director main view. To create muvees, press , and select Imaging > Movie. Muvees are short, edited - Nokia N72 | User Guide - Page 50
file you want to move, press the scroll key. Then scroll to the file below which you want to place the marked file muvee view, select Options > Play. To create a new custom muvee by using the same style settings, select Settings to edit the following options: Memory in use-Select where to store your - Nokia N72 | User Guide - Page 51
service messages, cell broadcast messages, and send service commands. Note: Only devices that have compatible features can receive and display for network services, to your service provider, select Options > Service command in the main view of Messaging. Cell broadcast (network service) allows - Nokia N72 | User Guide - Page 52
your service provider. In the main view of Messaging, select Options > Cell broadcast. indicates number mode. is displayed when you are writing to which you can also add new words. When the dictionary becomes full all editors in the device. is displayed when you write text using predictive text - Nokia N72 | User Guide - Page 53
words that correspond to your key presses. Insert word-Add a word to the dictionary by using traditional text input. When the dictionary becomes full, a new word replaces the oldest added word. Edit word-Edit the word using traditional text input. This is available if the word is active (underlined - Nokia N72 | User Guide - Page 54
to create a message from any application that has the option Send. Select a file (image or text) to be added network may limit the size of MMS messages. If the inserted picture exceeds this limit, the device may make it smaller so that it can be sent by MMS. 1 Select New phone number or e-mail 54 - Nokia N72 | User Guide - Page 55
application, and select Options > Send > Via e-mail, if available. 8 To send the message, select Options > Send, or press . Your device supports the sending of text messages beyond the character limit for a single message. Longer messages are sent as a series of two or more messages. Your service - Nokia N72 | User Guide - Page 56
to Guided or Free). See 'Multimedia messages', p. 62. Tip! When you send a multimedia message to an e-mail address or a device that supports the receiving of large images, use the larger image size. If you are not sure of the receiving device, or the network does not support sending large files, it - Nokia N72 | User Guide - Page 57
from your network operator, service provider, or company information management department in a configuration message. To save the settings, select Options > Save all. Business card-To save the information to Contacts, select Options > Save business card. Certificates or sound files attached to - Nokia N72 | User Guide - Page 58
new e-mails you have in your remote mailbox. An extended notification may list more detailed information. Tip! If you receive a vCard file that has a picture attached, the picture is saved to contacts. Web service messages Web service a new mailbox, software or otherwise be harmful to your device or - Nokia N72 | User Guide - Page 59
offline. E-mail status icons: New e-mail (offline or online mode): the content has not been retrieved to your device. New e-mail: the content has been remote mailbox, select Options > Delete. In Delete msg. from:, select Phone only. The device mirrors the e-mail headings in the remote mailbox. - Nokia N72 | User Guide - Page 60
In Delete msg. from:, select Phone and server. If you are When you are online, select Options > new e-mail (Headers only as default) is retrieved from the remote mailbox to your device automatically (only if the IMAP IDLE function is supported by your server). To leave the messaging application - Nokia N72 | User Guide - Page 61
type SIM card Before network service). When set to No, only the Sent status is shown in the log. See 'Log', p. 25. Message validity-If the recipient of a message cannot be reached within the validity period, the message is removed from the text message centre. The network must support this feature - Nokia N72 | User Guide - Page 62
messages through the normal GSM network or through packet data, if supported by the network. See 'Connection settings', p. 96. Reply via same ctr.-Select Yes, if you want the reply message to be sent using the same text message centre number (network service). Add a new text message centre 1 Select - Nokia N72 | User Guide - Page 63
the message is removed from the multimedia messaging centre. The network must support this feature. Maximum time is the maximum amount of time allowed by the network. Tip! You may also obtain the multimedia and e-mail settings from your service provider through a configuration message. Contact your - Nokia N72 | User Guide - Page 64
type)-Used with the POP3 protocol to encrypt the sending of passwords to the remote e-mail server while connecting to the mailbox. User settings: E-mails to retrieve (not shown if the e-mail protocol is set to POP3)-Define how many new recipient's phone when the recipient's phone supports this - Nokia N72 | User Guide - Page 65
the limit is reached, the oldest message is deleted. Memory in use-Choose the memory where you want to save your messages: Phone memory or Memory card. New e-mail alerts-Choose whether you want to receive the new e-mail indications, a tone or a note, when new mail is received to the mailbox. 65 - Nokia N72 | User Guide - Page 66
applications. To use the Visual Radio service, the following conditions are required: • The device must be switched on. • The device must have a valid SIM card inserted. • The station you listen to and the network operator you use must support this service . A compatible headset or enhancement needs - Nokia N72 | User Guide - Page 67
to select the memory location of a station network service). When the connection to the visual service is established, the display shows the current visual content designed by the content provider. To adjust display settings for the visual content view, select Options > Display settings > Lighting - Nokia N72 | User Guide - Page 68
offers visual service. Access point-Select the access point used for the data connection. You do not need an access point to use the application as an ordinary FM radio. Current region-Select the region you are currently located in. This setting is displayed only if there was no network coverage - Nokia N72 | User Guide - Page 69
to the device later. See 'Memory card tool', p. 16. Create calendar entries 1 Press , and select Calendar > Options > New entry and from the following: others who have access to view your calendar online. None-The calendar entry is not copied to your compatible PC when you synchronise. 3 To save the - Nokia N72 | User Guide - Page 70
data from many different Nokia phones to your device or synchronise your calendar and to-do notes to a compatible PC using Nokia PC Suite. See the CD- Delete calendar entries Deleting past entries in Calendar saves space in your device memory. To remove more than one event at a time, go to the month - Nokia N72 | User Guide - Page 71
services, pricing, and tariffs with your network operator or service provider. Service providers will also give you instructions on how to use their services. message from the network operator or service Enter the settings manually Follow the instructions given to you by your service provider. 1 - Nokia N72 | User Guide - Page 72
requires, a user name and password. Your device may have some bookmarks loaded for sites not affiliated with Nokia. Nokia does not warrant or endorse showing the title or Internet address of the bookmark. (If available) Folder that contains bookmarks for downloading content. Add bookmarks manually - Nokia N72 | User Guide - Page 73
services that you trust and that offer adequate security and protection against harmful software. On a browser page, new memory or a compatible memory card (if inserted), and browse them when offline. To access the pages later, press in the bookmarks view to open the Saved pages view. To enter a new - Nokia N72 | User Guide - Page 74
logos, themes, and video clips. These items can be provided free, or you can purchase them. Downloaded items are handled by the respective applications in your device, for example, a downloaded photo can be saved in Gallery. Important: Only install and use applications and other software from - Nokia N72 | User Guide - Page 75
memory of the device. A cache is a memory location that is used to store data temporarily. If you have tried to access or have accessed confidential information requiring passwords, empty the cache after each use. The information or services Options > Show images. that is downloaded when you select - Nokia N72 | User Guide - Page 76
Web want external cascading style sheets to be downloaded, select By speed. Cookies-To enable or disable of scripts. Security warnings-To hide or show security notifications. Serial no. sending-To enable or disable serial number sending. Some service providers may require that you enable this - Nokia N72 | User Guide - Page 77
Press , and select My own and a game. For instructions on how to play the game, select Options > Help. Music player Copy to memory card/Move to memory card or Copy to phone mem./Move to phone mem.. Files stored on the memory card are indicated with . Copyright protections may prevent some music - Nokia N72 | User Guide - Page 78
from the memory card and the device memory. Playlists The music player supports .m3u simple playlists. Copy playlists with music files, or create them in the music player. To add songs, albums, or artists to a playlist, select the items and Options > Add to a playlist. You can create a new playlist - Nokia N72 | User Guide - Page 79
services, pricing, and tariffs with your network operator and/or service provider. Service providers will also give you instructions on how to use their services type > On app. start-up. 1 Open IM to have your device connect to the IM server in use. To change the IM server in use and save new IM - Nokia N72 | User Guide - Page 80
online or offline, select Automatic or Manual. Search for IM groups and users To search for groups, in the IM groups view, select Options > Search. You can search by Group name, Topic, and Members (user ID). To search for users, in the IM contacts view, select Options > New to a file the messages - Nokia N72 | User Guide - Page 81
IM contacts to retrieve chat contact lists from the server, or to add a new chat contact to a contact list. When you log in to the server, the message from the network operator or service provider that offers the chat service. You obtain the user ID and password from your service provider when you - Nokia N72 | User Guide - Page 82
My own not know your user ID or password, contact your service provider. To change the IM server to which you wish to connect, select Default server. To add a new server to your list of IM servers, select Servers > Options > New server. Enter the following settings: Server name-Enter the name for - Nokia N72 | User Guide - Page 83
-up Networking Profile, Headset Profile, Handsfree Profile, Generic Object Exchange Profile, Object Push Profile, File Transfer Profile, Basic Imaging Profile, and Human Interface Device Profile. To ensure interoperability between other devices supporting Bluetooth wireless technology, use Nokia - Nokia N72 | User Guide - Page 84
Off, or select My phone's visibility > Hidden. Do not pair with an unknown device. Send data using Bluetooth connectivity There can be several active Bluetooth connections at a time. For example, if you are connected to a compatible headset, you can also transfer files to another compatible device - Nokia N72 | User Guide - Page 85
with the owner of the other device to use the same code. The passcode is used only once. To pair with a device, select Options > New paired device. Devices with Bluetooth wireless technology that are within range start to appear on the display one by one. Select the device, and enter the passcode - Nokia N72 | User Guide - Page 86
PC connections You can use your device with a variety of PC connectivity and data communications applications. With Nokia PC Suite you on how to install Nokia PC Suite (compatible with Windows 2000 and Windows XP), see the user guide for Nokia PC Suite and the Nokia PC Suite help in the "Install - Nokia N72 | User Guide - Page 87
your device to a compatible PC and to use Nokia PC Suite, use the Get Connected wizard available in Nokia PC Suite. See the CD-ROM supplied with your device. Note: The actual time invoiced for calls by your service provider may vary, depending on network features, rounding off for billing, and - Nokia N72 | User Guide - Page 88
application you want to synchronise your data with. You may receive syncronisation settings in a special text message. See 'Data and settings', p. 57. Create a new Contact your service provider or system administrator for your correct ID. Password-Write your password. Contact your service provider or - Nokia N72 | User Guide - Page 89
type: Normal (two-way synchronisation), To server only, or To phone file showing the network operator, service provider, or company information management department. These configuration settings may include access point settings for data connections and other settings used by different applications - Nokia N72 | User Guide - Page 90
Connectivity Server profile settings Contact your service provider for the correct settings. Server name-Enter a name for the configuration server. Server ID-Enter the unique ID to identify the configuration server. Server password-Enter a password to identify your device to the server. Access - Nokia N72 | User Guide - Page 91
memory (indicated by M), select Options > Memory > Save. To retrieve a number in memory, select Options > Memory > Recall. To clear a number in memory, select Options > Memory occur. 1 Scroll to the Type field, and press to open Amount field changes automatically to show the converted value. Press - Nokia N72 | User Guide - Page 92
select Options > Set as base curr.. 3 Add exchange rates. Scroll to the currency, and enter a new rate, that is, how many units of the currency equal one unit of the base currency you have notes to other compatible devices and save plain text files (.txt format) that you receive to Notes. 92 - Nokia N72 | User Guide - Page 93
Office Recorder Press , and select Office > Recorder to record telephone conversations and voice memos. If you are recording a telephone conversation, both parties hear a tone every 5 seconds during recording. 93 - Nokia N72 | User Guide - Page 94
. To do this, you need the lock code. See 'Phone and SIM', p. 100. After resetting, the device may take a longer time to power on. Documents and files are unaffected. Standby mode Active standby-Use shortcuts to applications in the standby mode on the main display. See 'Active standby mode', p. 21 - Nokia N72 | User Guide - Page 95
application from the list. Active standby apps.-To select the application phone number to be displayed to (Yes) or hidden from (No) the person to whom you are calling, or the value may be set by your network operator or service provider when you make a subscription (Set by network) (network service - Nokia N72 | User Guide - Page 96
the standby mode. Tip! To switch between the phone lines, press and hold in the standby mode. Line change-To prevent line selection (network service), select Disable if supported by your SIM card. To change this setting, you need the PIN2 code. Connection settings Data connections and access points - Nokia N72 | User Guide - Page 97
Other fields can be left empty, unless you have been instructed otherwise by your service provider. To be able to use a data connection, the network service provider must support this feature, and if necessary, activate it for your SIM card. Access point name (for packet data only)-The access point - Nokia N72 | User Guide - Page 98
on the selected network type. Phone IP address (for IPv4)-Enter the IP address of your device. Name servers-In Primary name server:, enter the IP address of the primary DNS server. In Second. name server:, enter the IP address of the secondary DNS server. Contact your Internet service provider to - Nokia N72 | User Guide - Page 99
set the device to display confirmation messages when you are using a SIM card service (network service). Glossary of PIN and lock codes If you forget any of these codes, contact your service provider. Personal identification number (PIN) code-This code protects your SIM card against unauthorized use - Nokia N72 | User Guide - Page 100
lock code. Keep the new code secret and in a safe place separate from your device. Personal unblocking key (PUK) code and PUK2 code- These codes (8 digits) are required to change a blocked PIN code or PIN2 code, respectively. If the codes are not supplied with the SIM card to an online bank or - Nokia N72 | User Guide - Page 101
following notes may be displayed: • Certificate not trusted-You have not set any application to use the App. installation: Yes-The certificate is able to certify the origin of a new Java application. • Online certif. check-Select to check the online certificates before installing an application - Nokia N72 | User Guide - Page 102
, that is, the operator whose SIM card is in your device. Glossary: A roaming agreement is an agreement between two or more network service providers to enable the users of one service provider to use the services of other service providers. Cell info display-Select On to set the device to indicate - Nokia N72 | User Guide - Page 103
e-mail attachment, or using Bluetooth connectivity. You can use Nokia Application Installer in Nokia PC Suite to install an application to your device or a compatible memory card. If you use Microsoft Windows Explorer to transfer a file, save the file to a compatible memory card (local disk). 103 - Nokia N72 | User Guide - Page 104
file, and press to start installation. Install applications and software Tip! You can also use Nokia Application Installer available in Nokia PC Suite to install applications. See the CD-ROM supplied with your device. Application icons are as follows: .sis application; Java application; application - Nokia N72 | User Guide - Page 105
used when checking online certificates. Some Java applications may require a phone call, a message to be sent, or a network connection to a specific access point for downloading extra data or components. In the Manager main view, scroll to an application, and select Options > Suite settings to - Nokia N72 | User Guide - Page 106
view the Expired activation keys, press . To buy more usage time or extend the usage period for a media file, select an activation key and Options > Activate content. Activation keys cannot be updated if Web service message reception is disabled. See 'Web service messages', p. 65. To view which keys - Nokia N72 | User Guide - Page 107
you have and how much memory the different data groups consume, press , and select Tools > File mgr. > Options > Memory details. Q: The note Retrieving network connections related to multimedia messaging. Messaging Q: Why can't I select a contact? A: The contact card may not have a phone number - Nokia N72 | User Guide - Page 108
wizard available in Nokia PC Suite to connect to your PC. For further information on how to use Nokia PC Suite, see the help function on Nokia PC Suite or visit the support pages at www.nokia.com. Access codes Q: What is my password for the lock, PIN, or PUK codes? A: The default lock code is 12345 - Nokia N72 | User Guide - Page 109
: • Use Nokia PC Suite to make a back up copy of all data to a compatible computer. • Send images to your e-mail address, and then save the images to your computer. • Send data using Bluetooth connectivity to a compatible device. • Store data on a compatible memory card. Troubleshooting 109 - Nokia N72 | User Guide - Page 110
eventually wear out. When the talk and standby times are noticeably shorter than normal, replace the battery. Use only Nokia approved batteries, and recharge your battery only with Nokia approved chargers designated for this device. If a replacement battery is being used for the first time or if the - Nokia N72 | User Guide - Page 111
message indicating whether the code can be authenticated. What if your battery is not authentic? If you cannot confirm that your Nokia battery with the hologram on the label is an authentic Nokia battery, please do not use the battery. Take it to the nearest authorized Nokia service point or dealer - Nokia N72 | User Guide - Page 112
Battery information its enhancements. It may also invalidate any approval or warranty applying to the device. To find out more about original Nokia batteries, visit www.nokia.com/battery. 112 - Nokia N72 | User Guide - Page 113
instructed in this guide light battery from time to time for optimum performance. Make back-up copies of all important data. All of the above suggestions apply equally to your device, battery, charger, or any enhancement. If any device is not working properly, take it to the nearest authorized service - Nokia N72 | User Guide - Page 114
or messages, this device requires a good quality connection to the network. In some cases, transmission of data files or messages may be delayed until such a connection is available. Ensure the above separation distance instructions are followed until the transmission is completed. Parts of the - Nokia N72 | User Guide - Page 115
atmosphere, and obey all signs and instructions. Potentially explosive atmospheres include areas at refueling points such as near gas pumps at service stations. Observe restrictions on the use of radio phones, including this device, operate using radio signals, wireless networks, landline networks - Nokia N72 | User Guide - Page 116
accessories and enhancements may result in different SAR values. SAR values may vary depending on national reporting and testing requirements and the network band. Additional SAR information may be provided under product information at www.nokia.com. Certification information (SAR) THIS MOBILE - Nokia N72 | User Guide - Page 117
address 85 factory set passcode 85 headset 102 pairing 85 passcode, glossary explanation 85 security 84 switching off 86 bookmarks 72 brightness display 95 setting in camera 36 C cache, clearing 75 calendar alarm 69 creating entries 69 synchronising PC Suite 70 call register See log calls dialled - Nokia N72 | User Guide - Page 118
contacts between the SIM card and device memory 29 text 54 files to album 41 creating new album 41 ordering files in albums 41, 43 viewing images and videos 40 H handsfree see loudspeaker headset settings 102 help application J Java See applications, Java L lock code 100 log erasing contents 26 - Nokia N72 | User Guide - Page 119
code See lock code sending contact cards, business cards 28 images 12, 32 video clips 39 service commands 51 settings access codes 99 access points 97 Bluetooth connection 84 calendar 70 call barring 102 call diverting 101 certificates 100 data connections 96 date and time 98 display 95 headset - Nokia N72 | User Guide - Page 120
SMS centre, short message service centre 62 snooze 14 software transferring a file to your device 103 sound clips 40 sounds muting a ringing tone 24 recording sounds 93 speed dialling 23 standby mode 18 synchronisation 88 T text message service centre adding new 62 text messages 54 themes 20 time 14
-
 1
1 -
 2
2 -
 3
3 -
 4
4 -
 5
5 -
 6
6 -
 7
7 -
8
-
9
-
10
-
11
-
12
-
13
-
14
-
15
-
16
-
17
-
18
-
19
-
20
-
21
-
22
-
23
-
24
-
25
-
26
-
27
-
28
-
29
-
30
-
31
-
32
-
33
-
34
-
35
-
36
-
37
-
38
-
39
-
40
-
41
-
42
-
43
-
44
-
45
-
46
-
47
-
48
-
49
-
50
-
51
-
52
-
53
-
54
-
55
-
56
-
57
-
58
-
59
-
60
-
61
-
62
-
63
-
64
-
65
-
66
-
67
-
68
-
69
-
70
-
71
-
72
-
73
-
74
-
75
-
76
-
77
-
78
-
79
-
80
-
81
-
82
-
83
-
84
-
85
-
86
-
87
-
88
-
89
-
90
-
91
-
92
-
93
-
94
-
95
-
96
-
97
-
98
-
99
-
100
-
101
-
102
-
103
-
104
-
105
-
106
-
107
-
108
-
109
-
110
-
111
-
112
-
113
-
114
-
115
-
116
-
117
-
118
-
119
-
120
 |
 |

Nokia N72-5
User’s Guide