Oki B6100n Guide: Administration and Installation, B6100 UNIX Printing Softwar - Page 72
Running Printtool, Red Hat LINUX Print System Manager, Add a Printer Entry, Example
 |
View all Oki B6100n manuals
Add to My Manuals
Save this manual to your list of manuals |
Page 72 highlights
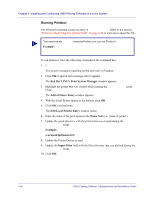
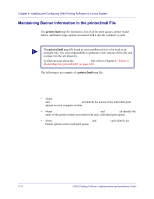
Chapter 4: Installing and Configuring UNIX Printing Software on a Linux System Running Printtool The Printtool command creates an entry in /etc/printcap. Refer to the section, "Printer to Model Map File (printer2mdl)" on page 6-88 to learn more about this file. i You must run the setenv command before you can run Printtool. Example: # setenv display 10.10.156:0 To run printtool, enter the following command at the command line: 1. # printtool Two system messages regarding samba and ncpfs will appear. 2. Click OK to ignore each message after it appears. The Red Hat LINUX Print System Manager window appears. 3. Highlight the printer that was created while running the make_filter script. Click Add. The Add a Printer Entry window appears. 4. With the Local Printer option as the default, click OK. 5. Click OK a second time. The Edit Local Printer Entry window opens 6. Enter the name of the print queue in the Name field (i.e., name of printer). 7. Update the spool directory with the printer that was created during the make_filter script. Example: /var/spool/lpd/printer32/ 8. Update the Printer Device to read /dev/null/. 9. Update the Input Filter field with the filter directory that you defined during the make_filter script. 10. Click OK. 4-668/25/02 UNIX Printing Software Administration and Installation Guide
-
 1
1 -
2
-
3
-
4
-
5
-
6
-
7
-
8
-
9
-
10
-
11
-
12
-
13
-
14
-
15
-
16
-
17
-
18
-
19
-
20
-
21
-
22
-
23
-
24
-
25
-
26
-
27
-
28
-
29
-
30
-
31
-
32
-
33
-
34
-
35
-
36
-
37
-
38
-
39
-
40
-
41
-
42
-
43
-
44
-
45
-
46
-
47
-
48
-
49
-
50
-
51
-
52
-
53
-
54
-
55
-
56
-
57
-
58
-
59
-
60
-
61
-
62
-
63
-
64
-
65
-
66
-
 67
67 -
 68
68 -
 69
69 -
 70
70 -
 71
71 -
 72
72 -
 73
73 -
 74
74 -
 75
75 -
 76
76 -
 77
77 -
78
-
79
-
80
-
81
-
82
-
83
-
84
-
85
-
86
-
87
-
88
-
89
-
90
-
91
-
92
-
93
-
94
-
95
-
96
-
97
-
98
-
99
-
100
-
101
-
102
-
103
-
104
-
105
-
106
 |
 |
