Oki C9600n C9600 Printing Guide
Oki C9600n Manual
 |
View all Oki C9600n manuals
Add to My Manuals
Save this manual to your list of manuals |
Oki C9600n manual content summary:
- Oki C9600n | C9600 Printing Guide - Page 1
- Oki C9600n | C9600 Printing Guide - Page 2
date drivers and manuals are available from the website: http://www.okidata.com Copyright © 2005 Oki Data Americas, Inc.. All rights reserved. OKI and OKI Printing Solutions are registered trademarks of OKI Electric Industry Company, Ltd. Energy Star is a trademark of the United States Environmental - Oki C9600n | C9600 Printing Guide - Page 3
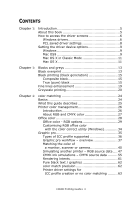
40 Simulating another printer - RGB source data .... 47 CMYK ink simulations - CMYK source data ......... 55 Rendering intents 61 Pure black text / graphics 62 color match precision 62 Printer driver settings for ICC profile creation or no color matching ......... 63 C9600 Printing Guide> 3 - Oki C9600n | C9600 Printing Guide - Page 4
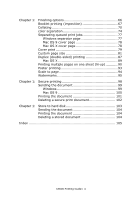
Chapter 1: Finishing options 66 Booklet printing (imposition 67 Collating 70 color separation 74 Separating queued print jobs 77 Windows separator page 77 Mac OS 9 103 Sending the document 104 Printing the document 104 Deleting a stored document 104 Index 105 C9600 Printing Guide> 4 - Oki C9600n | C9600 Printing Guide - Page 5
C9600. There are many cross-references within this book, each highlighted as blue text. When you click on a cross-reference within Adobe Acrobat or Adobe Reader (also supplied on the Manuals CD) the display will instantly jump to the part of the manual containing the referenced material. By using - Oki C9600n | C9600 Printing Guide - Page 6
own control panel are the printer defaults. They determine how your printer will behave unless you specify otherwise from your computer. The driver defaults override the printer defaults. Application Print settings override both the printer defaults and the driver defaults. C9600 Printing Guide> 6 - Oki C9600n | C9600 Printing Guide - Page 7
, make sure the printer shown is the appropriate one, and click [Properties]. Macintosh The Mac user interface is very different to that in Windows. In particular, OS X differs considerably from previous versions. Full instructions are therefore included with each procedure. C9600 Printing Guide> 7 - Oki C9600n | C9600 Printing Guide - Page 8
for the settings you are saving, and click [OK]. RECALLING SAVED DRIVER SETTINGS 1. In the driver's [Setup] tab, choose any previously saved [driver settings] you need. 2. Proceed to make any other adjustments for this job, as described in the relevant section in this manual. C9600 Printing Guide> 8 - Oki C9600n | C9600 Printing Guide - Page 9
changes. MAC OS9 There are 2 methods to configure printer hardware options, depending on whether or not you use Desktop Printing: > Use the desktop printer icon if you use desktop printing; or... > Use the Chooser if you do not use desktop printing and print via AppleTalk. C9600 Printing Guide> 9 - Oki C9600n | C9600 Printing Guide - Page 10
printer is connected via USB or AppleTalk, click the [Auto Setup] button. This queries the printer Use this method if you do not use Deskop Printing. 1. In the Apple menu, select [Chooser]. 2. Select the printer driver that you use . 4. Select the name of your printer in the right-hand side of the - Oki C9600n | C9600 Printing Guide - Page 11
It is recommended you connect to your printer via AppleTalk instead. MAC OS X 1. Open the Printer Setup Utility (OS X 10.3) or Printer Center (OS X earlier versions), and ensure that your printer model is selected. 2. Choose [Printers] → [Show Info] → [Installable Options]. C9600 Printing Guide> 11 - Oki C9600n | C9600 Printing Guide - Page 12
3. Select all hardware options appropriate to your printer, and click [Apply Changes]. C9600 Printing Guide> 12 - Oki C9600n | C9600 Printing Guide - Page 13
The Black Overprint feature is not included in the Windows PCL 6 driver. 2. When the background color is very dark, the toner may not fuse correctly. Change the background to a lighter color. WINDOWS 1. On the [Job Options] tab, click [Advanced]. 2. Check [Black Overprint]. C9600 Printing Guide> 13 - Oki C9600n | C9600 Printing Guide - Page 14
Black Overprint] checkbox (3). MAC OS X 1. Choose [File] → [Print]. 1 2 3 4 2. From the [Printer] menu (1), select your printer model. 3. Select [Printer Features] (2). 4. From the [Feature Sets] menu (3), select [color Options]. 5. Select the [Black Overprint] checkbox (4). C9600 Printing Guide> 14 - Oki C9600n | C9600 Printing Guide - Page 15
BLACK PRINTING (BLACK GENERATION) To use Black Generation, Office color or Graphic Pro must be the selected Print Mode. Your printer prints the color black in one of two ways: Composite Black or True Black. COMPOSITE BLACK The cyan, magenta, yellow, and black toners are combined to create composite - Oki C9600n | C9600 Printing Guide - Page 16
printer to choose the best method depending on page content), [True Black] or [Composite Black]. WINDOWS (GRAPHIC PRO) 1. On the driver's [color] tab, select [Graphic Pro] (1) and click the [Options] button. 1 2 2. From the [Black Finish] menu (2), choose your preferred setting. C9600 Printing Guide - Oki C9600n | C9600 Printing Guide - Page 17
, choose your preferred setting. MAC OS 9 (GRAPHIC PRO) 1. From the [File] menu, select [Print]. 1 2 3 2. From the [Printer] menu (1) select your printer. 3. In the next menu (2), select [color - Graphic Pro 2]. 4. For [Black Finish] menu (3), choose your preferred setting. C9600 Printing Guide> 17 - Oki C9600n | C9600 Printing Guide - Page 18
[File] menu, select [Print]. 1 2 3 4 2. From the [Printer] menu (1), select your printer. 3. In the next menu (2), select [Printer Features]. 4. From the [Feature Sets] menu (3), select [color - Graphic Pro 3]. 5. For [Black Finish] menu (4), choose your preferred setting. C9600 Printing Guide> 18 - Oki C9600n | C9600 Printing Guide - Page 19
be used to emphasize the pen width of very fine lines (minimum line width). With some software applications, if this feature is turned ON, the spaces in bar codes may become too narrow. If this happens, turn [Adjust Ultra Fine Lines] OFF. NOTE This is a feature of the Windows PCL 5c driver - Oki C9600n | C9600 Printing Guide - Page 20
If you select Greyscale, the printer converts all colors into shades of grey, and prints using only black toner. Use Grayscale to speed up printing of proof copies or when you do not need to print a color document in color. WINDOWS 1. If using the PCL driver, in the driver's [Setup] tab, choose any - Oki C9600n | C9600 Printing Guide - Page 21
3. On the [color] tab, click [Greyscale], and then click [Options] if you want to adjust brightness and contrast. C9600 Printing Guide> 21 - Oki C9600n | C9600 Printing Guide - Page 22
Halftone] checkbox (4). This ensures best quality when using greyscale. 5 6 6. From the menu below [Printer] (5), select [Job Options]. 7. Select the [Use optimised greyscale halftones] checkbox (6). This may slow down printing slightly, but will produce superior results. C9600 Printing Guide> 22 - Oki C9600n | C9600 Printing Guide - Page 23
the [color Mode] menu (4), select [Greyscale]. 6. Select [Always Use Printer Halftone] checkbox (5). This ensures best quality when using greyscale. 7. Select the [Use optimized greyscale halftones] checkbox (6). This may slow down printing slightly, but will produce superior results. C9600 Printing - Oki C9600n | C9600 Printing Guide - Page 24
System color Management (2). Windows 98, Me, 2000 and XP have Windows ICM color Management. Mac OS and Mac OS X have Apple ColorSync. 3. Printer color Management (3). When you print your document and modify settings in the printer driver, the printer performs color adjustments. C9600 Printing Guide - Oki C9600n | C9600 Printing Guide - Page 25
wish to use your printer's color management system, ensure that your application or operating system color management is switched off. Applying color management in multiple places will give unpredictable results. WHAT THIS GUIDE DESCRIBES This user guide only discusses the printer color management - Oki C9600n | C9600 Printing Guide - Page 26
the printer hard disk using a special utility, and then color matching can be applied to all incoming print jobs. The Graphic Pro color management system is recommended for users who are already familiar with ICC profile-based color matching and require more control over color. C9600 Printing Guide - Oki C9600n | C9600 Printing Guide - Page 27
drivers to use with your printer. You may wish to select a printer driver based on whether it supports CMYK data. SUPPORT FOR RGB DATA PCL 5c driver (Windows) ✔ PCL 6 driver (Windows) ✔ PostScript driver (Windows) ✔ PostScript driver (Mac) ✔ SUPPORT FOR CMYK DATA C9600 Printing Guide - Oki C9600n | C9600 Printing Guide - Page 28
printer drivers only support RGB color data. Although the Office color options contain controls for CMYK data, it is strongly recommended that you use the Graphic Pro options instead. If you are printing CMYK data, the Graphic Pro options provide more power and flexibility. C9600 Printing Guide - Oki C9600n | C9600 Printing Guide - Page 29
camera. Your results will vary depending on the subject and the conditions under which the photograph was taken. The printer will try to reproduce the sRGB color space. This may be useful if color matching from an sRGB input device such as a scanner or digital camera. C9600 Printing Guide> 29 - Oki C9600n | C9600 Printing Guide - Page 30
WINDOWS This information applies to the Windows PCL 5c, PCL 6 and PostScript drivers. 1. On the printer driver [color] tab, select [Office color] (1) and click the [Options] button. 1 2 2. Select a preset from [color matching options] (2). C9600 Printing Guide> 30 - Oki C9600n | C9600 Printing Guide - Page 31
9 1. Choose [File] → [Print]. 5 6 2. From the [Printer] menu (1), select your printer model. 3. Select [color Options] (2). 4. From the [color Mode] menu (3), select [Office color]. 5. Select [color - Office color] (4). 6. Select the Office color Preset (5) you wish to use. C9600 Printing Guide> 31 - Oki C9600n | C9600 Printing Guide - Page 32
In your application program, choose [File] → [Print]. 1 2 3 4 2. From the [Printer] menu (1), select your printer model. 3. Select [Printer Features] (2). 4. From the [Feature Sets] menu (3), select [color Options]. 5. From the [color Mode] menu (4), select [Office color]. C9600 Printing Guide> 32 - Oki C9600n | C9600 Printing Guide - Page 33
6. From the [Feature Sets] menu (5), select [color - Office color]. 5 6 7. Select the [Office color] Preset (6) you wish to use. C9600 Printing Guide> 33 - Oki C9600n | C9600 Printing Guide - Page 34
and Gamma. 2. You can adjust the specific palette colors used in Microsoft Office applications. These adjustments only affect one specific palette color at a time. Note The color Correct Utility is available for Windows only. For more details, see the C9600 Utilities Guide. C9600 Printing Guide> 34 - Oki C9600n | C9600 Printing Guide - Page 35
for C9600n and C9600dn, and standard equipment on C9600hdn and C9600hdtn. WHAT CAN YOU DO WITH GRAPHIC PRO COLOR MATCHING? The Graphic Pro color matching system is both powerful and flexible. Here are some examples of how the Graphic Pro color matching system can be used: MATCHING PRINTER COLOR TO - Oki C9600n | C9600 Printing Guide - Page 36
four classes of ICC profile supported by the Graphic Pro color matching system: PROFILE TYPE RGB Source (RGB Input) CMYK Simulation (CMYK input) Printer (CMYK Output) Link Profile DESCRIPTION These profiles describe the device that was used to capture RGB data (e.g. scanner or digital camera). The - Oki C9600n | C9600 Printing Guide - Page 37
PRO WORKFLOW - OVERVIEW There are three steps to using the Graphic Pro color matching system: 1. Gather or create ICC profiles (see below) 2. Download ICC profiles to the printer hard disk (page 37) 3. Select the ICC profiles in the printer driver when printing (page 39) STEP 1 - GATHER OR CREATE - Oki C9600n | C9600 Printing Guide - Page 38
CMYK profile, you may only be able to add this to the printer as a CMYK Simulation or Printer output profile. d. Select a number from 1 to 12. This number is used to identify the profile in the printer driver. 1 2 e. Click [OK] to download the ICC profile to the printer. C9600 Printing Guide> 38 - Oki C9600n | C9600 Printing Guide - Page 39
STEP 3 - SELECT ICC PROFILES IN THE PRINTER DRIVER What you select in the printer driver depends on the color matching task that you wish to perform. Examples of selecting ICC profiles for different color matching tasks are shown in the next sections of this guide. C9600 Printing Guide> 39 - Oki C9600n | C9600 Printing Guide - Page 40
printer hard disk using Profile Assistant. See "Using Profile Assistant" on page 37. Once the profile(s) have been downloaded, make the appropriate selections in the printer driver. These are described in the next section (Windows page 41, Mac OS 9 page 42. Mac OS X page 44). C9600 Printing Guide - Oki C9600n | C9600 Printing Guide - Page 41
the color of an input RGB device such as a monitor, scanner or digital camera, make the following selections in the printer driver: 1. On the printer driver [color] tab, select [Graphic Pro] (1) and click [Options]. 1 2 3 4 2. Select [ICC Profile color Matching] (2). C9600 Printing Guide> 41 - Oki C9600n | C9600 Printing Guide - Page 42
rendering intent. See "Rendering intents" on page 61. MAC OS 9 1. In your application program, choose [File] → [Print]. 1 2 3 2. From the [Printer] menu (1), select your printer model. 3. Select [color Options] (2). 4. From the [color Mode] menu (3), select [Graphic Pro]. C9600 Printing Guide> 42 - Oki C9600n | C9600 Printing Guide - Page 43
(8), select your printer profile. If [Auto] is selected, the factory default profiles that are embedded in the printer will be used. If you have created a printer profile yourself using profile creation software, select it here and choose a rendering intent (see page 61). C9600 Printing Guide> 43 - Oki C9600n | C9600 Printing Guide - Page 44
MAC OS X 1. Choose [File] → [Print]. 1 2 3 4 2. From the [Printer] menu (1), select your printer model. 3. Select [Printer Features] (2). 4. From the [Feature Sets] menu (3), select [color Options]. 5. From the [color Mode] menu (4), select [Graphic Pro]. C9600 Printing Guide> 44 - Oki C9600n | C9600 Printing Guide - Page 45
6. From the [Feature Sets] menu (5), select [color - Graphic Pro 1]. 5 6 7. From the [color Matching Task] menu (6), select [ICC Profile color Matching]. 8. From the [Feature Sets] menu (7), select [color - Graphic Pro 2]. 7 8 C9600 Printing Guide> 45 - Oki C9600n | C9600 Printing Guide - Page 46
, select your printer profile (10). If Auto is selected, the factory default profiles that are embedded in the printer will be used. If you have created a printer profile yourself using profile creation software, select it here and choose a rendering intent (see page 61). C9600 Printing Guide> 46 - Oki C9600n | C9600 Printing Guide - Page 47
. For example, it may be difficult to reproduce the exact colors of an inkjet printer on a toner-based printer. Additionally, differences in the range of printable colors between different devices can make simulation using RGB source data inaccurate. To achieve best results when simulating the - Oki C9600n | C9600 Printing Guide - Page 48
. If you are using a source RGB document, simulate the output of another printer by making the following selections in the printer driver: 1. On the printer driver [color] tab, select [Graphic Pro] (1) and click [Options]. 1 2 3 5 4 2. Select [Printer Simulation] (2). C9600 Printing Guide> 48 - Oki C9600n | C9600 Printing Guide - Page 49
" on page 37. 4. Select a Simulation Target Profile (4). This profile corresponds to the printer you want to simulate. If you wish to produce black and grey colors that are printed using only black toner, enable the [Preserve Black] option. Although this produces a better quality print, the black - Oki C9600n | C9600 Printing Guide - Page 50
Choose [File] → [Print]. 2. From the [Printer] menu (1), select your printer model. 3 5 4 3. Select [color Options] (2). 4. Choose [color Mode] → [Graphic Pro] (3). 5. Choose [color] → [Graphic Pro 1] (4). 5 6 6. Choose [color Matching Task] → [Printer Simulation] (5). C9600 Printing Guide> 50 - Oki C9600n | C9600 Printing Guide - Page 51
black and grey colors that are printed using only black toner, enable the [Preserve Black] option. Although this produces a better quality print, the black and grey colors will not be simulated accurately. 9. Choose [color] → [Graphic Pro 2] (8). 7 8 9 10. From the [Printer Output Profile] menu - Oki C9600n | C9600 Printing Guide - Page 52
Task] menu (6), select [Printer Simulation]. If you wish to produce black and grey colors that are printed using only black toner, enable the [Preserve Black] option. Although this produces a better quality print, the black and grey colors will not be simulated accurately. C9600 Printing Guide> 52 - Oki C9600n | C9600 Printing Guide - Page 53
8. From the [Feature Sets] menu (7), select [color - Graphic Pro 2]. 7 8 9 9. From the [RGB Profile source] (8), select the ICC profile "CMYK Source 2" and so on relate to the number assigned to the profile using Profile Assistant. See "Using Profile Assistant" on page 37. C9600 Printing Guide> 53 - Oki C9600n | C9600 Printing Guide - Page 54
(11), select your printer profile. If [Auto] is selected, the factory default profiles that are embedded in the printer will be used. If you have created a printer profile yourself using profile creation software, select it here and choose a rendering intent (see page 61). C9600 Printing Guide> 54 - Oki C9600n | C9600 Printing Guide - Page 55
using the Office color options in the printer driver, we recommend that you use the Graphic Pro color matching system to perform CMYK ink simulations, as this provides additional controls, such as using the "Preserve Black" feature, or specifying an alternative printer output profile. Instructions - Oki C9600n | C9600 Printing Guide - Page 56
driver only. If you are using a source CMYK document, use the following printer driver settings to perform a CMYK Ink Simulation: 1 2 4 3 5 1. On the printer driver [color assigned to the profile using Profile Assistant. See "Using Profile Assistant" on page 37. Use the [Preserve Black] option - Oki C9600n | C9600 Printing Guide - Page 57
CMYK document, use the following printer driver settings to perform a CMYK Ink Simulation: 3 4 1. Choose [File] → [Print]. 2. From the [Printer] menu (1), select your printer model. 3. Select [color Options] (2). 4. From the [color Mode] menu (3), select [Graphic Pro]. C9600 Printing Guide> 57 - Oki C9600n | C9600 Printing Guide - Page 58
Preserve Black] is disabled, the grey components may be printed using a mixture of CMYK toner, instead of just K (black) toner. 8. Select [color - Graphic Pro 2] (7). 7 8 9 9. From the [Printer Output Profile] menu (8), select your printer profile. If [Auto] is selected, the factory default profiles - Oki C9600n | C9600 Printing Guide - Page 59
] menu (6), select [ICC Profile color Matching]. Use the [Preserve Black] option to keep the original grey component (K channel) information. If [Preserve Black] is disabled, the grey components may be printed using a mixture of CMYK toner, instead of just K (black) toner. C9600 Printing Guide> 59 - Oki C9600n | C9600 Printing Guide - Page 60
(11), select your printer profile. If [Auto] is selected, the factory default profiles that are embedded in the printer will be used. If you have created a printer profile yourself using profile creation software, select it here and choose a rendering intent (see page 61). C9600 Printing Guide> 60 - Oki C9600n | C9600 Printing Guide - Page 61
. ABSOLUTE COLORIMETRIC This option is recommended if you are proofing images on your printer that are intended for final output on a printing press. This may result in a visible color cast on your print as it will also try to simulate the paper white of the target device. C9600 Printing Guide> 61 - Oki C9600n | C9600 Printing Guide - Page 62
document is printed using pure black toner. This means that the following colors in your documents will be printed using only 100% black toner: RGB Red = 0, Green = 0, Blue = 0 CMYK Cyan = 0%, Yellow = 0%, Magenta = 0%, Black = 100% COLOR MATCH PRECISION When the printer performs color matching, it - Oki C9600n | C9600 Printing Guide - Page 63
prevents the printer from restricting toner layer thickness. If you are using your application color matching, select [Use Application color Matching]. This option switches off all printer color management. (Mac OS 9 page 64, Mac OS X page 65.) WINDOWS 1. On the printer driver [color] tab, select - Oki C9600n | C9600 Printing Guide - Page 64
(5), select [Disable color Matching for Profile Creation] if you are creating an ICC profile using third-party profile creation software. Select [Use Application color Matching] if you wish to switch off all printer color management and use your application's color matching. C9600 Printing Guide> 64 - Oki C9600n | C9600 Printing Guide - Page 65
(6), select [Disable color Matching for Profile Creation] if you are creating an ICC profile using third-party profile creation software. Select [Use Application color Matching] if you wish to switch off all printer color management and use your application's color matching. C9600 Printing Guide> 65 - Oki C9600n | C9600 Printing Guide - Page 66
1: FINISHING OPTIONS Your printer offers a wide selection options see: > "Booklet printing (imposition)" on page 67 > "Collating" on page 70 > "color separation" on page 74 > "Separating queued print jobs" on page 77 > "Cover print" page" on page 94 > "Watermarks" on page 95 C9600 Printing Guide> 66 - Oki C9600n | C9600 Printing Guide - Page 67
from the printer control panel. See the C9600 User's Guide. 2. A few applications do not support booklet printing, but most do. 3. This feature is not available in the Macintosh drivers. 4. This feature is not available in the Windows 98 PostScript driver. When using the PostScript driver, if you - Oki C9600n | C9600 Printing Guide - Page 68
, choose [Booklet] from the [Pages Per Sheet] drop-down list. 2. Check that the duplex option is set to [Flip on Short Edge]. NOTE If the Booklet choice is not shown, check that the Duplex option is enabled in the driver. (See "Setting the driver device options" on page 9.) C9600 Printing Guide> 68 - Oki C9600n | C9600 Printing Guide - Page 69
WINDOWS PCL 1. In the driver's [Setup] tab, recall any saved [driver settings] you may wish to use. 2. Choose [Booklet] from the [Finishing Mode] drop-down list, then click [Options]. 3. In the enabled in the driver. (See "Setting the driver device options" on page 9.) C9600 Printing Guide> 69 - Oki C9600n | C9600 Printing Guide - Page 70
or on the printer's hard disk (if installed), and the printer performs collation. This method is normally faster, but may not work from all applications. If you experience problems using printer collate, use the collate option in your application's print options instead. C9600 Printing Guide> 70 - Oki C9600n | C9600 Printing Guide - Page 71
PCL driver, on the [Setup] tab first choose any saved [driver settings] that you wish to use. See "Recalling saved driver settings" on page 8. 2. In the [Job Options] tab, choose how many [copies] you want to print from the scrolling list. 3. Click the [Collate] checkbox. C9600 Printing Guide> 71 - Oki C9600n | C9600 Printing Guide - Page 72
Select [Job Options] (4). 6. Select the [Collate] checkbox (5) to enable printer collate. NOTE The illustrations here show the Apple LaserWriter driver, which uses "printer collate". The Adobe PostScript driver looks very similar but uses "application collate". See page 70. C9600 Printing Guide> 72 - Oki C9600n | C9600 Printing Guide - Page 73
Pages] dialogue is for application collate. See page 70. 4 5 6 4. Enter the number of [copies] (3) you wish to print. 5. Select [Printer Features] (4). 6. From the [Feature Sets] menu (5), select [Job Options]. 7. Select the [Collate] checkbox (6) to enable printer collate. C9600 Printing Guide> 73 - Oki C9600n | C9600 Printing Guide - Page 74
your print document. The darker an area appears, the more of the corresponding toner color will be used when printing in full color. WINDOWS POSTSCRIPT 1. In the driver's [color] tab, click [Advanced]. 2. Select which [separations] you want to print from the dropdown list. C9600 Printing Guide> 74 - Oki C9600n | C9600 Printing Guide - Page 75
MAC OS9 1. Choose [File] → [Print]. 1 2 3 2. From the printer menu (1), select your printer model. 3. Select [color Options] (2). 4. From the [Separations] menu (3), select the separations you wish to print. C9600 Printing Guide> 75 - Oki C9600n | C9600 Printing Guide - Page 76
MAC OS X 1. Choose [File] → [Print]. 1 2 3 4 2. From the printer menu (1), select your printer model. 3. Select [Printer Features] (2). 4. From the [Feature Sets] menu (3), select [color Options] 5. From the [Separations] menu (4), select the separations you wish to print. C9600 Printing Guide> 76 - Oki C9600n | C9600 Printing Guide - Page 77
from the printer driver's default properties window. driver defaults" on page 7. 2 1 1. In the driver's Advanced tab click the [Separator Page...] button (1). 2. Click [Browse] (2) and navigate to a file containing an image of the separator page you wish to use, then click [OK]. C9600 Printing Guide - Oki C9600n | C9600 Printing Guide - Page 78
page (3). MAC OS X COVER PAGE The cover page is accessed from your application's print dialogue. 1 2 3 1. Choose [File] → [Print]. 2. From the [Printer] menu (1), select your printer model. 3. Select [Cover Page] (2). 4. Select the required options for the cover page (3). C9600 Printing Guide> 78 - Oki C9600n | C9600 Printing Guide - Page 79
wish to use. See "Recalling saved driver settings" on page 8. 2. Click [Paper Feed Options]. 3. Check the [Use different source for first page] checkbox. 4. Choose the tray you want to feed the cover page from and the paper type in the [Source] and [Weight] drop-down lists. C9600 Printing Guide> 79 - Oki C9600n | C9600 Printing Guide - Page 80
to use for the first page and remaining pages. MAC OS X 1. Choose [File] → [Print]. 1 2 3 2. From the [Printer] menu (1), select your printer model. 3. Select [Paper Feed] (2). 4. Select the trays or paper types you wish to use for the first page and remaining pages (3). C9600 Printing Guide> 80 - Oki C9600n | C9600 Printing Guide - Page 81
limits vary slightly depending on which printer driver you use and your computer's operating system. driver's [Layout] tab, click [Advanced]. 2. In the Advanced Options window, under [Paper/Output], choose [PostScript Custom Page Size] from the [Paper Size] drop-down list. C9600 Printing Guide - Oki C9600n | C9600 Printing Guide - Page 82
. 6. Click [OK] to close the Advanced Options window. 7. In the driver's window, choose the [Multipurpose Tray] as the [Paper Source]. WINDOWS 98/ME POSTSCRIPT The Windows 98 PostScript driver allows up to three custom page sizes to be defined and saved for future use. C9600 Printing Guide> 82 - Oki C9600n | C9600 Printing Guide - Page 83
driver's [Setup] tab, on the [Size] drop-down list, choose one of the available [custom paper sizes]. 2. If this is a previously saved custom size that you wish to use, click [OK] to close the Printer Properties [OK] to save your new custom size. 4. Print your document. C9600 Printing Guide> 83 - Oki C9600n | C9600 Printing Guide - Page 84
WINDOWS PCL 1. In the driver's [Setup] tab, select any previously saved settings you wish to use. 2. Click the [Paper Feed Options] button. 3. In the Paper Feed Options window, click [Custom Size]. If you have previously saved any special custom sizes they will be listed in the Custom Size window. - Oki C9600n | C9600 Printing Guide - Page 85
printer page] in the Paper Feed Options window, and choose the printer's actual paper size from the [Conversion] dropdown list. MAC OS 9 NOTE The illustration in this procedure shows the Apple LaserWriter driver . 6. Enter a [Name] (5) for your new size and click [OK]. C9600 Printing Guide> 85 - Oki C9600n | C9600 Printing Guide - Page 86
for the paper size. 4. Enter the [Width] and [Height] (3) of your paper. 5. Specify paper [margins] (4) as required. 6. Click [OK] to save the new paper size. C9600 Printing Guide> 86 - Oki C9600n | C9600 Printing Guide - Page 87
printer has a duplex unit installed you can print on both sides of the paper, to save paper, weight, bulk and cost. > Only paper can be used for duplex printing, not transparencies or other media. > Use Page Skip function. WINDOWS POSTSCRIPT 1. In the driver's Layout tab (Windows XP) or Setup tab - Oki C9600n | C9600 Printing Guide - Page 88
printing and your document will be printed single-sided. WINDOWS PCL 1. In the driver's Setup tab, under [2-Sided Printing], select the binding edge you want. application program, choose [File] → [Print]. 1 2 3 4 2. From the [Printer] menu (1), select your printer model. C9600 Printing Guide> 88 - Oki C9600n | C9600 Printing Guide - Page 89
OS X 1. In your application program, choose [File] → [Print]. 1 2 3 2. From the [Printer] menu (1), select your printer model. 3. Select [Layout] (2). 4. From the [Two Sided Printing] options (3), select either [Long Edge plan to turn the paper over to read the second side. C9600 Printing Guide> 89 - Oki C9600n | C9600 Printing Guide - Page 90
for printing and reproduces several pages per sheet. This is useful when you simply want to proof your page layout, driver's Layout tab (Windows XP) or Setup tab (Windows 98), choose the number of pages ("N-up") you want to print on each sheet. 1-up is normal, 16-up is maximum. C9600 Printing Guide - Oki C9600n | C9600 Printing Guide - Page 91
WINDOWS PCL 1. In the driver's Layout tab (Windows XP) or Setup tab (Windows 98), choose the number of pages ("N-up") you want to print on want printed page borders, and a binding margin if you need it. MAC OS 9 1. In your application program, choose [File] → [Print]. 1 2 3 4 C9600 Printing Guide> 91 - Oki C9600n | C9600 Printing Guide - Page 92
1. In your application program, choose [File] → [Print]. 1 2 3 4 5 2. From the [Printer] menu (1), select your printer model. 3. Select [Layout] (2). 4. From the [Pages per Sheet] menu (3), select the number of 6. If required, you can surround each page with a border (5). C9600 Printing Guide> 92 - Oki C9600n | C9600 Printing Guide - Page 93
separate sheets to create a poster. Poster Print is only available with the Windows PCL printer drivers. WINDOWS PCL 1. In the driver's Setup tab, under [Finishing Mode], choose [Poster Print]. 2. Click [Options] pages (tiles) can be trimmed exactly to the edge of the image. C9600 Printing Guide> 93 - Oki C9600n | C9600 Printing Guide - Page 94
page, without modifying the print data. This feature is only available with the Windows PCL drivers. 1. In the driver's Setup tab, click the [Options] button. 2. Check the [Fit to Page] checkbox. 3. Choose the scaling factor you need from the [Conversions] drop-down list. C9600 Printing Guide> 94 - Oki C9600n | C9600 Printing Guide - Page 95
Draft", or perhaps "Confidential". This feature is not available on Mac OS X. The illustration below shows the Windows PostScript driver. The PCL driver is very similar. WINDOWS The Watermarks Feature is found in the driver's [Job Options] tab. Click the [Watermarks] button. C9600 Printing Guide> 95 - Oki C9600n | C9600 Printing Guide - Page 96
your watermark's font, size, color, angle, position and border ( USING A WATERMARK 1. In the Watermarks window, click the watermark's name in the list. 2. Click [OK] to close the Watermarks window. 3. Click [OK] to close the Printer Properties window. 4. Print your document. C9600 Printing Guide - Oki C9600n | C9600 Printing Guide - Page 97
for the Adobe PostScript driver. Watermarks are not featured in the Apple LaserWriter driver. 1. In your data to use (3): a PICT file, EPS file or plain text. 5. To create or edit the text for a watermark, click [Edit...] (4). This launches the watermark editing dialogue (5). C9600 Printing Guide - Oki C9600n | C9600 Printing Guide - Page 98
printer driver. (See "Setting the driver device options" on page 9.) The secure printing feature is not available for Mac OS X. If there is not enough hard disk space for the spooled data not work. There are three parts in secure printing: 1. Sending the document to the printer (Windows page 99, Mac - Oki C9600n | C9600 Printing Guide - Page 99
using the PCL driver, in the [Setup] tab choose any saved driver settings you wish to use. See "Recalling saved driver settings" on page 8. 2. In the driver one print job stored on the printer when you come to print, you If you would like a prompt at the printer for the job name, click the [Request - Oki C9600n | C9600 Printing Guide - Page 100
use the Apple LaserWriter driver, the printing plug-in for secure printing must first be enabled in the printer driver. This step is not necessary for the Adobe PostScript driver . To send the document to the printer: 1. In your application program, choose [File] → [Print]. C9600 Printing Guide> 100 - Oki C9600n | C9600 Printing Guide - Page 101
on the printer's control panel. 6. Enter a number from 0000 to 9999 in the [PIN] box and click [Print]. Your PIN must be unique on this printer. Each three digits. If you have more than one stored document, a list appears in the display. 4. Use the ▲ ▼ buttons to select the name of the print job you - Oki C9600n | C9600 Printing Guide - Page 102
printing the document. 2. Use the ▲▼ buttons to highlight the DELETE option and press [ENTER]. 3. If necessary, use the ▲▼ buttons to highlight the YES choice, and press [ENTER] to confirm the deletion. Your document is deleted from the printer's hard disk without printing. C9600 Printing Guide> 102 - Oki C9600n | C9600 Printing Guide - Page 103
check to ensure that the hard disk is enabled in the printer driver. (See "Setting the driver device options" on page 9.) Like the secure printing feature, there are three parts in job spooling: 1. Sending the document 2. Printing the document 3. Deleting a stored document C9600 Printing Guide> 103 - Oki C9600n | C9600 Printing Guide - Page 104
Follow the procedure as described on page 102 in Chapter 1 for deleting a secure print document. Like secure print documents, any other documents stored on the printer's hard disk can also be deleted remotely from the PC using the Storage Device Manager utility. C9600 Printing Guide> 104 - Oki C9600n | C9600 Printing Guide - Page 105
XP/2000 PS ..........81 G Grayscale Mac OS 9.x 22 Mac OS X 23 I ICC profiles 36 downloading to printer ........37 where to obtain 37 L Letterhead store to hard disk 103 M Messages DISK FULL Proof and Print 98 15 Profile Assistant utility 37 Pure (true) black 15 C9600 Printing Guide> 105 - Oki C9600n | C9600 Printing Guide - Page 106
S Secure documents printing 101 sending 99 Separator page 77 T Toner Black 15 True True b(plaucrke.)..b..la..c.k 1..6..,..1.7..,. 15 18 C9600 Printing Guide> 106
-
 1
1 -
 2
2 -
 3
3 -
 4
4 -
 5
5 -
 6
6 -
 7
7 -
8
-
9
-
10
-
11
-
12
-
13
-
14
-
15
-
16
-
17
-
18
-
19
-
20
-
21
-
22
-
23
-
24
-
25
-
26
-
27
-
28
-
29
-
30
-
31
-
32
-
33
-
34
-
35
-
36
-
37
-
38
-
39
-
40
-
41
-
42
-
43
-
44
-
45
-
46
-
47
-
48
-
49
-
50
-
51
-
52
-
53
-
54
-
55
-
56
-
57
-
58
-
59
-
60
-
61
-
62
-
63
-
64
-
65
-
66
-
67
-
68
-
69
-
70
-
71
-
72
-
73
-
74
-
75
-
76
-
77
-
78
-
79
-
80
-
81
-
82
-
83
-
84
-
85
-
86
-
87
-
88
-
89
-
90
-
91
-
92
-
93
-
94
-
95
-
96
-
97
-
98
-
99
-
100
-
101
-
102
-
103
-
104
-
105
-
106
 |
 |
