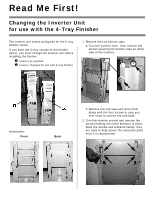
Oki C9600n Changing the Inverter Unit for use with the 4-Tray Finisher - Page 2
© 2005 Oki Data Americas, Inc.
 |
View all Oki C9600n manuals
Add to My Manuals
Save this manual to your list of manuals |
Page 2 highlights
3. Turn the inverter around and remove the two screws holding the extension plate. Keep them handy to reattach the plate once it is repositioned. 6. Turn the inverter over and install the brackets as illustrated below. 4. Pull forward on the extension plate to disengage the pins from the top channel stops, then slide it down into the inverter and push back to engage the pins on the bottom channel stops. 7. You are now ready to install the 4-tray finisher. See the Finisher Unit Installation Guide: 5. Reattach the extension plate using the screws you removed earlier. © 2005 Oki Data Americas, Inc. 58374301
-
 1
1 -
 2
2
 |
 |

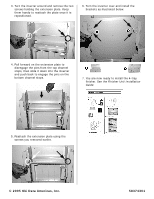
3. Turn the inverter around and remove the two
screws holding the extension plate. Keep
them handy to reattach the plate once it is
repositioned.
4. Pull forward on the extension plate to
disengage the pins from the top channel
stops, then slide it down into the inverter
and push back to engage the pins on the
bottom channel stops.
5. Reattach the extension plate using the
screws you removed earlier.
6. Turn the inverter over and install the
brackets as illustrated below.
7. You are now ready to install the 4-tray
finisher. See the
Finisher Unit Installation
Guide
:
© 2005 Oki Data Americas, Inc.
58374301