Olympus D-370 D-370 Reference Manual (2.28MB)
Olympus D-370 - CAMEDIA Digital Camera Manual
 |
View all Olympus D-370 manuals
Add to My Manuals
Save this manual to your list of manuals |
Olympus D-370 manual content summary:
- Olympus D-370 | D-370 Reference Manual (2.28MB) - Page 1
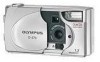
DIGITAL CAMERA C-100 D-370 OPERATION MANUAL CAMERA OPERATION G Thank you for purchasing an Olympus digital camera. G Please read this manual carefully before using your camera. We recommend that you check that your camera is functioning correctly by taking a number of test shots. - Olympus D-370 | D-370 Reference Manual (2.28MB) - Page 2
taken with an ordinary film-type camera. Copyright 2001 OLYMPUS OPTICAL Co., Ltd. TRADEMARKS All brand names and product names mentioned in this manual are trademarks and/or registered trademarks of their respective owners. ABOUT THE CAMERA FILE SYSTEM The camera file system is the DCF (Design - Olympus D-370 | D-370 Reference Manual (2.28MB) - Page 3
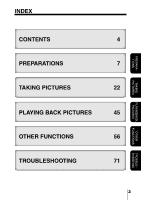
PREPARA- TIONS TAKING PICTURES INDEX CONTENTS 4 PREPARATIONS 7 TAKING PICTURES 22 PLAYING BACK PICTURES 45 OTHER FUNCTIONS 56 TROUBLESHOOTING 71 PLAYINGBACK PICTURES OTHER FUNCTIONS TROUBLE- SHOOTING 3 - Olympus D-370 | D-370 Reference Manual (2.28MB) - Page 4
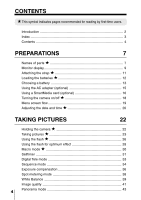
15 Using a SmartMedia card (optional 16 Turning the camera on/off 18 Menu screen flow 19 Adjusting the date and time 20 TAKING PICTURES 22 Holding the camera 22 Taking pictures 23 Using the flash 26 Using the flash for optimum effect 28 Macro mode 30 Selftimer 31 Digital Tele mode 33 - Olympus D-370 | D-370 Reference Manual (2.28MB) - Page 5
CONTENTS PLAYING BACK PICTURES 45 Playing back an image 45 Index playback 46 Auto image information 63 Adjusting the monitor brightness 64 Card format/Memory setup 65 Memory back-up 67 Print service 68 TROUBLESHOOTING 71 Error messages 71 Problems 72 Specifications 76 Index 78 5 - Olympus D-370 | D-370 Reference Manual (2.28MB) - Page 6
Caution Note Indicates important precautions that may lead to failure or trouble and operations that should be absolutely avoided. Indicates items that it is useful to know for effective use of the camera. Indicates the reference pages in this manual. # Indicates pages recommended for first-time - Olympus D-370 | D-370 Reference Manual (2.28MB) - Page 7
NAMES OF PARTS G Shutter button G Lens G Flash G DC-IN jack G Connector cover PREPARA- TIONS G Lens barrier Turns Record mode ON/OFF G Macro lever G USB connector G Selftimer lamp 7 - Olympus D-370 | D-370 Reference Manual (2.28MB) - Page 8
NAMES OF PARTS G Viewfinder G Green lamp G Target mark G Card cover PREPARA- TIONS G Monitor G Tripod socket G (Monitor) button Use to turn Play mode ON/OFF 8 G Strap eyelet G Battery compartment cover G (Arrow pad) G (OK/Menu) button - Olympus D-370 | D-370 Reference Manual (2.28MB) - Page 9
12"(seconds) - 0 Digital tele 1.6×, 2.0×, 3.2×, 4.0× P. 33 A Image quality SHQ, HQ, SQ1, SQ2 P. 41 Note • is displayed when the internal memory is used. When you use a card, is not displayed. • Memory gauge changes automatically to indicate whether the camera is ready for taking pictures - Olympus D-370 | D-370 Reference Manual (2.28MB) - Page 10
status 2 Protect 3 Moving image/Print service 4 Image quality SHQ, HQ, SQ1, SQ2 5 Exposure compensation +1.5, +2.0, -1.5, -2.0 6 White balance 7 File name 100-0012 8 Date/Time '01. 1. 1 12:00 9 Frame no./Recording time 12 (frames), 12" (seconds) 0 Internal memory Ref. Page P. 10 P. 52 - Olympus D-370 | D-370 Reference Manual (2.28MB) - Page 11
and check that the strap is securely attached. Caution Make sure that the strap is securely attached. If the strap is attached incorrectly and the camera comes loose and falls off, Olympus will not be responsible for any damage. 11 - Olympus D-370 | D-370 Reference Manual (2.28MB) - Page 12
with your both thumbs without applying unreasonable force. • If the camera is left without batteries for about one hour, all the settings will be reset to the default settings. • When powering the camera by batteries, if the batteries start to run low, the red battery - Olympus D-370 | D-370 Reference Manual (2.28MB) - Page 13
batteries are not easily affected by cold temperatures and are suitable for cold regions. ALKALINE BATTERIES The R6/AA alkaline batteries used by this camera are easily obtainable. The number of recordable images varies depending on the brand of battery and the conditions of use. Turn the monitor - Olympus D-370 | D-370 Reference Manual (2.28MB) - Page 14
CHOOSING A BATTERY Caution • Do not use manganese batteries. • Do not use the following batteries: G Batteries whose insulating cover is not completely intact. G Batteries whose (-) terminal protrudes but has no insulating cover. G Batteries whose (-) terminal is flat. (Do not use such - Olympus D-370 | D-370 Reference Manual (2.28MB) - Page 15
) The optional Olympus CAMEDIA AC adapter (C-7AU, 6V) enables you to power the camera from a household electrical outlet. AC adapter Power source Camera Caution • If you use batteries to power the camera while the camera is turned on for long periods of time (such as when downloading images to - Olympus D-370 | D-370 Reference Manual (2.28MB) - Page 16
if you need to store a large number of pictures. This camera only accepts SmartMedia removable memory. If you insert a SmartMedia card, the image will be stored on the card and you can playback the image with the card. If you remove the card from the camera, the image will be stored on the internal - Olympus D-370 | D-370 Reference Manual (2.28MB) - Page 17
. PREPARA- TIONS Note Non-Olympus or non-Lexar cards, or cards formatted on other equipment, such as a PC, may not be recognized by the camera. Format the card with the camera before using it. See "Card format/Memory setup" ( p.65). Caution • Never open the card cover or remove the SmartMedia - Olympus D-370 | D-370 Reference Manual (2.28MB) - Page 18
turns off PREPARA- TIONS Note • When the lens barrier is opened with no card inserted, "NO CARD" will be displayed on the monitor. This is not a malfunction. Use the internal memory of the camera to take pictures. • The camera's mode will change to power save mode if you do not carry out any - Olympus D-370 | D-370 Reference Manual (2.28MB) - Page 19
in the corresponding direction of the v/u mark. • The buttons operable on the camera are displayed below the menu. G Note • Some parts of the menu are whether a card is inserted or not. This is not a malfunction. • When the Shutter button is pressed while the menu is displayed, the picture will be - Olympus D-370 | D-370 Reference Manual (2.28MB) - Page 20
ADJUSTING THE DATE AND TIME 1 Press the button. The monitor will turn on. 2 Press the button. The Play menu will be displayed. PREPARA- TIONS 3 Select [SETUP] using the / buttons and press the button. 4 Select [ ] using the / buttons and press the button. 5 20 Select the date format [Y-M-D (Year - Olympus D-370 | D-370 Reference Manual (2.28MB) - Page 21
. Caution The date and time settings will be erased or become incorrect if the camera is left without batteries or the batteries are exhausted. Make sure that the date and time settings are correct before taking an important picture. Note The date and time can be adjusted both in Record mode and - Olympus D-370 | D-370 Reference Manual (2.28MB) - Page 22
. Horizontal position Vertical position Incorrect way to hold camera Keep your fingers and the strap away from the lens and flash. TAKING PICTURES Note To avoid blurred pictures, do not move the camera when pressing the Shutter button. Hold the camera firmly and press the Shutter button gently - Olympus D-370 | D-370 Reference Manual (2.28MB) - Page 23
TAKING PICTURES TAKING PICTURES When you take a picture, the image is stored in the camera's internal memory. If you insert a memory card (optional), the image will be stored on the card. TAKING PICTURES USING THE VIEWFINDER 1 Open the lens barrier. Slide the lens barrier open until it clicks. 2 - Olympus D-370 | D-370 Reference Manual (2.28MB) - Page 24
when the Shutter button is pressed halfway, the flash is not fully charged. The green lamp blinks while the camera is recording the picture taken. Wait for 2 to 40 seconds until the green lamp stops blinking. • When the memory gauge is full, no more images can be taken. Wait a few seconds until the - Olympus D-370 | D-370 Reference Manual (2.28MB) - Page 25
Caution • Press the Shutter button gently. Pressing the button down hard will cause the camera to move, resulting in a blurred picture. • Never remove the battery or AC adapter, or open the card cover while the green lamp is blinking. The picture you have just taken may not be recorded and previous - Olympus D-370 | D-370 Reference Manual (2.28MB) - Page 26
to suit various conditions. 1 Open the lens barrier. The camera will turn on in Record mode. 2 Press the button. The Camera menu screen will be displayed. 3 Select [CAMERA] using the / buttons and press the button. TAKING PICTURES 4 Select [ ] using the / buttons and press the button. 5 Select - Olympus D-370 | D-370 Reference Manual (2.28MB) - Page 27
Wait until the green lamp goes off. • When taking pictures at close range using the flash, the appropriate brightness may not be achieved and there may be pronounced shadows as a result. Olympus recommends that you check the picture on the camera's LCD monitor. • The flash cannot be used in Sequence - Olympus D-370 | D-370 Reference Manual (2.28MB) - Page 28
to photograph a person, their eyes may appear red in the resulting picture. Red-eye mode significantly reduces this phenomenon by emitting a pre-flash before it takes about 2 seconds before the shutter is released. Hold the camera firmly to avoid hand jitter. • The effectiveness of the red-eye - Olympus D-370 | D-370 Reference Manual (2.28MB) - Page 29
to capture the surrounding conditions. The red-eye phenomenon is reduced by the preflash. TAKING PICTURES Caution You are recommended to mount the camera on a tripod to avoid camera movement when taking pictures in Flash Off ( ), Night View ( ) or Night View/Red-eye ( ) Reduction flash modes - Olympus D-370 | D-370 Reference Manual (2.28MB) - Page 30
button is released. • If you use the flash in Macro mode, the brightness may not be correct and there may be pronounced shadows as a result. Olympus recommends that you check the picture on the camera's monitor. - Olympus D-370 | D-370 Reference Manual (2.28MB) - Page 31
TAKING PICTURES SELFTIMER You can use the selftimer to take photographs including the photographer. Use a tripod to keep the camera steady. 1 Open the lens barrier. The camera will turn on in Record mode. 2 Press the button. The Camera menu screen will be displayed. 3 Select [CAMERA] using the / - Olympus D-370 | D-370 Reference Manual (2.28MB) - Page 32
SELFTIMER 6 Take the picture. The Selftimer lamp lights for 10 sec. and then blinks for 2 sec. before the picture is taken. Note Selftimer lamp • The Selftimer is canceled automatically after the picture is taken. • To cancel the Selftimer after the Shutter button has been pressed, shut the lens - Olympus D-370 | D-370 Reference Manual (2.28MB) - Page 33
TAKING PICTURES DIGITAL TELE MODE This mode enables you to enlarge the image digitally to magnifications 1.6×, 2×, 3.2× and 4×. You can only set magnifications 3.2× and 4× in SQ2 modes. See "Image Quality" ( p. 41). 1 Open the lens barrier. The camera will turn on in Record mode. 2 Press the button - Olympus D-370 | D-370 Reference Manual (2.28MB) - Page 34
"Erasing an image" ( p. 50). 1 Open the lens barrier The camera will turn on in Record mode. 2 Press the button. The Camera menu screen will be displayed. 3 Select [CAMERA] using the / buttons, and press the button. TAKING PICTURES 4 Select [DRIVE] using the / buttons, and press the button. 5 34 - Olympus D-370 | D-370 Reference Manual (2.28MB) - Page 35
be darker than usual. • It takes a while to record the images taken in this mode. • The number of recordable pictures will vary depending on the image quality mode and whether a SmartMedia card is used. If you intend to take a lot of pictures, a SmartMedia card is recommended. TAKING PICTURES 35 - Olympus D-370 | D-370 Reference Manual (2.28MB) - Page 36
TAKING PICTURES EXPOSURE COMPENSATION In addition to automatic exposure, you can to make it darker. 1 Open the lens barrier. The camera will turn on in Record mode. 2 Press the button. The Camera menu screen will be displayed. 3 Select [CAMERA] using the / buttons and press the button. 4 Select - Olympus D-370 | D-370 Reference Manual (2.28MB) - Page 37
completed. Press the button again to exit the menu. 6 Take the picture. Note • The setting of exposure compensation will be returned to ±0.0 ( difference because the subject is dark, display the recorded image on the camera's monitor to check the brightness. Caution • The desired brightness ( - Olympus D-370 | D-370 Reference Manual (2.28MB) - Page 38
light metering setting (Digital ESP). In this case, change the setting to Spot metering, and you can take the picture according to the barrier. The camera will turn on in Record mode. TAKING PICTURES 2 Press the button. The Camera menu screen will be displayed. 3 Select [CAMERA] using the - Olympus D-370 | D-370 Reference Manual (2.28MB) - Page 39
. Fluorescent Light ( ) : Ensures natural colors in fluorescent light. 1 Open the lens barrier. The camera will turn on in Record mode. 2 Press the button. The Camera menu screen will be displayed. 3 Select [PICTURE] using the / buttons and press the button. 4 Select [ ] using the / buttons and - Olympus D-370 | D-370 Reference Manual (2.28MB) - Page 40
using the / buttons and press the button: [AUTO Setting of white balance is completed. Press the button again to exit the menu. 6 Take the picture. Note • The white balance setting will return to [AUTO] (default setting) when the lens barrier is closed. • Natural colors are hard to obtain under - Olympus D-370 | D-370 Reference Manual (2.28MB) - Page 41
* Pixel is the unit used to represent the image size. 1 Open the lens barrier. The camera will turn on in Record mode. 2 Press the button. Tne Camera menu screen will be displayed. 3 Select [PICTURE] using the / buttons and press the button. 4 Select [ ] using the / buttons and press the button - Olympus D-370 | D-370 Reference Manual (2.28MB) - Page 42
is completed. Press the button again to exit the menu. 6 Take the picture. Note • The image quality setting will remain even when the lens barrier is setting and the storage method used. (The camera's internal memory capacity is 1MB, SmartMedia cards are currently available in 8MB to 128 MB - Olympus D-370 | D-370 Reference Manual (2.28MB) - Page 43
TAKING PICTURES PANORAMA MODE The Olympus CAMEDIA brand SmartMedia cards support Panorama mode. You can join several images to make a composite panorama image using the included CAMEDIA Master software. Make sure the SmartMedia card is correctly inserted into the camera before operation. 1 Open the - Olympus D-370 | D-370 Reference Manual (2.28MB) - Page 44
Panorama mode when using an Olympus CAMEDIA brand SmartMedia. • Panorama images must be assembled on a computer. Follow the software directions carefully to successfully assemble panorama images. • Because the exposure and white balance are determined by the first picture taken, do not shoot overly - Olympus D-370 | D-370 Reference Manual (2.28MB) - Page 45
to display images recorded in the internal memory, remove the SmartMedia card from the camera. 1 Press the button with the lens barrier closed. The monitor will turn on and the last recorded image will be displayed on the monitor. PLAYINGBACK PICTURES 2 Press the / buttons. Press the button to - Olympus D-370 | D-370 Reference Manual (2.28MB) - Page 46
the frame to the previous image. 4 Press the button. The image in the green frame will be displayed in single-image playback mode. 46 PLAYINGBACK PICTURES - Olympus D-370 | D-370 Reference Manual (2.28MB) - Page 47
and press the button. Setting of the number of images in the index playback is completed. Press the button again to exit the menu. PLAYINGBACK PICTURES 47 - Olympus D-370 | D-370 Reference Manual (2.28MB) - Page 48
button. Note If you display the Play menu while an image marked by the Moving Image ( ) symbol is being played, you cannot select [ ]. Display a still picture first. PLAYINGBACK PICTURES 48 - Olympus D-370 | D-370 Reference Manual (2.28MB) - Page 49
PLAYBACK Images can be played back in 4 stages of magnification: 1.5×, 2×, 2.5× and 3×. This function is convenient when you want to check the details of the picture taken. 1 Close the lens barrier and press the button. The monitor will turn on. 2 Press the button. The image will be magnified in the - Olympus D-370 | D-370 Reference Manual (2.28MB) - Page 50
using the / buttons and press the button. The image will be erased. PLAYINGBACK PICTURES Caution 50 • You can also move to the erase menu by keeping the button the SmartMedia card, the image cannot be erased. Unprotect the image or remove the write-protect seal on the SmartMedia card before - Olympus D-370 | D-370 Reference Manual (2.28MB) - Page 51
ERASING ALL IMAGES PLAYINGBACK PICTURES You can erase all the images in the internal memory or on the SmartMedia card. Caution • When erasing images in the internal memory, do not insert a SmartMedia card. • When erasing images on a SmartMedia card, insert the card first. 1 Close the lens - Olympus D-370 | D-370 Reference Manual (2.28MB) - Page 52
will be protected. To cancel the protect setting, select [OFF]. PLAYINGBACK PICTURES Note • You can also protect an image by keeping the button pressed is indicated by a symbol. • The protect setting is saved when the camera is turned off. Caution 52 • Protected images cannot be erased by [ - Olympus D-370 | D-370 Reference Manual (2.28MB) - Page 53
image data. Caution (When creating monochrome image) • This function is not available for moving images. • This function is not available if you are using a SmartMedia card with a write-protect seal affixed to it. PLAYINGBACK PICTURES 53 - Olympus D-370 | D-370 Reference Manual (2.28MB) - Page 54
RESIZING PLAYINGBACK PICTURES You can change the size of a selected image to 640 × 480 or 320 × 240 and record the image as separate × 240, you cannot select [320 × 240 CREATE] in the menu. • This function is not available if you are using a SmartMedia card with a write-protect seal affixed to it. - Olympus D-370 | D-370 Reference Manual (2.28MB) - Page 55
be recorded as separate image data. Caution • This function is not available for moving images. • This function is not available if you are using a SmartMedia card with a write-protect seal affixed to it. PLAYINGBACK PICTURES 55 - Olympus D-370 | D-370 Reference Manual (2.28MB) - Page 56
MODE RECORDING A MOVING IMAGE In addition to still pictures, this camera has the ability to take movie pictures. 1 Open the lens barrier. The camera will turn on in Record mode. 2 Press the button. The Camera menu screen will be displayed. 3 Select [CAMERA] using the / buttons and press the button - Olympus D-370 | D-370 Reference Manual (2.28MB) - Page 57
be used in Movie mode. • It takes a while to record the images taken in this mode. • The recordable time will vary depending on whether a SmartMedia card is used. • Sound cannot be recorded. 57 - Olympus D-370 | D-370 Reference Manual (2.28MB) - Page 58
quality settings (HQ and SQ) that can be used to record moving images. 1 Select Movie mode and press the button. The Camera menu screen will be displayed. 2 Select [PICTURE] using the / buttons and press the button. 3 Select [ ] using the / buttons and press the button. 4 Select [HQ 320 × 240] or - Olympus D-370 | D-370 Reference Manual (2.28MB) - Page 59
PLAYING BACK MOVING IMAGES 1 Close the lens barrier and press the button. The monitor will turn on. 2 Display the desired image with the symbol indicated and press the button. The Play menu screen will be displayed. 3 Select [PLAY] using the / buttons and press the button. 4 Select [ ] using the / - Olympus D-370 | D-370 Reference Manual (2.28MB) - Page 60
MOVIE MODE TO PAUSE PLAYING BACK MOVING IMAGE Press any button of the to activate Pause status. (arrow pad) during playback of a moving image OPERATION DURING PAUSE STATUS The following buttons can be operated while the moving image is in Pause status. Press button Playback resumes Keep button - Olympus D-370 | D-370 Reference Manual (2.28MB) - Page 61
REC VIEW After each picture is taken, you can confirm the image on the LCD monitor. 1 Open the lens barrier. The camera will turn on in Record mode. 2 Press the button. The Camera menu screen will be displayed. 3 Select [SETUP] using the / buttons and press the button. 4 Select [REC VIEW] using the - Olympus D-370 | D-370 Reference Manual (2.28MB) - Page 62
BEEP SOUND This function enables you to turn off the beep sound. 1 Open the lens barrier. The camera will turn on in Record mode. 2 Press the button. The Camera menu screen will be displayed. 3 Select [SETUP] using the / buttons and press the button. 4 Select [ ] using the / buttons and press the - Olympus D-370 | D-370 Reference Manual (2.28MB) - Page 63
, see "Play mode screen" ( p.10). Image data display ON Image data display OFF OTHER FUNCTIONS 1 Close the lens barrier and press the button. The camera will turn on in Play mode. 2 Press the button. The Play menu screen will be displayed. 3 Select [PLAY] using the / buttons and press the - Olympus D-370 | D-370 Reference Manual (2.28MB) - Page 64
ADJUSTING THE MONITOR BRIGHTNESS 1 Open the lens barrier. The camera will turn on in Record mode. 2 Press the button. The Camera menu screen will be displayed. 3 Select [SETUP] using the / buttons and press the button. 4 Select [ ] using the / buttons and press the button. 5 Adjust the brightness - Olympus D-370 | D-370 Reference Manual (2.28MB) - Page 65
formatting the internal memory, do not insert a SmartMedia card. • When formatting a SmartMedia card, insert the card first. • Before using a non-Olympus SmartMedia card or a card formatted on a PC, format the card on the camera first. Olympus CAMEDIA brand SmartMedia cards do not require formatting - Olympus D-370 | D-370 Reference Manual (2.28MB) - Page 66
memory from the Camera menu. Caution • All protected images will be erased. Once formatted, the SmartMedia card or internal memory cannot be restored. • If an Olympus template card is formatted, all the card functions will be lost. For details, refer to the instruction manual for the card. • Cards - Olympus D-370 | D-370 Reference Manual (2.28MB) - Page 67
enables you to copy (backup) all image data recorded in the internal memory onto a SmartMedia card. Prepare a SmartMedia card and insert it before following the procedure below. 1 Close the lens barrier and press the button. The camera will turn on in Play mode. 2 Press the button. The Play menu - Olympus D-370 | D-370 Reference Manual (2.28MB) - Page 68
card before following the procedure below. See "Using a SmartMedia card (optional)" ( p.16). 1 Close the lens barrier and press the button. The camera want to cancel the print service using the / buttons and press the button. This screen is displayed when the print service has been requested. Select - Olympus D-370 | D-370 Reference Manual (2.28MB) - Page 69
Select the image using the / buttons and specify the number of prints from 1-9 using the / buttons. When the number of prints is 0, the print service is not requested. 8 When you have finished making the settings, press the button. ALL IMAGES 7 Select [ ] using the / buttons and press the button - Olympus D-370 | D-370 Reference Manual (2.28MB) - Page 70
PRINT SERVICE CANCELLING ALL DPOF SETTINGS 7 Select [ RESET] using the / buttons and press the button. All the DPOF settings will be cancelled. IMPRINTING THE DATE 7 Select the - Olympus D-370 | D-370 Reference Manual (2.28MB) - Page 71
no images in the card. Take pictures and then play back. TROUBLE- SHOOTING No images can be displayed. There are no images in the internal memory. Take pictures and then play back. Selected image cannot be displayed. Images on a card recorded with another brand of camera or images transferred - Olympus D-370 | D-370 Reference Manual (2.28MB) - Page 72
automatically turned off Close lens barrier, then reopen. Camera is connected to a The camera will not function PC while connected to a PC. Condensation inside camera Remove batteries from the camera and let the camera dry. Ref. Page P.18 P.12 P.12 P.12 P.18 - - The flash does not fire Cause - Olympus D-370 | D-370 Reference Manual (2.28MB) - Page 73
until green lamp stops blinking. picture is being processed Internal memory capacity or card capacity is full Erase unwanted images 12 recording or while writing lamp is blinking, wait until data on card recording is finished.) Write-protected seal on Insert new card or remove the P.17 card - Olympus D-370 | D-370 Reference Manual (2.28MB) - Page 74
or Flash Off. Subject is too bright Adjust the exposure compensation P.36 or change the camera position toward the subject. The picture is too dark Cause Flash was blocked by finger Subject is out of range of flash balance to suit the lighting. Ref. Page P.28 P.39 P.39 TROUBLE- SHOOTING 74 - Olympus D-370 | D-370 Reference Manual (2.28MB) - Page 75
PROBLEMS Part of the image is obscured Cause Remedy Lens was partly blocked by Hold the camera correctly. finger or strap Shooting distance is too close Check the composition of the picture on the monitor before taking the picture. Ref. Page P.22 P.24 The picture is out of focus Cause The - Olympus D-370 | D-370 Reference Manual (2.28MB) - Page 76
: Digital camera (for recording and displaying) Recording system: Digital recording, compatible with JPEG (based on DCF) and DPOF Recording media: Internal memory 1MB, SmartMedia card (4MB protect, image quality, battery level, file number, print service, menu, etc. TROUBLE- SHOOTING 76 - Olympus D-370 | D-370 Reference Manual (2.28MB) - Page 77
jack (USB) Date and time: Recorded with image data simultaneously Automatic calendar function: Automatic adjustment in range of 1981 ~ 2031 Calendar power source: Backup by built-in capacitor Card function: DPOF-compatible print service, Panorama assembly (when an Olympus standard card is - Olympus D-370 | D-370 Reference Manual (2.28MB) - Page 78
13 Arrow pad 8 Auto playback 48 B Batteries 12 Battery compartment cover 8 Battery status 9, 10 Beep sound 62 C Card 16 Card format 65 Close-up playback 49 Cloudy 39 Connector cover 7 D Date/Time 10 Daylight 39 DC-IN jack 7 Digital ESP 38 Digital Tele mode 33 Drive 9 E Erasing all - Olympus D-370 | D-370 Reference Manual (2.28MB) - Page 79
mode screen 10 Playing back an image 45 Print service 68 Protecting 52 T Target mark 8 Tripod socket 8 Tungsten Light 39 U USB connector 7 V Viewfinder 8 W White Balance SHQ 41 Shutter button 7 SmartMedia card 16 Spot metering 38 SQ1 41 SQ2 41 Strap eyelet 8 TROUBLE- SHOOTING 79 - Olympus D-370 | D-370 Reference Manual (2.28MB) - Page 80
-
 1
1 -
 2
2 -
 3
3 -
 4
4 -
 5
5 -
 6
6 -
 7
7 -
8
-
9
-
10
-
11
-
12
-
13
-
14
-
15
-
16
-
17
-
18
-
19
-
20
-
21
-
22
-
23
-
24
-
25
-
26
-
27
-
28
-
29
-
30
-
31
-
32
-
33
-
34
-
35
-
36
-
37
-
38
-
39
-
40
-
41
-
42
-
43
-
44
-
45
-
46
-
47
-
48
-
49
-
50
-
51
-
52
-
53
-
54
-
55
-
56
-
57
-
58
-
59
-
60
-
61
-
62
-
63
-
64
-
65
-
66
-
67
-
68
-
69
-
70
-
71
-
72
-
73
-
74
-
75
-
76
-
77
-
78
-
79
-
80
 |
 |

DIGITAL CAMERA
C-100
D-370
OPERATION MANUAL
●
Thank you for purchasing an Olympus digital camera.
●
Please read this manual carefully before using your camera.
We recommend
that you check that your camera is functioning correctly by taking a number
of test shots.
CAMERA
OPERATION