Olympus DM-420 DM-420 Detailed Instructions (English) - Page 20
Setting time and date [Time & Date]
 |
UPC - 807360860875
View all Olympus DM-420 manuals
Add to My Manuals
Save this manual to your list of manuals |
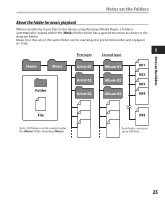
Page 20 highlights
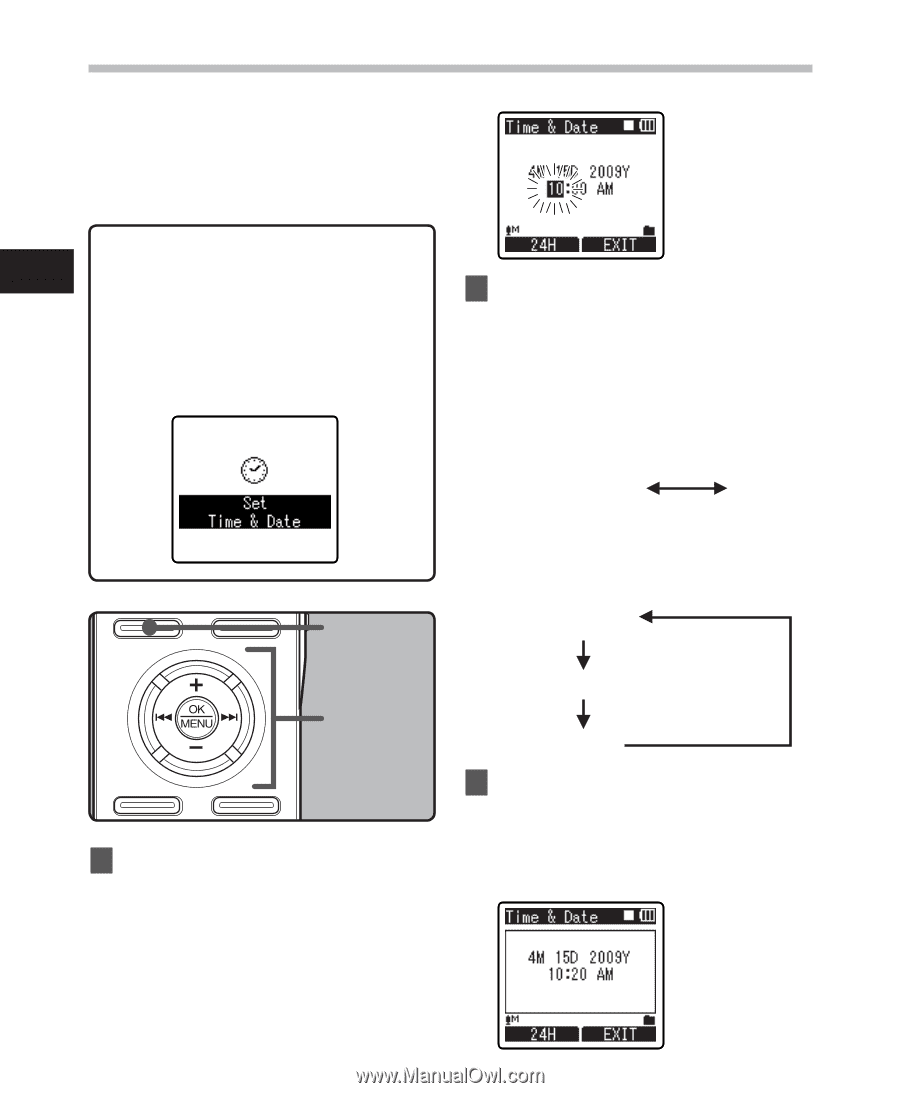
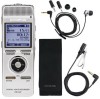
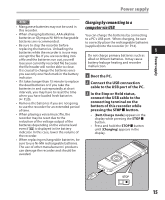
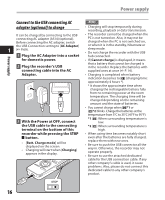
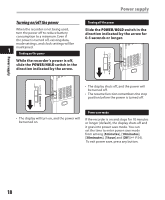
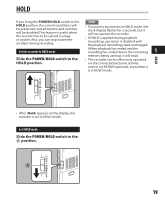
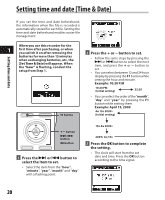
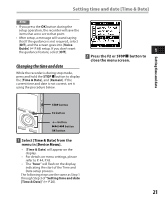
Setting time and date Setting time and date [Time & Date] If you set the time and date beforehand, the information when the file is recorded is automatically stored for each file. Setting the time and date beforehand enables easier file management. When you use this recorder for the 1 first time after purchasing, or when you switch it on after removing the batteries for more than 15 minutes when exchanging batteries, etc, the [Set Time & Date] will appear. When the "hour" is flashing, conduct the setup from Step 1. F1 button 2 Press the + or − button to set. • Follow the same steps by pressing the 9 or 0 button to select the next item, and press the + or − button to set. • You can select between 12 and 24 hour display by pressing the F1 button while setting the hour and minute. Example: 10:20 P.M 10:20 PM (Initial setting) 22:20 • You can select the order of the "month", "day" and "year" by pressing the F1 button while setting them. Example: April 15, 2009 4M 15D 2009Y (Initial setting) +− button 9 0 button OK button 1 Press the 9 or 0 button to select the item to set. • Select the item from the "hour", "minute", "year", "month" and "day" with a flashing point. 15D 4M 2009Y 2009Y 4M 15D 3 Press the OK button to complete the setting. • The clock will start from the set date and time. Press the OK button according to the time signal. 20
-
 1
1 -
2
-
3
-
4
-
5
-
6
-
7
-
8
-
9
-
10
-
11
-
12
-
13
-
14
-
 15
15 -
 16
16 -
 17
17 -
 18
18 -
 19
19 -
 20
20 -
 21
21 -
 22
22 -
 23
23 -
 24
24 -
 25
25 -
26
-
27
-
28
-
29
-
30
-
31
-
32
-
33
-
34
-
35
-
36
-
37
-
38
-
39
-
40
-
41
-
42
-
43
-
44
-
45
-
46
-
47
-
48
-
49
-
50
-
51
-
52
-
53
-
54
-
55
-
56
-
57
-
58
-
59
-
60
-
61
-
62
-
63
-
64
-
65
-
66
-
67
-
68
-
69
-
70
-
71
-
72
-
73
-
74
-
75
-
76
-
77
-
78
-
79
-
80
-
81
-
82
-
83
-
84
-
85
-
86
-
87
-
88
-
89
-
90
-
91
-
92
-
93
-
94
-
95
-
96
-
97
-
98
-
99
-
100
-
101
-
102
-
103
-
104
-
105
-
106
-
107
-
108
-
109
-
110
-
111
-
112
-
113
-
114
-
115
-
116
-
117
-
118
-
119
-
120
-
121
-
122
-
123
-
124
-
125
-
126
-
127
-
128
 |
 |