Olympus E-20 Auto-Connect USB Instructions for E-10 (English) - Page 8
Zoom, C-2100 Ultra Zoom and the C-211 Zoom Digital Printing Camera. - e 20 digital camera
 |
UPC - 050332147980
View all Olympus E-20 manuals
Add to My Manuals
Save this manual to your list of manuals |
Page 8 highlights
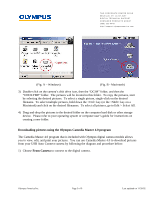
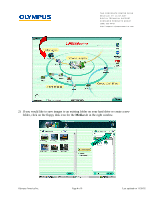
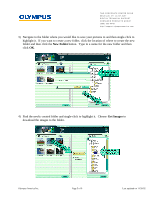
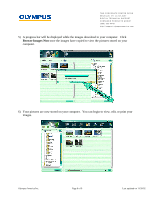
TWO CORPORATE CENTER DRIVE MELVILLE, NY 11747-3157 DIGITAL TECHNICAL SUPPORT CONSUMER PRODUCTS GROUP (888) 553-4448 http://support.olympusamerica. com 2) To copy the pictures, start by selecting the desired pictures. To select a single picture, singleclick on the desired thumbnail. To select multiple pictures, hold down the key (or the key on a Macintosh) and click on the desired thumbnails. To select all pictures, go to Edit menu and choose "Select All". 3) Drag-and-drop the pictures to the desired folder in the directory tree window on the left. To create a new folder in Windows, right-click on the directory tree in the left pane, then select "New Folder". To create a new forlder on a Macintosh, select File > New Folder. NOTE: The following menus/features in Camedia Master 2.5 do not apply to USB Auto Connect cameras. These features were designed to for serial or standard USB connected cameras that do not use an emulated disk drive. Standard USB cameras include the C-3000/3030 Zoom, C-2100 Ultra Zoom and the C-211 Zoom Digital Printing Camera. • My Camera • All functions located under the "Camera" menu Disconnecting the camera from the computer After the pictures have been completely downloaded to your computer, disconnect the camera from your computer by following the procedures below: For Windows ME/2000/XP 1. Verify that media card access indicator is not blinking. Some camera models have either a lamp on the right of the viewfinder or a card access lamp. The location varies depending on the model. Refer to examples shown below. 2. Single-click the "Unplug or Eject Hardware" icon on the task bar. The message saying that the drive has been stopped appears. 3. Click on the message. The "Unplug or Eject Hardware" window appears. 4. When a confirmation message appears, click "OK". Olympus America Inc. Page 8 of 9 Last updated on 11/20/02
-
 1
1 -
2
-
 3
3 -
 4
4 -
 5
5 -
 6
6 -
 7
7 -
 8
8 -
 9
9
 |
 |
