Onkyo TX-RZ810 User Manual - Page 29
Rear Panel
 |
View all Onkyo TX-RZ810 manuals
Add to My Manuals
Save this manual to your list of manuals |
Page 29 highlights
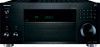
> Before start > Hookup > Setup > Playback > Part Names Rear Panel 1 23 4 56 7 8 9 10 11 90° 9 180° 12 13 1. DIGITAL IN OPTICAL/COAXIAL jacks: Input TV or AV component digital audio signals with a digital optical cable or digital coaxial cable. 2. TUNER AM/FM 75Ω terminal: The supplied antennas are connected. 3. VIDEO IN jacks: Input the video signals from AV components with an analog video cable. 4. USB port: A USB storage device is connected so that music files stored in it can be played. You can also supply power (maximum 5V/1A) to USB devices with a USB cable. 5. ETHERNET port: Connect to the network with an Ethernet cable. 6. COMPONENT VIDEO IN jacks: Input the video signals from AV components with a component video cable. 14 15 16 17 18 7. HDMI OUT jacks: Transmit video signals and audio signals with a HDMI cable connected to a monitor such as a TV or projector. 8. HDMI IN jacks: Transmit video signals and audio signals with a HDMI cable connected to an AV component. 9. Wireless antenna: Used for Wi-Fi connection or when using a BLUETOOTH enabled device. Adjust their angles according to the connection status. 10.RS232 port: For connection to the home control system. 11. AC INLET: The supplied power cord is connected. 12.GND terminal: The ground wire of the turntable is connected. 13.AUDIO IN jacks: Input TV or AV component audio signals with an analog audio cable. 14.SPEAKERS terminals: Connect speakers with speaker cables. You can connect the multichannel speakers for the 19 20 main room and the speakers for a separate room (ZONE 2). (North American models are compatible with banana plugs.) 15.ZONE 3 PRE/LINE OUT jacks: Output audio signals with an analog audio cable to a pre-main amplifier or power amplifier in a separate room (ZONE 3). (P17) 16.ZONE 2 PRE/LINE OUT jacks: Output audio signals with an analog audio cable to a pre-main amplifier or power amplifier in a separate room (ZONE 2). (P17) 17.SUBWOOFER PRE OUT jack: Connect a powered subwoofer with a subwoofer cable. Up to two powered subwoofers can be connected. The same signal is output from each of the SUBWOOFER PRE OUT jacks. 18.PRE OUT jacks: Connect a power amplifier. 19. 12V TRIGGER OUT jack: Allows you to connect a device with 12V trigger input jack to enable link operation between the device and the unit. 20.IR IN port: Allows you to connect a multiroom remote control kit. 29
-
 1
1 -
2
-
3
-
4
-
5
-
6
-
7
-
8
-
9
-
10
-
11
-
12
-
13
-
14
-
15
-
16
-
17
-
18
-
19
-
20
-
21
-
22
-
23
-
 24
24 -
 25
25 -
 26
26 -
 27
27 -
 28
28 -
 29
29 -
 30
30 -
 31
31 -
 32
32 -
 33
33 -
 34
34 -
35
-
36
 |
 |
