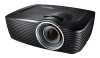
Optoma EH501 User's Manual
Optoma EH501 Manual
 |
View all Optoma EH501 manuals
Add to My Manuals
Save this manual to your list of manuals |
Optoma EH501 manual content summary:
- Optoma EH501 | User's Manual - Page 1
69 Replacing the Dust Filter ...69 Replacing the Lamp ...70 Ceiling mount installation ...72 Compatibility Modes ...73 IR Code ...76 Telnet Commands ...78 PJLink commands ...79 AMX Device Discovery commands 80 RS232 Commands and Protocol Function List 81 Troubleshooting ...87 Optoma Global - Optoma EH501 | User's Manual - Page 2
with the voltage of your local power supply. 7. Servicing Do not attempt to service this projector yourself. Refer all servicing to qualified service personnel. 8. Replacement parts When replacement parts are required, be sure that the replacement parts are specified by the manufacture. Unauthorized - Optoma EH501 | User's Manual - Page 3
moving it from a cold location to a warm one. When the projector is exposed to such a change in temperature, moisture may condense on the lens and the crucial internal parts. To prevent the unit from possible damage, do not use the projector for at least 2 hours when there is an extreme or sudden - Optoma EH501 | User's Manual - Page 4
your AC plug type with the graphics below and ensure that the proper AC Power Cord is used. If the supplied AC Power Cord does not match your AC outlet, please contact your sales dealer. This projector is equipped with a grounding type AC line plug. Please ensure that your outlet fits the plug - Optoma EH501 | User's Manual - Page 5
control „ Quick Resume feature „ Eco+ mode for more economic usage „ Full 3D „ HDMI compatibility „ PJLinkTM compatibility „ Support wireless dongle via internal power of VGA 2 „ LAN Settings allowing management of projector status from a remote computer „ LAN display 4-1 (maximum 4PC/ NB display to - Optoma EH501 | User's Manual - Page 6
sure you have all these components: Projector AC Power Cord VGA Cable (D-SUB to D-SUB) Remote Control with Laser Pointer & batteries (AAA *2 PCS) Carry Bag (optional for certain models) Dust filter (depending on region) Documentation: 5User's Manual 5Warranty Card 5Quick Start Card 5WEEE - Optoma EH501 | User's Manual - Page 7
Projector Overview Front View 10 98 1 23 4 5 6 7 1 Front adjustment foot 2 Projection lens 3 Focus ring 4 Front IR remote control sen- sor 5 Security bar 6 Speaker 7 Ventilation holes 8 Control panel 9 Zoom ring 10 Top cover EN-7 - Optoma EH501 | User's Manual - Page 8
ports 4 Kensington lock Bottom View 5 Rear IR remote control sensor 6 Optional wireless dongle slot 7 Speaker 8 Ventilation holes 1 2 1 Ceiling mount holes 22 Rear adjustment feet Note „ This projector can be used with a ceiling mount for support. The ceiling mount is not included in the package - Optoma EH501 | User's Manual - Page 9
"LED Indicator Messages" on page 88. 8 Four directional buttons Use four directional buttons to select items or make adjustments to your selection. 9 Re-SYNC Automatically synchronize the projector to the input source. 10 Power Turn the projector on or off. 11 ENTER Confirm your item selection. EN - Optoma EH501 | User's Manual - Page 10
16 15 14 13 12 11 10 1 RS-232C When operating the projector via a computer, connect this to the controlling computer's RS-232C port S-Video output from video equipment to this jack. 4 MOUSE/SERVICE This connector supports firmware update, remote mouse and page up/ down. 5 HDMI Connect HDMI output - Optoma EH501 | User's Manual - Page 11
Connect composite video output from video equipment to this jack. 16 VGA2-IN / YPbPr / Connect image input signal (analog RGB or component) to this jack. Support wireless dongle via internal power of VGA 2. 17 VGA1-IN / YPbPr Connect image input signal (analog RGB or component) to this jack. EN-11 - Optoma EH501 | User's Manual - Page 12
the projector on or off. 2 Source Switch between input signals. 3 Left mouse Perform the left button of the mouse when mouse mode is activated. 4 Four directional buttons Use when mouse mode is activated. 6 Keystone (+/-) Manually correct distorted images resulting from an angled projection. EN-12 - Optoma EH501 | User's Manual - Page 13
User definable key for customized function. 15 Re-SYNC Automatically synchronize the projector to the input source. 16 Right mouse Perform the right button of the mouse when mouse mode is activated. 17 Enter Confirmed selections. Enter key for emulation of USB mouse via USB. 18 Laser Aim the remote - Optoma EH501 | User's Manual - Page 14
Remote with Laser Pointer. Using the remote mouse control The capability of operating your computer with the remote control gives you more flexibility when delivering presentations. 1. Connect the projector . 4. Perform the desired mouse controls on your remote control. „ To move the cursor on the - Optoma EH501 | User's Manual - Page 15
inside the compartment. 3. Close the battery cover into position. Caution „ Risk of explosion if battery is replaced by an incorrect type. „Dispose of used batteries according to the instructions. „ Make sure the plus and minus terminals are correctly aligned when loading a battery. Note „ Keep the - Optoma EH501 | User's Manual - Page 16
10m 7m „ Operating the projector from the rear 15 15 5m 10m 7m Note „ The remote control may not operate when there is sunlight or other strong light such as a fluorescent lamp shining on the remote sensor. „ Operate the remote control from a position where the remote sensor is visible. „ Do - Optoma EH501 | User's Manual - Page 17
Connection When connecting a signal source to the projector, be sure to: 1. Turn all equipment off before making any connections. 2. Use the correct signal cables for each source. 3. Ensure the cables are firmly inserted. 1 23 4 1 5 6 7 8 9 10 11 12 3 1 VGA cable (D-Sub to D-Sub) 2 USB cable - Optoma EH501 | User's Manual - Page 18
10 Composite video cable 11 USB flash drive 12 Microphone 3.5 mini jack cable Note „ Due to the difference in applications for each country, some regions may have different accessories. „ (*) Optional Accessory EN-18 - Optoma EH501 | User's Manual - Page 19
connect them to both IBM® compatible and Macintosh® computers. A Mac adapter is needed if you are connecting legacy version Macintosh computers. To connect the projector to a notebook or desktop computer: 1. Take the supplied VGA cable and connect one end to the D-Sub output socket of the computer - Optoma EH501 | User's Manual - Page 20
the screen, you can connect the VGA-OUT signal output socket on the projector to an external monitor with a VGA cable following the instructions below: To connect the projector to a monitor: 1. Connect the projector to a computer as described in "Connecting a computer" on page 19. 2. Take a suitable - Optoma EH501 | User's Manual - Page 21
provide any one of the following output sockets: „ HDMI „ Component Video „ S-Video „ Video (composite) You need only connect the projector to a Video source device using just one of the above connecting methods, however each provides a different level of video quality. The method you choose will - Optoma EH501 | User's Manual - Page 22
jacks available: „ If so, you can continue with this procedure. „ If not, you will need to reassess which method you can use to connect to the device. To connect the projector to an HDMI source device: 1. Take an HDMI cable and connect one end to the HDMI output jack of the HDMI - Optoma EH501 | User's Manual - Page 23
socket available: „ If so, you can continue with this procedure. „ If not, you will need to reassess which method you can use to connect to the device. To connect the projector to an S-Video source device: 1. Take an S-Video cable and connect one end to the S-Video output socket of the Video - Optoma EH501 | User's Manual - Page 24
If you are connecting multiple sources to the projector simultaneously, press SOURCE on the projector or Source on the remote control to select your desired signal or press your desired signal key on the remote control. Warning „Never look into the lens when the lamp is on. This can damage your eyes - Optoma EH501 | User's Manual - Page 25
the rear adjustment feet to fine- tune the height. Note „ To avoid damaging the projector, make sure that the adjustment feet are fully retracted before placing the projector in its carrying case. Adjusting the Projector Zoom and Focus Zoom ring Focus ring 1. Focus the image by rotating the focus - Optoma EH501 | User's Manual - Page 26
Adjusting Projection Image Size Refer to the graphic and table below to determine the screen size and projection distance. Maximum zoom Minimum zoom Screen Center of lens Vertical offset Projection distance XGA model Screen size Diagonal [inch (cm)] 30 (76) 40 (102) 60 (152) 80 (203) 100 (254) - Optoma EH501 | User's Manual - Page 27
762) 16:9 Screen Projection distance [feet (m)] Image height projector. „ Do not use the projector in a smoky environment. Smoke residue may build-up on critical parts and damage the projector or its performance. „ Consult with your dealer for special installation such as suspending from a ceiling - Optoma EH501 | User's Manual - Page 28
Adjusting the position using the vertical lens shift function If the projector is not positioned right in front of the center of the screen, you can adjust the vertical position of projected image by moving the vertical - Optoma EH501 | User's Manual - Page 29
down)). Shift to top Lens shift adjustable range 17% 0.17V 1V 0.15V Shift range Lens shift center position Attention Please note the following s when using the projector. „ Do not touch the lens while it is moving as this could cause injury to the fingers. „ Never allow children to touch the lens - Optoma EH501 | User's Manual - Page 30
make image adjustments and change a variety of settings. How to operate 1. To open the OSD menu, press "Menu" on the Remote Control or Projector Keypad. 2. When OSD is displayed, use / key to select to select any item in the main menu. While making a selection on a particular page, press or "Enter - Optoma EH501 | User's Manual - Page 31
Red Green Blue Cyan Magenta Yellow White Reset Exit Single-Item Menu Presentation / Bright / Movie / sRGB / Blackboard / DICOM SIM / User / 3D 1.8 / 2.0 / 2.2 / 2.6 / Film /Video / Graphic Warm / Medium / Cold Hue / Saturation / Gain Hue / Saturation / Gain Hue / Saturation / Gain Hue / Saturation - Optoma EH501 | User's Manual - Page 32
V. Position (VGA) Exit On / Off Yes / No XGA: 4:3 / 16:9 / Native / Auto WXGA/1080P: 4:3 / 16:9 or 16:10 / LBX / Native / Auto On / Off DLP-Link / IR 3D / L / R Auto / SBS / Top and Bottom / Frame Sequential On / Off SETUP Language Projection Menu Location Screen Type 16: 10/16:9 (WXGA) EN-32 - Optoma EH501 | User's Manual - Page 33
SETUP Security Projector ID Audio Settings Advanced Network Security Security Timer Change Password Exit On On / Off On / Off Default / Audio 1 / Audio 2 / Audio 3 Default / Neutral / User Off / CC1 / CC2 Network Status Connected / Disconnected MAC Address DHCP On / Off IP Address Subnet - Optoma EH501 | User's Manual - Page 34
Source Source Lock High Altitude Information Hide Keypad Lock Test Pattern 12V Trigger IR Function Background Color OPTIONS EN-34 Remote Settings Advanced Lamp Settings Optional Filter Settings Reset Direct Power On Signal Power On Auto Power Off (min.) Sleep Timer (min.) Quick Resume Power Mode - Optoma EH501 | User's Manual - Page 35
settings when projecting onto a blackboard (green). „ User: User's settings. „ DICOM SIM: Recommended for DICOM format files in simulation mode. „ 3D: Recommended setting for 3D mode. Any further adjustments by the user in 3D will be saved in this mode for further use. Note „ DCIM SIM option is only - Optoma EH501 | User's Manual - Page 36
a video image from black and white to fully saturated color. Tint Shift colors toward red or green. Note „ "Color" and "Tint" functions are only supported under Video mode. Advanced Gamma This allows you to choose a degamma table that has been fine-tuned to bring out the best image quality for - Optoma EH501 | User's Manual - Page 37
Automatic: Automatically selects the singal. If you use this function, the Phase, frequency items are grayed out, and if Signal is not automatic, the phase, frequency items will appear for user to manually tune and saved in settings after that for next time projector turns off and on again. „ Phase - Optoma EH501 | User's Manual - Page 38
Reset Return the display parameters on IMAGE menu to the factory default settings. EN-38 - Optoma EH501 | User's Manual - Page 39
DISPLAY Format Use this function to choose your desired aspect ratio. For XGA model: Source 480i/p 576i/p 1080i/p 720p 4:3 1024x768 center 16:9 1024x576 center Native Displays the original - Optoma EH501 | User's Manual - Page 40
16:9 Screen 16 : 9 screen 480i/p 576i/p 1080i/p 720p PC 4:3 960x720 center 16:9 1280x720 center LBX 1280x960 center, then get the central 1280x720 image to display. Native 1:1 mapping centered 1:1 mapping display 1280 x 720 1280x720 1:1 mapping Centered centred Auto (Default) If this - Optoma EH501 | User's Manual - Page 41
correct distorted images resulting from an angled projection. 3D 3D Mode „ DLP Link: Select "DLP Link" to use optimized settings for DLP Link 3D glasses. „ IR: Select "IR" to use optimized settings for IR-based 3D glasses. 3D--->2D „ 3D: Select 3D format. „ L: Select left eye data. „ R: Select right - Optoma EH501 | User's Manual - Page 42
-screen menu. Press / /"Enter" key to enter the sub menu and then use the / / / key to select your preferred language. Press "Enter" to finalize the selection. Projection Adjust the picture to match the orientation of the projector: upright or upsidedown, in front of or behind the screen. Invert or - Optoma EH501 | User's Manual - Page 43
contact your local office for support. Note „ Password default value is "1234" (first time). Projector ID ID definition can be set up by menu (range 0~99), and allow user control an individual projector by RS232. Audio Settings Internal Speaker Use the internal speaker of projector. Mute Cut off the - Optoma EH501 | User's Manual - Page 44
Select audio input sources. Advanced Logo Use this function to set the desired startup screen. If changes are made they will take effect the next time the projector is powered on. „ Default: The default startup screen. „ Neutral: Neutral startup screen. „ User: "User" is the screen that you captured - Optoma EH501 | User's Manual - Page 45
„ MAC Address: a read-only display of MAC Address. „ IP Address: a read-only display of IP Address. „ SSID: Display the projector's SSID information. „ Connection Mode: Methods for connecting to wireless networks with Wi- Fi enabled devices. Control Settings Allow you to configure nework settings. „ - Optoma EH501 | User's Manual - Page 46
not selected. Source Lock „ On: The projector will only search current input connection. „ Off: The projector will search for other signals if the current input signal is lost. High Altitude When "On" is selected, the fans will spin faster. This feature is useful in high altitude areas where the air - Optoma EH501 | User's Manual - Page 47
Auto 3D to set 12V Trigger. IR Function Choose the setting from On / Front / Back to Off and then choose "Yes" to apply the selection. Background Color Use this feature to display a "Black", "Red", "Blue", "Green" or "White", screen when no signal is available. Remote Settings Allow user to define - Optoma EH501 | User's Manual - Page 48
80% and 30% dynamically. The lamp life will be extended. Lamp Reset Reset the lamp hour counter after replacing the lamp. Optional Filter Settings Optional Filter Installed Choose "Yes" if an optional dust filter is installed. Filter Usage Hours Display the dust filter's elapsed operating time (in - Optoma EH501 | User's Manual - Page 49
Filter Reminder Sets a filter reminder if timer is up. Filter Reset Reset the dust filter hour counter after replacing the dust filter. Reset Choose "Yes" to return the display parameters on all menus to the factory default settings. EN-49 - Optoma EH501 | User's Manual - Page 50
through a LAN environment You can manage and control the projector from one or more remote computers when they are properly connected to the same local area network. Wired connection Internet IP Router If you are in a DHCP environment: 1. Take a RJ45 - Optoma EH501 | User's Manual - Page 51
, and DNS settings will display 0.0.0.0. Make sure the cables are properly connected and perform the procedures above again. „ If you wish to connect to the projector in its standby mode, be sure you have selected RJ45 and obtained the IP Address, Subnet Mask, Gateway, and DNS information when the - Optoma EH501 | User's Manual - Page 52
5. Make sure the SSID information is displayed. 6. In AP mode, you need to use your computer's wireless connection utility to search the projector's SSID and connect to it. Then you can search the projector with Optoma Presenter. To use Infrastructure mode, you should connect both your computer and - Optoma EH501 | User's Manual - Page 53
use your computer's wireless connection utility to search for the projector's SSID and connect to it. Then you can search for the projector with Optoma Presenter. In Infrastructure mode, you should connect both your computer and projector refer to user documentations for Wireless Routers which are usually available - Optoma EH501 | User's Manual - Page 54
is on or in standby mode, you can use any computer that is on the same local area network to control the projector. Important „ Make sure your browser supports IE7, IE8, IE9, Saferi 5.1.2, Google Chrome 18, Firefox 10.0.1. „ The screenshots in this manual are for reference only, and may differ from - Optoma EH501 | User's Manual - Page 55
: Displays the system information. „ General Setup: Allows you to turn on/off the projector, switch the input signal for the projector, and change the password for the Administrator page. „ Projector Control: Provides some OSD menu items for adjusting the projected pictures. See "Menu Operation - Optoma EH501 | User's Manual - Page 56
to previous OSD menus, exit and save menu settings. „ The source list varies according to the connectors available on the projector. „ When you use the projector control panel or remote control to change the OSD menu settings, it may take a while for the web browser to synchronize these changes with - Optoma EH501 | User's Manual - Page 57
allows you to manage the projector, configure the LAN control settings and secure access of remote network operation on this projector. i ii iii v iv i. This section is only used with the Crestron Control System. Please contact Creston or refer to its user manual for setup information. ii. This - Optoma EH501 | User's Manual - Page 58
Projector Name 10 Location 9 Assigned To 9 Network Configuration DHCP (Enabled) (N/A) IP Address 15 Subnet Mask 15 Default Gateway 15 DNS Server 15 User Password Enabled (N/A) New Password 20 Confirm 2 Admin Password Enabled (N/A) New Password 20 Confirm 20 EN - Optoma EH501 | User's Manual - Page 59
of this projector. Press exit to go back to the Crestron remote network operation page. 4. After pressing the button "Contact IT Help", the HELP DESK window will appear in the upper right corner of the screen. You will be able to deliver messages to RoomView software administrators/users who connect - Optoma EH501 | User's Manual - Page 60
Address (or hostname) as shown on the projector's on-screen display (OSD) menu, and "05" for IPID, "41794" for the reserved Crestron control port. About Crestron RoomView setting and command method, please access below website to get RoomView User Guide and more information: http://www.crestron.com - Optoma EH501 | User's Manual - Page 61
3. When the download is complete, install the software to your computer by clicking the exe file. Follow the on-screen instructions to complete the installation. 4. Launch Optoma Presenter. Using Optoma Presenter 1 4 2 3 1. The Search page allows you to search and connect to a projector. EN-61 - Optoma EH501 | User's Manual - Page 62
in the Search result list, and click Connect. You can also type a desired projector name and click Search. ii. You can also type the projector IP address and click Connect to connect the projector directly. 2. You can choose a capture mode and display location from here. i. To display a full - Optoma EH501 | User's Manual - Page 63
Network Control. You are the user of the projector. There is another user of the projector. You are an administrator of the projector. You are a normal user of the projector. Sets a display zone for the projector. 4. The Setting page allows you to configure Optoma Presenter. i. To change the - Optoma EH501 | User's Manual - Page 64
ii. To allow notification messages to appear, click Yes. Click Apply. iii. To adjust the image quality, click the down arrow to reveal a drop- down list and select a desired quality level. The higher image quality you select, the higher network transfer speed is required. Click Apply after your - Optoma EH501 | User's Manual - Page 65
The projector supports the manually select Flash drive from the source selection bar. 3. Press "Enter" to display the content of your USB storage device. 4. When only one USB is plugged, folders and supported files are represented in thumbnail mode. „ To scroll through the thumbnails, use - Optoma EH501 | User's Manual - Page 66
Select another USB Setup function „ Use the four directional arrow keys to highlight options. „ Press "Enter" to switch the settings of the highlighted function. „ Go back to thumbnail file, press . Thumbnail - Optoma EH501 | User's Manual - Page 67
5. When more than one USB is plugged, press "Enter" to switch to another USB. Slide shows 1. When user press "Enter" into a picture, it will display picture auto fit to the screen by retaining original size ratio. 2. Press "Enter" key to shows setting bar. - Optoma EH501 | User's Manual - Page 68
Right Jump to next photo and keep slideshow Left Jump to previous photo and keep slideshow Enter Show setting bar Menu Show projector menu When it's only displaying one picture: Press button Action Up Rotate +90° Down Rotate -90° Right Jump to next photo Left Jump to previous - Optoma EH501 | User's Manual - Page 69
properly. This can cause over heating and damage the projector. If the projector is used in a dusty environment, be sure to cleaned or replaced the dust filter more frequently. 1. Remove the dust filter, located at the rear side of the projector, by pulling it out as the illustration. dust - Optoma EH501 | User's Manual - Page 70
is displayed. Do not attempt to replace the lamp yourself. Contact the qualified service personnel for replacement. Note „ The lamp is extremely hot right after turning off the projector. If you touch the lamp, you may scald your finger. When you replace the lamp, wait for at least 45 minutes - Optoma EH501 | User's Manual - Page 71
„ Since the lamp is made of glass, do not drop the unit and do not scratch the glass. „ Do not reuse the old lamp. This could cause the lamp to explode. „ Be sure to turn off the projector and unplug the AC power cord before replacing the lamp. „ Do not use the projector with the lamp cover removed - Optoma EH501 | User's Manual - Page 72
1. To prevent damage to your projector, please use the Optoma ceiling mount. 2. If you wish to use a third party ceiling mount kit, please ensure the screws used to attach a mount to the projector meet the following specifications: „ Screw type: M4*3 „ Maximum screw length: 10mm „ Minimum - Optoma EH501 | User's Manual - Page 73
/75/85 Mac 60 Mac 60/75/85 Mac 60 Mac 60 Mac 60 Mac 60/75 Mac 60 Mac 60 (*)1920 x 1200 @60hz only support reduced blanking (**) 3D timing for True 3D projector EN-73 - Optoma EH501 | User's Manual - Page 74
Mac 60 60/75/85 Mac 60/75 60 60 50/60 24/30/50/60 Mac 60 60 Mac 60 (*)1920 x 1200 @60hz only support reduced blanking (**)3D timing for True 3D projector EN-74 - Optoma EH501 | User's Manual - Page 75
1280 x 720P @60Hz Top-andBottom TAB mode is on 480i HQFS 3D format is Frame sequential „ If 3D input is 1080p@24hz, the DMD should replay with integral multiple with 3D mode „ Support NVIDIA 3DTV Play if there is no patent fee from Optoma „ 1080i@25hz and 720p@50hz will run in 100hz; other - Optoma EH501 | User's Manual - Page 76
IR Code Customer code: 32CD Key code Printing-key definition 81 Power on/off 3E Switch C3 Source 97 User C4 Re-Sync CB L CC R C6 Up arrow C8 Left arrow C9 Right arrow EN-76 - Optoma EH501 | User's Manual - Page 77
Brightness/1 88 Menu/2 89 Zoom/3 86 HDMI/4 8B Freeze/5 8A AV mute/6 83 S-Video/7 8E VGA/8 8D Video/9 96 Eco+ 93 3D The IR codes below are for user-defined remote only. 79 Power off (single push) 82 Power off 80 Power on 9A VGA2 99 Network Display 9E DVI 94 Contrast - Optoma EH501 | User's Manual - Page 78
same time „ Command Format: Follow RS232 command format (support both of ASCII and HEX) „ Command Response: Follow RS232 return message. Lead Code ~ Fix code One Digit Projector ID X X 00 Command ID X X X Defined by Optoma 2 or 3 Digit See the Follow content space variable carriage - Optoma EH501 | User's Manual - Page 79
PJLink commands Support PJ link: click on below documents (English only) Name? INF0? INF1? INF2? RGB1 RGB2 VIDEO1 VIDEO2 DIGITAL1 DIGITAL2 STORAGE1 STORAGE2 NETWORK1 Projector name Resolution Optoma Model name VGA1 VGA2 Video S-Video HDMI DVI Flash Drive USB Display Network Display Varies with - Optoma EH501 | User's Manual - Page 80
class name VideoProjector Device-Make Maker name MakerPXLW Device-Model Model name Projector Device's IP address LAN IP address is shown up if LAN protocol is modified. Attention 1. This AMX function is only to support AMX Device Discovery. 2. The broadcast information only send out through - Optoma EH501 | User's Manual - Page 81
RS232 Commands and Protocol Function List RS232 Pin Assignments D-Sub 9 pin (from the projector side) 1 1 CD 2 RXD 3 TXD 4 DTR 5 GND 6 DSR 7 RTS 8 CTS 9 RI (from the cable side) C1 COLOR 1 Black 2 Brown 3 Red 4 Orange 5 Yellow 6 Green 7 Blue 8 Purple 9 White - Optoma EH501 | User's Manual - Page 82
Return (Fail) 9600 8 None 1 None Disable P F Lead Code ~ Fix code One Digit Projector ID X X Set in OSD 00~99 Two Digit Command ID X X X space variable carriage return n CR Defined by Optoma 2 or 3 Digit See the Follow content One Digit Per item Definition Fix code One digit - Optoma EH501 | User's Manual - Page 83
SEND to projector 232 ASCII Code HEX Code Function Description ~XX00 1 7E 4 7E 30 30 32 30 20 34 0D sRGB ~XX20 5 7E 30 30 32 30 20 35 0D User ~XX20 7 7E 30 30 32 30 20 37 0D Blackboard ~XX20 13 7E 30 30 32 30 21 ~XX230 1 7E 30 30 32 33 30 20 31 0D 3D Mode DLP-Link EN-83 - Optoma EH501 | User's Manual - Page 84
7E 30 30 34 30 35 20 30 0D 3D Format Auto ~XX405 1 7E 30 30 34 0D Front-Ceiling ~XX71 4 7E 30 30 37 31 20 34 0D Rear-Ceiling ~XX72 1 39 39) ~XX79 n 7E 30 30 37 39 20 a 0D Projector ID n = 00 (a=30 30) ~ 99 (a=39 39) ~ 7E 30 30 38 32 20 32 0D User ~XX82 3 7E 30 30 38 32 20 - Optoma EH501 | User's Manual - Page 85
30 30 31 39 32 20 33 0D Auto 3D ~XX11 0 7E 30 30 31 31 20 1 7E 30 30 31 30 39 20 31 0D Lamp Reminder On ~XX109 0 7E 30 30 31 30 39 7E 30 30 33 32 30 20 31 0D Optional Filter Installed Yes ~XX320 0 7E 30 30 33 32 OSD n: 1-30 characters SEND to emulate Remote ~XX140 10 7E 30 30 31 34 - Optoma EH501 | User's Manual - Page 86
None/Presentation/Bright/Movie/sRGB/User/Blackboard/DICOM SIM./3D ~XX124 1 ~XX125 1 : 0/1/2/3 = Front-Desktop/ Rear-Desktop/ Front-Ceiling/ ~XX150 1 7E 30 30 31 35 30 EH501 OKbbbb bbbb: LampHour Cumulative Lamp Hours OKbbbbb bbbbb: (5 digits) Total Lamp Filter Usage Hours OKbbbb bbbb: Filter - Optoma EH501 | User's Manual - Page 87
Troubleshooting Refer to the symptoms and measures listed below before sending the projector for repairs. If the problem persists, contact your local reseller or service center. Please refer to "LED Indicator Messages" as well. Start-up If no lights turn on: „ Be sure that the power cord is securely - Optoma EH501 | User's Manual - Page 88
LED Indicator Messages Message Standby State (Input power cord) Power on (Warming) Power on & Lamp lighting Power off (Cooling) Quick Resume (100 secs) Error (Lamp fail) Error (Fan fail) Error (Over Temp) Standby State (Burn in mode) Burnin (Warming) Burnin (Cooling) Power LED (Red) Steady light - Optoma EH501 | User's Manual - Page 89
Global Offices For service or support please contact your local office. USA 3178 Laurelview Ct. Fremont, CA 94538, USA 888-289-6786 www.optomausa.com [email protected] Canada 3178 Laurelview Ct. Fremont, CA 94538, USA www.optomausa.com 888-289-6786 [email protected] Europe 42 Caxton - Optoma EH501 | User's Manual - Page 90
-worldwide.com Taiwan 12F., No.215, Sec. 3, Beixin Rd., Xindian Dist., New Taipei City 231, Taiwan, R.O.C. www.optoma.com.tw +886-2-8911-8600 +886-2-8911-6550 [email protected] asia.optoma.com Hong Kong Unit A, 27/F Dragon Centre, 79 Wing Hong Street, Cheung Sha Wan, Kowloon, Hong Kong +852 - Optoma EH501 | User's Manual - Page 91
1205 号 5 +86-21-62947376 +86-21-62947375 www.optoma.com.cn EN-91 - Optoma EH501 | User's Manual - Page 92
of your projector. FCC uses and can radiate radio frequency energy and if not installed and used in accordance with the instructions in question off and on, the user is encouraged to try to correct the relocate the receiving antenna „ Increase the distance between the equipment and the receiver „ - Optoma EH501 | User's Manual - Page 93
undesired operation. Notice: Canadian users This Class B digital Canada. Declaration of Conformity for EU countries „ EMC Directive 2004/108/EC (including amendments) „ Low Voltage Directive 2006/95/EC „ R & TTE Directive 1999/5/EC (if product has RF function) Disposal instructions Do not throw
-
 1
1 -
 2
2 -
 3
3 -
 4
4 -
 5
5 -
 6
6 -
 7
7 -
8
-
9
-
10
-
11
-
12
-
13
-
14
-
15
-
16
-
17
-
18
-
19
-
20
-
21
-
22
-
23
-
24
-
25
-
26
-
27
-
28
-
29
-
30
-
31
-
32
-
33
-
34
-
35
-
36
-
37
-
38
-
39
-
40
-
41
-
42
-
43
-
44
-
45
-
46
-
47
-
48
-
49
-
50
-
51
-
52
-
53
-
54
-
55
-
56
-
57
-
58
-
59
-
60
-
61
-
62
-
63
-
64
-
65
-
66
-
67
-
68
-
69
-
70
-
71
-
72
-
73
-
74
-
75
-
76
-
77
-
78
-
79
-
80
-
81
-
82
-
83
-
84
-
85
-
86
-
87
-
88
-
89
-
90
-
91
-
92
-
93
 |
 |

EN-1
CONTENTS
Usage Notice
.....................................................................................
2
Safety Instructions
.................................................................................................................
2
Introduction
.......................................................................................
5
Projector Features
.................................................................................................................
5
Package Contents
.................................................................................................................
6
Projector Overview
................................................................................................................
7
Using the Product
.............................................................................
9
Control Panel
.........................................................................................................................
9
Connection Ports
.................................................................................................................
10
Remote Control
...................................................................................................................
12
Installing the Batteries
.........................................................................................................
15
Remote Control Operation
...................................................................................................
16
Connection
......................................................................................
17
Connecting a computer or monitor
......................................................................................
19
Connecting Video source devices
.......................................................................................
21
Operation
.........................................................................................
24
Powering On/Off the Projector
.............................................................................................
24
Adjusting the Projector Height
.............................................................................................
25
Adjusting the Projector Zoom and Focus
............................................................................
25
Adjusting Projection Image Size
..........................................................................................
26
Menu Operation
...................................................................................................................
30
Controlling the projector through a LAN environment
.........................................................
50
Controlling the projector through a web browser
.................................................................
54
Displaying images through Optoma Presenter
....................................................................
61
Displaying pictures with a USB storage device
...................................................................
65
Appendix
..........................................................................................
69
Replacing the Dust Filter
.....................................................................................................
69
Replacing the Lamp
.............................................................................................................
70
Ceiling mount installation
.....................................................................................................
72
Compatibility Modes
............................................................................................................
73
IR Code
...............................................................................................................................
76
Telnet Commands
...............................................................................................................
78
PJLink commands
...............................................................................................................
79
AMX Device Discovery commands
.....................................................................................
80
RS232 Commands and Protocol Function List
....................................................................
81
Troubleshooting
...................................................................................................................
87
Optoma Global Offices
........................................................................................................
89
Regulation & Safety Notices
................................................................................................
92