Optoma TX780 User Manual - Page 35
Information - manual
 |
UPC - 796435116354
View all Optoma TX780 manuals
Add to My Manuals
Save this manual to your list of manuals |
Page 35 highlights
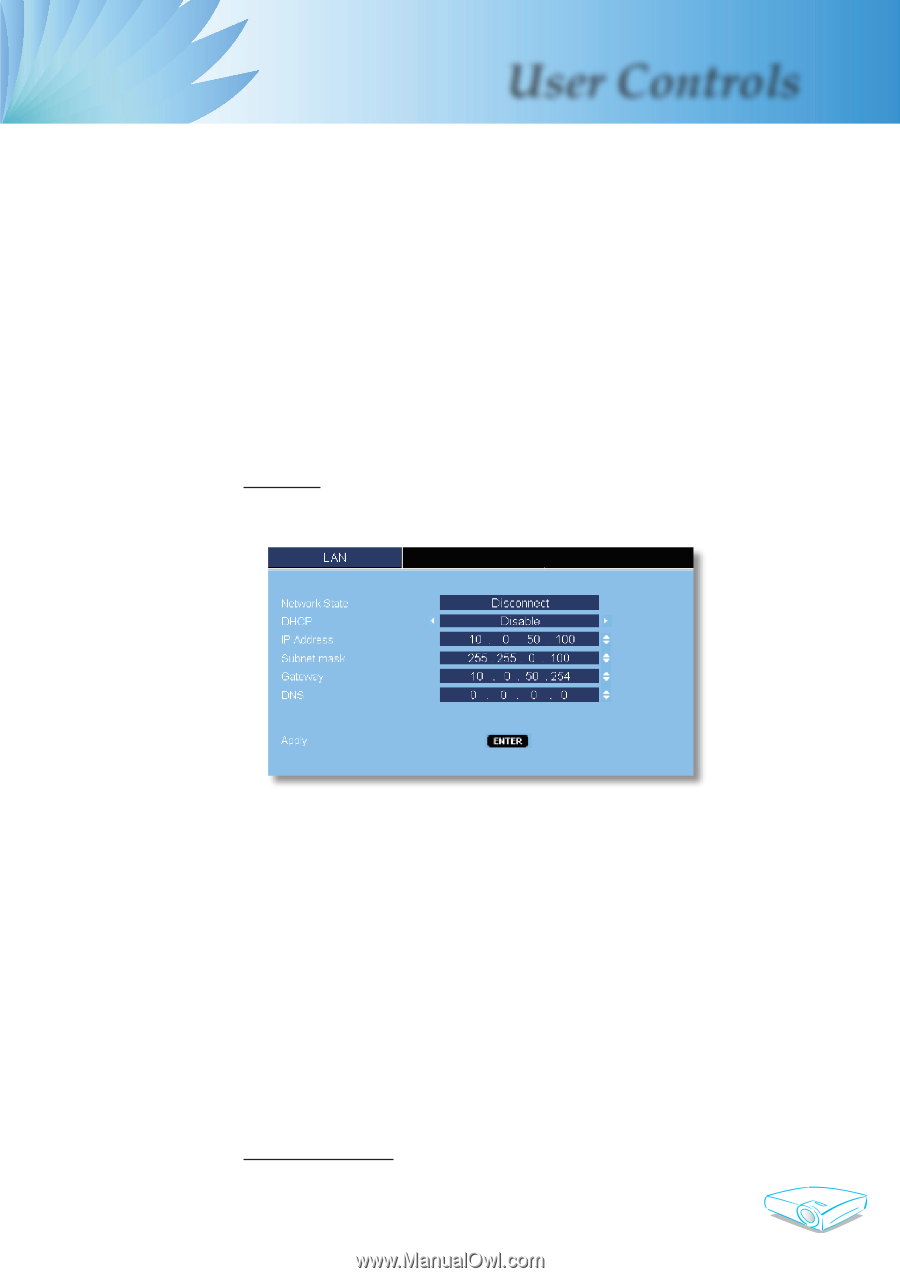
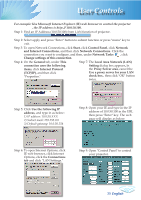
User Controls 2. Use number button to enter current password, and then press "Enter" key again to reveal next OSD menu. 3. Scroll down to highlight Password, and then press "Enter" to activate. 4. Enter new password (4 digits in length) using the number buttons on the remote, then press "Enter" to confirm. 5. Enter new password again and press "Enter" to confirm. Security settings: Enable: Choose "Enable" to enable security verification when turning on the projector. Disable: Choose "Disable" to be able to switch on the projector without password verification. LAN Press "Enter" to apply LAN settings. If the connection is successful, the OSD display will show the following dialogue box. Network State: To display network information. DHCP: Enable: Assign an IP address to the projector from the DHCP server automatically. Disable: Assign an IP address manually. IP Address: Select an IP address. Subnet Mask: Select subnet mask number. Gateway: Select the default gateway of the network connected to the projector. DNS: Select DNS number. Apply: Press "Enter" to apply the selection. Information To display source information on the screen. 33 English
-
 1
1 -
2
-
3
-
4
-
5
-
6
-
7
-
8
-
9
-
10
-
11
-
12
-
13
-
14
-
15
-
16
-
17
-
18
-
19
-
20
-
21
-
22
-
23
-
24
-
25
-
26
-
27
-
28
-
29
-
 30
30 -
 31
31 -
 32
32 -
 33
33 -
 34
34 -
 35
35 -
 36
36 -
 37
37 -
 38
38 -
 39
39 -
 40
40 -
41
-
42
-
43
-
44
-
45
-
46
-
47
 |
 |