Panasonic 36PST1U6 26PEU1U6 Owner's Manual - Page 86
Before Installing the Ceiling Panel, Ceiling Panel
 |
View all Panasonic 36PST1U6 manuals
Add to My Manuals
Save this manual to your list of manuals |
Page 86 highlights
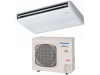
Ceiling Panel CAUTION Never touch or attempt to move the air direction louver by hand or you may damage the unit. Instead, use the remote controller if you want to change the direction or air flow. 6-6. Before Installing the Ceiling Panel (1) Remove the air-intake grille and air filter from the ceiling panel. (Figs. 1-24 and 1-25) (a) Remove the 2 screws on the latch of the airintake grille. (Fig. 1-24) (b) Press on the 2 latches of the air-intake grille 1 with your thumbs in the direction of the arrow to open the grille. (Fig. 1-24) (c) With the air-intake grille open about 45°, remove the safety cord (hook on the grille side). (Fig. 1-25) (d) Pull the air-intake grille towards you to remove it from the ceiling panel. (2) Pull down the two panel catches on the body of the indoor unit body. (Fig. 1-26) Ceiling panel Panel catch Electrical component box Electrical component box Clamp Ceiling panel wiring connector 1. Specifications Latch Screw Air-intake grille Safety cord Ceiling panel Fig. 1-24 Air filter 45° Unit body Fig. 1-25 Panel catch (arrange facing downwards) (2 locations) Screws M5 with washer (supplied) Fig. 1-26 1-80 Air filter Air-intake grille
-
 1
1 -
2
-
3
-
4
-
5
-
6
-
7
-
8
-
9
-
10
-
11
-
12
-
13
-
14
-
15
-
16
-
17
-
18
-
19
-
20
-
21
-
22
-
23
-
24
-
25
-
26
-
27
-
28
-
29
-
30
-
31
-
32
-
33
-
34
-
35
-
36
-
37
-
38
-
39
-
40
-
41
-
42
-
43
-
44
-
45
-
46
-
47
-
48
-
49
-
50
-
51
-
52
-
53
-
54
-
55
-
56
-
57
-
58
-
59
-
60
-
61
-
62
-
63
-
64
-
65
-
66
-
67
-
68
-
69
-
70
-
71
-
72
-
73
-
74
-
75
-
76
-
77
-
78
-
79
-
80
-
 81
81 -
 82
82 -
 83
83 -
 84
84 -
 85
85 -
 86
86 -
 87
87 -
 88
88 -
 89
89 -
 90
90 -
 91
91 -
92
-
93
-
94
-
95
-
96
-
97
-
98
-
99
-
100
-
101
-
102
-
103
-
104
-
105
-
106
-
107
-
108
-
109
-
110
-
111
-
112
-
113
-
114
-
115
-
116
-
117
-
118
-
119
-
120
-
121
-
122
-
123
-
124
-
125
-
126
-
127
-
128
-
129
-
130
-
131
-
132
-
133
-
134
-
135
-
136
-
137
-
138
-
139
-
140
-
141
-
142
-
143
-
144
-
145
-
146
-
147
-
148
-
149
-
150
-
151
-
152
-
153
-
154
-
155
-
156
-
157
-
158
-
159
-
160
-
161
-
162
-
163
-
164
-
165
-
166
-
167
-
168
-
169
-
170
-
171
-
172
-
173
-
174
-
175
-
176
-
177
-
178
-
179
-
180
-
181
-
182
-
183
-
184
-
185
-
186
-
187
-
188
-
189
-
190
-
191
-
192
-
193
-
194
-
195
-
196
-
197
-
198
 |
 |
