Panasonic AG HPX170 Memory Card Camera Recorder - Page 94
Menu, Using the setup menus
 |
UPC - 086753091052
View all Panasonic AG HPX170 manuals
Add to My Manuals
Save this manual to your list of manuals |
Page 94 highlights
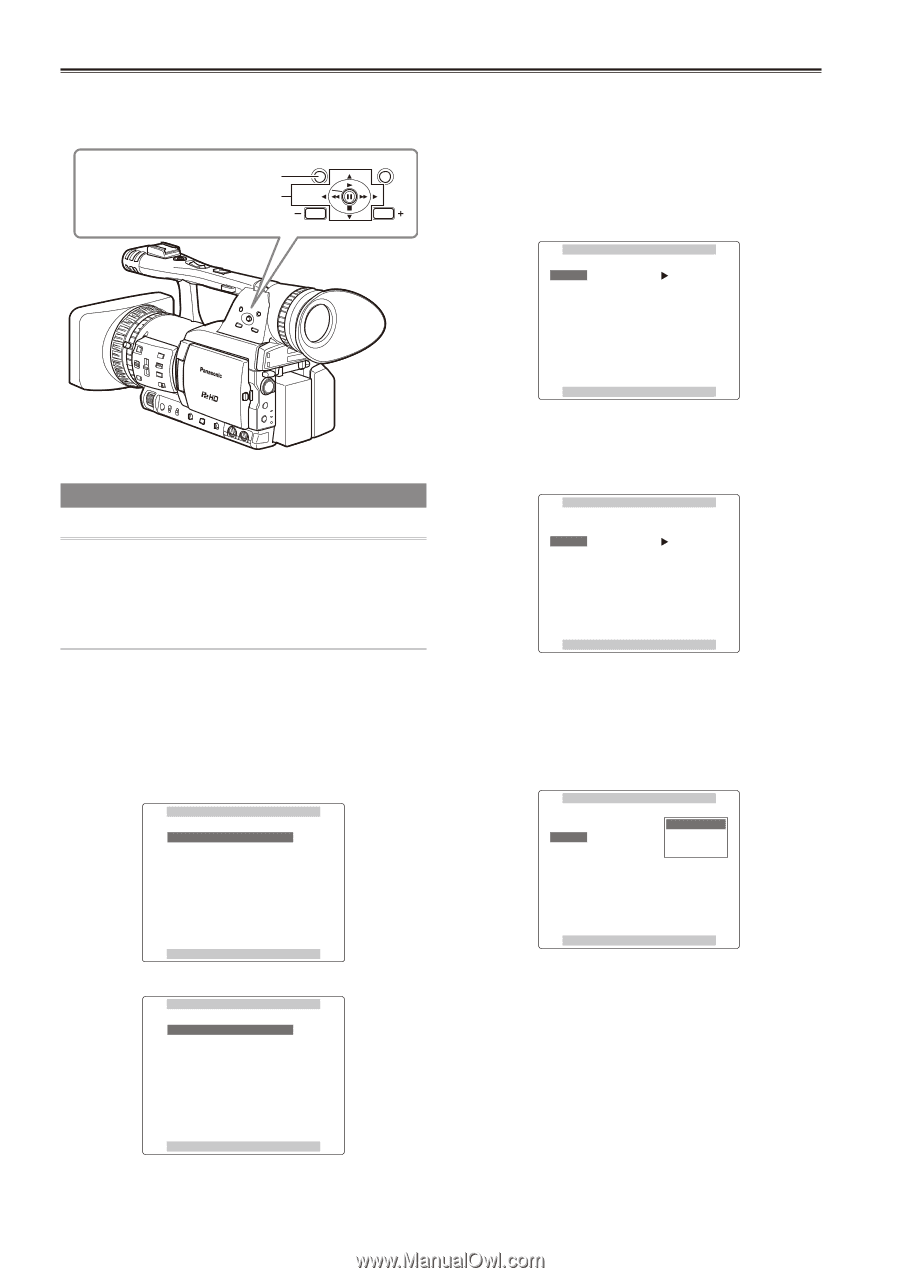
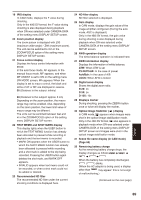
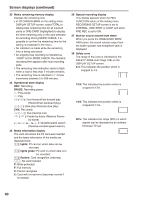
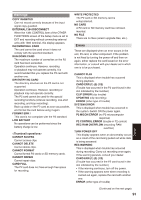
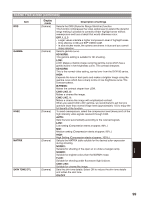
Using the setup menus Use the setup menus to change the settings to suit the scenes you are shooting or what you are recording. MENU MENU button Operation lever PUSH-SET THUMBNAIL PAGE/AUDIO MON/VAR 2 Push the Operation lever in the e or r direction to move the highlight to the setting you want. 3 Press the Operation lever (or push it in the q direction) to display the items. Example: AUTO SW A.IRIS ON AGC 6dB ATW ON AF ON Using the menus • If the thumbnail menu is displayed, press the THUMBNAIL button to release the display. (Page 66) • The menu items indicated in the blue characters cannot be used. 1 When the unit is in other than playback or recording mode, press the MENU button. The following is displayed on the viewfinder and LCD screen. CAM mode (Example) CAMERA MENU 1 . SCENE FILE 2 . CAMERA SETUP 3 . SW MODE 4 . AUTO SW 5 . RECORDING SETUP 6 . AV IN/OUT SETUP 7 . DISPLAY SETUP 8 . CARD FUNCTIONS PUSH MENU TO EXIT MCR mode (Example) MCR MENU 1 . RECORDING SETUP 2 . PLAYBACK FUNCTIONS 3 . AV IN/OUT SETUP 4 . DISPLAY SETUP 5 . OTHER FUNCTIONS PUSH MENU TO EXIT PUSH MENU TO RETURN 4 Push the Operation lever in the e or r direction to move to the setting you want. Example: AUTO SW A.IRIS ON AGC 6dB ATW ON AF ON PUSH MENU TO RETURN 5 Press the Operation lever to confirm the setting. To change a value, push the Operation lever in the e or r direction to change as necessary. Example: AUTO SW A.IRIS AGC ATW AF 6dB 12dB OFF ON PUSH MENU TO RETURN 6 To change other settings, repeat steps 4 and 5. When you finish, press the MENU button to return to the function screen. 7 To change other functions, repeat steps 2 to 5. When you exit the menu mode, press the MENU button again to return to the normal screen. 94
-
 1
1 -
2
-
3
-
4
-
5
-
6
-
7
-
8
-
9
-
10
-
11
-
12
-
13
-
14
-
15
-
16
-
17
-
18
-
19
-
20
-
21
-
22
-
23
-
24
-
25
-
26
-
27
-
28
-
29
-
30
-
31
-
32
-
33
-
34
-
35
-
36
-
37
-
38
-
39
-
40
-
41
-
42
-
43
-
44
-
45
-
46
-
47
-
48
-
49
-
50
-
51
-
52
-
53
-
54
-
55
-
56
-
57
-
58
-
59
-
60
-
61
-
62
-
63
-
64
-
65
-
66
-
67
-
68
-
69
-
70
-
71
-
72
-
73
-
74
-
75
-
76
-
77
-
78
-
79
-
80
-
81
-
82
-
83
-
84
-
85
-
86
-
87
-
88
-
 89
89 -
 90
90 -
 91
91 -
 92
92 -
 93
93 -
 94
94 -
 95
95 -
 96
96 -
 97
97 -
 98
98 -
 99
99 -
100
-
101
-
102
-
103
-
104
-
105
-
106
-
107
-
108
-
109
-
110
-
111
-
112
-
113
-
114
-
115
-
116
-
117
-
118
-
119
-
120
-
121
-
122
-
123
-
124
-
125
-
126
-
127
-
128
 |
 |