Panasonic AGVP310 AGVP310 User Guide
Panasonic AGVP310 - DVD/VCR DECK Manual
 |
View all Panasonic AGVP310 manuals
Add to My Manuals
Save this manual to your list of manuals |
Panasonic AGVP310 manual content summary:
- Panasonic AGVP310 | AGVP310 User Guide - Page 1
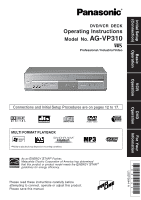
Operation VCR Operation DVD Operation DVD/VCR DECK Operating Instructions Model No. AG-VP310 Professional / Industrial Video Connections and Initial Setup guidelines for energy efficiency. Please read these instructions carefully before attempting to connect, operate or adjust this product. - Panasonic AGVP310 | AGVP310 User Guide - Page 2
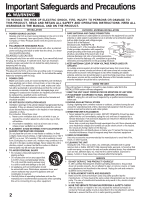
sloping surface. • Do not place this unit on any support that is not firm, level, and adequately strong. instructions, this product does not operate properly, do not attempt to open or remove covers, or make any adjustments not described in the manual. Unplug the unit and contact a qualified service - Panasonic AGVP310 | AGVP310 User Guide - Page 3
NO USER-SERVICEABLE PARTS INSIDE REFER SERVICING TO QUALIFIED SERVICE PERSONNEL This problems. CAUTION: UNIT IS A CLASS I LASER PRODUCT. HOWEVER THIS UNIT USES A VISIBLE LASER BEAM WHICH COULD CAUSE HAZARDOUS RADIATION EXPOSURE IF DIRECTED. BE SURE TO OPERATE THE UNIT CORRECTLY AS INSTRUCTED - Panasonic AGVP310 | AGVP310 User Guide - Page 4
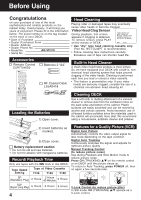
Phone No. • Model No. AG-VP310 MANUAL on the remote or DECK. END : PLAY • Use "dry" type head cleaning cassette only. (Part No. NV-TCL30PT is recommended.) • Follow cleaning tape instructions Digital Auto Tracking Continuously analyzes the signal and adjusts for optimum picture quality. Manual - Panasonic AGVP310 | AGVP310 User Guide - Page 5
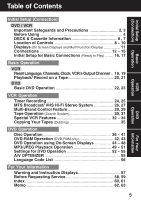
44 ~ 48 MP3/JPEG Playback Operation 49 ~ 51 Settings for DVD Operation 52 ~ 55 A/V OPTIMIZER 55 Language Code List 56 For Your Information Warning and Instruction Displays 57 Before Requesting Service 58, 59 Index 60, 61 Memo 62, 63 5 DVD Operation For Your Information - Panasonic AGVP310 | AGVP310 User Guide - Page 6
cellophane tape. • Remove TYPE 2 and 4 discs from their cartridges before use, then return them when you are finished. Read the instructions for the disc carefully. Disc formats supported by this DECK DECK can play back discs bearing any of the following marks: Logo Disc type DVD-RAM (Version - Panasonic AGVP310 | AGVP310 User Guide - Page 7
-sided) 3" (8 cm) 2.8 GB (double-sided) (2) Compact Disc (CD-DA) 5" (12 cm) disc 3" (8 cm) disc (CD-R/CD-RW, MP3, WMA, JPEG) Digital Audio Output: Pickup: Digital Optical Connector Wavelength: 655 nm (DVD), 790 nm (CD) Laser power: CLASS II Note: • Designs and specifications are subject to - Panasonic AGVP310 | AGVP310 User Guide - Page 8
Location of Controls Remote Control Bold: VCR Function / Bold Italic: VCR and DVD Functions Italic: DVD Function / Normal: Others EJECT / OPEN / CLOSE pp. 20, 22 POWER NUMBER keys ADD/DELETE / CLEAR pp. 19, 39 VCR/TV p. 21 TV mode p. 28 CHANNEL / / TRACKING / V-LOCK / 10 pp. 4, 21, 22 VOLUME + / - Panasonic AGVP310 | AGVP310 User Guide - Page 9
Initial Setup (Connection) FFrroonnttVVieiwewofoDfEDCEKCK Bold: VCR Function Italic: DVD Function Bold Italic: VCR and DVD Functions Normal: Others PLAY p. 20 If the disc cannot be removed... First, unplug DECK. Then, prepare a rigid wire (e.g. an extended paper clip) and, applying moderate - Panasonic AGVP310 | AGVP310 User Guide - Page 10
Video Output Video Input Connector Connector p. 12 p. 35 • • • Optical Digital Audio Output Connector (DVD Only) p. 15 Audio Output 1 Connector (L/R) p. adjust the screen position if this occurs. (Refer to your TV manual.) • If the television is not progressive compatible, a progressive - Panasonic AGVP310 | AGVP310 User Guide - Page 11
used. Flashes when Timer Recording is set, but a tape has not been inserted VCR REC Indicator Lights up during recording. VCR TIMER REC Hi - Fi DIGITAL DVD CD MP3 WMA AM ANGLE PM CD/MP3/WMA Indicator CD : Lights when an Audio CD is inserted or JPEG file is played. MP3 - Panasonic AGVP310 | AGVP310 User Guide - Page 12
Connections Basic Connections • If your TV has AUDIO and VIDEO IN terminals, connect them to DECK for higher quality picture and sound. • You can enjoy stereo sound even if your TV is not stereo by connecting a stereo amplifier to DECK. • Connect DECK and TV with an RF Coaxial Cable a (supplied) or - Panasonic AGVP310 | AGVP310 User Guide - Page 13
, and then press PROG. • TV must have capability to accept and display a progressive scan signal to use PROGRESSIVE mode. Consult your TV operating instructions. DVD/VCR DECK DVD OUTPUT COMPONENT VIDEO OUT AUDIO OUT2 From DECK's TV A/V OUTPUT IN IN IN Y P B L S-VIDEO OUT Y L AUDIO PB - Panasonic AGVP310 | AGVP310 User Guide - Page 14
freely. Read through the instructions before connecting other equipment. Ensure Digital is a digital sound compression technique developed by the Dolby Laboratories Licensing Corporation. Supporting Digital soundtracks, as well as from titles with the Dolby Surround mark. For information on Panasonic - Panasonic AGVP310 | AGVP310 User Guide - Page 15
be stereo sound. (See p. 53.) • CDs can be played as usual. Note: • Some DTS decoders which do not support DVD-DTS interface may not work properly with DECK. Manufactured under license from Digital Theater Systems, Inc. US Pat. No's. 5,451,942, 5,956,674, 5,974,380, 5,978,762, 6,487,535 and other - Panasonic AGVP310 | AGVP310 User Guide - Page 16
buttons are void during Initial Setup. • To eject a tape during Auto Set, press EJECT on remote or STOP/EJECT twice on DECK. Then make settings manually. (See p. 18.) • If Auto Clock Set takes more than 30 minutes, press STOP and perform settings - Panasonic AGVP310 | AGVP310 User Guide - Page 17
ACTION SELECT SET VCR If "AUTO CLOCK SET IS INCOMPLETE" appears, manually set clock (below). AUTO CLOCK SET IS I NCOMPLETE PLEASE SET CLOCK BY PRESSING ACT I ON KEY STOP/EJECT Manual Clock Set If Auto Clock Set was incomplete. 1 Press ACTION* on remote to - Panasonic AGVP310 | AGVP310 User Guide - Page 18
IDIOMA/LANGUE : ENGLISH VCR'S OUTPUT CH:3 SELECT : SET : SET EXIT : ACTION 2) Press to select "MANUAL," and press SET. (For Auto Clock Set, select "AUTO CLOCK SET.") SET CLOCK AUTO CLOCK SET MANUAL T I ME ZONE ADJUST : 0 SELECT : SET : SET EXIT : ACT I ON ("TIME ZONE ADJUST" appears only - Panasonic AGVP310 | AGVP310 User Guide - Page 19
: SET EXIT : ACTION POWER NUMBER keys CH / ADD/DLT ACTION SELECT SET VCR 2) Press to select "TIME ZONE ADJUST," SET CLOCK AUTO CLOCK SET MANUAL T I ME ZONE ADJUST : 0 SELECT : SET : SET EXIT : ACT I ON and press SET to subtract or add hour(s) as necessary. 2) Press SET. I F YOU PRESS ACT - Panasonic AGVP310 | AGVP310 User Guide - Page 20
➛ Press PLAY to release. SPEED Notes • These features work best in SP or SLP mode. • The sound will be muted. • To reduce picture noise, see "Manual Tracking Control" on page 4. • After 3 minutes in Still or Slow mode, VCR stops to protect the tape and the video heads. Playback using DECK buttons - Panasonic AGVP310 | AGVP310 User Guide - Page 21
tested and inspected for use in 2, 4, 6, and 8 hour machines are recommended. • If channel number is over 100, first press 100 key then the other 2 digits. • For "LINE" input, see p. 35. 3 Press SPEED to select the record speed (p. 4). Note Remove loose or peeling labels from tapes to prevent tape - Panasonic AGVP310 | AGVP310 User Guide - Page 22
6 Press STOP. *1 Interactive DVD... May include multiple camera angles, stories, etc. 1 Press POWER* on the disc by its edges only (p. 6) with printed side up and use guides 1 to place into tray. 2 Use 1 3" (8 cm) or with each disc. 2 digit number 12 ••• 10 ➛ 1 - Panasonic AGVP310 | AGVP310 User Guide - Page 23
*Important: If a remote control button does not work when pressed, press the DVD button on the remote and try the button again. Basic Operation I Forward/Reverse Scene Search V.S.S. (Virtual Surround Sound) Press FF/SLOW+ or REW/SLOW- during play. Press PLAY to release. Enjoy a surround-like - Panasonic AGVP310 | AGVP310 User Guide - Page 24
Timer Recording Ready Checklist All connections are made. (pp. 12 ~ 15) TV and DECK are plugged in. Clock set correctly. (p. 18) Tape has record tab intact. (p. 6) Remote is in VCR mode. (Press VCR.) Sufficient tape remaining for recording time. 1 Press PROG* to display Program. 2 P DT START STOP - Panasonic AGVP310 | AGVP310 User Guide - Page 25
you are using a Cable Box, the VCR's channel for Timer Recording must be set to the Cable Box input channel and Cable Box must be manually set to the desired channel. Cable Box power must be left on. • 2 minutes before Timer Recording is performed, "PLEASE PREPARE FOR TIMER REC" appears and - Panasonic AGVP310 | AGVP310 User Guide - Page 26
MTS Broadcast/ VHS Hi-Fi Stereo System Connection Make the Audio/Video Connection as shown on pp. 12 ~ 15. • You can use TV connected to a Stereo amplifier and speakers instead of Stereo TV. Receivable Broadcast Types The following are possible audio broadcast types and onscreen displays. The - Panasonic AGVP310 | AGVP310 User Guide - Page 27
*Important: If a remote control button does not work when pressed, press the VCR button on the remote and try the button again. Audio Mode for Recording 1 Press AUDIO (SAP/Hi-Fi) to display audio mode. (Display disappears after 5 seconds.) 2 STEREO SAP MONO Press AUDIO (SAP/Hi-Fi) repeatedly - Panasonic AGVP310 | AGVP310 User Guide - Page 28
Multi-Brand Control Feature Multi-Brand Control Setup The Remote Control can be set to control some TVs. 1 Find your TV Brand Code Number on the following page. 2 Set up for TV control, ➛ hold down TV button, ➛ enter code with NUMBER keys. 3 Confirm code entry, ➛ press POWER to turn selected - Panasonic AGVP310 | AGVP310 User Guide - Page 29
VCR Operation TV Brand Code Numbers Panasonic 01, 02 Quasar 01, 02 RCA 03 GE 03 Zenith 04 Magnavox 05 Sylvania 05 Sharp 06, 07 Sony 08 . If the first code entered fails, try the next one listed. • Some TVs require you to turn on the power manually. POWER VCR TV NUMBER keys DVD ENTER 29 - Panasonic AGVP310 | AGVP310 User Guide - Page 30
Tape Operation Search System For each recording, an invisible index mark is placed on the tape. A program index and information are also included for timer recordings. These marks are used to access or scan recordings. Zero Search To quickly return to a specified tape location. 1 Press DISPLAY - Panasonic AGVP310 | AGVP310 User Guide - Page 31
*Important: If a remote control button does not work when pressed, press the VCR button on the remote and try the button again. VCR Operation Tape Select Tape Position Display Select your tape length so the tape position and amount of tape remaining are properly displayed. (See "Tape Position - Panasonic AGVP310 | AGVP310 User Guide - Page 32
TV SelectioornFFeeaatuturere The VCR/TV selection can be set to auto or manual. 1 Press ACTION* to display MENU. 2 MENU SET UP ON Press to select "AUTO VCR/TV," and press SET to set "ON" or "OFF." • OFF(Manual): You select "VCR" or "TV" mode using the VCR/TV button on the remote. • ON(Auto): - Panasonic AGVP310 | AGVP310 User Guide - Page 33
*Important: If a remote control button does not work when pressed, press the VCR button on the remote and try the button again. VCR Operation Weak Signal Display Feature ACTION SELECT SET When "ON," picture is displayed regardless of signal strength. 1 Press ACTION to display MENU. 2 MENU SET - Panasonic AGVP310 | AGVP310 User Guide - Page 34
Special VCR Features (continued) Remote Warning Feature *Important: If a remote control button does not work when pressed, press the VCR button If Multi-brand feature is used (p. 28), and this feature is on the remote and try the button again. set to on, a warning appears whenever an invalid - Panasonic AGVP310 | AGVP310 User Guide - Page 35
Copying Your Tapes (Dubbing) VCR Operation Connection VCR/ Camcorder (Hi-Fi) OUT VIDEO AUDIO L R DVD/VCR DECK OUT VIDEO AUDIO1RL IN1 IN FROM ANT. VHF/UHF OUT TO TV TV Front of DECK VIDEO IN 2 L-AUDIO IN2-R VHF/ UHF (Audio/Video In Terminals on the front of DECK are available) 1 Connect - Panasonic AGVP310 | AGVP310 User Guide - Page 36
LPCM ~ 44.1 kHz 16 bit 20 bit Linear PCM disc 192 kHz 24 bit Audio Soundtrack Language (DVD only) Dolby Digital 1 ch - 5.1 ch DTS 1 ch - 5.1 ch Notes Dolby Digital disc DTS disc You can change the audio soundtrack language, selected at the Settings for DVD Operation, to a different language - Panasonic AGVP310 | AGVP310 User Guide - Page 37
so that the angle is switched whenever the ANGLE Indicator lights up. Multiple Angle Viewing (DVD only) DVDs may contain scenes shot from multiple camera angles allowing the same scene to be viewed at different angles. You can view these angles, if available, using the ANGLE button. 1 Press - Panasonic AGVP310 | AGVP310 User Guide - Page 38
SET or PLAY" is not necessary when using NUMBER keys. DVD Menu (DVD only) DVDs may offer a special menu. This menu may include guides to unique contents, audio/subtitle languages, etc. Although contents and operation may vary, the following steps show basic procedure for using the menu - Panasonic AGVP310 | AGVP310 User Guide - Page 39
*Important: if a remote control button does not work when pressed, press the DVD button on the remote and try the button again. Program Play (CD only) You can program specific tracks and order of play. 1 Press ACTION to display DVD MAIN MENU. 2 DVD MAIN MENU DISC LANGUAGES AUDIO OUTPUT ST I L - Panasonic AGVP310 | AGVP310 User Guide - Page 40
Disc Operation (continued) Random Play (CD only) Tracks are played in a random order. 1 Press ACTION* to display DVD MAIN MENU. 2 DVD MAIN MENU DISC LANGUAGES AUDIO OUTPUT ST I L L MODE : AUTO TV MODE : 4:3 Pan&Scan PROGRESSIVE OUT: OFF PLAY MODE SELECT SET END : : SET : ACTION Press to - Panasonic AGVP310 | AGVP310 User Guide - Page 41
the remote and try the button again. DVD-Audio Operation (DVD-Audio only) This DECK, equipped with a 192 kHz/ 24 bit Audio D/A converter, supports DVD-Audio recorded with high quality sound. The DVD-Audio feature includes "Still Image Skip" and "Bonus Group Playback" functions. (See below.) Please - Panasonic AGVP310 | AGVP310 User Guide - Page 42
using NUMBER keys. Using NUMBER keys starts playing automatically. The number of available titles varies with each disc. 2 digit number 12 ••• 10 ➛ 1 ➛ 2 3 Press D.NAVI to clear Direct navigator menu. Direct Navigator Page 1/4 No. Date Length 1 2002/12 - Panasonic AGVP310 | AGVP310 User Guide - Page 43
when using NUMBER keys. Using NUMBER keys starts playing automatically. The number of available titles varies with each disc. 2 digit number 12 ••• 10 ➛ 1 ➛ 2 3 Press PLAY LIST to clear Play List menu. Play List No. Date Length 1 2002/12/24 5:15 - Panasonic AGVP310 | AGVP310 User Guide - Page 44
DVD Operation using On-Screen Displays ➡➡ When DISPLAY is pressed, On-Screen Displays show disc information (title/chapter/track number, elapsed playing time) and DECK information (repeat play, play mode). 1 Press DISPLAY* in Play or Stop mode to display "On-Screen Displays." • Each press of - Panasonic AGVP310 | AGVP310 User Guide - Page 45
*Important: if a remote control button does not work when pressed, press the DVD button on the remote and try the button again. Detailed Descriptions of each On-Screen Display I Disc information screen (for DVD-Video) 1 3 1. TITLE No. 2 4 Go directly to a preset title number. • Select " - Panasonic AGVP310 | AGVP310 User Guide - Page 46
DVD Operation using On-Screen Displays (continued) I Disc information screen (for CD) 1. TRACK No. 1 2 3 Go directly to a preset track number. • Select "TRACK", and press SET*. • Change the No. by pressing or NUMBER keys, and press SET. 2. Disc currently being played The type of disc - Panasonic AGVP310 | AGVP310 User Guide - Page 47
*Important: if a remote control button does not work when pressed, press the DVD button on the remote and try the button again. I DECK information screen (for DECK) 1. Operating mode 1 The current operation is displayed. 2 2. Repeat Play mode (see p. 48) Repeat play mode can be selected. • - Panasonic AGVP310 | AGVP310 User Guide - Page 48
DVD Operation using On-Screen Displays (continued) For your reference Repeat Play mode example (see p. 47) • CHAPTER/TITLE REPEAT PLAY (DVD-Video) CURRENT PLAYBACK POSITION TITLE chapter chapter chapter CHAPTER REPEAT TITLE REPEAT NORMAL PLAY • TRACK/GROUP REPEAT PLAY (DVD-Audio) CURRENT PLAYBACK - Panasonic AGVP310 | AGVP310 User Guide - Page 49
MP3/WMA/JPEG Playback Operation This unit can play MP3/WMA/JPEG format CD-R or CD-RW recorded for personal use on a PC, etc. MP3/WMA Playback Some discs may not play due to the condition of the recording. 1 Press POWER* on the remote or DECK. Do steps 1~3 at left. a Press to select an MP3/WMA - Panasonic AGVP310 | AGVP310 User Guide - Page 50
MP3/WMA/JPEG Playback Operation (continued) JPEG Playback You can play back JPEG images. Displayable Image Size: 32x32~7680x7680 pixels Note • Some JPEG format may not be played back. Do steps 1~3 on page 49. 1 Press to select a JPEG file ( ). 2 Press SET or PLAY. Selected JPEG file is - Panasonic AGVP310 | AGVP310 User Guide - Page 51
SELECT SET FF/ SLOW+ REW/ SLOWSTILL ANGLE JPEG Zoom (During JPEG Playback.) You can enlarge specific portions of a JPEG picture and select the zoom ratio using the ZOOM button on the remote during JPEG Playback screen. Set Zoom size. Press ZOOM repeatedly to change display as follows. ➡ Press - Panasonic AGVP310 | AGVP310 User Guide - Page 52
is set, the original disc language will be selected. NUMBER keys AUDIO OUTPUT (See p. 53.) You can set the audio output that comes from the digital audio output terminal. STILL MODE (See p. 54.) To select "FIELD" (Field still) or "FRAME" (Frame still) to prevent jitter or make small text or fine - Panasonic AGVP310 | AGVP310 User Guide - Page 53
48 kHz/20 bit, no high level of noise as to be harmful to digital audio is output. (Factory preset) your ears and damage the speakers. PCM: DVDs recorded in linear PCM of 44.1 or 48 kHz/20 bit/24 bit or more, digital *2 When a dts decoder is connected, audio converted to 44.1 kHz/16 bit or 48 - Panasonic AGVP310 | AGVP310 User Guide - Page 54
Settings for DVD Operation (continued) Still Mode (DVD only) Set to reduce jitter in a displayed still picture or a motion picture. 1 Press ACTION* to display DVD MAIN MENU. 2 DVD MAIN MENU DISC LANGUAGES AUDIO OUTPUT ST I L L MODE : AUTO TV MODE : 4:3 Pan&Scan PROGRESSIVE OUT: OFF Press - Panasonic AGVP310 | AGVP310 User Guide - Page 55
BE DISPLAYED IN THE PICTURE. IN CASE OF 525 PROGRESSIVE SCAN PICTURE PROBLEMS, IT IS RECOMMENDED TO SET PROGRESSIVE OUT TO "OFF". IF THERE COMPATIBILITY WITH THIS MODEL 525p DVD/VCR DECK, PLEASE CONTACT OUR CUSTOMER SERVICE CENTER. DVD Operation A/V OPTIMIZER You can set to preset audio/video - Panasonic AGVP310 | AGVP310 User Guide - Page 56
Language Code List Enter the appropriate code number for the initial settings "AUDIO", "SUBTITLE" and/or "MENUS" (see p. 52). Code Language 6565 Afar 6566 Abkhazian 6570 Afrikaans 6577 Ameharic 6582 Arabic 6583 Assamese 6588 Aymara 6590 Azerbaijani 6665 Bashkir 6669 Byelorussian 6671 Bulgarian - Panasonic AGVP310 | AGVP310 User Guide - Page 57
alert you to a missed operation or provide further instructions. OSD PLEASE SET CLOCK BY PRESSING ACTION KEY PLEASE FOR APPROX 3 SEC VIDEO HEADS MAY NEED CLEANING PLEASE INSERT HEAD CLEANING CASSETTE OR REFER TO MANUAL END : PLAY VCR LOCK ACTIVATED REMOTE CONTROL IS SET TO TV MODE USE VCR : VCR - Panasonic AGVP310 | AGVP310 User Guide - Page 58
Before Requesting Service Check the following points if you are having trouble with your DECK. Power No power... Solution TV with an Automatic Vertical Hold Control... • Set TV's Vertical Hold Control to MANUAL, then adjust. DECK cannot be controlled... Remote Control • Make sure DECK power is - Panasonic AGVP310 | AGVP310 User Guide - Page 59
DVD/ CD Play fails to start even when PLAY is pressed... Picture is distorted during rapid advance or rapid reverse... No Forward/Reverse Scene Search play... Audio soundtrack and/or subtitle language is not the one selected at the initial settings... No subtitles... Alternative audio soundtrack (or - Panasonic AGVP310 | AGVP310 User Guide - Page 60
8, 20 T Tape Position, Tape Status 31 Tape Select 31 Timer Recording 24 Trouble Shooting 58, 59 TV mode button 8, 28 V VCR Lock 32 VCR mode Feature 32 VOLUME +/- button (TV Volume) .... 8, 28 WWarning and Instruction Displays ....... 57 Weak Signal Display 33 L Location of Controls (Remote, - Panasonic AGVP310 | AGVP310 User Guide - Page 61
... 37 L Language Code List 56 MMENU button (To display DVD Menu 8, 38 MP3 49 Multiple Angle Viewing 37 O OPEN/CLOSE button 8, 22 Optical Digital Audio Output .......... 10, 15 P PAGE button (Still Image Skip) ....... 8, 41 PLAY button (Play a Disc 8, 22 Play List 43 Program Play (For CD 39 - Panasonic AGVP310 | AGVP310 User Guide - Page 62
Memo 62 - Panasonic AGVP310 | AGVP310 User Guide - Page 63
For Your Information 63 - Panasonic AGVP310 | AGVP310 User Guide - Page 64
Broadcast & Digital Systems Company Panasonic Broadcast & Television Systems Company Division of Matsushita Electric Corporation of America Executive Office: One Panasonic Way 4E-7, Secaucus, NJ 07094 (201) 348-7000 Eastern Zone: One Panasonic Way 4E-7, Secaucus, NJ 07094 (201) 348-7621 Central
-
 1
1 -
 2
2 -
 3
3 -
 4
4 -
 5
5 -
 6
6 -
 7
7 -
8
-
9
-
10
-
11
-
12
-
13
-
14
-
15
-
16
-
17
-
18
-
19
-
20
-
21
-
22
-
23
-
24
-
25
-
26
-
27
-
28
-
29
-
30
-
31
-
32
-
33
-
34
-
35
-
36
-
37
-
38
-
39
-
40
-
41
-
42
-
43
-
44
-
45
-
46
-
47
-
48
-
49
-
50
-
51
-
52
-
53
-
54
-
55
-
56
-
57
-
58
-
59
-
60
-
61
-
62
-
63
-
64
 |
 |
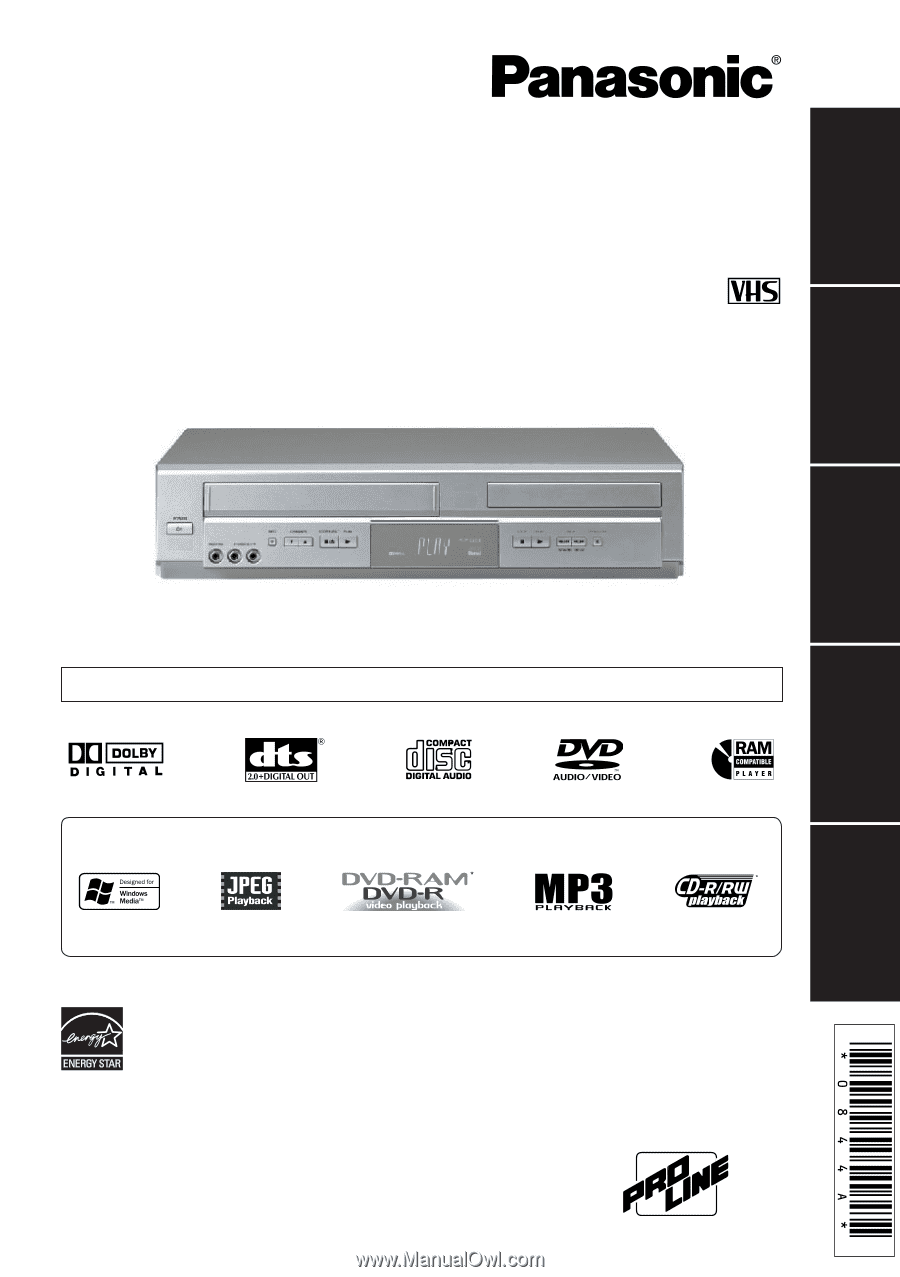
AG-VP310
DVD/VCR DECK
Operating Instructions
Model No.
Please read these instructions carefully before
attempting to connect, operate or adjust this product.
Please save this manual.
Professional / Industrial Video
®
As an
E
NERGY
S
TAR
Partner,
Matsushita Electric Corporation of America has determined
that this product or product model meets the
E
NERGY
S
TAR
guidelines for energy efficiency.
®
Initial Setup
(Connection)
Basic
Operation
VCR
Operation
DVD
Operation
For Your
Information
LSQT0844 A
MULTI FORMAT PLAYBACK
*
Ability to play back may depend on recording conditions.
Connections and Initial Setup Procedures are on pages 12 to 17.