Panasonic AW-HS50 How-To Use HS50 AUX Output
Panasonic AW-HS50 Manual
 |
View all Panasonic AW-HS50 manuals
Add to My Manuals
Save this manual to your list of manuals |
Panasonic AW-HS50 manual content summary:
- Panasonic AW-HS50 | How-To Use HS50 AUX Output - Page 1
2 seconds.) ② Use the OSD/TIME dial - (Fig.1-B) to change the following menu setting. Menu: [11] Output Menu > 2. SDI-OUT2 => [AUX] - (Fig.2) * Default Setting: PVW (Figure 1: AW-HS50 Control Panel) (B) (Figure 2: AW-HS50 Menu Display Screen) (A) - Panasonic AW-HS50 | How-To Use HS50 AUX Output - Page 2
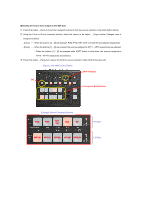
- [A bus] ・・・ When the buttons [1] - [5] are pressed, PGM, PVW, KEY OUT, CLN and MV are selected respectively. - [B bus] ・・・ When the buttons off). (Figure 3: AW-HS50 Control Panel) (SHIFT Button) (A) (Crosspoint Buttons Area) (Enlarged View of Crosspoint Buttons) PGM PVW KEY CLN MV OUT XPT1
-
 1
1 -
 2
2
 |
 |
★
AUX bus is a spare bus that can be used without changing the main line output, for example, when you want to switch
the input video or multi view (MV) screen and output it, or want to fix another input signal and output it.
* This AUX
bus is a single bus.
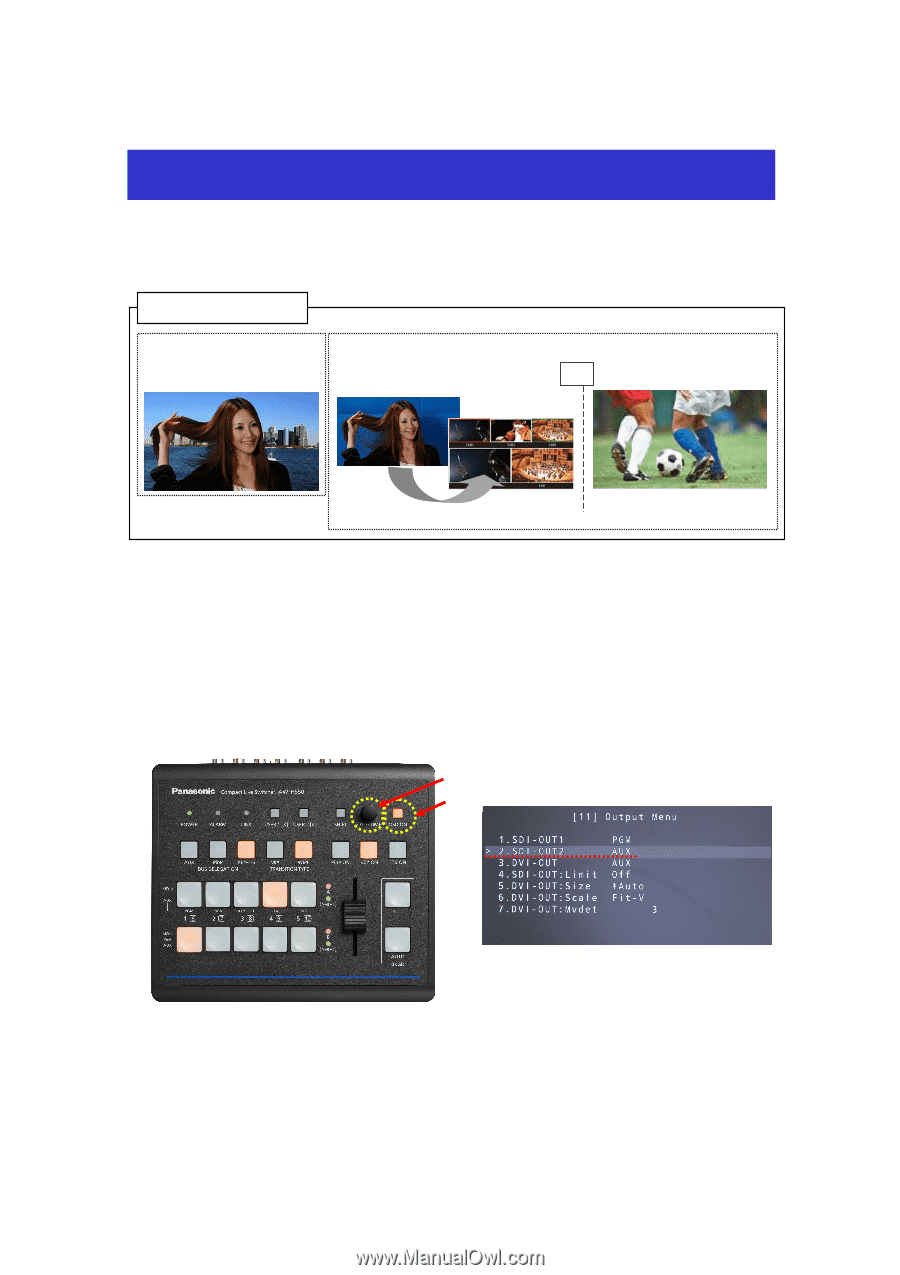
(To use the output as [AUX])
★
This is to explain the operation for assigning the output signal [AUX] to SDI OUT2 and selecting the source.
①
Hold down the OSD ON button – (Fig.1-A) for 2 seconds to open the menu. (To close it, hold down the button again
for 2 seconds.)
②
Use the OSD/TIME dial – (Fig.1-B) to change the following menu setting.
Menu: [11]
Output Menu
>
2. SDI-OUT2
=>
[AUX] – (Fig.2)
* Default Setting: PVW
AUX (Auxiliary) Bus
(Main Line Output)
(Input video, multi view (MV) screen, etc.
are switched and output)
(Possible to switch without changing main line)
(Input video is fixed and output)
SDI OUT1 Signal: PGM
SDI OUT2 Signal: AUX
(Figure 2: AW-HS50 Menu Display Screen)
(Figure 1: AW-HS50 Control Panel)
(
A
)
(
B
)
Or
* This AUX bus is a single bus
Example of Use of AUX Bus