Panasonic AW-HS50 How-To Setup the HS50 Multi View Display - Page 2
Setting for Screen Layout, Setting for Sources to be Displayed on the Screen
 |
View all Panasonic AW-HS50 manuals
Add to My Manuals
Save this manual to your list of manuals |
Page 2 highlights
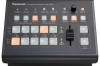
(Setting for Screen Layout) ① Use the OSD/TIME dial - (Fig.1-B) to select the split screen layout via the following menu setting. Menu: [7] MultiView Pattern Menu > 1. Sprit => [Select from 8 patterns] - (Fig.3) * Default: 10-aSplit (Figure 3: AW-HS50 Menu Display Screen) 1. Setting for Screen Layout * Figure 4 below: Select from the following 8 patterns. (Figure 4: Split Screen Layout: 8 Patterns in Total) (Setting for Sources to be Displayed on the Screen) ② Use the OSD/TIME dial - (Fig.1-B) to select the sources to be displayed on split screens 1 - 10 via the following menu setting. Menu: [7] MultiView Pattern Menu > 2. Pos1 Source - 11.Pos10 Source => [Set the Sources] - (Fig.5) (Figure 5: AW-HS50 Menu Display Screen) (10-aSplit Layout) The sources assigned to each Pos number will be displayed in the corresponding positions. * The sources to be displayed on the split screens can be selected from the following signals. SDI IN 1 - 4 DVI IN CBGD FMEM1, FMEM2 PGM PVW KEY OUT AUX Videos input into SDI IN1 - 4 Video input into DVI IN Signal output from color generator built in this switcher Image stored in this switcher Video output into Main Line Video output after the next transition Key signal Video selected using AUX Bus
-
 1
1 -
 2
2
 |
 |
