Panasonic CF-52CCABCBM Operating Instructions - Page 19
Hard Disk Data Erase Utility
 |
UPC - 092281877570
View all Panasonic CF-52CCABCBM manuals
Add to My Manuals
Save this manual to your list of manuals |
Page 19 highlights
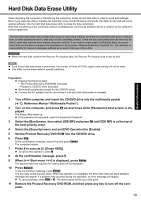
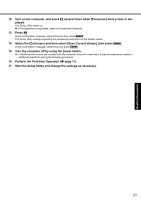
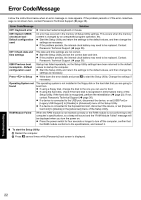
Hard Disk Data Erase Utility When disposing the computer or transferring the ownership, erase all hard disk data in order to avoid data leakage. Even if you erase the data or initialize the hard disk using normal Windows commands, the data can be read with some special software. Use the hard disk data erase utility to erase the data completely. Note that transferring of the ownership without uninstalling the commercial software will be a violation of the software's license agreement. The hard disk data erase utility erases data using an overwriting method, but there is a possibility that due to malfunctions or other operational errors, data may not be completely erased. There are also specialized devices that may be able to read data that has been erased using this method. If you need to erase highly confidential data, we recommend that you contact a company that specializes in this process. Matsushita Electric Industrial Co., Ltd. will bear no responsibility for losses or damages suffered as a result of the use of this utility. CAUTION When the hard disk contains the Recover Pro backup data, the Recover Pro backup area is lost as well. NOTE Even if hard disk data erase is performed, the number of times of DVD's region code setting will not be reset. This utility cannot erase data for specific partitions. Troubleshooting Useful Information Getting Started Preparation Prepare the following items: • The Product Recovery DVD-ROM (included) • Panasonic CD/DVD drive (included) Remove all peripherals (except for the CD/DVD drive). Connect the AC adaptor and do not remove it until hard disk data erase is complete. 1 Turn off the computer and insert the CD/DVD drive into the multimedia pocket ( Reference Manual "Multimedia Pocket"). 2 Turn on the computer, and press F2 several times while [Panasonic] boot screen is displayed. The Setup Utility starts up. If the password is requested, enter the Supervisor Password. 3 Select the [Boot] menu, then select [IDE MP] and press F6 until [IDE MP] is at the top of the boot priority order. 4 Select the [Security] menu and set [DVD Operation] to [Enable]. 5 Set the Product Recovery DVD-ROM into the CD/DVD drive. 6 Press F10. At the confirmation message, select [Yes] and press Enter. The computer restarts. 7 Press 2 to execute [2. [Erase HDD]]. To cancel this operation, press 0. 8 At the confirmation message, press Y. 9 When [>] is displayed, press Enter. The approximate time required for erasing data will be displayed. 10 Press Space. At the confirmation message, press Enter. The hard disk erase process starts. When the operation is completed, the [Hard disk data has been deleted.] message will appear. If a problem has occurred during the operation, an error message will appear. To cancel partway, press Ctrl + C. The data erasure will be up to that point. 11 Remove the Product Recovery DVD-ROM, and then press any key to turn off the computer. 19 Appendix
-
 1
1 -
2
-
3
-
4
-
5
-
6
-
7
-
8
-
9
-
10
-
11
-
12
-
13
-
 14
14 -
 15
15 -
 16
16 -
 17
17 -
 18
18 -
 19
19 -
 20
20 -
 21
21 -
 22
22 -
 23
23 -
 24
24 -
25
-
26
-
27
-
28
-
29
-
30
-
31
-
32
-
33
-
34
-
35
-
36
-
37
-
38
-
39
-
40
 |
 |
