Panasonic DMCG5 DMCG5 User Guide - Page 193
Playing Back Pictures on a TV Screen, Connect the camera and a TV.
 |
View all Panasonic DMCG5 manuals
Add to My Manuals
Save this manual to your list of manuals |
Page 193 highlights
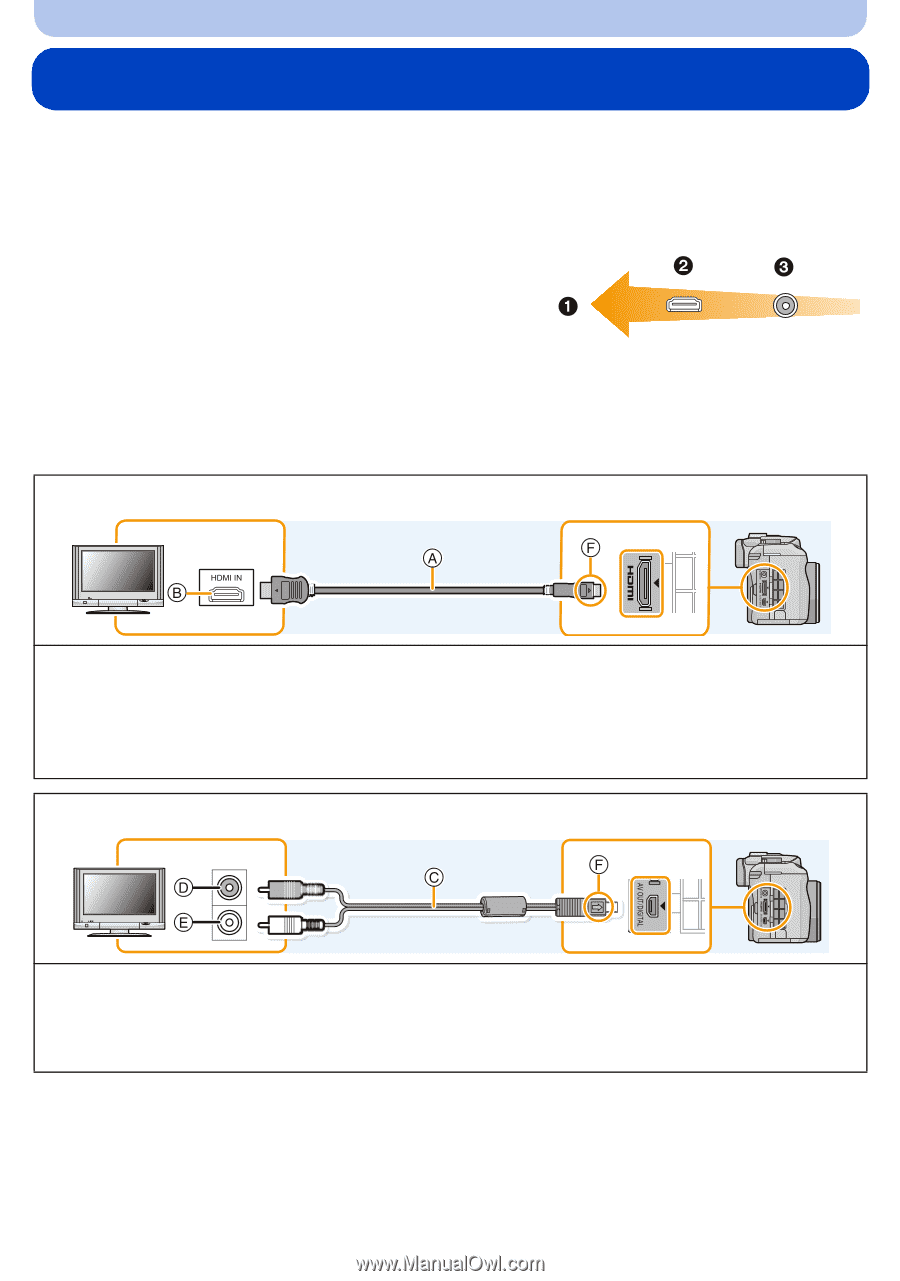
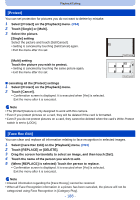
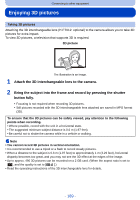
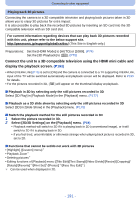
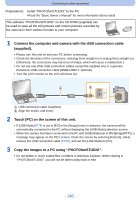
Connecting to other equipment Playing Back Pictures on a TV Screen Pictures recorded with this unit can be played back on a TV screen. Preparations: Turn this unit and the TV off. • Confirm the terminals on your TV and use a cable compatible with the terminals. Image quality may vary with the connected terminals. 1 High quality 2 HDMI socket 3 Video socket 1 Connect the camera and a TV. • Check the direction of the terminals and plug in/out straight holding onto the plug. (It may result in malfunction by the deforming of the terminal if it is plugged in obliquely or in wrong direction.) To connect with an HDMI mini cable (optional) • Always use a genuine Panasonic HDMI mini cable (RP-CDHM15, RP-CDHM30: optional). Part numbers: RP-CDHM15 (1.5 m) (5 feet), RP-CDHM30 (3.0 m) (10 feet) • Check the [HDMI Mode]. (P74) • Audio will be played back as stereo (2ch). • No picture is displayed on the screen of this unit. To connect with an AV cable (optional) • Always use a genuine Panasonic AV cable (DMW-AVC1: optional). • Check the [TV Aspect]. (P74) • Audio will be played back in monaural. • The viewfinder cannot be displayed when connected with a AV cable. A HDMI mini cable (optional) B HDMI socket C AV cable (optional) D Yellow: to the video input socket E White: to the audio input socket F Align the marks, and insert. - 193 -
-
 1
1 -
2
-
3
-
4
-
5
-
6
-
7
-
8
-
9
-
10
-
11
-
12
-
13
-
14
-
15
-
16
-
17
-
18
-
19
-
20
-
21
-
22
-
23
-
24
-
25
-
26
-
27
-
28
-
29
-
30
-
31
-
32
-
33
-
34
-
35
-
36
-
37
-
38
-
39
-
40
-
41
-
42
-
43
-
44
-
45
-
46
-
47
-
48
-
49
-
50
-
51
-
52
-
53
-
54
-
55
-
56
-
57
-
58
-
59
-
60
-
61
-
62
-
63
-
64
-
65
-
66
-
67
-
68
-
69
-
70
-
71
-
72
-
73
-
74
-
75
-
76
-
77
-
78
-
79
-
80
-
81
-
82
-
83
-
84
-
85
-
86
-
87
-
88
-
89
-
90
-
91
-
92
-
93
-
94
-
95
-
96
-
97
-
98
-
99
-
100
-
101
-
102
-
103
-
104
-
105
-
106
-
107
-
108
-
109
-
110
-
111
-
112
-
113
-
114
-
115
-
116
-
117
-
118
-
119
-
120
-
121
-
122
-
123
-
124
-
125
-
126
-
127
-
128
-
129
-
130
-
131
-
132
-
133
-
134
-
135
-
136
-
137
-
138
-
139
-
140
-
141
-
142
-
143
-
144
-
145
-
146
-
147
-
148
-
149
-
150
-
151
-
152
-
153
-
154
-
155
-
156
-
157
-
158
-
159
-
160
-
161
-
162
-
163
-
164
-
165
-
166
-
167
-
168
-
169
-
170
-
171
-
172
-
173
-
174
-
175
-
176
-
177
-
178
-
179
-
180
-
181
-
182
-
183
-
184
-
185
-
186
-
187
-
 188
188 -
 189
189 -
 190
190 -
 191
191 -
 192
192 -
 193
193 -
 194
194 -
 195
195 -
 196
196 -
 197
197 -
 198
198 -
199
-
200
-
201
-
202
-
203
-
204
-
205
-
206
-
207
-
208
-
209
-
210
-
211
-
212
-
213
-
214
-
215
-
216
-
217
-
218
-
219
-
220
-
221
-
222
-
223
-
224
-
225
-
226
-
227
-
228
-
229
-
230
-
231
-
232
 |
 |