Panasonic P2 Handheld Camcorder Understanding P2 Workflow: Vegas and Raylight - Page 10
Importing Footage, Outputting Footage
 |
View all Panasonic P2 Handheld Camcorder manuals
Add to My Manuals
Save this manual to your list of manuals |
Page 10 highlights
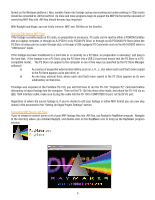
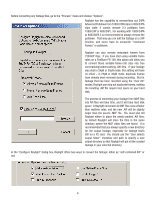
(The above settings are appropriate for a 4:3 DV/DVCPRO/DVCPRO50 project at 30P.) Importing Footage: Raylight provides the ability to directly import P2's MXF files, either from a P2 card or from a hard disk (assuming you've copied the contents of a P2 card onto a hard disk, or are importing the files from a P2 Store). You can either drag the MXF files directly to the timeline from the CONTENTS/VIDEO directory using Windows Explorer, or you can use Vegas' "File>Import->Media" command to select the MXF files you want to import. Of course, if you've used RayMaker to convert the MXF files into .AVI files, you can always use the File->Import->Media command to import those new .AVI files. Vegas will allow you to mix and match MXF files and .AVI files (and many other types of files), regardless of frame rate, resolution, or aspect ratio. Vegas will automatically scale the footage to match your project preset. One note about importing MXF files: if you've used 720p mode (instead of 720pN mode) to shoot a variable-frame-rate clip, the Raylight timeline MXF import function may not accurately show the proper frames in version 2.02. Later versions may correct this, but the recommended workaround is to use RayMaker to convert those variable-frame-rate clips into .AVI files. 60p/24p/30p/60i and 720pN clips can all be directly used via MXF; only 720p variable-frame-rate clips require conversion to .AVI. Outputting Footage: Once your project is edited, you can export the footage in a variety of ways, including to DVD or as a Windows .AVI file or Quicktime file, or you can also render back to a P2 card or to a "virtual card" on a hard disk or other archival media. Raylight 2.02 cannot render out a standard-definition file back to a P2 card, but it can export high-definition files to a P2-compatible MXF file. To render out a P2-compatible DVCPRO-HD MXF file, first choose File->Render As... 10
-
 1
1 -
2
-
3
-
4
-
 5
5 -
 6
6 -
 7
7 -
 8
8 -
 9
9 -
 10
10 -
 11
11 -
 12
12 -
 13
13 -
 14
14 -
 15
15
 |
 |
