Panasonic PV-DV953 Digital Video Camera - Page 41
Playing Back On Your Tv, Audio Dubbing - usb cable
 |
View all Panasonic PV-DV953 manuals
Add to My Manuals
Save this manual to your list of manuals |
Page 41 highlights
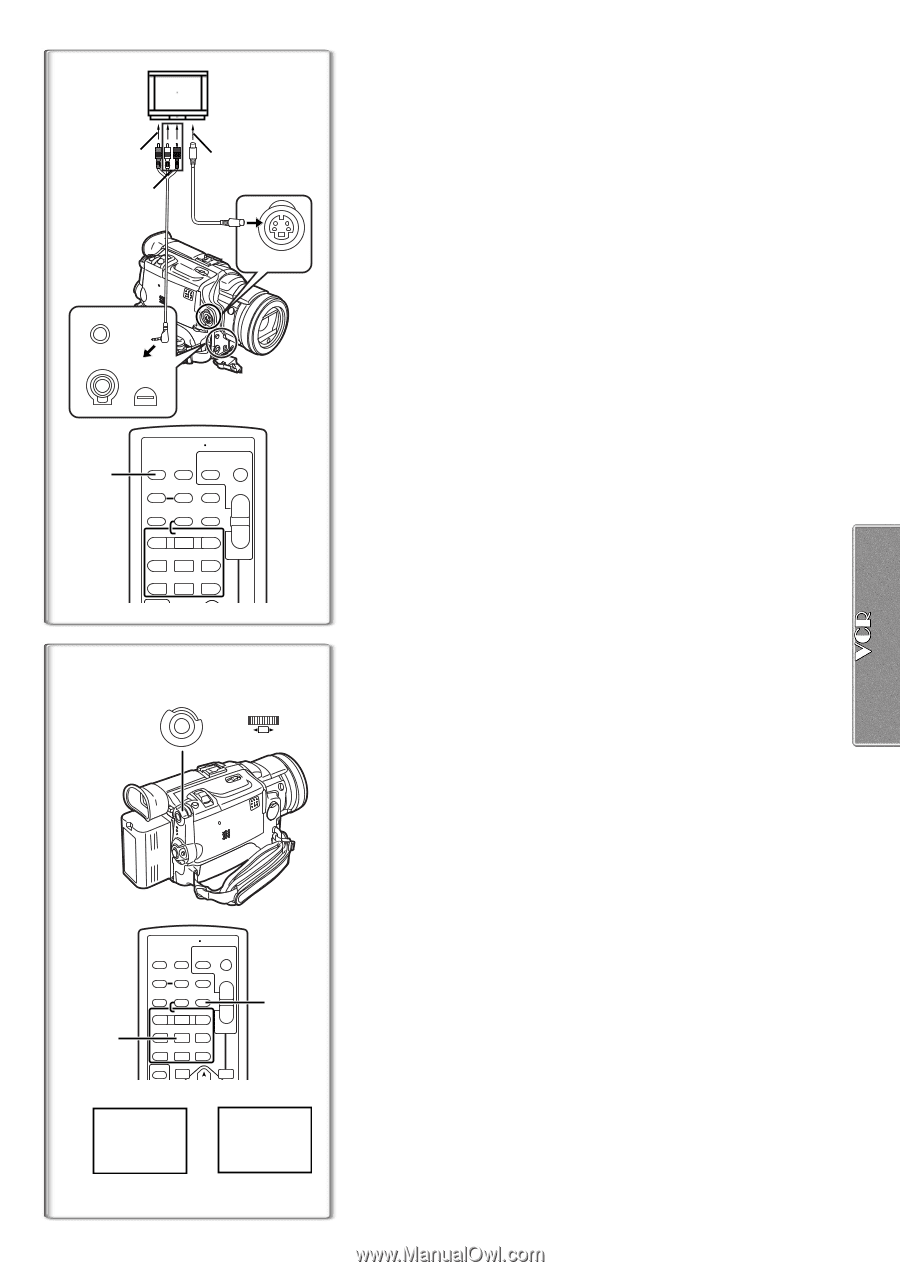
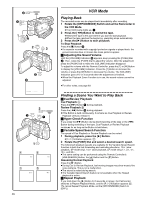
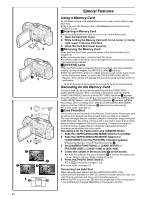
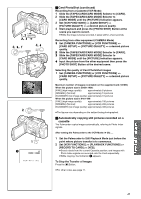
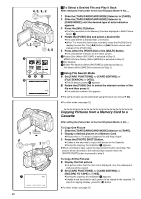
[VIDEO IN] [AUDIO IN] 1 [S-VIDEO IN] 21 S-VIDEO IN/OUT MIC A/V IN/OUT PHONES/REMOTE USB 3 START/ DATE/ PHOTO STOP OSD TIME SHOT COUNTER RESET TITLE MULTI/ P-IN-P ¥REC A.DUB ZOOM T sVOL r V/REW PLAY FF/W W 61 5 STILL ADV PAUSE STILL ADV E ; D INDEX STOP INDEX K ∫ L SELECT 1, 2 MENU SHUTTER/IRIS/ VOL/JOG PUSH 4 START/ DATE/ PHOTO STOP OSD TIME SHOT COUNTER RESET TITLE MULTI/ P-IN-P ¥REC A.DUB ZOOM T sVOL r V/REW PLAY FF/W 61 5 STILL ADV PAUSE STILL ADV E ; D INDEX STOP INDEX K ∫ L SELECT VAR. SEARCH W P.B. ZOOM 1 2 A.DUB; 3 A.DUB! Playing Back on Your TV By connecting your Palmcorder to your TV, the recorded scenes can be viewed on your TV screen. ≥Before connecting them, turn off the power of both the Palmcorder and TV. 1 Connect the [A/V IN/OUT] Jack of the Palmcorder to the Video and Audio Input Jacks of the TV. ≥Using the A/V Cable 1 (supplied), make a connection with the TV. If the TV has an S-Video Jack, connect an S-Video Cable (not supplied) 2, too. ≥When plugging the pin plug of the A/V cable into the [A/V IN/OUT] Jack, plug it in as far as it goes. Making the Indications Appear on the TV screen Press the [OSD] Button 3 on the Remote Controller. ≥Be sure to select the proper input on your TV. (If necessary, consult your TV's operating instructions.) ≥If you play back a Cassette recorded with copyright protection signals, the screen becomes blue or mosaic-like noise patterns appear. ≥If you set [AV JACK] on the [AV IN/OUT SETUP] Sub-Menu to [IN/OUT], nothing will be shown on the TV screen except during playback. Audio Dubbing You can add music or narration to the recorded Cassette. ≥If you perform audio dubbing onto a tape that was recorded with [AUDIO REC] on the [RECORDING SETUP] Sub-Menu of the [CAMERA FUNCTIONS] Main-Menu set to [16bit], the original sound is erased. (If you want to preserve the original sound, use the [12bit] Mode when recording.) ≥Audio Dubbing cannot be performed onto recordings made in LP Mode. (l 23) 1 Set [VCR FUNCTIONS] >> [AV IN/OUT SETUP] >> [AV JACK] >> [IN/OUT]. 2 Continuing the aforesaid setup, select [A.DUB INPUT] >> [MIC] or [AV IN]. ≥Set to [AV IN] when external device is used, and to [MIC] when an external or built-in microphone is used. ≥Switch the Palmcorder over to the Still Playback Mode where you want to add new sound track. 3 Press the [A.DUB] Button on the Remote Controller. ≥[A.DUB;] Indication appears. 1 4 To start Audio Dubbing, press the [;] Button on the Remote Controller. ≥[A.DUB!] Indication appears. 2 To Stop Audio Dubbing Press the [;] Button on the Remote Controller. The Palmcorder is in the Still Playback Mode again. To dub audio while listening to a pre-recorded sound When pausing the audio dubbing, [12bit AUDIO] on the [PLAYBACK FUNCTIONS] Sub-Menu is automatically set to [ST2] and you can check the pre-recorded sound. When a microphone is used for audio dubbing, use headphones to listen to the pre-recorded sound while dubbing the audio. (When using headphones, set [AV JACK] on the [AV IN/ OUT SETUP] Sub-Menu to [OUT/PHONES].) When the line input is used, you can dub audio while listening to a pre-recorded sound from the speaker. Playing Back the Sound Recorded with Audio Dubbing (For 12 bit Audio Recording) Set [VCR FUNCTIONS] >> [PLAYBACK FUNCTIONS] >> [12bit AUDIO] >> [ST2] or [MIX]. ST1: Play back only the original sound. ST2: Play back only the sound added by Audio Dubbing MIX: Play back both the original sound and the sound added by Audio Dubbing simultaneously. ≥For other notes, see page 70. 41
-
 1
1 -
2
-
3
-
4
-
5
-
6
-
7
-
8
-
9
-
10
-
11
-
12
-
13
-
14
-
15
-
16
-
17
-
18
-
19
-
20
-
21
-
22
-
23
-
24
-
25
-
26
-
27
-
28
-
29
-
30
-
31
-
32
-
33
-
34
-
35
-
 36
36 -
 37
37 -
 38
38 -
 39
39 -
 40
40 -
 41
41 -
 42
42 -
 43
43 -
 44
44 -
 45
45 -
 46
46 -
47
-
48
-
49
-
50
-
51
-
52
-
53
-
54
-
55
-
56
-
57
-
58
-
59
-
60
-
61
-
62
-
63
-
64
-
65
-
66
-
67
-
68
-
69
-
70
-
71
-
72
-
73
-
74
-
75
-
76
-
77
-
78
-
79
-
80
-
81
-
82
-
83
-
84
-
85
-
86
-
87
-
88
-
89
-
90
-
91
-
92
 |
 |