Panasonic PV GS400 Digital Video Camcorder
Panasonic PV GS400 - 4MP 3CCD MiniDV Camcorder Manual
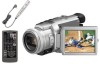 |
UPC - 037988977772
View all Panasonic PV GS400 manuals
Add to My Manuals
Save this manual to your list of manuals |
Panasonic PV GS400 manual content summary:
- Panasonic PV GS400 | Digital Video Camcorder - Page 1
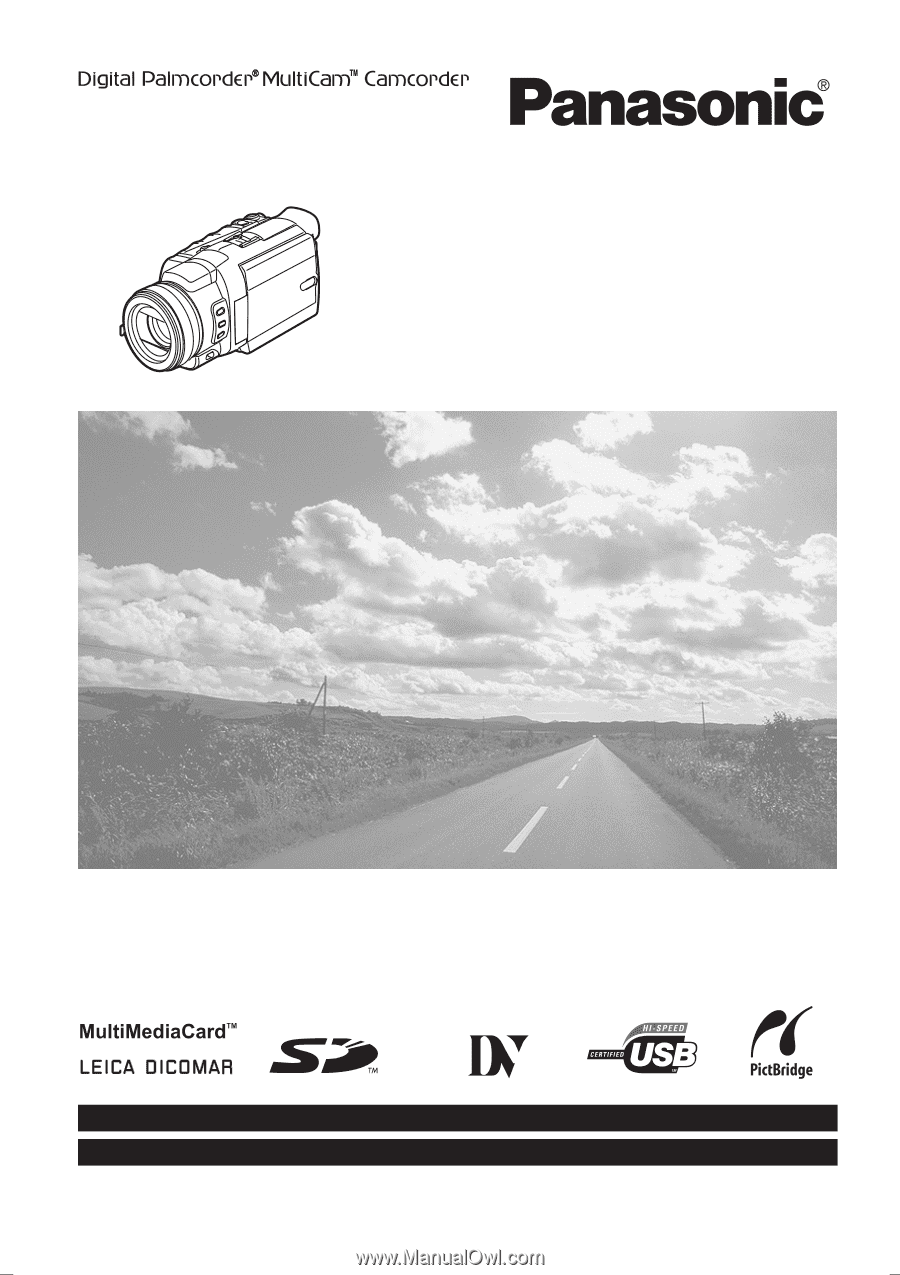
Operating Instructions Digital Video Camcorder Model No. PV-GS400 Before attempting to connect, operate or adjust this product, please read these instructions thoroughly. Spanish Quick Use Guide is included. Guía para rápida consulta en español está incluida. Mini For USA assistance, please call: 1- - Panasonic PV GS400 | Digital Video Camcorder - Page 2
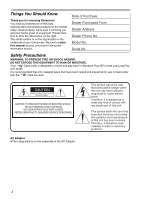
Panasonic manual as your convenient Camcorder information source. Date of Purchase Dealer Purchased From Dealer Address Dealer Phone BACK) NO USER-SERVICEABLE PARTS INSIDE REFER SERVICING TO QUALIFIED SERVICE PERSONNEL This symbol warns problems. AC Adaptor ≥The rating plate is on the underside of - Panasonic PV GS400 | Digital Video Camcorder - Page 3
the limits for a Class B digital device, pursuant to Part 15 , follow the attached installation instructions and use only shielded interface Panasonic Model No.: PV-GS400 Responsible party: Matsushita Electric Corporation of America One Panasonic Way, Secaucus, NJ 07094 Support Contact: Panasonic - Panasonic PV GS400 | Digital Video Camcorder - Page 4
block any ventilation openings. Install in accordance with the manufacturer's instructions. 8) Do not install near any heat sources such as for long periods of time. S3125A 14) Refer all servicing to qualified service personnel. Servicing is required when the apparatus has been damaged in any - Panasonic PV GS400 | Digital Video Camcorder - Page 5
Camcorder. Do not attempt to disassemble this unit. There are no user serviceable parts inside. Unplug your Camcorder from the power supply before cleaning. CAUTION Reverse engineering or disassembly is prohibited. This class B digital apparatus complies with CANADIAN ICES-003. U.S.A. CONSUMERS ONLY - Panasonic PV GS400 | Digital Video Camcorder - Page 6
please read the following. End User License Agreement (for USB Driver, Video Stream Driver, MotionDV STUDIO and SD Viewer) You ("Licensee") are granted including the information recorded or described on the CD-ROM, instruction manuals, and any other media provided to Licensee (collectively "Software - Panasonic PV GS400 | Digital Video Camcorder - Page 7
Article 5 Reverse Engineering, Decompiling or Disassembly Licensee may not reverse engineer, decompile, or disassemble the Software, except to the extent either of them is permitted under law or regulation of the country where Licensee resides. Matsushita, or its distributors or dealers will not be - Panasonic PV GS400 | Digital Video Camcorder - Page 8
Use Quick Guide 10 Quick Start 31 Self-timer Recording 31 Zoom In/Out Functions 31 Digital Zoom Function 32 Image Stabilizer Function 32 Fade In/Out Functions 33 Adjusting White Balance Manually 36 Manual Shutter Speed Adjustment 37 Manual Iris Adjustment 38 Manual Focus Adjustment 38 - Panasonic PV GS400 | Digital Video Camcorder - Page 9
46 Playback Digital Effect Driver 58 Connecting Computer and Camcorder.......... 59 Using as a Web Camera driver (Uninstall 68 Notes 69 Others Indicators 71 Initializing the Modes 72 Warning/Alarm Indicators 73 Notes and Hints 74 Cautions for Use 82 Before Requesting Service (Problems - Panasonic PV GS400 | Digital Video Camcorder - Page 10
Before Use Quick Guide 1 Attach the Battery to the AC Adaptor and charge it. ª Inserting a Card 1 Slide the [OPEN] Lever 1 to open the Card Slot Cover 2. 2 1 OPEN 2 While holding - Panasonic PV GS400 | Digital Video Camcorder - Page 11
Before Use ª Recording a Still Picture on a Card (Photoshot) 1 Set the Mode Dial to Card Recording Mode. ª Playing Back a Card It plays back files recorded on a Card. 1 Set the Mode Dial to Picture Playback Mode. D O S SD PC PC PC 2 Press the [PHOTO SHOT] Button. PHOTO SHOT ª Playing Back a - Panasonic PV GS400 | Digital Video Camcorder - Page 12
Camcorder. Controls and Components ª Camcorder (1) 1) PV-DAC14D 2) K2GJ2DZ00017 K2CA2EA00005 3) 4) CR2025 CGA-DU14 can be attached here. Power is supplied directly from the Camcorder when using an accessory supported by the Smart Accessory Shoe. ≥Do not touch the connector part of the Smart - Panasonic PV GS400 | Digital Video Camcorder - Page 13
microsystems IR GmbH and DICOMAR is a registered trademark of Leica Camera AG. (23) Lens Hood -85(24) Multi Manual Ring -31-, -37-, -38(25) Microphone (built-in Remote Control Sensor -16- (37) REMOTE/MIC (PLUG IN POWER) (38) AV IN/OUT PHONES (39) (40)(41)(42)(43) (37) USB Jack [ ] -59- (38) Jack - Panasonic PV GS400 | Digital Video Camcorder - Page 14
59) Tripod Receptacle ≥Used for mounting the Camcorder on an optional tripod. (60) DV Terminal [DV] -54-, -55-, -56≥Connect this to the digital video equipment. (61) S-Video Input/Output Jack [S-VIDEO IN/OUT] -52- 14 ª Remote Controller Using the wireless Remote Controller that is supplied with the - Panasonic PV GS400 | Digital Video Camcorder - Page 15
P.B. ZOOM K ∫ L SELECT VAR. SEARCH STORE ENTER MENU OFF/ON P.B.DIGITAL (83) (84) (85) (86) (87) Before Use ≥Insert the batteries according to manufacturer's instructions. Risk of fire, swallowed, call your doctor. Replace battery with Panasonic PART NO. CR2025 only. Use of another - Panasonic PV GS400 | Digital Video Camcorder - Page 16
to [OFF] and make sure that [POWER] Lamp is not lit. ª Using the Battery Before use, fully charge the Battery. ≥We recommend using a Panasonic Battery. ≥We cannot guarantee the quality of this Camcorder when batteries from other companies are used. 1 Attach the Battery to the AC Adaptor and charge - Panasonic PV GS400 | Digital Video Camcorder - Page 17
Before Use 2 Attach the charged Battery to the Camcorder. ≥When you use the Camcorder while brightening the LCD Monitor up by pressing the [POWER LCD] Button. ≥When you use accessories applicable to the Smart Accessory Shoe (Stereo Zoom Microphone, Video DC Light, etc.). The One-touch Free Style - Panasonic PV GS400 | Digital Video Camcorder - Page 18
2 Detach the end of the Grip Belt. Before Use 3 Slide A in the direction of the arrow and reattach the Grip Belt. A 4 Attach the Grip Belt around your wrist. Attaching the Shoulder Strap We recommend that you attach the Shoulder Strap before going out to avoid dropping the Camcorder. 1 Pull the - Panasonic PV GS400 | Digital Video Camcorder - Page 19
this item, see -74-. Using a Memory Card A Card can be used to record pictures. ≥Use a genuine SD Memory Card or MultiMediaCard manufactured by Panasonic only. ª Caution before inserting/removing a Card Be sure to turn off the Camcorder. ≥Otherwise, the Camcorder may not function properly or it may - Panasonic PV GS400 | Digital Video Camcorder - Page 20
Before Use Selecting Modes You can choose a desired mode by rotating the Mode Dial. 1 Rotate the Mode Dial (44). S (44) :Tape Recording Mode Use this mode when recording pictures on a tape. Also, you can record still pictures on the card simultaneously during recording on a tape. :Tape Playback - Panasonic PV GS400 | Digital Video Camcorder - Page 21
Before Use ª Adjusting Brightness and Color Level When [LCD/EVF SET] on the [LCD/EVF] Sub-Menu is set to [YES], the following items are displayed. LCD/EVF SETUP 1LCD BRIGHTNESS LCD COLOR LEVEL EVF BRIGHTNESS ;/∫:SELECT &/%:SETUP !/MENU:EXIT LCD Brightness [LCD BRIGHTNESS] Adjusts the - Panasonic PV GS400 | Digital Video Camcorder - Page 22
Operations. (The above procedure will not be repeated in the following instructions.) List of Menus The figures of the Menus are for explanation purposes MENU] Tape Recording Menu TAPE RECORDING MENU CAMERA !PROG.AE ADVANCED EIS DIGITAL D.ZOOM CARD SELF TIMER RECORDING USB FUNCTION - Panasonic PV GS400 | Digital Video Camcorder - Page 23
Sub-Menu [AV JACK] AV Jack -53[A.DUB INPUT] Audio Dubbing Input -53[DV OUT] Analog-Digital Conversion Output -813) [DIGITAL] Playback Digital Setup Sub-Menu [EFFECT ON] Digital Effect On/Off -47[EFFECT SEL] Digital Effect Selection -47[TITLE IN] Adding a Title -494) [CARD] Card Setup Sub-Menu [PICT - Panasonic PV GS400 | Digital Video Camcorder - Page 24
-28[REMOTE] Remote Controller Mode -16[BEEP SOUND] Beep Sound -74- ª [CARD RECORDING MENU] Card Recording Menu CARD RECORDING MENU CAMERA !PROG.AE ADVANCED EIS DIGITAL SHTR EFFECT CARD SELF TIMER RECORDING RED EYE DISPLAY FLASH LEVEL LCD/EVF INITIAL ;/∫:SELECT %:NEXT MENU:EXIT - Panasonic PV GS400 | Digital Video Camcorder - Page 25
a Card -51- 3) [PRINT] Printing Setting Sub-Menu [THIS PICTURE] Printing Only the Displayed Picture -57[DATE] Printing with Recording Date -574) [DIGITAL] Playback Digital Setup Sub-Menu [TITLE IN] Adding a Title -495) [DISPLAY] Display Setup Sub-Menu [DISPLAY] Display Mode -72[DATE/TIME] Date and - Panasonic PV GS400 | Digital Video Camcorder - Page 26
Before Use Setting Date and Time Since the internal clock of the Camcorder has a slight imprecision make sure to check the time before recording. 1 Set [TAPE RECORDING MENU] or [CARD RECORDING MENU] >> [INITIAL] >> [CLOCK SET] >> [YES]. Internal Lithium Battery Recharge The internal lithium - Panasonic PV GS400 | Digital Video Camcorder - Page 27
], the Camcorder automatically adjusts the focus and white balance. In some cases, they cannot be adjusted automatically and need to be adjusted manually. (-36-, -37-, -38-) AUTO MANUAL (31) AE LOCK ≥Before turning on the power, remove the Lens Cap. If the Lens Cap is still attached when the power - Panasonic PV GS400 | Digital Video Camcorder - Page 28
is pressed, the built-in microphone does not operate. ª Digital Still Picture You can record images stilled by Digital Still Picture Mode onto a tape. When the [STILL] is also possible to record sound.) 1 Set [TAPE RECORDING MENU] >> [CAMERA] >> [REC MODE] >> [FRAME]. (17) STILL ENTER FADE ≥You - Panasonic PV GS400 | Digital Video Camcorder - Page 29
is not pressed. Check it for your reference. ≥Even if the [PHOTO SHOT] Button is pressed halfway, the Shutter Chance Mark does not appear in Manual Focus Mode. 29 - Panasonic PV GS400 | Digital Video Camcorder - Page 30
Recording Mode Selecting the Size of Photoshot Images 1 Tape Recording Mode: Set [TAPE RECORDING MENU] >> [CARD] >> [PICTURE SIZE] >> [1280k960] or [640k480]. Card Recording Mode: Set [CARD RECORDING MENU] >> [CARD] >> [PICTURE SIZE] >> [2288k1728], [1600k1200], [1280k960] or [640k480]. (16) MENU - Panasonic PV GS400 | Digital Video Camcorder - Page 31
on the Card. 1 Set [TAPE RECORDING MENU] or [CARD RECORDING MENU] >> [CAMERA] >> [SELF TIMER] >> [ON]. ≥To cancel the Self-timer Recording while the ] Indication appears, the Camcorder is set to Auto Focus Mode.) 2 Turn the Multi Manual Ring (24) to zoom in/out. (16) MENU STILL ENTER FADE ≥The - Panasonic PV GS400 | Digital Video Camcorder - Page 32
. ≥Set [TAPE RECORDING MENU] >> [RECORDING] >> [ZOOM MIC] >> [ON]. (The [ Z.MIC ] Indication is displayed.) To Cancel the Digital Zoom Function Set [TAPE RECORDING MENU] >> [CAMERA] >> [D.ZOOM] >> [OFF]. ≥For other notes concerning this item, see -76-. Image Stabilizer Function If the Camcorder is - Panasonic PV GS400 | Digital Video Camcorder - Page 33
gradually, leaving a black screen at the end of a scene. (47) To Cancel Image Stabilizer Function Set [TAPE RECORDING MENU] or [CARD RECORDING MENU] >> [CAMERA] >> [EIS] >> [OFF]. ≥For other notes concerning this item, see -76-. Fade In/Out Functions Fade In Fade In brings out images and sounds - Panasonic PV GS400 | Digital Video Camcorder - Page 34
Recording Mode MagicPix Functions Advanced MagicPix Function This function allows you to record color images brightly in a dark place. 1 Press the [ADVANCED MAGICPIX] Button (13) until the [MAGICPIX] Indication appears. Soft Skin Function This enables you to record skin colors in a softer tone. In - Panasonic PV GS400 | Digital Video Camcorder - Page 35
. 1 Press the [WIDE/PRO-CINEMA] Button (7) twice. (7) WIDE/ PRO-CINEMA AUTO MANUAL (31) AE LOCK ≥The [MNL] Indication appears. 2 Set [TAPE RECORDING MENU] or [CARD RECORDING MENU] >> [CAMERA] >> [PROG.AE] >> a desired mode ([5], [7], [4], [Ω] or [º]). ≥The [PRO.CINE]/[FRAME] Indication appears - Panasonic PV GS400 | Digital Video Camcorder - Page 36
in glaring surroundings, such as ski slopes, beaches, etc. To Cancel the Program AE Function Set the [PROG.AE] on the [CAMERA] Sub-Menu to [OFF]. Or, set the [AUTO/MANUAL/AE LOCK] Switch to [AUTO]. ≥For other notes concerning this item, see -77-. Recording in Natural Colors (White Balance) Depending - Panasonic PV GS400 | Digital Video Camcorder - Page 37
] causes faster shutter speed. To Resume Automatic Adjustment Set the [AUTO/MANUAL/AE LOCK] Switch to [AUTO], or keep pressing the [SHUTTER/IRIS Balance cannot be changed. ≥the Camcorder focuses on the subject manually. ≥When you set to the Manual Focus Mode, the shutter speed is already set to 1/60 - Panasonic PV GS400 | Digital Video Camcorder - Page 38
is attached indicates a Gain-up value. If this value is too large, the quality of the image deteriorates. To Resume Automatic Adjustment Set the [AUTO/MANUAL/AE LOCK] Switch to [AUTO], or keep pressing the [SHUTTER/IRIS] Button. ≥For other notes concerning this item, see -78-. To Resume Automatic - Panasonic PV GS400 | Digital Video Camcorder - Page 39
appear on parts of the picture which are overexposed (extremely brightly lit and shiny subjects). ZEBRA ≥To prevent recording of overexposed, whitish pictures, manually adjust the iris/gain (-38-) so that the Zebra Pattern disappears. The recorded picture may become dark. ≥The Zebra Pattern is not - Panasonic PV GS400 | Digital Video Camcorder - Page 40
Recording Mode MIC LEVEL SETUP MODE AUTO 1MNL(AGC) MNL(NO-AGC) (dB)-30 0 +6 GAIN (dB)-30 0 +6 LEVEL MIC) ;/∫:SELECT &/%:SETUP !/MENU:EXIT AUTO: AGC is activated, and the recording level is adjusted automatically. MNL (AGC): The desired recording level can be set. AGC will also be - Panasonic PV GS400 | Digital Video Camcorder - Page 41
. 1 Set [TAPE RECORDING MENU] or [CARD RECORDING MENU] >> [CAMERA] >> [RED EYE] >> [ON]. Digital Effect Functions This Camcorder is equipped with Digital Effect Functions that add special effects to the scene. Digital Effects 1 [EFFECT1] 1) MULTI 2) P-IN-P 3) WIPE 4) MIX 5) STROBE 6) TRAIL - Panasonic PV GS400 | Digital Video Camcorder - Page 42
] settings are cancelled. You can capture and record 9 consecutive small still pictures. Manual Multi-Picture Mode: You can manually capture and record 9 small still pictures. 1 Set [TAPE RECORDING MENU] >> [DIGITAL] >> [EFFECT1] >> [MULTI]. (16) MENU STILL ENTER FADE 2 Set [TAPE RECORDING MENU - Panasonic PV GS400 | Digital Video Camcorder - Page 43
Button is pressed again, the small still picture is cleared. ≥For other notes concerning this item, see -79-. 1 Set [TAPE RECORDING MENU] >> [DIGITAL] >> [EFFECT1] >> [WIPE] or [MIX]. (16) MENU STILL ENTER FADE ≥The [WIPE] or [MIX] Indication appears. 2 Press the Recording Start/Stop Button (47 - Panasonic PV GS400 | Digital Video Camcorder - Page 44
Playback Mode Playback Mode Playing Back a Tape The recorded scene can be played back immediately after the recording. 1 Set the [OFF/ON] Switch (48) to [ON]. ≥The [POWER] Lamp (46) lights up. (46) POWER ª Adjusting the Sound Volume To adjust the volume, push the [`VOL/JOG_] Lever (51) to display - Panasonic PV GS400 | Digital Video Camcorder - Page 45
Playback Mode ª Variable Speed Search Function The speed of Cue Playback or Review Playback can be varied. 1 During playback, press the [1] Button (19). ≥The [1k!] Indication appears. (19) STILL ENTER FADE 2 Push the [sVOL/JOGr] Lever (51) to select a desired search speed. VOL/JOG W T (51) - Panasonic PV GS400 | Digital Video Camcorder - Page 46
] Button (86) on the Remote Controller. (68) INDEX STOP INDEX P.B. ZOOM K ∫ L SELECT STORE VAR. SEARCH ENTER MENU OFF/ON (86) (68) P B DIGITAL ≥The center of the image is enlarged by approximately 2 times. ZOOM 2t To Change the Zoom Magnification 2 Change the magnification by pressing - Panasonic PV GS400 | Digital Video Camcorder - Page 47
the [SELECT] Button (71) on the Remote Controller and select [WIPE] or [MIX]. (71) (72) K ∫ SELECT STORE VAR. SEARCH L ENTER MENU (73) OFF/ON P.B.DIGITAL ≥For other notes concerning this item, see -80-. Playing Back a Card It plays back files recorded on a Card. 1 Set the Mode Dial (44) to - Panasonic PV GS400 | Digital Video Camcorder - Page 48
Playback Mode To Select a Desired File and Playing Back 1 Set the Mode Dial (44) to Picture Playback Mode. (44) Slide Show The recorded still pictures in the Card can be played back like a Slide Show. 1 Set the Mode Dial (44) to Picture Playback Mode. SD SD PC PC 2 Press the [MULTI] Button (12 - Panasonic PV GS400 | Digital Video Camcorder - Page 49
ENTER FADE 2 Set [CARD] >> [CREATE TITLE] >> [YES]. (16) MENU STILL ENTER FADE 3 Press the [PHOTO SHOT] Button (52). (52) PHOTO SHOT 1 Set [DIGITAL] >> [TITLE IN] >> [ON]. (16) MENU STILL ENTER FADE 2 Press the [MENU] Button (16). ≥The title is displayed. 3 Press the [MULTI] Button (12 - Panasonic PV GS400 | Digital Video Camcorder - Page 50
Setting) DPOF Setting Printing data (DPOF Settings), such as the number of images to be printed, can be written to the Card. "DPOF" means Digital Print Order Format. 1 Set the Mode Dial (44) to Picture Playback Mode. (44) 3 Select a desired picture and press the [ENTER] Button (19). ≥The selected - Panasonic PV GS400 | Digital Video Camcorder - Page 51
Playback Mode Deleting the Files Recorded on a Card Using the Camcorder, you can delete the files recorded on a Card. After the file is deleted, it cannot be restored. ≥If files conforming to DCF standard are deleted, all the data related to the files will be deleted. To Select and Delete Files or - Panasonic PV GS400 | Digital Video Camcorder - Page 52
IN/OUT] Jack of the Camcorder and the Video and Audio Input Jacks of the TV. [S-VIDEO IN] 2 [VIDEO IN] [AUDIO IN] 1 AV IN/OUT PHONES DV S-VIDEO IN/OUT ≥Connect to the TV with the AV Cable 1. If the TV has an S-Video Jack, connect the S-Video Cable 2, too. ≥Plug - Panasonic PV GS400 | Digital Video Camcorder - Page 53
used for audio dubbing, use headphones to listen to the pre-recorded sound while dubbing the audio. (When using headphones, set [AV JACK] to [OUT/PHONES].) When the line input is used, you can dub audio while listening to the pre-recorded sound from the speaker. ≥For other notes concerning this - Panasonic PV GS400 | Digital Video Camcorder - Page 54
external input, tape speed, etc.) are required, please refer to the operating instructions of your DVD Recorder or VCR. Camcorder: 3 Press the [1] Button (19 OUT] 2 [VIDEO OUT] [AUDIO OUT] 1 DV S-VIDEO IN/OUT AV IN/OUT PHONES 3 DV Cable (optional) Be sure to press the [OSD] Button (-14-) on the - Panasonic PV GS400 | Digital Video Camcorder - Page 55
format/model) that has a DV input/output terminal, and using a 4-pin to 4-pin DV Interface cable PV-DDC9/PV-DDC9-K (optional) 1, high quality images and sounds can be dubbed in the digital mode. sVOL r sVOL r Player: 2 Press the [1] Button (84) to start playback. T MULTI/ P-IN-P ¥REC A.DUB (66 - Panasonic PV GS400 | Digital Video Camcorder - Page 56
DV Interface. Panasonic DVC are OHCI compliant and should have no problem working with any printer compatible with PictBridge. (Also read the operating instructions of the printer.) ≥You cannot print images . REMOTE/MIC (PLUG IN POWER) AV IN/OUT PHONES 1 1 USB Cable PRINT ≥The [PRINT] Indication - Panasonic PV GS400 | Digital Video Camcorder - Page 57
the USB connection cable again or check the printer. (16) MENU STILL ENTER FADE ≥You cannot set date printing when the printer does not support it. ≥Proceed to the next step if you do not need date printing. 5 Set [PICTURE PLAYBACK MENU] >> [PRINT] >> [THIS PICTURE] >> a desired paper size. (16 - Panasonic PV GS400 | Digital Video Camcorder - Page 58
video recorded on a tape or images viewed through the lens of a camera. Connecting the Camcorder with the DV cable also allows you to output on-screen instructions. ≥Click [Next] and proceed with installation. ≥After completing the installation, Click [Finish]. 6 After the USB Driver is installed - Panasonic PV GS400 | Digital Video Camcorder - Page 59
problem. Simply click [Yes] to proceed with the installation. Connecting Computer and Camcorder When your OS is Windows 98SE, install USB Driver can use the same drag and drop or copy methods. Using as a Web Camera If the Camcorder is connected to your personal computer, you can send video and - Panasonic PV GS400 | Digital Video Camcorder - Page 60
by following the on-screen instructions. ≥Click [Next] and proceed with installation. ≥After completing the installation, Click [Finish]. 5 Click [OK]. ª Connecting the Camcorder to personal computer (For Use as a Web Camera) 1 Install the supplied Video Stream Driver on the provided CD-ROM - Panasonic PV GS400 | Digital Video Camcorder - Page 61
Driver as instructed Camera, the quality of the video to be exchanged will depend on the Internet connection status. ≥In the WEB CAMERA WEB CAMERA mode, Service] and click [OK]. 3 After the .NET Passport Wizard is displayed, click [Next]. ≥Please refer to the instruction manual in the [Camera] menu. 8 - Panasonic PV GS400 | Digital Video Camcorder - Page 62
[Web Camera Settings...] in the [Tools] menu. 8 Confirm that the [Panasonic DVC Web Camera Device] Driver must be installed. ≥Do not connect the USB Cable until the Video Stream Driver recommended) Desktop resolution of 1024k768 pixels or more (Supporting the overlay of DirectDraw) 4 MB or more video - Panasonic PV GS400 | Digital Video Camcorder - Page 63
≥When DirectX 9.0b is installed, applications supported by previous versions of DirectX may not run [Setup] screen appears. 2 Click [Video Stream Driver]. ≥The set up program starts running. 3 For , please carry out the installation according to instructions. 4 Select the Video system. 5 After - Panasonic PV GS400 | Digital Video Camcorder - Page 64
] etc. in [Device Manager] and then select [Properties]. If a description other than [Microsoft] is displayed ≥Update the driver with the following procedure. 1 Click [Update Driver...]. 2 Check [Install from a list or specific location (Advanced)] and then click [Next]. ≥When your OS is Windows - Panasonic PV GS400 | Digital Video Camcorder - Page 65
1 Set the Mode Dial to Tape Recording Mode or Tape Playback Mode. 2 Set [CAMERA] or [PLAYBACK] >> [USB FUNCTION] >> [MOTION DV]. STILL (16) MENU USB Connection Cable. 4 Select [Start] >> [All Programs (Programs)] >> [Panasonic] >> [MotionDV STUDIO 5.1E LE for DV] >> [MotionDV STUDIO]. ≥Using - Panasonic PV GS400 | Digital Video Camcorder - Page 66
reading the displayed contents, please carry out the installation according to instructions. 4 Select the Video system. ≥Easy-to-use photo-stitching 4.0 (Windows, Mac) 3 Select [Start] >> [All Programs (Programs)] >> [Panasonic] >> [SD Viewer for DV] >> [SD Viewer for DV]. ≥Program to layout - Panasonic PV GS400 | Digital Video Camcorder - Page 67
and/or VRML viewer needed. [1] RAM: 64 MB or more (128 MB or more is recommended) Free hard disk space: At least 300 MB ≥This instruction manual describes only the procedures for installation, connection and start-up. Please read the Help messages of your software for how to use the ArcSoft Software - Panasonic PV GS400 | Digital Video Camcorder - Page 68
[PhotoPrinter Installer]). 8 Follow the instructions on the computer screen until the [PhotoPrinter 4]). Note on the driver name displayed The driver name displayed will differ depending on . S (44) If you no longer need software or driver (Uninstall) The screens may vary with the type of OS. - Panasonic PV GS400 | Digital Video Camcorder - Page 69
Instructions are shown in English for the sake of example, other languages are supported as well. ≥These instructions Camera Driver, and re-install it. 1 Set the Camcorder to Tape Recording Mode or Tape Playback Mode, connect it to the personal computer, and delete [USB Video Device] (or [Panasonic - Panasonic PV GS400 | Digital Video Camcorder - Page 70
other company and product names in the operating instructions are trademarks or registered trademarks of their respective "MultiMediaCard" by this Camcorder conform with DCF (Design rule for Camera File system) established by JEITA (Japan Electronics and Information Technology Industries - Panasonic PV GS400 | Digital Video Camcorder - Page 71
Audio Dubbing Input Display -5312 bit, 16 bit: Audio Recording Mode -26- MF: Manual Focus -38- ª: 5: 7: 4: Back Light Mode -33Sports Mode (Program AE) - -28- : External microphone supported by the Smart Accessory Shoe -12- LOW CUT: External microphone supported by the Smart Accessory Shoe - Panasonic PV GS400 | Digital Video Camcorder - Page 72
47- TITLE: Title picture -49- WEB : WEB CAMERA Mode (recording) -60- WEB : WEB CAMERA Mode (playback) -60- PRINT (Highlighted): PictBridge Mode in the following cases. When using Tape Recording Mode ≥Digital Effect Modes in [EFFECT1] ≥Digital Zoom range ≥1/750 s or faster shutter speed ≥ - Panasonic PV GS400 | Digital Video Camcorder - Page 73
RESET] Button (-13-). This may solve the problem. CARD FULL: Card does not have sufficient are recording pictures on a Tape while setting the Digital Effect [MULTI] of [EFFECT1]. UNABLE TO WRITE: DOES NOT SUPPORT USB2.0: In the MotionDV STUDIO Mode, your personal computer does not support USB 2.0 - Panasonic PV GS400 | Digital Video Camcorder - Page 74
MAGICPIX] Button with setting the [AUTO/MANUAL/AE LOCK] Switch to [AE LOCK]. ≥When the Camcorder is used for a long time, the Camera body becomes warm, but this is not a malfunction. ≥ Moving Pictures (Frame Mode) ≥It is not possible to use the digital modes of [EFFECT1]. (-41-) ≥Set [REC MODE] to - Panasonic PV GS400 | Digital Video Camcorder - Page 75
of the screen changes or blurs, adjust the shutter speed manually to 1/60 or 1/100. Photoshot ≥When you record Mode. ≥Sound cannot be recorded. ≥The file format supported by this Camcorder is JPEG. ≥If [NORMAL] or on the card. We recommend using a Panasonic SD Memory Card. ≥When the [PICTURE - Panasonic PV GS400 | Digital Video Camcorder - Page 76
speed is set to 1/15 or lower, the zoom operation with the Multi Manual Ring is disabled. ª Tele-Macro Function ≥The Tele-Macro Function cannot be started Flash. ≥The shutter speed cannot be adjusted. ≥The Program AE or Digital Effect Modes in [EFFECT1] cannot be set. ≥When recording with the - Panasonic PV GS400 | Digital Video Camcorder - Page 77
screen format. Please refer to the TV's operating instructions for details. ≥When images are displayed on a When you set the Zoom to 12k or higher. ≥During Digital Still Picture Mode. ≥When you display a Menu. ≥ Balance Adjustment manually under weak illumination. ª Manual Shutter Speed Adjustment - Panasonic PV GS400 | Digital Video Camcorder - Page 78
of the person recorded may become too dark. Picture Adjustment ≥You cannot use the Picture Adjustment when setting the Digital Effect 2. ≥You cannot use the Picture Adjustment when the [AUTO/MANUAL/AE LOCK] Switch is set to [AUTO]. ≥Settings once performed will remain valid so long as the [AUTO - Panasonic PV GS400 | Digital Video Camcorder - Page 79
either adjust the iris manually or use the Backlight be adjusted. ≥Also refer to the operating instructions of the Video Flash carefully. ª Red Eye Functions cannot be used. ≥Set another Digital Effect item. ≥Operate the [OFF/ON to [OUT/PHONES] and connect the headphones to the [PHONES] Jack (-13 - Panasonic PV GS400 | Digital Video Camcorder - Page 80
Functions ≥Signals of images to which digital effects are added during playback cannot be output from the DV Terminal (-14-). ≥You cannot use the Wipe or Mix Function while playing back the non-recorded portion of tape. ª Playing Back a Card ≥The file format supported by this Camcorder is JPEG. (Not - Panasonic PV GS400 | Digital Video Camcorder - Page 81
disturbed, but it does not affect the recorded images. ≥Even if Playback Digital Effects, Playback Zoom, or Playback Title In have been used, these effects cannot be displayed if the software of the connected equipment does not support the display function. ≥You cannot record on a card when recording - Panasonic PV GS400 | Digital Video Camcorder - Page 82
may be disturbed due to electromagnetic wave radiation. ≥Do not use near a cell phone because doing so may cause noise to adversely affect the picture and sound. ≥ case lined with soft pads so as to prevent the coating on the camera body from being worn. After use, be sure to take the Cassette - Panasonic PV GS400 | Digital Video Camcorder - Page 83
≥High-temperature and high-humidity environment ≥Damaged tape ≥Long operating hours Using Mini-DV Format Digital Video Head Cleaner 1 Insert the Head Cleaner into the Camcorder in the same manner as conditions, such as temperature, humidity, dust, etc.) Please contact a Panasonic Service Center. 83 - Panasonic PV GS400 | Digital Video Camcorder - Page 84
59oF to 77oF (15oC to 25oC), Recommended Humidity: 40% to 60% Camcorder ≥Wrap it with a soft cloth to prevent dust from getting into the Camera. ≥Do not leave the Camcorder in places that expose it to high temperature. Battery ≥Extremely high temperatures or low temperatures will shorten the life of - Panasonic PV GS400 | Digital Video Camcorder - Page 85
and conversion lens attached together to the Camcorder, 4 corners of the image may become dark (vignetting). For details, please refer to the operating instructions of your accessories. ≥Be sure to keep the Lens Hood attached to the Camcorder so as to shut out unnecessary light. Extremely high - Panasonic PV GS400 | Digital Video Camcorder - Page 86
Service (Problems correctly. In this case, use the Manual Focus Mode to adjust the focus. Motion Playback. • This phenomenon is characteristic of digital video systems. It is not a malfunction. Input" on the TV? Please read the operating instructions of your TV and select the channel that matches - Panasonic PV GS400 | Digital Video Camcorder - Page 87
[ ] Icon in the task tray and follow the instructions on the screen. (-68-) Explanation of Terms ª Digital Video System In a digital video system, images and sounds are converted into digital signals and recorded on a tape. This complete digital recording is capable of recording and playback with - Panasonic PV GS400 | Digital Video Camcorder - Page 88
clearly. However, the Auto Focus System does not function properly for the following subjects or under the following recording conditions. Please use the Manual Focus Mode instead. 1) Recording a subject whose one end is located close to the Camcorder and the other end farther away from it ≥Because - Panasonic PV GS400 | Digital Video Camcorder - Page 89
function, USB 2.0 compliant (Hi-Speed) No copyright protection support PictBridge-compliant Digital Interface: DV Input/Output Terminal (IEEE1394, 4-pin) Flash: GB) Still picture recording file format: JPEG (Design rule for Camera File system, based on Exif 2.2 standard), DPOF corresponding Still - Panasonic PV GS400 | Digital Video Camcorder - Page 90
Others Maximum number of still pictures recordable on an SD Memory Card (optional) PICTURE SIZE 640k480 1280k960 1600k1200 2288k1728 PICTURE QUALITY FINE NORMAL ECONOMY FINE NORMAL ECONOMY FINE NORMAL ECONOMY FINE NORMAL ECONOMY 8 MB 45 95 190 9 16 23 5 9 14 1 3 5 16 MB 100 - Panasonic PV GS400 | Digital Video Camcorder - Page 91
USA) BN-SDABPU/1B (For Canada) N2QCBD000030 VW-LDC10 VW-LDH3 VW-VMH3 PV-H150 (USA only) Description AC Adaptor with AC Cable and DC Cable 1360mAh/ to activate it.) Video DC Light (3 W) Stereo Zoom Microphone Carrying Case PV-HB002 (USA only) Carrying Case *Please refer to page -17-, concerning - Panasonic PV GS400 | Digital Video Camcorder - Page 92
ACCESSORIES YOU CAN DO ANY OF THE FOLLOWING: VISIT YOUR LOCAL PANASONIC DEALER OR CALL PANASONIC'S ACCESSORY ORDER LINE AT 1-800-332-5368 [6 AM-5 PM M-F, 6 AM-10:30 AM SAT, PACIFIC TIME] OR MAIL THIS ORDER TO: PANASONIC SERVICES COMPANY ACCESSORY ORDER OFFICE 20421 84th Avenue South Kent, WA. 98032 - Panasonic PV GS400 | Digital Video Camcorder - Page 93
is wrong with the unit and any symptom it is exhibiting. Mail this completed form and your Proof of Purchase along with your unit to: Panasonic Services Company 1705 N. Randall Road Elgin, IL. 60123-7847 Attn: Camcorder Repair 93 - Panasonic PV GS400 | Digital Video Camcorder - Page 94
visit Panasonic Web Site: http://www.panasonic.com For assistance in Puerto Rico call Panasonic Sales Company (787)-750-4300 or fax (787)-768-2910. In-Home service, which vary from state to state. If a problem with this product develops during or after the warranty period, you may contact your dealer - Panasonic PV GS400 | Digital Video Camcorder - Page 95
your nearest Dealer or Servicenter; purchase Parts and Accessories; or make Customer Service and Literature requests by visiting our Web Site at: http://www.panasonic.com/support or, contact us via the web at: http://www.panasonic.com/contactinfo You may also contact us directly at: 1-800-211-PANA - Panasonic PV GS400 | Digital Video Camcorder - Page 96
or other proof of date of original purchase is required before warranty service is performed. THIS EXPRESS, LIMITED WARRANTY IS IN LIEU OF ALL : Telephone #: (905) 624-5505 Fax #: (905) 238-2360 Web: www.panasonic.ca For product repairs, please contact one of the following: ≥Your Dealer who will - Panasonic PV GS400 | Digital Video Camcorder - Page 97
44 Customer Services Directory 95 ªD Date/Time Indication 72 Date/Time Setting 26 Digital Effects 41 Digital Still Picture 28 Digital Zoom 32 Magic Wire Remote Control with Narration Mic 15 MagicPix Function 34 Manual Focus 38 Menu Screen 22 Microphone Sensitivity Level 39 Mirror Mode 41 - Panasonic PV GS400 | Digital Video Camcorder - Page 98
Time Code 88 Title 49 Trailing Effect Mode 41 ªU USB Connection Kit 58 ªV Variable Speed Search 45 Video Head Clogging 83 Viewfinder 20, 85 ªW Web Camera 59 White Balance 36 Wide Function 35 Wind Noise Reduction 34 Wipe Mode 41 ªZ Zebra Pattern 39 Zoom 31 Zoom Microphone 32 98 - Panasonic PV GS400 | Digital Video Camcorder - Page 99
Others Spanish Quick Use Guide/ Guía española para el uso rápido 1 Una la batería al adaptador de CA y cárguela. ª Inserción de la tarjeta 1 Desplace la palanca [OPEN] 1 para abrir - Panasonic PV GS400 | Digital Video Camcorder - Page 100
Others S ª Grabación de una imagen fija en una tarjeta (Photoshot) 1 Ajuste en disco del modo al de la grabación. D 2 Oprima el botón [PHOTO SHOT]. PHOTO SHOT 5 Oprima el botón [∫] para parar la reproducción. STILL ENTER FADE ª Reproducción de la tarjeta Reproduce las imágenes grabadas en la - Panasonic PV GS400 | Digital Video Camcorder - Page 101
101 - Panasonic PV GS400 | Digital Video Camcorder - Page 102
PSC") Division of Matsushita Electric of Puerto Rico, Inc. Ave. 65 de Infantería, Km. 9.5, San Gabriel Industrial Park, Carolina, Puerto Rico 00985 Panasonic Canada Inc. 5770 Ambler Drive, Mississauga, Ontario, L4W 2T3 P LSQT0801 A S0604Nm0 ( 1400 A ) © 2004 Matsushita Electric Industrial Co., Ltd
-
 1
1 -
 2
2 -
 3
3 -
 4
4 -
 5
5 -
 6
6 -
 7
7 -
8
-
9
-
10
-
11
-
12
-
13
-
14
-
15
-
16
-
17
-
18
-
19
-
20
-
21
-
22
-
23
-
24
-
25
-
26
-
27
-
28
-
29
-
30
-
31
-
32
-
33
-
34
-
35
-
36
-
37
-
38
-
39
-
40
-
41
-
42
-
43
-
44
-
45
-
46
-
47
-
48
-
49
-
50
-
51
-
52
-
53
-
54
-
55
-
56
-
57
-
58
-
59
-
60
-
61
-
62
-
63
-
64
-
65
-
66
-
67
-
68
-
69
-
70
-
71
-
72
-
73
-
74
-
75
-
76
-
77
-
78
-
79
-
80
-
81
-
82
-
83
-
84
-
85
-
86
-
87
-
88
-
89
-
90
-
91
-
92
-
93
-
94
-
95
-
96
-
97
-
98
-
99
-
100
-
101
-
102
 |
 |
Spanish Quick Use Guide is included.
Guía para rápida consulta en español está incluida.
LSQT0801 A
For USA assistance, please call: 1-800-211-PANA(7262) or, contact us via the web at: http://www.panasonic.com/contactinfo
For Canadian assistance, please call: 1-800-561-5505 or visit us at www.panasonic.ca
Digital Video Camcorder
Operating Instructions
Model No.
PV-GS400
Mini
Before attempting to connect, operate or adjust this product,
please read these instructions thoroughly.