Panasonic PV-GS90 Digital Video Camcorder - Page 22
Recording with the built-in LED video light, LIGHT
 |
UPC - 037988255849
View all Panasonic PV-GS90 manuals
Add to My Manuals
Save this manual to your list of manuals |
Page 22 highlights
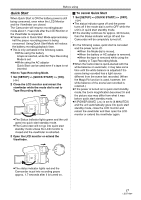
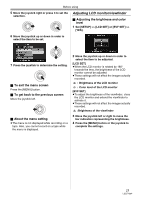
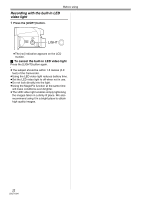
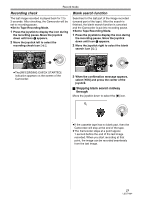
Before using Recording with the built-in LED video light 1 Press the [LIGHT] button. LIGHT ≥The [ ] indication appears on the LCD monitor. ª To cancel the built-in LED video light Press the [LIGHT] button again. ≥The subject should be within 1.5 metres (4.9 feet) of the Camcorder. ≥Using the LED video light reduces battery time. ≥Set the LED video light to off when not in use. ≥Do not look directly into the light. ≥Using the MagicPix function at the same time will make conditions even brighter. ≥The LED video light enables simply lightening the images taken in a dimly-lit place. We also recommend using it in a bright place to obtain high quality images. 22 LSQT1284
-
 1
1 -
2
-
3
-
4
-
5
-
6
-
7
-
8
-
9
-
10
-
11
-
12
-
13
-
14
-
15
-
16
-
 17
17 -
 18
18 -
 19
19 -
 20
20 -
 21
21 -
 22
22 -
 23
23 -
 24
24 -
 25
25 -
 26
26 -
 27
27 -
28
-
29
-
30
-
31
-
32
-
33
-
34
-
35
-
36
-
37
-
38
-
39
-
40
-
41
-
42
-
43
-
44
-
45
-
46
-
47
-
48
-
49
-
50
-
51
-
52
-
53
-
54
-
55
-
56
-
57
-
58
-
59
-
60
 |
 |

Before using
22
LSQT1284
Recording with the built-in LED
video light
1
Press the [LIGHT] button.
≥
The [
] indication appears on the LCD
monitor.
ª
To cancel the built-in LED video light
Press the [LIGHT] button again.
≥
The subject should be within 1.5 metres (4.9
feet) of the Camcorder.
≥
Using the LED video light reduces battery time.
≥
Set the LED video light to off when not in use.
≥
Do not look directly into the light.
≥
Using the MagicPix function at the same time
will make conditions even brighter.
≥
The LED video light enables simply lightening
the images taken in a dimly-lit place. We also
recommend using it in a bright place to obtain
high quality images.
LIGHT