Panasonic PVDV402 Digital Video Camcorder
Panasonic PVDV402 - DIGITAL VIDEO CAMCORDER Manual
 |
View all Panasonic PVDV402 manuals
Add to My Manuals
Save this manual to your list of manuals |
Panasonic PVDV402 manual content summary:
- Panasonic PVDV402 | Digital Video Camcorder - Page 1
R Digital Video Camcorder Operating Instructions Models No. PV-DV202 PV-DV402 [ PV-DV402 shown ] Mini Before attempting to connect, operate or adjust this product, please read these instructions thoroughly. Spanish Quick Use Guide is included. Guía para rápida consulta en español está incluida. For - Panasonic PVDV402 | Digital Video Camcorder - Page 2
problems. The above markings are located on the appliance bottom cover. Declaration of Conformity Model Number : PV-DV202/PV-DV402 Trade Name : Panasonic shielded interface cable when connecting digital video camcorder to computer in accordance with instruction herein. Also, any unauthorized - Panasonic PVDV402 | Digital Video Camcorder - Page 3
rack unless proper ventilation is provided or the manufacturer's instructions have been adhered to. 10. Power Sources - to proper grounding of the mast and supporting structure, grounding of the lead-in (NEC SECTION 810-21) GROUND CLAMPS POWER SERVICE GROUNDING ELECTRODE SYSTEM (NEC ART 250, PART - Panasonic PVDV402 | Digital Video Camcorder - Page 4
following the operating instructions. Adjust only those controls that are covered by the operating instructions, as an serviceable parts inside. Unplug your Palmcorder from the power supply before cleaning. DO NOT AIM YOUR PALMCORDER AT THE SUN OR OTHER BRIGHT OBJECTS DO NOT LEAVE THE PALMCORDER - Panasonic PVDV402 | Digital Video Camcorder - Page 5
Movie Messenger™ System 58 • TransferringYour Images (i.LINK) (Windows 72 • PHOTOVU/MPEG4 Movie Messenger™ System (i.LINK 73 • Palmcorder USB Device Driver/SD Drive 75 • Palmcorder File Converter 78 • Web Camera (For Windows XP users/For Windows 98SE, Me, 2000 users 80 • Warning Indications - Panasonic PVDV402 | Digital Video Camcorder - Page 6
. Shoulder (K1HA05CD0001) Strap (LSFC0016) 1 pc. Audio Adaptor (LSJP0829) 1 pc. IR Remote 1 pc. CD-ROM of Driver Software for Windows 98SE/Me/2000/XP Control (LSSQ0294) and Macintosh; USB Device Driver for Windows 98SE/Me/2000/ with Battery (CR2025) XP; PHOTOVU/MPEG4 Movie Messenger™ System for - Panasonic PVDV402 | Digital Video Camcorder - Page 7
digital Palmcorder to a power source. (pp. 14, 15) 4 2 1 PUSH TO TAPE EJECT CLOSE Press LCD-OPEN to unlock the LCD monitor, and swing it fully open. 2 Slide TAPE EJECT to open the Cassette Compartment Cover. 1LCD-OPEN Cassette Compartment Cover 3 Insert a cassette record tab up, window - Panasonic PVDV402 | Digital Video Camcorder - Page 8
through the loop in the Lens Cap Cord. Reattach the Hand Strap. 8 For assistance, please call : 1-800-211-PANA(7262) or send e-mail to : [email protected] - Panasonic PVDV402 | Digital Video Camcorder - Page 9
Use Using the Built-in Light To brighten the natural colors in a scene. Before Using Before you begin • Connect the Palmcorder to a power source. (pp. 14, 15) • Set POWER to CAMERA or M-CARD. 1 Hold down LIGHT for more than 0.7 seconds to turn ON or OFF. • " " will appear on the screen. Built - Panasonic PVDV402 | Digital Video Camcorder - Page 10
dispose of in a fire. Remote Controlling Two Palmcorders You can control any two Panasonic Palmcorders with one Remote control. In order for the 2 VCR or CAMERA position. Press MENU to display the VCR or 3 CAMERA mode menu screen. Rotate JOG KEY to select SET-UP in the CAMERA mode menu screen - Panasonic PVDV402 | Digital Video Camcorder - Page 11
monitor, and swing it fully open. 2 Set POWER to VCR or CAMERA. 5 Press PUSH TO CLOSE mark to close the Cassette Compartment Cover. 3 Slide TAPE EJECT to open the Cassette Compartment Cover. 4 Insert a cassette record tab up, window side facing out. • Make sure the record tab is closed. (p. 7) 11 - Panasonic PVDV402 | Digital Video Camcorder - Page 12
Quick Guide Camera Recording When the LCD monitor is fully open, the Viewfinder automatically turns OFF. 1 Set POWER to CAMERA. 2 Adjust the Vision Adjustment Control to your eyesight. playback. 12 Forassistance, pleasecall: 1-800-211-PANA(7262)orsende-mailto:[email protected] - Panasonic PVDV402 | Digital Video Camcorder - Page 13
Guide Insert Memory Card* Before you begin • Charge the Battery. (p. 14) *Memory Card: MultiMediaCard or SD Memory Card (p. 94) • Be sure to insert the Memory Card before using the Card PhotoShot. (p. 48) Below is a list of memory cards which can be used in this Palmcorder POWER to CAMERA. Note - Panasonic PVDV402 | Digital Video Camcorder - Page 14
upward. 2 Remove the Battery Pack and slide the Battery downward while sliding the BATT RELEASE. 14 Forassistance, pleasecall: 1-800-211-PANA(7262)orsende-mailto:[email protected] - Panasonic PVDV402 | Digital Video Camcorder - Page 15
prevent operation. To insure longer battery life: • While not in use, remove Battery from the Palmcorder and AC Adaptor and store in a cool, dark, dry place. If you leave the Battery in the Palmcorder or on the AC Adaptor, the Battery will no longer be rechargeable. • Keep the Battery terminals - Panasonic PVDV402 | Digital Video Camcorder - Page 16
KEY 1MENU Before you begin • Connect the Palmcorder to a power source. (pp. 14, 15) • Set POWER to CAMERA or VCR. 1 Press MENU to display the Camera or VCR mode menu screen. (p. 17) [ CAMERA MENU ] [ VCR MENU ] . EXAMPLE: : 1-800-211-PANA(7262)orsende-mailto:[email protected] - Panasonic PVDV402 | Digital Video Camcorder - Page 17
Palmcorder to a power source. (pp. 14, 15) • Set POWER to CAMERA or VCR. 2, A, B, C JOG KEY 1, D MENU Displaying the MENU 1Press MENU to display the CAMERA or ZOOM-MIC. 4 : SET-UP CAMERA SET-UP menu is displayed. To select REMOTE, BEEP, or MAGICVU (PV-DV402 only). 5 : DISPLAY SETTING DISPLAY SETTING - Panasonic PVDV402 | Digital Video Camcorder - Page 18
Palmcorder to a power source. (pp. 14, 15) • Insert a cassette with the record tab closed. (p. 7) 1 Set POWER to CAMERA . • The POWER Lamp lights red. • Be sure POWER is fully turned to the CAMERA or "LP" in the CAMERA Mode Menu. (Menu OSD: the Palmcorder is the Palmcorder with the Palmcorder - Panasonic PVDV402 | Digital Video Camcorder - Page 19
or COLOR" below. 3 Start recording. Note • Using the LCD monitor will reduce battery operating time. • Close the LCD monitor completely when not in use. Camera To adjust the LCD/EVF BRIGHTNESS or COLOR 1, 5 MENU 2, 3, 4 JOG KEY EVF/LCD 1Press MENU to display the main menu screen. 2 Rotate JOG KEY - Panasonic PVDV402 | Digital Video Camcorder - Page 20
Camera Recording Digital PhotoShot™ Mode Use this feature to record a seven second 1 Set POWER to CAMERA. (approx.) still image from the current camera picture. Audio is also recorded for on-thespot 20 Forassistance, pleasecall: 1-800-211-PANA(7262)orsende-mailto:[email protected] - Panasonic PVDV402 | Digital Video Camcorder - Page 21
Zoom You can gradually zoom in for close ups or zoom out for wide angle shots. 2POWER ZOOM 1POWER 3REC/PAUSE 1 Set POWER to CAMERA. 2 Zoom slowly: by lightly pressing the "T" (Telephoto) or the "W" (Wide Angle) side of the POWER ZOOM. Zoom quickly: by applying more pressure. 3 Start recording - Panasonic PVDV402 | Digital Video Camcorder - Page 22
Camera Recording Recording Check To playback the final few seconds of the last recorded scene in the REC/PAUSE mode. 1RECORDING CHECK 1Press RECORDING CHECK briefly in the REC/PAUSE mode. The [CHK] indication appears. After checking, the Palmcorder still picture. The camera will resume recording - Panasonic PVDV402 | Digital Video Camcorder - Page 23
is darker than the surrounding scene, is in a shadowed area, or when the light source is in back of your subject. 1POWER 1 Set POWER to CAMERA. 2 Press BACK LIGHT to activate the Backlight feature. • The Indicator " " will appear in the EVF or LCD monitor. 3 Press BACK LIGHT again to cancel the - Panasonic PVDV402 | Digital Video Camcorder - Page 24
(PV-DV402 only) is ON, Program AE and H.S.S. cannot be set in the menu. 2AUTO/MANUAL 4, 5 JOG KEY 3MENU 1POWER 1 Set POWER to CAMERA. 2 Hold down AUTO/MANUAL for in the Digital function camera menu. 24 Forassistance, pleasecall: 1-800-211-PANA(7262)orsende-mailto:[email protected] - Panasonic PVDV402 | Digital Video Camcorder - Page 25
one scene to the next. A During recording, hold down FADE until the picture fades out. B Press REC/PAUSE to pause the recording. Camera MagicVu™ IR Filter (0 Lux) (PV-DV402 only) MagicVu allows you to record video in total darkness. You can select the color of image: B/W, green, or blue. (Menu OSD - Panasonic PVDV402 | Digital Video Camcorder - Page 26
PAUSE 5, 6, 7 CAMERA STILL 7 Press REC/PAUSE to record a scene with PinP image. • Press PHOTOSHOT to record a scene with PinP image in PhotoShot mode. • Press (CAMERA STILL) again to remove PinP image. 26 Forassistance, pleasecall: 1-800-211-PANA(7262)orsende-mailto:[email protected] - Panasonic PVDV402 | Digital Video Camcorder - Page 27
the current scene in a gradual mixing effect. Before you begin • Connect the Palmcorder to a power source. (pp. 14, 15) • Set POWER to OFF before inserting 3 seconds, and the screen goes back to the Camera mode screen. • After Photo Title is performed, Digital Function turns off. 5 Press REC/PAUSE to start - Panasonic PVDV402 | Digital Video Camcorder - Page 28
Digital Functions, etc., you may get better results by using the manual adjustment. 3, 4, A, B JOG KEY 1POWER 2AUTO/MANUAL 1 Set POWER to CAMERA. 2 Hold down AUTO/MANUAL MANUAL for more than 0.7 seconds to cancel the setting. * For manual the Palmcorder is turned on, the previous manual White - Panasonic PVDV402 | Digital Video Camcorder - Page 29
automatically adjusts the focus over the entire zoom range. Manual Focus 1 Use Manual Focus (MF) when recording ... • a subject through glass. Set POWER to CAMERA. • a scene where the subject is far from the Palmcorder and there are objects in the foreground. • a subject with distinct horizontal - Panasonic PVDV402 | Digital Video Camcorder - Page 30
manually select the shutter speed. • When MagicVu (PV-DV402 only) is ON, Program AE and H.S.S. cannot manually select the shutter speed. • When MagicPix is ON, H.S.S. cannot manually select the shutter speed. 30 Forassistance, pleasecall: 1-800-211-PANA(7262)orsende-mailto:consumerproducts@panasonic - Panasonic PVDV402 | Digital Video Camcorder - Page 31
Advanced Settings Camera Adjusting the Iris Manually Normally, the Palmcorder adjusts the exposure automatically. However, when the background is extremely bright, or when the subject is backlit, you can compensate by adjusting the Iris manually. 3, 4 JOG KEY 1POWER 2AUTO/MANUAL EVF/LCD Iris - Panasonic PVDV402 | Digital Video Camcorder - Page 32
SEARCH Note 5 • When a tape recorded in LP mode on STOP another digital video camera is played back on this unit, the picture may appear mosaic. • Using the LCD monitor reduces battery operating time. • You can place the Palmcorder on a table, etc. for viewing. Rotate the LCD Monitor 180° and - Panasonic PVDV402 | Digital Video Camcorder - Page 33
will go into Repeat Playback mode when the tape reaches its end. • The letter "R " will appear in the EVF and LCD monitor. 2 Turn the Palmcorder OFF to exit the Repeat Playback mode. Adjusting the Volume 1, 2 VOLUME Built-in Speaker 1 Rotate VOLUME to adjust the volume of the built-in speaker - Panasonic PVDV402 | Digital Video Camcorder - Page 34
(PLAY) or (PAUSE) to release. Note • To protect the tape and video heads, your Palmcorder's operating modes will revert as follows: STILL STOP (after 3 minutes.) Fast Forward/Rewind Check Monitor . 34 Forassistance, pleasecall: 1-800-211-PANA(7262)orsende-mailto:[email protected] - Panasonic PVDV402 | Digital Video Camcorder - Page 35
Slow: Press SLOW/F.ADV during play. 2 Press PLAY to release. (During reverse slow motion playback, time code indication may not change regularly.) Note • Palmcorder will automatically STOP when in slow motion for more than 10 minutes. • During slow motion playback, picture may move up and down. This - Panasonic PVDV402 | Digital Video Camcorder - Page 36
Search may fail to detect a recorded PhotoShot image if the image is 3 seconds or less. 36 Forassistance, pleasecall: 1-800-211-PANA(7262)orsende-mailto:[email protected] - Panasonic PVDV402 | Digital Video Camcorder - Page 37
. (Menu OSD; p. 110) • Press MENU twice to exit. A Place the Palmcorder in the VCR STOP mode. B Press INDEX SEARCH fast forward or rewind for the of recordings (indexes) forward or back you want to view. The Palmcorder will advance or rewind to the desired recording and automatically start playback. - Panasonic PVDV402 | Digital Video Camcorder - Page 38
screens will be captured, and playback will stop. EVF/LCD 5PLAY Note • A Multi Image Playback screen cannot be output from the DV terminal or Digital Still Image terminal. • A Multi screen will have slightly lower image quality. • Press (PLAY) to start playback. Press (STOP) to stop playback. 38 - Panasonic PVDV402 | Digital Video Camcorder - Page 39
In To Audio In To Video In 1 Set POWER to CAMERA or VCR. To view what the Palmcorder is recording or to playback a tape on your TV. 2 VIDEO. Check your TV operating instructions for further information. 3 Start playback or begin a recording. • Make sure the Palmcorder and TV are turned off while - Panasonic PVDV402 | Digital Video Camcorder - Page 40
Digital Zoom are selected. EVF/LCD Zoom In ("T") D.ZOOM 5POWER ZOOM 3, 4 JOG KEY 1POWER Zoom Out ("W") 2MENU 5REC/PAUSE CAMERA mode 1 Set POWER to CAMERA. 2 Press MENU to display the CAMERA . 40 Forassistance, pleasecall: 1-800-211-PANA(7262)orsende-mailto:[email protected] - Panasonic PVDV402 | Digital Video Camcorder - Page 41
JOG KEY to select D.FUNCTION , and then press JOG KEY to display the CAMERA FUNCTION menu screen. 4 Rotate JOG KEY to select D.FUNCTION , and then press JOG KEY repeatedly to select MAGICPIX. • Press MENU twice to exit. 5 To cancel the Digital Function, press JOG KEY repeatedly to select OFF. 41 - Panasonic PVDV402 | Digital Video Camcorder - Page 42
Digital Functions are turned off automatically when the EIS and Digital Zoom are selected. NORMAL 1, A POWER EIS ON CAMERA mode 1 Set POWER to CAMERA off when not needed. D.E.I.S. may not function when... • Palmcorder movement is too extreme. • Recording a subject with distinct panasonic.com - Panasonic PVDV402 | Digital Video Camcorder - Page 43
4, 5 JOG KEY 2MENU 1POWER Types of Digital Functions MIRROR Symmetrical image from the current camera picture. STROBE The recording appears as a still images onto the Mini DV in low lighting. (p. 41) • Only Manual Focus is available. WIPE Successive scenes are separated in a way which simulates the - Panasonic PVDV402 | Digital Video Camcorder - Page 44
PV-DV402 only). • Turn on the Palmcorder. • Insert a pre-recorded tape to be dubbed. The AUDIO-REC setting in CAMERA you can set the Palmcorder to stop automatically at 2PLAY When using the Palmcorder only 3 Press MENU . • The Palmcorder will go to Remote Control. • The Palmcorder will go to Stand By - Panasonic PVDV402 | Digital Video Camcorder - Page 45
Editing Features 4, 5PAUSE 4 Press (PAUSE) to start Audio Dubbing. • Connect the Palmcorder to the TV in order to monitor the sound. (p. 39) Editing Features To listen to the desired audio sound, set the AUDIO setting of the - Panasonic PVDV402 | Digital Video Camcorder - Page 46
(Recorder). 2Press (PLAY) on the Palmcorder. When the tape reaches the point you want to start dubbing, press PAUSE. 3 Place the VCR into REC/PAUSE mode. (See VCR manual.) 4 Simultaneously, press PAUSE on both , pleasecall: 1-800-211-PANA(7262)orsende-mailto:[email protected] - Panasonic PVDV402 | Digital Video Camcorder - Page 47
Copying from Digital Equipment (dubbing) High quality digital-to-digital copying can be accomplished if both Palmcorders incorporate the DV Input/Output (i.LINK) Connector (DV interface cable (i.LINK) is not supplied). Source (Playing) Palmcorder Before you begin • Connect both Palmcorders to their - Panasonic PVDV402 | Digital Video Camcorder - Page 48
connected. 3PHOTOSHOT 2JOG KEY 1POWER M-CARD Lock 2MENU Before you begin • Connect the Palmcorder to a power source. (pp. 14, 15) • Set POWER to OFF before • While "PROCESSING" is displayed, DO NOT turn off the Palmcorder or unplug the AC Adaptor (supplied) because this will cause irreversible - Panasonic PVDV402 | Digital Video Camcorder - Page 49
to direct sunlight, or a place where electromagnetic waves and static electricity can be generated. • Electromagnetic waves, static electricity, malfunction of the Digital Video Palmcorder or of the Memory Card itself could erase the data recorded on it. To prevent the loss of picture data, we - Panasonic PVDV402 | Digital Video Camcorder - Page 50
Palmcorder cannot read the file data. • This product is compliant with DCF (Design rule for Camera File System). Images saved on the Memory Card using other Digital Still Cameras "PLEASE WAIT" is displayed, DO NOT turn off the Palmcorder or unplug the AC Adaptor (supplied) because this will cause - Panasonic PVDV402 | Digital Video Camcorder - Page 51
image to be deleted. • The selected image is underlined in pink. Card Features Warning • While deleting image, DO NOT turn off the Palmcorder or unplug the AC Adaptor (supplied) because this will cause irreversible damage to the memory, resulting in reduced image storage capacity. 5 Rotate JOG - Panasonic PVDV402 | Digital Video Camcorder - Page 52
"NO PICTURE" is displayed. Warning • While deleting image, DO NOT turn off the Digital Video Camcorder or unplug the AC Adaptor (supplied) because this will cause irreversible damage to the memory, 48) 52 Forassistance, pleasecall: 1-800-211-PANA(7262)orsende-mailto:[email protected] - Panasonic PVDV402 | Digital Video Camcorder - Page 53
data is deleted from Memory Card. Deletion is complete when "NO PICTURE" is displayed. Warning • While deleting image, DO NOT turn off the Palmcorder or unplug the AC Adaptor (supplied) because this will cause irreversible damage to the memory, resulting in reduced image storage capacity. • Press - Panasonic PVDV402 | Digital Video Camcorder - Page 54
print-related information (DPOF setting) on a Memory Card. "DPOF" stands for Digital Print Order Format, and since printing data can be added to images on the . Print mark is based on DPOF (Digital Print Order Format). 54 Forassistance, pleasecall: 1-800-211-PANA(7262)orsende-mailto - Panasonic PVDV402 | Digital Video Camcorder - Page 55
(for ArcSoft Software) • Video card that supports 16 bit color at 800 x 600 monitor resolution (for Palmcorder USB Device Driver, PHOTOVU/MPEG4 Movie Messenger™ System, and Palmcorder File Converter) • Microsoft® Windows Media™ Player 6.4 (for Windows 2000 users: Microsoft® Windows Media™ Player - Panasonic PVDV402 | Digital Video Camcorder - Page 56
start up Windows. 2 Insert the supplied Software CD-ROM into the CD-ROM drive. 3 Click the icon you want to install. Please install the Palmcorder USB Device Driver first and follow the instructions listed under "Caution". Palmcorder USB Device Driver • For Movie Messenger • For Web Camera • For - Panasonic PVDV402 | Digital Video Camcorder - Page 57
forward, and rewind functions are operated using the Palmcorder buttons, the image may not be captured properly. Use Palmcorder Operation Buttons displayed on the PC screen. Uninstalling Application Software [ This screen is an example (Windows 2000) ] 1 Click "Start," "Settings," and "Control Panel - Panasonic PVDV402 | Digital Video Camcorder - Page 58
Movie Messenger™ System) 2 USB Terminal 1 Turn on your PC. USB Terminal 3 USB Cable (supplied) 2 Set the Palmcorder POWER to VCR. For Windows XP users 3 Connect the Palmcorder to your PC (Windows) using the USB Cable (supplied). • "CAPTURE" appears in the EVF or the LCD monitor. • The "Found - Panasonic PVDV402 | Digital Video Camcorder - Page 59
the USB Cable (supplied). • "CAPTURE" appears in the EVF or the LCD monitor. • The "Found New Hardware" screen of Windows is displayed. • When the Palmcorder and PC (with Windows 2000) are connected via USB, a message, such as the one below, is displayed. The following message is displayed. Even so - Panasonic PVDV402 | Digital Video Camcorder - Page 60
area or color pallet in the Display Properties window. • Turn the Palmcorder power switch ON or OFF while connecting the Palmcorder to your PC using the USB Cable or DV Interface Cable (i.LINK). • Change the Palmcorder power switch (VCR/CAMERA). *You must first close the application. • Connect - Panasonic PVDV402 | Digital Video Camcorder - Page 61
not USB, please confirm the connection. Then, close 2 and restart the software. Click (PLAY) on PC screen to playback the DV tape. • The playback screen cannot be viewed on the PC. Please use the LCD monitor on the Palmcorder for confirmation. To capture Motion images 3 Click on [Movie Capture] at - Panasonic PVDV402 | Digital Video Camcorder - Page 62
. • The image captured last is displayed in the VideoGift screen. Caution for Windows 2000 users • If warning indication is displayed, 3 please see page 89. Click be opened, please refer to the software Help menu. 62 Forassistance, pleasecall: 1-800-211-PANA(7262)orsende-mailto:consumerproducts - Panasonic PVDV402 | Digital Video Camcorder - Page 63
PHOTOVU/MPEG4 Movie Messenger™ System VideoGift Screen You can use these features using the VideoGift Screen. PC Connection 14 1 9 15 2 10 3 11 16 4 12 5 13 6 78 17 1 Slider Drag the pointer of the playback start position. 2 Movie Mode You can display motion images. 3 Open Movie - Panasonic PVDV402 | Digital Video Camcorder - Page 64
saved motion images on your PC hard disk. You can also select the file by dragging and dropping from Windows Explorer. • You can use the VideoGift features (p. 63) on the VideoGift screen. Using a Still Image , pleasecall: 1-800-211-PANA(7262)orsende-mailto:[email protected] - Panasonic PVDV402 | Digital Video Camcorder - Page 65
e-mail Software must support MAPI (Messaging Application Programming Interface). Below are some e-mail Software programs which support MAPI: The image captured last is displayed in the VideoGift screen. Caution for Windows 2000 users • If warning indication is displayed, please see page 89. - Panasonic PVDV402 | Digital Video Camcorder - Page 66
application operations and Error messages. • If your e-mail software is not supported by MAPI, pressing the [E-Mail] button will automatically open the instructions as they appear on your PC screen. 66 Forassistance, pleasecall: 1-800-211-PANA(7262)orsende-mailto:[email protected] - Panasonic PVDV402 | Digital Video Camcorder - Page 67
the VideoGift screen. • The image captured last is displayed in the VideoGift screen. Caution for Windows 2000 users • If warning indication is displayed, please see page 89. 3Select the Still images. screen is displayed. 5Edit slides. • Use "Help" for detailed instructions. 67 PC Connection - Panasonic PVDV402 | Digital Video Camcorder - Page 68
display the VideoGift screen. • The image captured last is displayed in the VideoGift screen. Caution for Windows 2000 users • If warning indication is displayed, please see page 89. 3 Select a Motion ). 68 Forassistance, pleasecall: 1-800-211-PANA(7262)orsende-mailto:[email protected] - Panasonic PVDV402 | Digital Video Camcorder - Page 69
Movie Messenger™ System. 2 Click [VideoGift] to display the VideoGift screen. • The image captured last is displayed in the VideoGift screen. Caution for Windows 2000 users • If warning indication is displayed, please see page 89. 3 Click [View Manager] to display the View Manager screen. 4 Click on - Panasonic PVDV402 | Digital Video Camcorder - Page 70
image captured last is displayed in the VideoGift screen. Caution for Windows 2000 users • If warning indication is displayed, please see (Continued on next page.) * PictureStage Home Page PictureStage is a service whereby, through the uploading of images captured on this unit to the panasonic.com - Panasonic PVDV402 | Digital Video Camcorder - Page 71
Manager screen, then drag and drop the image to the PictureStage Image (Video) Uploader screen. Note • You can also drag and drop files from Windows Explorer. • You can also drag and drop files from temp folder. 8 Click [Upload to PictureStage.com] on the PictureStage Uploader to upload the files - Panasonic PVDV402 | Digital Video Camcorder - Page 72
terminal. • During Palmcorder playback, do not disconnect the DV Interface Cable (i.LINK) or turn the Palmcorder off as this may Windows 98SE or later operating system. • PHOTOVU/MPEG4 Movie Messenger™ System i.LINK connection may not work with some DV Interface boards. In this case, use the software - Panasonic PVDV402 | Digital Video Camcorder - Page 73
Palmcorder-PC connections. (p. 72) • Turn your PC on. • Set Palmcorder POWER to VCR. • Run the Software after the DV Interface Cable (i.LINK) has been connected to the Palmcorder restart the software. • When using Windows XP, "Windows Movie Maker" may open automatically. If so, close "Windows Movie - Panasonic PVDV402 | Digital Video Camcorder - Page 74
to the PC, and you can playback the saved images on the View Manager. (P. 62) 74 Forassistance, pleasecall: 1-800-211-PANA(7262)orsende-mailto:[email protected] - Panasonic PVDV402 | Digital Video Camcorder - Page 75
Palmcorder USB Device Driver/SD Drive) 2 USB Terminal 1 Turn on your PC. USB Terminal 3 USB Cable (supplied) 2 Set the Palmcorder POWER to M-CARD. For Windows XP users 3 Connect the Palmcorder to your PC (Windows Windows XP, the OS installation CD may be required. Follow the instructions - Panasonic PVDV402 | Digital Video Camcorder - Page 76
USB Device Driver/SD Drive For Windows 2000 users 3 Connect the Palmcorder to your PC (Windows) using the USB Cable (supplied). • "CONNECT WITH PC" appears in the EVF or the LCD monitor. • The "Found New Hardware" screen of Windows is displayed. • When the Palmcorder and PC (with Windows 2000) are - Panasonic PVDV402 | Digital Video Camcorder - Page 77
. Before you begin • Install the Palmcorder USB Device Driver. (p. 56) • Set POWER to OFF before inserting a recorded Memory Card. (pp. 48, 49) • Make Palmcorder-PC connections. (pp. 75, 76) • Turn your PC on. (p. 75) For Windows 98SE/Me/2000 users 1 Connect the Palmcorder to your PC using the USB - Panasonic PVDV402 | Digital Video Camcorder - Page 78
then "File Converter 3.0." 4 Select and click "To resize the image" or "To convert format for Panasonic Digital Palmcorder." • To resize the image: The size of images captured with the Palmcorder can be increased or decreased to make them suitable for Internet and E-mail use. • To convert format - Panasonic PVDV402 | Digital Video Camcorder - Page 79
which the converted file is to be saved. • The Conversion results screen is displayed. 7 Use "Help" for detailed instructions. When selecting "To convert format for Panasonic Digital Palmcorder" 5 Select the file to be converted. 6 Select the drive to which the converted file is to be saved. • The - Panasonic PVDV402 | Digital Video Camcorder - Page 80
are software that can be linked and used together. Using the Palmcorder and the internet, you can communicate with others by having picture and sound similar in fashion to a videophone. Please read this first • To use the Web Camera feature, Microsoft's Windows Messenger, MSN Messenger Service, and - Panasonic PVDV402 | Digital Video Camcorder - Page 81
the Palmcorder POWER to CAMERA. For Windows XP users 3 Connect the Palmcorder to your PC (Windows) Palmcorder and PC is correct, please refer to "Tuning Wizard" on page 84. Note • When connecting for the first time using Windows XP, the OS installation CD may 4 be required. Follow the instructions - Panasonic PVDV402 | Digital Video Camcorder - Page 82
Web Camera For Windows 2000 users 3 Connect the Palmcorder to your PC (Windows) using the USB Cable (supplied). • "Found New be a source of trouble. For more details, please read the respective Help file. 82 Forassistance, pleasecall: 1-800-211-PANA(7262)orsende-mailto:[email protected] - Panasonic PVDV402 | Digital Video Camcorder - Page 83
Camera (For Windows XP users) For Windows Messenger (Windows XP only) When Windows software is run. Before you begin • Be sure you have a dial-up connection. • Referring to pages 81~82, connect the Palmcorder installation instructions, please refer to Help on the Home Page. 4 The first time Windows - Panasonic PVDV402 | Digital Video Camcorder - Page 84
Web Camera (For Windows XP set the volume for playback or mic volume, etc. • Also, confirm that the Palmcorder and PC are connected correctly. The person you wish to access needs to do Windows Messenger. 84 Forassistance, pleasecall: 1-800-211-PANA(7262)orsende-mailto:[email protected] - Panasonic PVDV402 | Digital Video Camcorder - Page 85
, click [Decline]. 10 At this point you may proceed with a voice/video conversation. Note • For other information about Windows Messenger, please refer to Help. 11 When access is finished, close Windows Messenger, then set Palmcorder POWER to OFF. Finally, disconnect the USB Cable. 85 PC Connection - Panasonic PVDV402 | Digital Video Camcorder - Page 86
time the software is run. Before you begin • Be sure you have a dial-up connection. • Referring to pages 81~82, connect the Palmcorder and PC. Confirm that equipment is connected correctly by running the [Audio Tuning Wizard]. (p. 87) Caution • For MSN Messenger Service and Windows NetMeeting - Panasonic PVDV402 | Digital Video Camcorder - Page 87
Camera (For Windows 98SE/Me/2000 users) 6 Click on [Audio Tuning Wizard] in the [Tools] menu. Note • You can set the volume for playback or mic volume, etc. • Also, confirm that the Palmcorder a person who is not signed-on to MSN Messenger Service. 8 The person calling (inviting) side Double-click a - Panasonic PVDV402 | Digital Video Camcorder - Page 88
Service and Windows 14 NetMeeting, please refer to Help. When access is finished, close MSN Messenger Service and Windows NetMeeting, then set Palmcorder POWER to OFF. Finally, disconnect the USB Cable. 88 Forassistance, pleasecall: 1-800-211-PANA(7262)orsende-mailto:consumerproducts@panasonic - Panasonic PVDV402 | Digital Video Camcorder - Page 89
the following type of error to occur. If so, please perform the following instructions. Download and install Media Player (7.1 or newer), go to http://www.microsoft.com/windows/ mediaplayer (current as of Dec. 28, 2001). • "Windows Media. com: Download" is opened. Click [Download Now!] on the screen - Panasonic PVDV402 | Digital Video Camcorder - Page 90
Transferring Your Images (Macintosh) You can transfer images from your Palmcorder tape to your Macintosh. System Requirements (for Built-in SD Drive/ArcSoft Software) • Mac OS 9.0~9.1 • Mac OS 8.6~9.1 (for ArcSoft Software) • iMac, iBook or Power Macintosh® G3 with USB port or Power Mac™ G4 • RAM - Panasonic PVDV402 | Digital Video Camcorder - Page 91
FAX : 1-510-440-1270 Web Site : http://www.arcsoft.com E-mail : [email protected] 1 Turn on the Macintosh. 2 Insert the supplied Software CD-ROM into the CD-ROM Drive. PC Connection 3 Double click the "Panasonic" icon. Double click the "ArcSoft" Folder. 4 Double click the "Panorama Maker - Panasonic PVDV402 | Digital Video Camcorder - Page 92
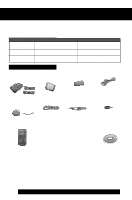
Palmcorder Accessory System Accessory # Figure Description Price PV-DAC11A AC Adaptor with AC Cable and DC Cable Call For Pricing CGR-D08A/1B CGR-D16A/1B 800mAH / Call For Pricing $79.95 $79.95 92 Forassistance, pleasecall: 1-800-211-PANA(7262)orsende-mailto:[email protected] - Panasonic PVDV402 | Digital Video Camcorder - Page 93
) Ship To: Mr. Mrs. Ms. First Street Address City Last State Zip Phone #: Day ( ) Night ( ) TO OBTAIN ANY OF OUR PALMCORDER ACCESSORIES YOU CAN DO ANY OF THE FOLLOWING: VISIT YOUR LOCAL PANASONIC DEALER OR CALL PANASONIC'S ACCESSORY ORDER LINE AT 1-800-332-5368 [6 AM-5 PM M-F, 6 AM-10:30 - Panasonic PVDV402 | Digital Video Camcorder - Page 94
to crack. DANGER: Use only replacement bulb (PART NO. LSLL0028) supplied by Panasonic to reduce risk of fire. Handle new bulb with cloth or tissue as skin the Memory Card (MultiMediaCard and SD Memory Card) • Model PV-DV202/PV-DV402 can be used with either a MultiMediaCard or a SD Memory - Panasonic PVDV402 | Digital Video Camcorder - Page 95
The table below shows the color temperature for reference. PALMCORDER SETTINGS NATURAL LIGHT CONDITIONS KELVIN COLOR ARTIFICIAL LIGHT SOURCE COLOR 800 - 2,000 • Color television Bluish • Fluorescent lamp (Daylight) • Camera flash bulb • Blue lamp for photography • Fluorescent lamp (White) • - Panasonic PVDV402 | Digital Video Camcorder - Page 96
PV-DV202) 88.9 mm (3.5 inch) Liquid Crystal Display (PV-DV402) Minimum Illumination Required: 5 lx (F1:1.8) 0.5 footcandles 0 lx (MAGICVU/0LUX ON) (PV-DV402 for Camera File System) Operating Temperature: 32 °F~104 °F (0 °C~40 °C) Operating Humidity: 10 %~75 % Weight: Palmcorder : (PV-DV202/ - Panasonic PVDV402 | Digital Video Camcorder - Page 97
service technician. Please contact your nearest Panasonic Servicenter. An alternate solution is to obtain a head cleaning cassette. Please use Panasonic cleaning cassette (AY-DVMCLA). Be sure to follow the cleaning instructions appear on-screen, the camcorder may need service. Do not remove the - Panasonic PVDV402 | Digital Video Camcorder - Page 98
Service If you have a problem with your Palmcorder connected. (pp. 14, 15) • Insert the cassette record tab up, window side facing out. (p. 11) Video cassette cannot be removed... • Make AUTO. (p. 29) • Make sure the unit is ON and set to CAMERA mode. (p. 18) • Make sure the unit is set to REC or - Panasonic PVDV402 | Digital Video Camcorder - Page 99
mode without a cassette inserted, " " will flash and "TAPE NOT INSERTED" will appear for 5 seconds. Recording will not start. If the Palmcorder is in CAMERA mode or Audio dub mode with the cassette sliding record tab opened, " " will flash and "CHECK REC TAB" will appear for 5 seconds. Recording - Panasonic PVDV402 | Digital Video Camcorder - Page 100
LEFT" appears. If the Palmcorder is in M-CARD mode or Photo Title (CAMERA mode) and the DV Palmcorder. In M-CARD mode, this display appears if the SD Memory Card Lock Switch is in the Lock position. 100 Forassistance, pleasecall: 1-800-211-PANA(7262)orsende-mailto:consumerproducts@panasonic - Panasonic PVDV402 | Digital Video Camcorder - Page 101
unit and any symptom it is exhibiting. Mail this completed form and your Proof of Purchase along with your unit to: Panasonic Services Company 1705 N. Randall Road Elgin, IL. 60123-7847 Attn: Camcorder Repair Please write the displayed Self Diagnostic number here. (p. 97) For Your Information 101 - Panasonic PVDV402 | Digital Video Camcorder - Page 102
the original purchase): PRODUCT CAMCORDER PARTS ONE (1) YEAR, EXCEPT CCD IMAGE SENSOR CCD IMAGE SENSOR - SIX (6) MONTHS LABOR NINETY (90) DAYS NINETY (90) DAYS SERVICE CONTACT NUMBER Carry-In or Mail-In 1-800-211-PANA(7262) DVD/VCR DECK ONE (1) YEAR DIGITAL STILL CAMERA ONE (1) YEAR, EXCEPT - Panasonic PVDV402 | Digital Video Camcorder - Page 103
20425-84th Avenue South Kent, WA 98032 HAWAII 99-859 Iwaiwa Street Aiea, Hawaii 96701 Phone (808) 488-1996 Fax (808) 486-4369 Service in Puerto Rico Matsushita Electric of Puerto Rico, Inc. Panasonic Sales Company/ Factory Servicenter: Ave. 65 de Infantería. Km. 9.5, San Gabriel Industrial Park - Panasonic PVDV402 | Digital Video Camcorder - Page 104
Guide/Guía Para Uso Rápido Precauciones para su seguridad ADVERTENCIA: PARA EVITAR INCENDIOS Y DESCARGAS ELÉCTRICAS, NO EXPONGA ESTE EQUIPO A LA LLUVIA NI A LA HUMEDAD. Su Mini Palmcorder interfaz blindado cuando conecte una cámara de video digital a una computadora de acuerdo con las instrucciones - Panasonic PVDV402 | Digital Video Camcorder - Page 105
Spanish Quick Use Guide/Guía Para Uso Rápido Inserte de la batería Antes de comenzar • completamente el monitor LCD. 2 Ajuste el interruptor de alimentación (POWER) a la posición VCR o CAMERA. For Your Information 5 Presione la marca PUSH TO CLOSE (EMPUJAR PARA CERRAR) para cerrar la tapa del - Panasonic PVDV402 | Digital Video Camcorder - Page 106
Guide/Guía Para Uso Rápido Grabación con la cámara Cuando el monitor LCD se enchuentra totalmente abjerto, el visor se DESACTIVA automàticamente. 1 Ajuste el interruptor de alimentación (POWER) a la posición CAMERA , pleasecall: 1-800-211-PANA(7262)orsende-mailto:[email protected] - Panasonic PVDV402 | Digital Video Camcorder - Page 107
Spanish Quick Use Guide/Guía Para Uso Rápido Introducir la Tarjeta de memoria* Antes de comenzar la posicion LOCK, evitara que POWER gire por error a la posicion M-CARD al cambiar POWER a CAMERA. Nota • Al insertar la tarjeta de memoria, insertela con la esquina recortada hacia abajo tal como se - Panasonic PVDV402 | Digital Video Camcorder - Page 108
MENU OSD Camera Mode Menu Screen 1 2 3 4 5 6 7 8 9 10 11 12 1 D.FUNCTION (pp. 41, 43) To select one of the 10 digital functions. Setting to OFF cancels the previously selected digital function. 2 D.ZOOM (p. 40) To , pleasecall: 1-800-211-PANA(7262)orsende-mailto:[email protected] - Panasonic PVDV402 | Digital Video Camcorder - Page 109
and stopping camera recording or 16 when unusual conditions occur. To cancel the beep, set to OFF. 17 Palmcorder will beep: Once when you start recording 18 Twice when you stop recording Repeatedly when warning of unusual conditions. 19 (pp. 99, 100) 15 MAGICVU (PV-DV402 only) (p. 25 - Panasonic PVDV402 | Digital Video Camcorder - Page 110
NORM : Every 0.6 seconds SLOW : Every 1.0 seconds 3 D.ZOOM (p. 41) Set to ON to double the size of a playback image. Setting to OFF cancels the previously selected digital zoom. 110 Forassistance, pleasecall: 1-800-211-PANA(7262)orsende-mailto:[email protected] - Panasonic PVDV402 | Digital Video Camcorder - Page 111
(p. 115) Select to OFF to cancel all Displays on the screen. 3 DCF NO. (pp. 50, 115) Select to OFF to cancel DCF (Design rule for Camera File system) No. on the screen. 4 DPOF (pp. 54, 115) When set to ON, information of the image to be printed and the number of - Panasonic PVDV402 | Digital Video Camcorder - Page 112
speed (SP or LP). i MAGICVU (PV-DV402 only) (Menu OSD: p. 109) This display appears when MAGICVU is set to ON. j MNL Indication (pp. 28~31) This display appears when AUTO/ MANUAL is pressed to MANUAL. 112 Forassistance, pleasecall: 1-800-211-PANA(7262)orsende-mailto:[email protected] - Panasonic PVDV402 | Digital Video Camcorder - Page 113
Electronic Viewfinder/LCD Monitor Indications CAMERA/VCR Mode kl m k WARNING Indication (pp. all displays are turned off. LinearTime Counter Memory Counter Time Code Memory Counter M 0:00:00 The Palmcorder will stop whenever it reaches the point where the counter was previously set to M 0:00:00 - Panasonic PVDV402 | Digital Video Camcorder - Page 114
CAMERA/VCR Mode n Zoom Magnification Level (p. 40) o Digital EIS Indications (p. 42) This display appears when EIS is pressed. p Backlight Indication (p. 23) This display appears when BACK LIGHT is pressed. q PROGRAM-AE Indication (p. 24) r Manual (7262)orsende-mailto:[email protected] - Panasonic PVDV402 | Digital Video Camcorder - Page 115
pixels "FINE" mode 1 280 x 960 pixels c Recording Mode POWER is set to PICTURE. d Directly/Image Number e DCF NO. (Design rule for Camera File system) Indication (Menu OSD: p. 111) f DPOF Indication (p. 54) g Multi Image Playback page number h Currently selected image is underlined in green 115 - Panasonic PVDV402 | Digital Video Camcorder - Page 116
13. POWER (VCR•OFF• CAMERA•M-CARD) pp. 11, 12, 13. M-CARD Lock p. 13. Shoulder Strap Attachment Ring p. 8. BATT RELEASE pp. 14, 15. M-CARD Door p. 13. External Microphone Jack (PV-DV402 only) p. 44. Built Forassistance, pleasecall: 1-800-211-PANA(7262)orsende-mailto:[email protected] - Panasonic PVDV402 | Digital Video Camcorder - Page 117
12. MENU pp. 16, 17. A/V Output Connector pp. 39, 81. PHONE p. 32. Top View FOCUS p. 29. AUTO/MANUAL pp. 28~31. FADE p. 25. REC p. 47. LIGHT p. 9. EIS POWER ZOOM pp. 21, 40. VOLUME p. 33. Lens Cap p. 8. PAUSE pp. 34, 45, 47. CAMERA STILL p. 26. M-DEL pp. 51, 52, 53. PLAY pp. 12, 32. M-PLAY pp. 50, - Panasonic PVDV402 | Digital Video Camcorder - Page 118
, 36. FORWARD INDEX SEARCH pp. 9, 36, 37. PAUSE pp. 9, 36, 47. SEL pp. 9, 16, 17. 118 Forassistance, pleasecall: 1-800-211-PANA(7262)orsende-mailto:[email protected] - Panasonic PVDV402 | Digital Video Camcorder - Page 119
41 MagicVu™ IR Filter (0 Lux) (PV-DV402 only) ......... 25 Memory Counter ......... 113 Memory Stop Editing .... 45 MENU OSD ......... 108~111 Memory Card ...... 6, 13, 92 O On-Screen Display (OSD 99, 100 P Palmcorder File Converter 78, 79 Palmcorder USB Device Driver/SD Drive ..... 75~77 Photo - Panasonic PVDV402 | Digital Video Camcorder - Page 120
Consumer Electronics Company, Division of Matsushita Electric Corporation of America One Panasonic Way Secaucus, New Jersey 07094 Panasonic Sales Company ("PSC"), Division of Matsushita Electric of Puerto Rico, Inc. Ave. 65 de Infanteria, Km. 9.5 San Gabriel Industrial Park Carolina, Puerto
-
 1
1 -
 2
2 -
 3
3 -
 4
4 -
 5
5 -
 6
6 -
 7
7 -
8
-
9
-
10
-
11
-
12
-
13
-
14
-
15
-
16
-
17
-
18
-
19
-
20
-
21
-
22
-
23
-
24
-
25
-
26
-
27
-
28
-
29
-
30
-
31
-
32
-
33
-
34
-
35
-
36
-
37
-
38
-
39
-
40
-
41
-
42
-
43
-
44
-
45
-
46
-
47
-
48
-
49
-
50
-
51
-
52
-
53
-
54
-
55
-
56
-
57
-
58
-
59
-
60
-
61
-
62
-
63
-
64
-
65
-
66
-
67
-
68
-
69
-
70
-
71
-
72
-
73
-
74
-
75
-
76
-
77
-
78
-
79
-
80
-
81
-
82
-
83
-
84
-
85
-
86
-
87
-
88
-
89
-
90
-
91
-
92
-
93
-
94
-
95
-
96
-
97
-
98
-
99
-
100
-
101
-
102
-
103
-
104
-
105
-
106
-
107
-
108
-
109
-
110
-
111
-
112
-
113
-
114
-
115
-
116
-
117
-
118
-
119
-
120
 |
 |

Before attempting to connect, operate or adjust this product, please read these
instructions thoroughly.
Spanish Quick Use Guide is included.
Guía para rápida consulta en español está incluida.
LSQT0563A
Models No.
PV-DV202
PV-DV402
Digital Video Camcorder
Operating Instructions
Mini
R
[ PV-DV402 shown ]
For assistance, please call : 1-800-211-PANA(7262) or send e-mail to : [email protected]