Panasonic TC22LR30 TC22LR30 User Guide - Page 43
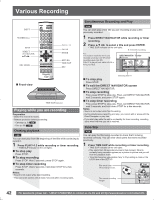
Recording from a video cassette, recorder, To stop play, To stop recording
 |
View all Panasonic TC22LR30 manuals
Add to My Manuals
Save this manual to your list of manuals |
Page 43 highlights
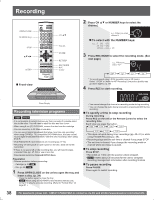
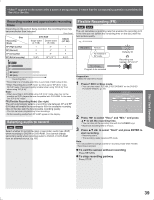
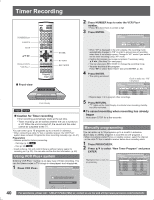
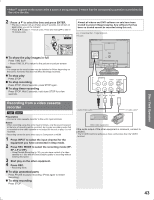
• When appears on the screen while a button is being pressed, it means that the corresponding operation is prohibited by the unit or the disc. 2 Press ▲▼ to select the time and press ENTER. • The time indicator will go off after about 5 seconds, but will turn on again when you set the indicator. • Press ▲▼ to alter in 1-minute units. Press and hold ▲▼ to alter in 10-minute units. PLAY -5 min Almost all videos and DVD software on sale have been treated to prevent illegal copying. Any software that has been so treated cannot be recorded using this unit. e.g., Connecting the L2 input terminals This unit REC Disc / Card Operation To show the play images in full Press TIME SLIP. • Press TIME SLIP to return to the picture-in-picture screen. Note: • The image on the small screen may be distorted or flicker depending on the scene. However, this does not affect the image recorded. To stop play Press STOP. To stop recording Press STOP. Wait 2 seconds, press STOP again. To stop timer recording Press STOP. Wait 2 seconds, hold down STOP for a few seconds. IN AUDIO R L VIDEO S VIDEO Red White Yellow Recording from a video cassette recorder RAM DVD-R Preparation • Connect a video cassette recorder to this unit's input terminals. Notes: • When recording using this unit's input terminals, only the sound received at the time of recording will be recorded. As long as secondary audio that is recorded on the video cassette is not output on the unit in play, it is not recorded. • Recording cannot be done when input is Component or HDMI. 1 Press INPUT to select the input channel for the equipment you have connected in Stop mode. 2 Press REC MODE to select the recording mode (XP, SP, LP or EP). • Using Flexible Recording (p. 39), you can save content of a video cassette to 1 disc with the best possible quality of recording without wasting disc space. 3 Start play on the other equipment. 4 Press REC. • Recording starts. To skip unwanted parts Press PAUSE to pause recording. (Press again to restart recording.) To stop recording Press STOP. Audio/Video cable S-Video cable* Other video equipment If the audio output of the other equipment is monaural, connect to L/MONO. * The S-VIDEO terminal achieves a more vivid picture than the VIDEO terminal. 43
-
 1
1 -
2
-
3
-
4
-
5
-
6
-
7
-
8
-
9
-
10
-
11
-
12
-
13
-
14
-
15
-
16
-
17
-
18
-
19
-
20
-
21
-
22
-
23
-
24
-
25
-
26
-
27
-
28
-
29
-
30
-
31
-
32
-
33
-
34
-
35
-
36
-
37
-
 38
38 -
 39
39 -
 40
40 -
 41
41 -
 42
42 -
 43
43 -
 44
44 -
 45
45 -
 46
46 -
 47
47 -
 48
48 -
49
-
50
-
51
-
52
-
53
-
54
-
55
-
56
-
57
-
58
-
59
-
60
-
61
-
62
-
63
-
64
-
65
-
66
-
67
-
68
-
69
-
70
-
71
-
72
-
73
-
74
-
75
-
76
-
77
-
78
-
79
-
80
-
81
-
82
-
83
-
84
-
85
-
86
-
87
-
88
-
89
-
90
-
91
-
92
 |
 |
