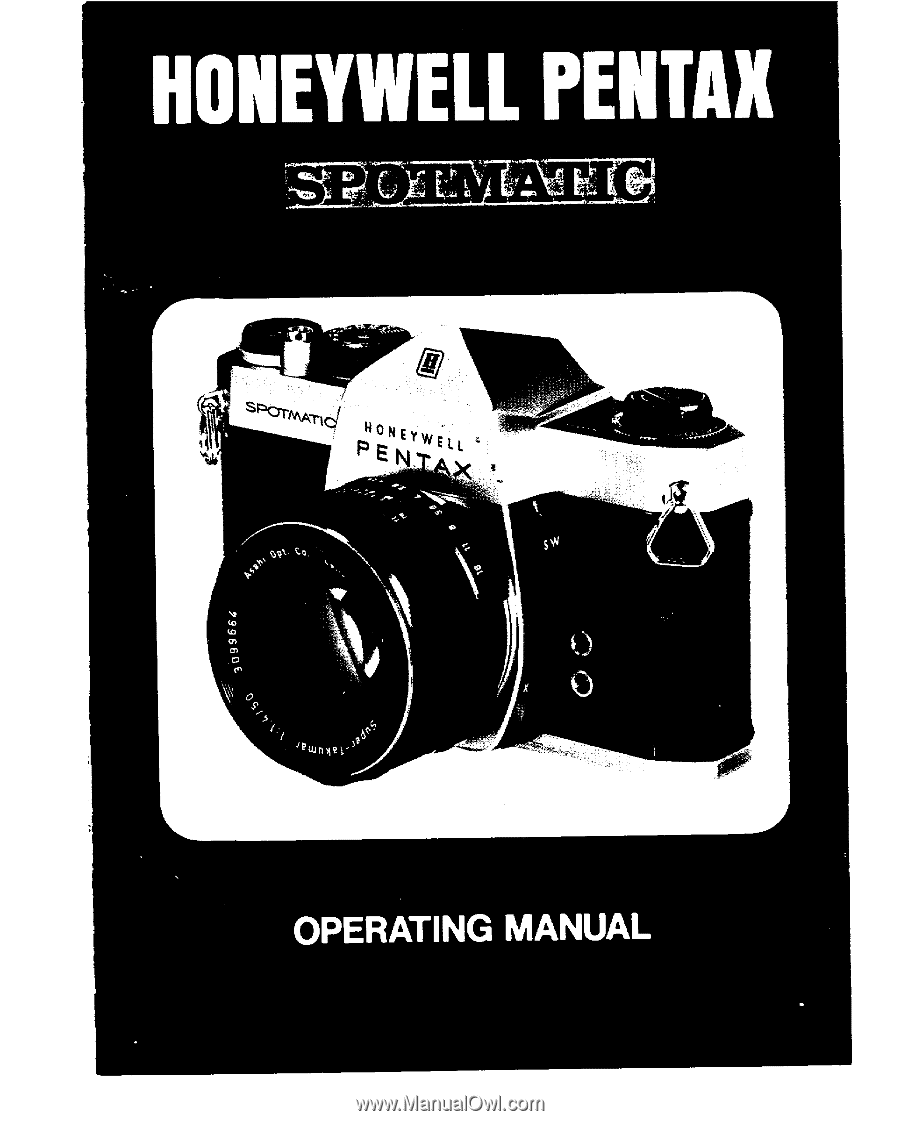
Pentax Spotmatic Spotmatic Manual
Pentax Spotmatic Manual
 |
View all Pentax Spotmatic manuals
Add to My Manuals
Save this manual to your list of manuals |
Pentax Spotmatic manual content summary:
- Pentax Spotmatic | Spotmatic Manual - Page 1
- Pentax Spotmatic | Spotmatic Manual - Page 2
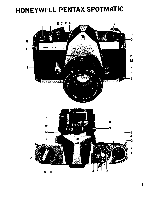
Major working parts of the A-Shutter speed index B-Shutter speed dial C-Rapid wind lever D-ASA film speed setting E-Shutter release F-Automatic reset exposure counter G-'Cocked' indicator H-D-ring lug I -Self-timer cocking lever J -Focusing ring K-X flash terminal L -FP flash terminal M-Preview - Pentax Spotmatic | Spotmatic Manual - Page 3
HONEYWELL PENTAX SPOTMATIC DC BA secrrmAric ,KoN cyw ELL ;PEN'TAX• N M L 0 K J aseel ri 15 .1SS 127147 T S E ABC D 1 - Pentax Spotmatic | Spotmatic Manual - Page 4
with telephoto lenses or with filters . .. the Honeywell Pentax Spotmatic will give you correctly exposed photo- graphs without the use of external meters or the need for cumbersome, time-consuming calculations! The Spotmatic may also be set manually the same as any other quality 35mm camera if - Pentax Spotmatic | Spotmatic Manual - Page 5
1100,004, a. IVVI.1.1 TAX - Pentax Spotmatic | Spotmatic Manual - Page 6
09 0 O 0 Li •O 4 Specifications Type 35mm single-lens reflex with built-in light meter. Film and Picture Size 35mm film (20 or 36 exposures). 24mm x 36mm. Standard Lenses Super-Takumar 55mm f/1.8 with fully automatic diaphragm. Filters and lenshood size: 49mm. Equipped with diaphragm preview lever - Pentax Spotmatic | Spotmatic Manual - Page 7
for ASA-100 film with standard lens.) Meter is powered with a mercury battery. Film Rewind Rapid rewind crank for speedy film take-up. Film rewind release button on bottom of camera body rotates while film is being rewound. Loaded Film Indicator Loaded film reminder dial underneath film rewind knob - Pentax Spotmatic | Spotmatic Manual - Page 8
for the light meter is packed separately. Please be sure to insert it into the battery housing before operating the camera. For battery insertion, refer to page 16. 1 • • S? SET FILM SPEED. Lift the outer ring of the shutter speed dial, turn it around and set the same number as the ASA number - Pentax Spotmatic | Spotmatic Manual - Page 9
you will get under-exposure: change the shutter speed to a slower setting. 6 RELEASE SHUTTER. Hold your camera firmly and trip the shutter. When the shutter is released, the meter switch will automatically turn off, lighting conditions, it is not necessary to repeat instructions 4 and 5.) 7 - Pentax Spotmatic | Spotmatic Manual - Page 10
the camera. When you focus with the camera held horizontally (Position A), hold the lens barrel as illustrated in photograph. Put the camera on shooting. With the Honeywell Pentax, whether held vertically or horizontally, you see your subject image through the taking lens, enabling you to compose - Pentax Spotmatic | Spotmatic Manual - Page 11
will turn counter-clockwise when you advance the film by turning the rapid wind lever. Film type reminder dial r or' 7 q Use the film type dial to show what type of film is in your camera. Simply turn the dial so that the type of film in the camera is opposite the A mark. To check whether the - Pentax Spotmatic | Spotmatic Manual - Page 12
film, and that the film must be rewound. DON'T open the back of the camera, or all exposed frames will be ruined. 4 Unfold the film rewind crank. 5 Depress the film prevents loosening or warping of the film. 2 The first portions of the film can- not be used for picture taking as they have already - Pentax Spotmatic | Spotmatic Manual - Page 13
image is much brighter. When the letters "MAN" appears beside the lever, the lens is in manual position; when "AUTO" appears, it is in automatic position. Microprism Honeywell Pentax cameras have a Fresnel lens with a microprism center underneath the ground glass. As you look through the finder - Pentax Spotmatic | Spotmatic Manual - Page 14
, which permits a constant check of depth of field. 7 IN FOCUS * When the exposure meter switch is turned to the "on" position, the lens diaphragm changes from the automatic to manual position even though the preview lever is in the "AUTO" (automatic) position. When the shutter is released, the - Pentax Spotmatic | Spotmatic Manual - Page 15
support your camera rigidly or use a tripod to prevent movement of your camera. 2 To protect the shutter mechan- ism, trip the shutter release before putting the camera out of use for different lens apertures. For example, if the lens opening of f/8 is to be used, Depth-of-field guide the range on - Pentax Spotmatic | Spotmatic Manual - Page 16
7.6" co co IS' oo Depth-of-field table: Super-Takumar 55mm lens Distance Scale f Setting f/1.8 f/2 f/2.8 f/4 f/5.6 f/8 fill filo 1 , o" 2' 3' 5' 10' 15' 30' OO 1' 5.9" 1 6.1' 1' 5.9' 1' 6.1" 1' 5.9" 1' 6.1' 1' 5.8" 1' 6.2" 1' 5.6" 1' 6.4" 1' 5.5" 1' 6.5" 1' 5.4" 1' 6.7" 1' 5.2" I' 7" 1'11 - Pentax Spotmatic | Spotmatic Manual - Page 17
of course, determined by the minimum and maximum apertures of the lens being used. For example, with the 50mm f/1.4 lens and ASA100 film, an aperture from f/1.4 (the maximum aperture of this lens) to f/16 (the minimum aperture) may be used with any shutter speed from 1 sec. to 1/1000 sec. that will - Pentax Spotmatic | Spotmatic Manual - Page 18
housing cover on the bottom cover plate with a coin. Insert the battery with (+) side toward the top of the camera. For replacement, use Mallory PX-400 or RM-400-R or equivalent. How to check it 1. Set the shutter speed dial to B (bulb) position. 2. Turn the ASA dial to - Pentax Spotmatic | Spotmatic Manual - Page 19
is exactly at the 60 marked on the speed dial. This indicates the highest shutter speed at which Honeywell Strobonars or other electronic flash units may be used. SHUTTER SPEED 1 11 FLASH 1000 500 250 125 60 TERMINAL FP FP Class (Screw Base/ FP Class (Bayonet Base) 30 15 8 4 2 F Class - Pentax Spotmatic | Spotmatic Manual - Page 20
off when not actually taking readings. Leaving the meter switched on will rapidly exhaust the battery. It is also necessary to keep the meter switched off when mounting a Super-Takumar lens on the Spotmatic camera body. If it is switched on, the tip • of the automatic diaphragm release pin - Pentax Spotmatic | Spotmatic Manual - Page 21
filters, close-ups, macro- and micro-photos, do not apply to the Spotmatic. N 44 , 454 0091 ,; .. .. yoo • ..- '5-log 4g "15. Do not use the Super-Takumar 50mm f/1.4 lens with any other camera or any other Honeywell Pentax model except with models H3v and Hla, having orange-colored "R" marking on - Pentax Spotmatic | Spotmatic Manual - Page 22
• • .4 • :In • Infra-red photography 50mm f/1.4 If you intend to take infra -red photographs, remember to use the small "R" index marked on the depth-of-field guide. Some of the Takumar lenses, however, like the above picture of Super-Takumar 50mm f/1.4, do not have the "R" mark. The index is just - Pentax Spotmatic | Spotmatic Manual - Page 23
its life size. Regardless of the lens selected for your Honeywell Pentax, there is never need for an accessory viewfinder, ordinarily required for rangefinder type cameras. When interchanging lenses, hold the lens by the distance scale ring. When attaching a lens, filter, or lenshood, do not screw - Pentax Spotmatic | Spotmatic Manual - Page 24
your Spotmatic will be repaired or replaced (at our option) and defective parts will be replaced without cost to you within the 12-month period, provided the camera has not been abused, altered or operated contrary to instructions. Honeywell will not be liable for damages from delay or loss of use - Pentax Spotmatic | Spotmatic Manual - Page 25
0 (") HOW TO REMOVE THE FRONT COVER As you see from the above photographs, the rear side of the front cover has a half-moon convex clip and the body side has a half-moon concave clip, which accepts the convex clip. When removing the front cover, turn it 180°. Do not try to remove it with force - Pentax Spotmatic | Spotmatic Manual - Page 26
rapid deterioration. Don't throw a used battery into fire ... it may explode. Keep the battery out of the camera's battery housing when you do not intend to use it for a lengthy period of time. See page 16. Should you need additional information about your Honeywell Pentax, address your questions to - Pentax Spotmatic | Spotmatic Manual - Page 27
40._2 ismaim 4.4 Honeywell
-
 1
1 -
 2
2 -
 3
3 -
 4
4 -
 5
5 -
 6
6 -
 7
7 -
8
-
9
-
10
-
11
-
12
-
13
-
14
-
15
-
16
-
17
-
18
-
19
-
20
-
21
-
22
-
23
-
24
-
25
-
26
-
27
 |
 |