Philips LC1345 User Manual - Page 10
Remote Control Unit
 |
View all Philips LC1345 manuals
Add to My Manuals
Save this manual to your list of manuals |
Page 10 highlights
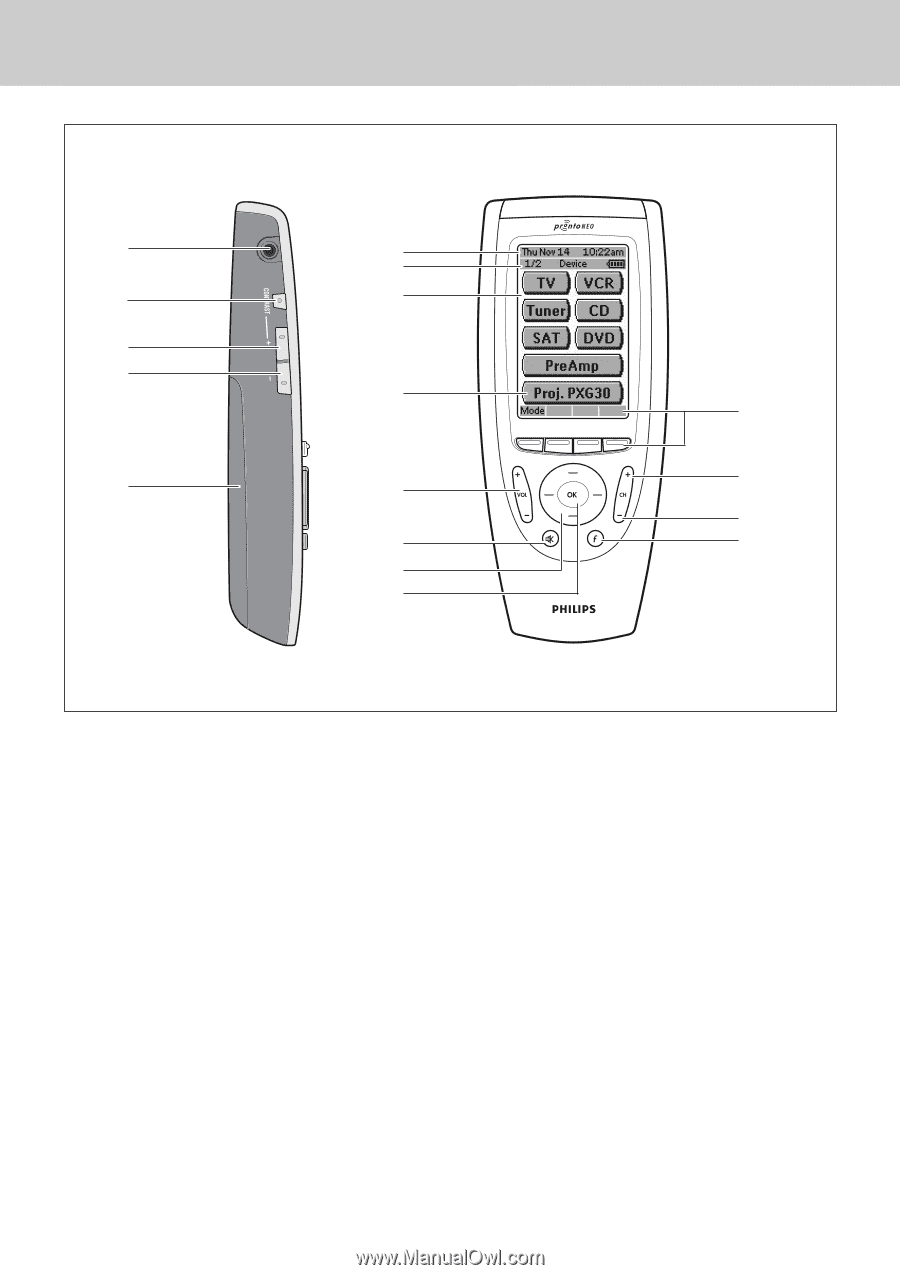
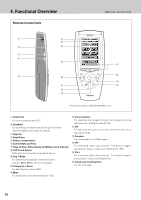
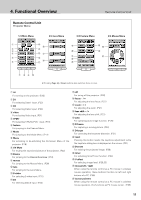
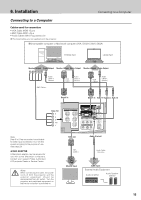
4. Functional Overview Remote Control Unit Remote Control Unit q y u w i e r o !7 t !0 !6 !5 !1 !4 !2 !3 ✽ This figure shows the Device Overview screen. q Serial Port For communicating with a PC w Backlight For activating the display and adjusting the contrast. (See ProntoNEO User Guide for details) e Page Up r Page Down t Battery Compartment y Current Date and Time u Page number, Active device and Battery Level Indicator i LCD Touch Screen Soft buttons are provided to operate a device. o Proj. PXG30 For activating the projector, press this button. (Jump to Main Menu, see the next page.) !0 Volume Up / Down For adjusting the volume.(P22) !1 Mute For muting the sound of the projector. (P22) !2 Cursor Control For operating and navigate through the activated menu via Up/Down and Left/Right buttons.(P18) !3 OK For executing the action in the menu when the menu is on the screen.(P18) !4 Function For jumping back to 1st(Main) page. !5 CH - For switching video input sources. The button toggles among Auto, Video, S-video and Y,Pb/Cb,Pr/Cr. (P31) !6 CH + For switching data input sources. The button toggles among Data 1, Data 2 and Data3.(P23) !7 Labels and 4 hard buttons See the next page. 10
-
 1
1 -
2
-
3
-
4
-
 5
5 -
 6
6 -
 7
7 -
 8
8 -
 9
9 -
 10
10 -
 11
11 -
 12
12 -
 13
13 -
 14
14 -
 15
15 -
16
-
17
-
18
-
19
-
20
-
21
-
22
-
23
-
24
-
25
-
26
-
27
-
28
-
29
-
30
-
31
-
32
-
33
-
34
-
35
-
36
-
37
-
38
-
39
-
40
-
41
-
42
-
43
-
44
-
45
-
46
-
47
-
48
-
49
-
50
-
51
-
52
 |
 |