Philips LC5231 User Guide
Philips LC5231 - UGO S-Lite Impact SVGA DLP Projector Manual
 |
UPC - 037849924327
View all Philips LC5231 manuals
Add to My Manuals
Save this manual to your list of manuals |
Philips LC5231 manual content summary:
- Philips LC5231 | User Guide - Page 1
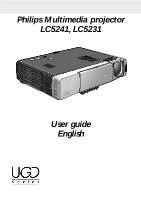
StatusStandby/On Input Auto image Philips Multimedia projector LC5241, LC5231 User guide English - Philips LC5231 | User Guide - Page 2
0. Controls and connections 1 y I Status Standby/On Input Auto image 2 4 3 @ Status Standby/On Input Auto image OPEN # y StSattuasndby/On Input Auto image Mouse Audio in Data / YCbCr S - Philips LC5231 | User Guide - Page 3
0. Controls and connections £ º ª ≤ Mouse Standby /On Menu • Video Data ∞ Cancel ≥ § ° Mouse Video Menu Cancel Standby /On Data ‡ Auto image D-Freeze A/V Mute ⁄ fl D-Zoom D-Keystone Volume ¤ fi › ‹ 3 fig. 3 - Philips LC5231 | User Guide - Page 4
are packed in the accessories box. They are provided to help you use or set up your projector. - UGO X-lite Impact or S-lite Impact (resp. XGA or SVGA) projector - Remote control + 2 x AAA 1,5V/LR03 batteries - Power cord (USA version + Continental Europe version) - VGA Cable - Mouse cable set (PS - Philips LC5231 | User Guide - Page 5
has been exposed to rain or water. D. If the projector does not operate normally when you follow the operating instructions. Adjust only those controls that are covered by the operating instructions; improper adjustment of other controls may cause damage and will often require extensive work by - Philips LC5231 | User Guide - Page 6
Projector Features 1. UGO X-lite Impact; LC5241 Fully compatible with true XGA; support for SXGA using advanced intelligent compression technology. The advanced intelligent compression technology enables these projectors to present clear compression SXGA images without any line omission. UGO S-lite - Philips LC5231 | User Guide - Page 7
green when the lamp is starting up (1 min.) - Lights up green when the lamp is on - Flashes orange when the projector is switched from projector to the mains. ¡ Lock slit To insert an optional locking device (Kensington lock). ™ IR sensor Receives the signals from the remote control. Remote control - Philips LC5231 | User Guide - Page 8
projector towards the screen for the best picture results. To determine the distance for the desired size, please refer to the Projection Assistant, a calculation programme included on the CD-ROM. Distance and image sizes UGO X-lite Impact; LC5241 inch) 3.0 3.0 4.7 7.1 9.4 11.8 14.1 17.7 23.6 • The - Philips LC5231 | User Guide - Page 9
distortion of the vertical keystone type by internal scaling. By pressing the D-Keystone +/- buttons of the remote control you can Keystoned image fine adjust the projected image. Adjusting height and level of the projector • Use the Height/Level Adjuster to adjust the vertical angle of the - Philips LC5231 | User Guide - Page 10
shorter than four meters (13 feet). Caution! Do not mix old and new batteries (also never mix alkaline and manganese batteries). Using the remote control as PC mouse The remote control of this projector can be used as the PC mouse (wireless mouse function) by connecting the Mouse connector of this - Philips LC5231 | User Guide - Page 11
Audio Conversion Cable 5 Mouse Cable PS/2 6 Mouse Cable USB 7 S-Video Cable Projector side Mini D-Sub 15P (male) RCA pin (male) CONNECTIONS Computer/AV products (1 to 7) are supplied with the product for connecting the projector to computer/AV equipment. The numbers in the left-hand column - Philips LC5231 | User Guide - Page 12
# correspond to the characters in fig. 2 of 'Controls and connections'. - Either read the instruction manual or contact the manufacturer concerning the method used to set your PC. Connecting to PC mouse connector General - The remote control of this projector can be used as the PC mouse (wireless - Philips LC5231 | User Guide - Page 13
in the accessories diagram. The figures in circles like # correspond to the figures in fig. 2 of 'Controls and connections'. Caution! Always switch off the projector before making any connections. COMPOSITE VIDEO SIGNAL S-VIDEO SIGNAL (3) Scart adapter (optional) (7) (4) Scart adapter (optional - Philips LC5231 | User Guide - Page 14
Y (green), Cb (blue) and Cr (red) connectors of a DVD player or other component video equipment to the corresponding Data/YCbCr connector % of the projector. For this, use a YCbCr Component cable (optional). 3. To use the built-in audio system, connect one end of the computer audio cable (3) to the - Philips LC5231 | User Guide - Page 15
the section under Maintenance. - When the lamp is on, the Standby/On indicator lights up green. 2. Select the required source (Data/YCbCr, Video or S-Video) by pressing the Input selection button on the projector or the Video/Data buttons on the remote control. Note: The Input selection button on - Philips LC5231 | User Guide - Page 16
0 CONTRAST 0 PICTURE ADJ 0 FINE PICTURE 0 -POSITION- Menu structure - data input IMAGE INFORMATION -RESET- -LAMP USAGE HOURS RESET- RESOLUTION 1024 X 768 FREQUENCY H: 48.4 KH z V: 60 Hz LAMP USAGE 34 STATUS -0.02 12 POSITION Note: The IMAGE and INFORMATION features are also - Philips LC5231 | User Guide - Page 17
closed Mouse Video Menu Cancel Standby /On Data IMAGE INFORMATION BRIGHTNESS 0 CONTRAST 0 COLOR 0 TINT 0 SHARPNESS 1 IMAGE INFORMATION -RESET- -LAMP USAGE HOURS RESET- LAMP USAGE 34 STATUS 21212.13361 Note: The IMAGE and INFORMATION features are also accessible in the Advanced - Philips LC5231 | User Guide - Page 18
Auto image setting the picture still is not of satisfactory performance, manual setting for possible further improvement can be made. For details mode. Menu access of projector functions DATA MODE - NORMAL MENU Press the Menu button with the flip cover of the remote control closed, to display the - Philips LC5231 | User Guide - Page 19
levels. To activate the personal setting, press the OK button on the remote control when the color balance setting is selected. With the cursor key (left/ to the desired portion. Input a signal that is rated SXGA (XGA for S-lite) to RGB/YCbCr connector and then set the partial display position with - Philips LC5231 | User Guide - Page 20
PAL - PAL-M - PAL-N - PAL60 - SECAM To activate the color system setting, press the OK button on the remote control when COLOR SYSTEM is addressed in the COLOR setting menu. Other Settings The projector is equipped with the following functions to optimize its use and handling: SET UP With the Flip - Philips LC5231 | User Guide - Page 21
reset all user settings to the default factory settings. 1. Press Menu. - The menu bar appears on the screen. 2. Use Cursor Control to move the cursor to INFORMATION. 3. Select RESET by using Cursor Control. 4. Press OK. Note: All items can be reset to the standard settings except as follows: - Lamp - Philips LC5231 | User Guide - Page 22
resetting, the Status indicator that turned on because 1100 hours had been ex-ceeded will turn off. Note: Obtain a replacement lamp cartridge at the store where the unit was purchased. Please specify the following information when ordering a replacement lamp cartridge: - Model name: LC5241 (XGA - Philips LC5231 | User Guide - Page 23
the Philips replacement lamp cartridge. Order this from your Philips dealer using the unit model number (see 'Note' under 'Lamp replacement'). - Be very careful. The lamp and lampholder may still be too hot to touch. - Do not loosen any screws except for those mentioned in the instructions below - Philips LC5231 | User Guide - Page 24
10. Troubleshooting If a fault occurs, first check the points listed below before taking the projector for repair. If you are unable to remedy a problem by following these hints, consult your dealer or service organisation. Warning: Under no circumstances should you try to repair the projector
-
 1
1 -
 2
2 -
 3
3 -
 4
4 -
 5
5 -
 6
6 -
 7
7 -
8
-
9
-
10
-
11
-
12
-
13
-
14
-
15
-
16
-
17
-
18
-
19
-
20
-
21
-
22
-
23
-
24
 |
 |

Philips Multimedia projector
LC5241, LC5231
User guide
English
Auto image
Input
Standby/On
Status