Philips VOX120 User Manual - Page 1
Philips VOX120 Manual
 |
View all Philips VOX120 manuals
Add to My Manuals
Save this manual to your list of manuals |
Page 1 highlights
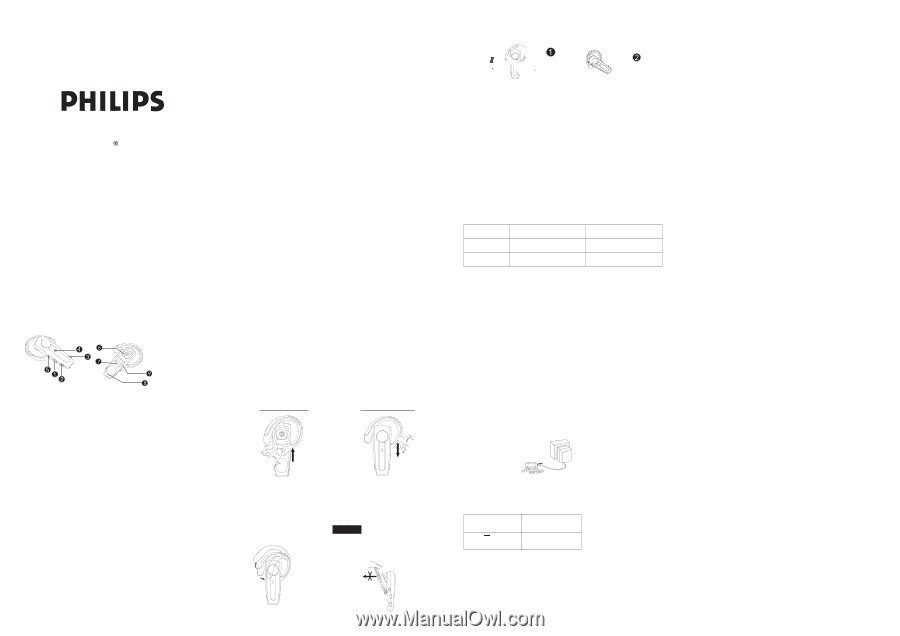
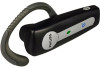
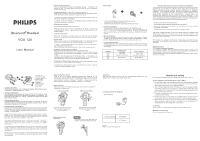
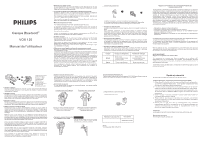
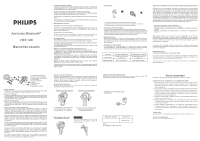
Bluetooth Headset VOX 120 User Manual ! Answering Incoming Calls When an incoming call is present, the Headset will ring . Pressing S1 will answer the call. The status light will flash fast while the call is in progress. (once every second) ! Transferring Calls (For Nokia 3650 or equivalent models) When you are in session, calls can be transferred from the Bluetooth phone to the Headset and from the Headset to the Bluetooth phone. To transfer a call from the Bluetooth phone to the Headset: press S1 once, the call will be transferred to the Headset. To transfer a call from Headset to the Bluetooth phone, please follow the operating instructions of your phone. ! Muting the microphone To mute the microphone during an active call Pressing both S2 and S3 buttons simultaneously for about a second, the microphone will be muted. A periodic beep tone will be heard while the mute function is active. To end the mute function When the microphone is muted, press on both S2 and S3 buttons simultaneously will end the mute function and the periodic beep tone will stop. ! Ending Calls While a call is in session on the Headset pressing S1 will disconnect the call. After the call is disconnected, the status light will flash every 3 seconds To reject a call (this function will only be supported by some mobile phones, e.g. Nokia 3650 or Siemens S55) When the Headset rings, press and hold S1 until you hear a long beep tone. ! To make a new call using voice dialing Requires a Bluetooth mobile phone with Voice Dialing function 1.Make sure the voice dialing function is enabled in the mobile phone and the mobile phone is within the range of the Headset. Press S1 on the Headset shortly. 2.After you hear the beep tone in the Headset, make a voice dial as you normally would by saying the name of the contact as set up in the memory of the mobile phone. The call will be connected in a few seconds. ! Redialing last dialed number (this function will only be supported by some mobile phones, e.g. Nokia 3650 or Siemens S55) To redial the last dialed number, press and hold S3 for 2 seconds. short low tones will indicate an attempt to redial. ! How to wear 1. Put on the headset with the ear hook behind your ear. 2. Bend the ear hook gently to fit your ear. 3. Make sure the microphone is pointing towards your mouth. ! Low-battery indication The status light will flash red instead of green when the battery is low. There will also be a short beep every few minutes. When the battery level is too low , the Headset will automatically power off. It cannot be powered on again unless the charger is connected or the battery is charged for at least 5 minutes. ! Battery recharging To recharge the battery, connect the charger cable to the Headset. During recharging, the status light shows a steady red light if the headset is turned off but the red light will dim once every 3 seconds while the headset is on. ! Fully charged indication A steady green status light indicates that the headset is off and is fully charged. Green light dimming once every 3 seconds indicates that the headset is on and fully charged. Headset Turn on Turn off Headset under charging Red LED dim once every 3 sec Red LED on Fully charged Green LED dim once every 3 sec Green LED on Federal Communication Commission Interference Statement This equipment has been tested and found to comply with the limits for a Class B digital device, pursuant to Part 15 of the FCC Rules. These limits are designed to provide reasonable protection against harmful interference in a residential installation. This equipment generates, uses and can radiate radio frequency energy and, if not installed and used in accordance with the instructions, may cause harmful interference to radio communications. However, there is no guarantee that interference will not occur in a particular installation. If this equipment does cause harmful interference to radio or television reception, which can be determined by turning the equipment off and on, the user is encouraged to try to correct the interference by one of the following measures: - Reorient or relocate the receiving antenna. - Increase the separation between the equipment and receiver. - Connect the equipment into an outlet on a circuit different from that to which the receiver is connected. - Consult the dealer or an experienced radio/TV technician for help. This device complies with Part 15 of the FCC Rules. Operation is subject to the following two conditions: (1) This device may not cause harmful interference, and (2) this device must accept any interference received, including interference that may cause undesired operation. FCC Caution: Any changes or modifications not expressly approved by the party responsible for compliance could void the user's authority to operate this equipment. IMPORTANT NOTE: FCC Radiation Exposure Statement: This equipment complies with FCC radiation exposure limits set forth for an uncontrolled environment. This equipment should be installed and operated with minimum distance 20cm between the radiator & your body. This transmitter must not be co-located or operating in conjunction with any other antenna or transmitter. 1. On/Off(S1) 2.Volume Up (S2) 3.Volume Down(S3) 4. Status Light 5. DC Socket 6.Speaker 7.Knuckle Joint 8.Microphone 9.Ear hook ! Charging the battery Thank you for buying new VOX 120 Bluetooth Headset. Before first time use, it is important to charge the battery for 12 hours. ! Turning on the Headset While the Headset is powered down, press and hold S1 for 2 seconds. A low tone followed by a high tone will indicate that the Headset is powered up. The status light will be green for 1 second. Afterward, the status light will flash green every 3 seconds. ! Turning off the Headset While the Headset is powered up, press and hold S1 for 5 seconds. A high tone followed by a low tone will indicate that the Headset is powered down. And the status light will be red until S1 is released. ! Putting Headset in Pairing Mode Make sure the Headset is fully charged and charging cable disconnected from it before pairing starts. While the Headset is powered off, press and hold S1 for 4 seconds. The status light will flash alternately green and red to indicate that the Headset is in Pairing Mode. Follow the operating instructions for your Bluetooth mobile phone to start the pairing process. Typically, this has to be done by going to a setup or connect menu and then selecting the options to detect Bluetooth devices. Bluetooth may take several seconds to establish a connection. Your phone's display should indicate that it has found the" VOX 120 " headset and ask if you want to pair it. You should confirm this. The phone's display would prompt you for a passkey or PIN. Enter a sequence of "0000" and confirm. The Headset status light will flash green every 3 seconds, indicating successful pairing. Probably the phone will also ask whether you want to change the headset's name. We recommend you should approve the VOX 120 name and not change it. If pairing does not work as expected, turn the headset and phone off and wait for 10 seconds. Turn the headset and phone on again and repeat all steps from beginning. ! Adjusting Speaker Volume While a call is in session, repeatedly pressing and releasing S2 will increase the speaker volume and repeatedly pressing and releasing S3 will decrease the speaker volume on the Headset. There is a key tone to indicate volume increase or decrease. However, a warning tone will be heard when the volume level reaches its maximum or minimum. ! Right or left ear If you want to wear the Headset on your right ear, you have to change the orientation of the ear hook. Left ear orientation Right ear orientation 1) Pull the ear hook upward from the knuckle joint and flip the hook 180 degrees. 2) Put the ear hook back to the knuckle joint and pull it down firmly. ! Bend the ear hook to fit your ear Warning Don't pull the ear hook side way over its limit, it will break the ear hook joint. Disclaimer: Talk time and stand-by time of the VOX 120 Bluetooth Headset will vary depending on mobile phone model being used ! Charging Connection Diagrams (1) A/C charging AC Mains AC Adaptor Accessories Table Description A / C Adaptor NOTE: BQB, CE and FCC approved. Health and safety Do not allow the product to come into contact with liquid. Do not open it. Electric, Magnetic and Electromagnetic Fields ("EMF") 1. Philips Royal Electronics manufactures and sells many products targeted at consumers, which, like any electronic apparatus, in general have the ability to emit and receive electro magnetic signals. 2. One of Philips' leading Business Principles is to take all necessary health and safety measures for our products, to comply with all applicable legal requirements and to stay well within the EMF standards applicable at the time of producing the products. 3. Philips is committed to develop, produce and market products that cause no adverse health effects. 4. Philips confirms that if its products are handled properly for their intended use, they are safe to use according to scientific evidence available today. 5. Philips plays an active role in the development of international EMF and safety standards, enabling Philips to anticipate further developments in standardization for early integration in its products. Conformity The Declaration of conformity is available on www.p4c.philips.com. Maintenance and service On line help: www.p4c.philips.com
-
 1
1 -
 2
2 -
 3
3
 |
 |