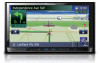
Pioneer AVIC-Z110BT Owner's Manual
Pioneer AVIC-Z110BT Manual
 |
UPC - 012562956404
View all Pioneer AVIC-Z110BT manuals
Add to My Manuals
Save this manual to your list of manuals |
Pioneer AVIC-Z110BT manual content summary:
- Pioneer AVIC-Z110BT | Owner's Manual - Page 1
AV NAVIGATION RECEIVER AVIC-Z110BT Notice to all users: This software requires that the navigation system is properly connected to your vehicle's parking brake and depending on your vehicle, additional installation may be required. For more information, please contact your Authorized Pioneer - Pioneer AVIC-Z110BT | Owner's Manual - Page 2
this manual in a safe place for future reference. Important The screens shown in the examples may differ from actual screens. Actual screens may be changed without notice for performance and function improvements. Introduction Information to User 9 License Agreement 10 - PIONEER AVIC-Z110BT - for - Pioneer AVIC-Z110BT | Owner's Manual - Page 3
screen settings Setting the Item on the Map Screen 44 - Setting "Close Up View" 44 - City Map 44 - Setting the switching of the city map display 44 - Show Traffic Incident 45 - Bluetooth Connected 45 - Setting the setting of navigation interruption screen 49 Selecting "Quick Access" 49 Setting a - Pioneer AVIC-Z110BT | Owner's Manual - Page 4
89 - Editing the device name 90 - Editing the password 90 - Stopping Bluetooth wave transmission 90 - Echo canceling and noise reduction 90 - Answering a call automatically 90 - Setting the automatic rejection function 91 - Clearing memory 91 - Updating the Bluetooth wireless technology software 91 - Pioneer AVIC-Z110BT | Owner's Manual - Page 5
on the "System Settings" menu 98 - Displaying the "System Settings" screen 98 - Customizing the regional settings 99 - Setting the Volume for Guidance and Phone 100 - Changing the splash screen 101 - Changing to the splash screen stored in the SD memory card 101 - Setting for rear view camera 101 - Pioneer AVIC-Z110BT | Owner's Manual - Page 6
for a song 141 Operating this navigation system's iPod function from your iPod 142 Starting the video playback 142 Using the touch panel keys (Video) 143 - Browsing for a video 143 Using the "Function" menu 144 Using the Bluetooth audio player Reading the screen 146 Using the touch panel keys - Pioneer AVIC-Z110BT | Owner's Manual - Page 7
preferences Options on the "AV System Settings" menu 162 - Displaying the "AV System Settings" menu 162 - Setting video input 1 (AV1) 162 - Setting video input 2 (AV2) 162 - Switching the auto antenna setting 162 - Changing the wide screen mode 163 - Setting the rear output 163 - Switching - Pioneer AVIC-Z110BT | Owner's Manual - Page 8
initial state 178 Returning the navigation system to the default or factory settings 178 - Setting items to be deleted 179 Appendix Troubleshooting 181 Messages and how to react to them 186 Messages for audio functions 188 Positioning technology 190 - Positioning by GPS 190 - Positioning by "Dead - Pioneer AVIC-Z110BT | Owner's Manual - Page 9
or transmitter. This equipment complies with FCC radiation exposure limits set forth for uncontrolled equipment and meets the FCC radio frequency ( permissive exposure evaluation (MPE). But it is desirable that it should be installed and operated with at least 20 cm and more between the radiator - Pioneer AVIC-Z110BT | Owner's Manual - Page 10
PIONEER AVIC-Z110BT - for U.S.A. THIS IS A LEGAL AGREEMENT BETWEEN YOU, AS THE END USER, AND PIONEER ELECTRONICS (USA) INC. ("PIONEER"). PLEASE READ THE TERMS AND CONDITIONS OF THIS AGREEMENT CAREFULLY BEFORE USING THE SOFTWARE INSTALLED ON THE PIONEER PRODUCTS. BY USING THE SOFTWARE INSTALLED - Pioneer AVIC-Z110BT | Owner's Manual - Page 11
, OR EXEMPLARY DAMAGES, LOST PROFITS, LOST INCOME, LOST SALES OR BUSINESS, EXPENDITURES, INVESTMENTS, OR COMMITMENTS IN CONNECTION WITH ANY BUSINESS, LOSS OF ANY GOODWILL, OR DAMAGES) RESULTING FROM THE USE OF OR INABILITY TO USE THE SOFTWARE, EVEN IF PIONEER HAS BEEN INFORMED OF, KNEW OF, OR SHOULD - Pioneer AVIC-Z110BT | Owner's Manual - Page 12
PIONEER AVIC-Z110BT - for Canada THIS IS A LEGAL AGREEMENT BETWEEN YOU, AS THE END USER, AND PIONEER ELECTRONICS OF CANADA, INC. ("PIONEER"). PLEASE READ THE TERMS AND CONDITIONS OF THIS AGREEMENT CAREFULLY BEFORE USING THE SOFTWARE INSTALLED ON THE PIONEER PRODUCTS. BY USING THE SOFTWARE INSTALLED - Pioneer AVIC-Z110BT | Owner's Manual - Page 13
, CONSEQUENTIAL, OR EXEMPLARY DAMAGES, LOST PROFITS, LOST SALES OR BUSINESS, EXPENDITURES, INVESTMENTS, OR COMMITMENTS IN CONNECTION WITH ANY BUSINESS, LOSS OF ANY GOODWILL, OR DAMAGES) RESULTING FROM THE USE OF OR INABILITY TO USE THE SOFTWARE, EVEN IF PIONEER HAS BEEN INFORMED OF, KNEW OF, OR - Pioneer AVIC-Z110BT | Owner's Manual - Page 14
these discs, solely for personal, non-commercial use and not to operate a service bureau or for any other use involving the processing of data of other persons . You may make one (1) copy of the Data for archival or backup purposes only but you may not otherwise copy, reproduce, modify, make derivative - Pioneer AVIC-Z110BT | Owner's Manual - Page 15
) (DOD technical data - commercial items clause); FAR 52.227-14 Alternates I, II, and III (JUN 1987) (civilian agency technical data and noncommercial computer software clause); and/or FAR 12.211 and FAR 12.212 (commercial item acquisitions), as applicable. In case of conflict between any of the FAR - Pioneer AVIC-Z110BT | Owner's Manual - Page 16
Chapter 01 Introduction In addition to the Warranties contained in the Agreement, YOU UNDERSTAND THAT THE POIS ARE LICENSED ON AN "AS IS" BASIS WITHOUT GUARANTEE, AND THERE ARE NO OTHER WARRANTIES MADE WHETHER, EXPRESS OR IMPLIED, INCLUDING WITHOUT LIMITATION, ANY EXPRESS OR IMPLIED WARRANTIES OF - Pioneer AVIC-Z110BT | Owner's Manual - Page 17
Introduction Licenses Chapter 01 Introduction En 17 - Pioneer AVIC-Z110BT | Owner's Manual - Page 18
Chapter 01 Introduction 18 En - Pioneer AVIC-Z110BT | Owner's Manual - Page 19
Introduction Chapter 01 Introduction En 19 - Pioneer AVIC-Z110BT | Owner's Manual - Page 20
Chapter 01 Introduction 20 En - Pioneer AVIC-Z110BT | Owner's Manual - Page 21
Introduction Chapter 01 Introduction En 21 - Pioneer AVIC-Z110BT | Owner's Manual - Page 22
this database. ! For more details about the map coverage of this navigation system, refer to the information on our website. ! It is strictly third-party brand icons (the "Brand Icons") are located in the operator's manual included in the Licensed Products. 3 As of the Effective Date, the copyright - Pioneer AVIC-Z110BT | Owner's Manual - Page 23
notice smoke, a strange noise or odor from the navigation system, or any other abnormal signs on the LCD screen, turn off the power immediately and consult your dealer or the nearest authorized Pioneer Service Station. Using this navigation system in this condition may result in permanent damage to - Pioneer AVIC-Z110BT | Owner's Manual - Page 24
to all warnings in this manual and follow the instructions carefully. p Do not install this navigation system where it may (i) obstruct Pioneer does not bear responsibility for changes to information services provided by related companies, such as cancellation of services or changing to pay-services - Pioneer AVIC-Z110BT | Owner's Manual - Page 25
fail to operate properly, contact your dealer or nearest authorized Pioneer Service Station. WARNING Do not use with vehicles that do not feature an ACC position. Rear view camera With an optional rear view camera, you are able to use the navigation system as an aid to keep an eye on trailers, or - Pioneer AVIC-Z110BT | Owner's Manual - Page 26
much more. 4 Receive notices of software upgrades and software updates. Manual overview How to use this manual Finding the operation procedure for what you your navigation system are de- scribed in ALL CAPITAL, BOLD lettering: e.g.) MENU button, MAP button. ! Items in different menus, screen titles - Pioneer AVIC-Z110BT | Owner's Manual - Page 27
optional screen that is purchased for use in conjunction with this navigation unit will be referred to as the "Rear Display". "Video image" "Video image" in this manual indicates moving images of DVD-Video, DivXâ, iPod, and any equipment that is connected to this system with an RCA cable, such - Pioneer AVIC-Z110BT | Owner's Manual - Page 28
Chapter 01 Introduction p In this manual, iPod and iPhone will be referred to as iPod. p When you use this navigation system with a Pioneer USB interface cable for iPod (CDIU50V) (sold separately), you can control an iPod compatible with this navigation system. p To obtain maximum performance, we - Pioneer AVIC-Z110BT | Owner's Manual - Page 29
This chapter gives information about the names of the parts and the main features using the buttons. Chapter 02 Basic operation 7 6 54 3 21 8 9 1 LCD screen 2 OPEN CLOSE button 3 TRK (c/d) button Press to perform manual seek tuning, fast forward, reverse and track search controls. En 29 - Pioneer AVIC-Z110BT | Owner's Manual - Page 30
screen and the AV operation screen. ! Press to display the map screen while the navigation function screen is displayed. ! Press and hold to display the "Picture Adjustment" screen and hold to turn off the screen display. 6 VOL (+/-) button Adjusts the AV (Audio and Video) source volume. 7 VOICE - Pioneer AVIC-Z110BT | Owner's Manual - Page 31
that angle for safety. ! Do not place a glass or a can on this navigation system when the LCD panel is open. Doing so may break this navigation system. Inserting a disc 1 Press the OPEN CLOSE button. The "Monitor Setup" screen appears. 2 Touch [Open]. The LCD panel opens, and the disc loading slot - Pioneer AVIC-Z110BT | Owner's Manual - Page 32
video files, the navigation system will not be restarted. Ejecting an SD memory card 1 Press the OPEN CLOSE button. The "Monitor Setup" screen appears. 3 Touch [Yes]. The navigation system sto- rage device, never remove it from this navigation system while data is being transferred. ! If data loss - Pioneer AVIC-Z110BT | Owner's Manual - Page 33
you to connect your iPod to the navigation system. Disconnecting your iPod % Pull out the USB interface cable for iPod after checking that no data is being accessed. Flow from startup to termination 1 Start the engine to boot up the system. After a short pause, the splash screen comes on for a few - Pioneer AVIC-Z110BT | Owner's Manual - Page 34
you agree to the conditions. On first-time startup When you use the navigation system for the first time, select the language that you want to use. 1 Start the engine to boot up the system. After a short pause, the splash screen comes on for a few seconds. 2 Touch the language that you want to use - Pioneer AVIC-Z110BT | Owner's Manual - Page 35
Basic operation Chapter 02 Basic operation En 35 - Pioneer AVIC-Z110BT | Owner's Manual - Page 36
Chapter 03 How to use the navigation menu screens Screen switching overview 2 3 4 1 5 6 7 36 En - Pioneer AVIC-Z110BT | Owner's Manual - Page 37
POI list) 1 4 5 How to use the navigation menu screens 2 Classic Menu Shortcut Menu p In this manual, "Classic Menu" will be referred to as "Top Menu". 2 Destination Menu You can search for your destination on this menu. You can also check or cancel your set route from this menu. 3 Phone Menu - Pioneer AVIC-Z110BT | Owner's Manual - Page 38
the HOME button to display the "Top Menu". 2 Touch [Settings]. The "Settings Menu" screen appears. 3 Touch [System Settings]. The "System Settings" screen appears. 4 Touch [Back Camera]. The "Back Camera Settings" screen appears. 5 Touch [Camera] to turn it [On]. Canceling the Shortcut 1 Touch and - Pioneer AVIC-Z110BT | Owner's Manual - Page 39
provided by your navigation system can be seen on the map. You need to become familiar with how information appears on the map. How to use the map How to read the map screen This example shows an example of a 2D map screen. 1 h g 2 f e 3 d c 4 b 5 a 6 7 p Information with the - Pioneer AVIC-Z110BT | Owner's Manual - Page 40
screen of the current source directly. p If you connect your iPod to this navigation system The route currently set is highlighted in bright color on the map. If a waypoint is set on the route, active. f Bluetooth connection icon This icon shows whether the device featuring Bluetooth technology is - Pioneer AVIC-Z110BT | Owner's Manual - Page 41
map of the intersection When "Close Up View" in the "Map Settings" screen is "On", an enlarged map of the intersection appears. 2 Freeway exit on the actual road. How to use the map = For details, refer to Setting "Close Up View" on page 44. Display during freeway driving In certain locations of - Pioneer AVIC-Z110BT | Owner's Manual - Page 42
by the scroll cursor or registering a location in [Favorites], faster than using the navigation menu. You can customize "Quick Access" displayed on screen. The "Quick Access" described here are prepared as the default setting. = For details, refer to Selecting "Quick Ac- cess" on page 49. p Items - Pioneer AVIC-Z110BT | Owner's Manual - Page 43
icons for surrounding facilities (POI) on the map. = For details, refer to Displaying POI on the map on page 46. : Volume Displays the "Volume Settings" screen. = For more details about "Volume", refer to Setting the Volume for Guidance and Phone on page 100. : Contacts Displays the "Contacts List - Pioneer AVIC-Z110BT | Owner's Manual - Page 44
the map screen settings The general settings related with a map screen can be customized. To customize the map screen, display the "Map Settings" screen. 1 Display the "Top Menu" screen. 2 Touch [Settings]. The "Settings Menu" screen appears. Setting "Close Up View" This setting enables switching - Pioneer AVIC-Z110BT | Owner's Manual - Page 45
Customizing the map screen settings Chapter 05 Customizing the map screen settings Displays a city map when the setting. ! [View] (default): Displays the icons on the map. ! [Hide]: Hides the icons on the map. = For details, refer to Checking traffic information manually on page 74. Bluetooth - Pioneer AVIC-Z110BT | Owner's Manual - Page 46
map p You can select up to 10 items from the detailed category. 1 Display the "Map Settings" screen. 2 Touch [Overlay POI]. The "Overlay POI" screen appears. 46 En # Touch [OK]. The previous screen returns. 6 Touch the subcategory. A red check mark appears next to the selected category. To cancel - Pioneer AVIC-Z110BT | Owner's Manual - Page 47
AVIC FEEDS" which is available separately, on your PC. ("AVIC FEEDS" will be available on our website.) Storing the customized POI properly and inserting the SD memory card enables the system to display the icons on the map screen Settings" screen. 3 Touch [Overlay POI]. The "Overlay POI" screen - Pioneer AVIC-Z110BT | Owner's Manual - Page 48
use this function with [Automatic], the Orange/white lead of the navigation system must be connected correctly. 1 Display the "Map Settings" screen. 2 Touch [View Mode]. The "View Mode" screen appears. 3 Touch the type that you want to set. You can select the following types: ! [2D View] (default - Pioneer AVIC-Z110BT | Owner's Manual - Page 49
such as an intersection while displaying a screen other than navigation. 1 Display the "Map Settings" screen. 2 Touch [AV Guide Mode]. Each time you touch the key changes that setting. ! [On] (default): Switches from the audio operation screen to the navigation screen. ! [Off]: Does not switch the - Pioneer AVIC-Z110BT | Owner's Manual - Page 50
system sets the route to your destination, and the map of your surroundings appears. 9 After releasing the parking brake, drive in accordance with navigation guidance. Checking the location on the map After searching for the destination, the "Location confirmation screen" appears. Location - Pioneer AVIC-Z110BT | Owner's Manual - Page 51
and then touch [OK]. The route is recalculated, and "Route confirmation screen" appears. Items that users can operate Settings marked with an asterisk (*) show that these are default or factory settings. Route Condition This setting controls how the route should be calculated by taking into account - Pioneer AVIC-Z110BT | Owner's Manual - Page 52
to set your set correctly, the navigation system cannot consider traffic regulations correctly. Set the time difference correctly (= Refer to Setting the time difference on page 99). Learning Route The system screen". The "Route Profile" screen appears. Adding a waypoint Up to 5 waypoints can be set - Pioneer AVIC-Z110BT | Owner's Manual - Page 53
on the next page. 1 Touch [Waypoints] on the "Route confirmation screen". The "Waypoints List" screen appears. 4 Touch [OK] on the "Waypoints List" screen. The route is recalculated, and "Route confirmation screen" appears. Setting a route to your destination 2 Touch [Add]. The "Select Search - Pioneer AVIC-Z110BT | Owner's Manual - Page 54
Up to 5 waypoints can be set, and waypoints and final destination can be sorted automatically or manually. 1 Display the "Waypoints List" screen. 2 Touch [Add]. The "Select Search method" screen appears. p When a long distance route is calculated, your navigation system may not be able to list - Pioneer AVIC-Z110BT | Owner's Manual - Page 55
appears. 5 Touch [OK] on the "Waypoints List" screen. The route is recalculated, and "Route confirmation screen" appears. 6 Touch [OK]. The map of the current position appears. Modifying the route calculation conditions The settings related to route calculation can be customized. 1 Display the - Pioneer AVIC-Z110BT | Owner's Manual - Page 56
follow the steps below to cancel the route guidance. 1 Display the "Destination Menu" screen. 2 Touch [Cancel Route]. A message confirming the cancellation of the current route appears. is completed, "Route confirmation screen" appears. p [Skip] is available only when a waypoint is set. 56 En - Pioneer AVIC-Z110BT | Owner's Manual - Page 57
Display the "Destination Menu" screen. 2 Touch [Address]. The "Address Search" screen appears. 3 Touch the key next to "Country" to select the country. If the destination is in another country, this changes the country setting. p Once the country has been selected, you only have to change countries - Pioneer AVIC-Z110BT | Owner's Manual - Page 58
Enter the city name and then touch [OK]. The "Select City" screen appears. 4 Touch the desired city name. The "Street Name" screen appears. 8 Touch the desired house number range. The searched location appears on the map screen. Finding the location by specifying the house number p Depending on the - Pioneer AVIC-Z110BT | Owner's Manual - Page 59
by touching a single key. 1 Display the "Destination Menu" screen. 2 Touch [Return Home]. "Location confirmation screen" appears. If the home location has not been stored yet, a confirmation message appears. # Touch [Register]. The "Set Home" screen appears. = For details, refer to Registering your - Pioneer AVIC-Z110BT | Owner's Manual - Page 60
. If the destination is in another country, this changes the country setting. 4 Enter the POI name and then touch [OK]. The "POI List" screen appears. 5 Touch the POI you want. The searched location appears on the map screen. # Touch [Sort]. Each time you touch [Sort] changes the sort order - Pioneer AVIC-Z110BT | Owner's Manual - Page 61
country list. If the destination is in another country, this changes the country setting. 4 Enter the city name and then touch [OK]. The "Select City" screen appears. 5 Touch the desired city name. The "POI List" screen appears. # Touch . The representative location of the city appears on the map - Pioneer AVIC-Z110BT | Owner's Manual - Page 62
SD memory card enables the system to use the data for searches. 1 Insert an SD memory card into the SD card slot. = For more details of the operation, refer to Inserting and ejecting an SD memory card on page 31. 2 Display the "Destination Menu" screen. 3 Touch [AVIC FEEDS]. POI's are divided into - Pioneer AVIC-Z110BT | Owner's Manual - Page 63
[5]. 4 Touch [North] or [South], and then enter the latitude. To enter N 5°1'2.5" for example, touch [North], [0], [5], [0], [1], [0], [2], and [5]. 5 Touch [OK]. The searched location appears on the map screen. Searching for and selecting a location En 63 - Pioneer AVIC-Z110BT | Owner's Manual - Page 64
8. 5 When the map of the location you want to register is displayed, touch [OK]. The location is registered, and then the "Edit Favorite" screen appears. = For details, refer to Editing the entry in "Favorites" on this page. 6 Touch [OK]. The registration is completed. 2 Touch menu. to display - Pioneer AVIC-Z110BT | Owner's Manual - Page 65
of the list. 3 Touch [Sort]. Each time you touch [Sort] changes the sort order. p Current order is displayed on the upper right of the screen. ! : Sorts the items in the list in order by dis- tance from the vehicle position. ! : Sorts the items in the list alphabetically. ! : Sorts - Pioneer AVIC-Z110BT | Owner's Manual - Page 66
and ejecting an SD memory card on page 31. 2 Display the "Destination Menu" screen. 3 Touch [Favorites]. The "Favorites" screen appears. 4 Touch . Data export starts. Importing the "Favorites" items edited on AVIC FEEDS You can import the locations that you have edited on the utility program - Pioneer AVIC-Z110BT | Owner's Manual - Page 67
Registering and editing locations Chapter 09 5 Touch [Yes]. Data import starts. After importing the data is finished, the "Favorites" screen appears. Deleting an entry in "History" Items in History can be deleted. All entries in History can be deleted at once. 1 Display the "Destination Menu" - Pioneer AVIC-Z110BT | Owner's Manual - Page 68
service, you can check and browse various information on your navigation system, such as gas prices, movie times, weather conditions and traffic information. The information will be updated Notice about MSN Direct Pioneer is not responsible for the screen appears. 2 Touch [Status]. 3 Write your product - Pioneer AVIC-Z110BT | Owner's Manual - Page 69
the following conditions: - You are currently in the coverage area of MSN Direct. 1 Boot-up your navigation system. 2 Touch [Destination] on the "Top Menu", and then touch [MSN Direct]. The "MSN Direct" screen appears. 3 Touch [Status]. 4 Wait until the activation status changes to "Active". It may - Pioneer AVIC-Z110BT | Owner's Manual - Page 70
time. ! When you have not performed this function previously around the current area. ! After the navigation system has been turned off for a few days. # Touch [Refresh]. The information is updated. p [Refresh] appears when the new information is received. 5 Touch the desired tab to change the - Pioneer AVIC-Z110BT | Owner's Manual - Page 71
with cellular phone featuring Bluetooth wireless technology is required.) Browsing weather information Local weather information can be displayed on a list. Switching the screen allows you to see worldwide weather conditions. Although the MSN Direct service regularly updates weather information, the - Pioneer AVIC-Z110BT | Owner's Manual - Page 72
system receives updated traffic information, it will overlay the traffic information on your map and also display detailed text information when available. In the default setting, the navigation system Traffic Information is displayed on a screen in the form of a list Direct service regularly updates - Pioneer AVIC-Z110BT | Owner's Manual - Page 73
the information cannot be dis- played on one screen, touch or to view the remaining information. # Touch traffic information. Each time you touch the key changes that set- ting. ! : You can sort the traffic information by has been removed, the list is updated to reflect the new situation. # - Pioneer AVIC-Z110BT | Owner's Manual - Page 74
, the navigation system will recommend a new alternative route automatically. In such a case, the following screen will appear. 1 Touch [New]. The recommended route is displayed on the screen. # Touch [Current]. The current route is displayed on the screen. 2 Touch [OK]. The displayed route is set - Pioneer AVIC-Z110BT | Owner's Manual - Page 75
only when the system can find " screen in the form of a list. This allows you to check how many traffic incidents have occurred, their location and their distance from your current position. Although the MSN Direct service regularly updates you touch the key changes that set- ting. ! : You can - Pioneer AVIC-Z110BT | Owner's Manual - Page 76
service, and you can select which types will be incorporated and displayed on your navigation system. 1 Touch [Destination] on the "Top Menu", and then touch [MSN Direct]. 2 Touch [Traffic Settings]. The "Traffic Settings" screen the MSN Direct service regularly updates local event information, - Pioneer AVIC-Z110BT | Owner's Manual - Page 77
Bluetooth wireless technology is required.) Browsing news headlines Recent news headlines are displayed in a list. Although the MSN Direct service regularly updates about the news are displayed. # Touch . "Location confirmation screen" appears. = For details, refer to Checking the location on - Pioneer AVIC-Z110BT | Owner's Manual - Page 78
a list. Although the stock quote displayed onscreen is updated about 40 minutes (approx.), these prices are not realtime values. It may take up to the navigation system has been turned off for a few days. = Please refer to Notice about MSN Direct on page 68. 3 Touch [Add]. The "Stock Info" screen - Pioneer AVIC-Z110BT | Owner's Manual - Page 79
display the "Top Menu". 2 Touch [Settings]. The "Settings Menu" screen appears. 3 Touch [Bluetooth Settings]. The "Bluetooth Settings" screen appears. Searching for nearby Bluetooth devices The system searches for available Bluetooth devices near the navigation system, displays them in a list, and - Pioneer AVIC-Z110BT | Owner's Manual - Page 80
devices, no specific action is necessary to activate Bluetooth wireless technology. For details, refer to the instruction manual of your devices. 2 Display the "Bluetooth Settings" screen. 3 Touch [Registration]. The "Nearby Device List" screen appears. 4 Touch [Select specific devices]. The "Select - Pioneer AVIC-Z110BT | Owner's Manual - Page 81
For details, refer to the instruction manual of your devices. 2 Display the "Bluetooth Settings" screen. 3 Touch [Registration]. The "Nearby Device List" screen appears. 4 Touch [Register from mobile phone]. The navigation system waits for a Bluetooth wireless technology connection. Registering and - Pioneer AVIC-Z110BT | Owner's Manual - Page 82
system detect it automatically. 1 Activate the Bluetooth wireless technology on your devices. For some Bluetooth devices, no specific action is necessary to activate Bluetooth wireless technology. For details, refer to the instruction manual of your devices. 2 Display the "Bluetooth Settings" screen - Pioneer AVIC-Z110BT | Owner's Manual - Page 83
the map screen by touching [OK]. p To cancel the connection to your device, touch [Cancel]. p The selected device is set for priority connecting. p If connection fails, check whether your device is waiting for a connection and then retry. Chapter 11 Registering and connecting the Bluetooth device - Pioneer AVIC-Z110BT | Owner's Manual - Page 84
transfer the phone book data stored in your cellular phone to the navigation system. This section describes how to set up a Bluetooth connection and how to operate a cellular phone featuring Bluetooth technology on the navigation system. For details about the connectivity with the devices featuring - Pioneer AVIC-Z110BT | Owner's Manual - Page 85
book entries stored in your cellular phone to the navigation system. = For details, refer to Transferring the phone book on page 89. 1 Display the "Phone Menu" screen. 2 Touch [Contacts]. The "Contacts List" screen appears. Alphabet tabs Makes the screen jump to the beginning of the page including - Pioneer AVIC-Z110BT | Owner's Manual - Page 86
12 Using hands-free phoning 3 Touch an entry on the list. Dialing starts. p To cancel the call after the system starts dialing, touch . # Touch [Detail]. The "Detailed Information" screen appears. You can check the details of the party before making a phone call. 4 Touch to end the call. You - Pioneer AVIC-Z110BT | Owner's Manual - Page 87
may apply. You can dial GOOG-411 to dial the free business listing service of Google™ with one touch. 1 Touch [GOOG-411] on the " want to call. The "Detailed POI Information" screen appears. 5 Touch [Call] to make a call. To cancel the call after the system starts dialing, touch . 6 Touch to end - Pioneer AVIC-Z110BT | Owner's Manual - Page 88
set to [Off], answer the call manually. Answering is available if any screen is displayed, such as the map screen or the setting screen. p You can set this navigation system already registered in "Contacts". p Depending on the caller ID service, the phone number of the received call may not be - Pioneer AVIC-Z110BT | Owner's Manual - Page 89
be edited on the navigation system. 1 Connect the cellular phone that has the phone book to transfer. = For details, refer to Connecting a registered Bluetooth device on page 82. 2 Touch [Contacts Transfer] on the "Phone Menu" screen. 3 Check that the following screen is displayed, and operate - Pioneer AVIC-Z110BT | Owner's Manual - Page 90
on your cellular phone. (Default is [PIONEER NAVI].) 1 Display the "Bluetooth Settings" screen. 2 Touch [Device Name]. The keyboard to Bluetooth Settings" screen. 2 Touch [Echo Cancel]. Touching [Echo Cancel] switches between "On" and "Off". Answering a call automatically The navigation system - Pioneer AVIC-Z110BT | Owner's Manual - Page 91
phone. 3 Touch [Yes]. Data on the selected item is cleared from this navigation system's memory. p If you do not want to clear the memory that you have selected, touch [No]. Updating the Bluetooth wireless technology software Update files will be available for download in the future. You will be - Pioneer AVIC-Z110BT | Owner's Manual - Page 92
, refer to Inserting and ejecting an SD memory card on page 31. 2 Display the "Bluetooth Settings" screen. 3 Touch [Firmware update]. The current version is displayed. 4 Touch [Firmware update]. Update starts. Notes for hands-free phoning General notes ! Connection to all cellular phones featuring - Pioneer AVIC-Z110BT | Owner's Manual - Page 93
in the phone book at one time. In this case, transfer items one by one from your cellular phone. ! Depending on the cellular phone, this navigation system may not display the phone book correctly. (Some characters may be garbled, or first and last names may be reversed.) ! If the phone book in - Pioneer AVIC-Z110BT | Owner's Manual - Page 94
also check whether they are connected in the correct positions. 1 Display the "Navi Settings" screen. 2 Touch [Connection Status]. The "GPS Status" screen appears. 1 2 3 4 5 6 1 Speed Pulse The Speed Pulse value detected by the navigation system is shown. "0" is shown while the vehicle is stationary - Pioneer AVIC-Z110BT | Owner's Manual - Page 95
statuses. p Touch [All] for the following cases: - After changing the installation position of the navigation system - After changing the installation angle of the navigation system - After moving the navigation system to another vehicle # Touch [Distance]. Clears the learned results stored in - Pioneer AVIC-Z110BT | Owner's Manual - Page 96
you enter the fueling information to the navigation system, and export the data to SD memory cards, you can check the fuel consumption information by using the utility program "AVIC FEEDS" which is available separately, on your PC. p Up to 24 sets of "Gas Price Calculation" en- tries can be stored - Pioneer AVIC-Z110BT | Owner's Manual - Page 97
[Gas Price Per Unit]: Enter the fuel unit price. When Setting" screen appears. Exporting the data of "Gas Mileage Management" Exporting the "Gas Mileage Management" data to an SD memory card is possible. p The data stored in this navigation system " below). You can review the travel history later. - Pioneer AVIC-Z110BT | Owner's Manual - Page 98
the navigation system continues to store the track logs in the inserted SD memory card. Using the demonstration guidance This is a demonstration function for retail stores. After a route is set, touching this key starts the simulation of route guidance. 1 Display the "Navi Settings" screen. 2 Touch - Pioneer AVIC-Z110BT | Owner's Manual - Page 99
the time difference Adjusts the system's clock. Set the time difference (+, -) from the time originally set in your navigation system. 1 Display the "Regional Settings" screen. 2 Touch [Time]. The "Time Settings" screen appears. Selecting the language You can set the languages used on the program - Pioneer AVIC-Z110BT | Owner's Manual - Page 100
Volume for Guidance and Phone The sound volume for the navigation can be set. You can separately set the volume of the route guidance and the beep sound. 1 Display the "System Settings" screen. 2 Touch [Volume]. The "Volume Settings" screen appears. Changing the virtual speed of the vehicle When - Pioneer AVIC-Z110BT | Owner's Manual - Page 101
on page 29. 5 To finish the setting, touch [OK]. Changing the splash screen You can change the splash screen to the other images stored in the navigation system. 1 Display the "System Settings" screen. 2 Touch [Splash Screen]. The "Select Splash Screen" screen appears. 3 Touch the image to use - Pioneer AVIC-Z110BT | Owner's Manual - Page 102
Rear view camera The navigation system features a function that automatically switches to the full-screen rear view camera image installed on your vehicle. When the shift lever is in the REVERSE (R) position, the screen automatically switches to full-screen rear view camera. Camera for Rear - Pioneer AVIC-Z110BT | Owner's Manual - Page 103
"System Settings" screen. 2 Touch [Service Information]. The "Service Information Screen" screen appears. 3 Check the version information. Replicating the settings You can import settings you have made on the utility program "AVIC FEEDS" which is available separately to the navigation system. En - Pioneer AVIC-Z110BT | Owner's Manual - Page 104
[Settings]. The "Settings Menu" screen appears. 4 Touch [Setting Replicator]. A message confirming whether to update the settings appears. 5 Touch [Yes]. Update starts. After the settings are updated, a message confirming whether to restart the navigation system appears. 6 Touch [OK]. The navigation - Pioneer AVIC-Z110BT | Owner's Manual - Page 105
navigation system. This section describes operations for radio (FM). % Touch [FM] on the "AV Source" menu to display the "FM" screen. = For details concerning operations, refer to Screen service name indicator Shows the program service channels. 3 Perform manual tuning To tune manually, touch [c] or - Pioneer AVIC-Z110BT | Owner's Manual - Page 106
preset list display You can switch the left side of the basic screen according to your preference. 2 The next time you touch the be stored in memory. Storing the strongest broadcast frequencies "BSM" (best stations memory) lets you automatically store the six strongest broadcast frequencies under - Pioneer AVIC-Z110BT | Owner's Manual - Page 107
tuning off, touch [Off]. 3 Touch [cPrev] or [Nextd] to set the sensitivity. There are four levels of sensitivity for FM. Level: 1 - 2 - 3 - 4 p The level "4" setting allows reception of only the strongest stations, while lower settings let you receive weaker stations. Using the radio (FM) Chapter - Pioneer AVIC-Z110BT | Owner's Manual - Page 108
navigation system. This section describes operations for radio (AM). % Touch [AM] on the "AV Source" menu to display the "AM" screen. = For details concerning operations, refer to Screen switching overview on page 36. Reading the screen presets. 3 Perform manual tuning To tune manually, touch [c] or - Pioneer AVIC-Z110BT | Owner's Manual - Page 109
Screen switching overview on page 36. 2 Touch . 1 Storing the strongest broadcast frequencies = For details, refer to this page. 2 Tuning in strong signals = For details, refer to this page. Storing the strongest broadcast frequencies "BSM" (best set the sensitivity. There are two levels of sensitivity for AM. - Pioneer AVIC-Z110BT | Owner's Manual - Page 110
16 HD RadioäReception You can listen to the radio by using the navigation system. This section describes operations for HD Radio reception. p For details concerning operation, refer to the HD Radio tuner's operation manual. % Touch [Digital Radio] on the "AV Source" menu to display the "Digital - Pioneer AVIC-Z110BT | Owner's Manual - Page 111
the preset list display You can switch the left side of the basic screen according to your preference. 2 The next time you touch the same displayed. % Touch [Disp]. Touch [Disp] repeatedly to switch between the following settings: Channel name - Artist name - Song title - Program type p Only when - Pioneer AVIC-Z110BT | Owner's Manual - Page 112
refer to this page. Storing the strongest broadcast frequencies "BSM" (best stations memory) lets you automatically store the six strongest broadcast frequencies under . p If you select "Analog" on this setting while [Seek] is set to "HD", the setting on [Seek] turns to "All" automatically. - Pioneer AVIC-Z110BT | Owner's Manual - Page 113
a normal music CD using the built-in drive of the navigation system. This section describes how. 1 Insert the disc you want screen. = For details concerning operations, refer to Screen switching overview on page 36. 3 Use the touch panel keys on the screen to control the disc. Reading the screen - Pioneer AVIC-Z110BT | Owner's Manual - Page 114
Touch [Disc] on the "AV Source" menu to display the "CD" screen. = For details concerning operations, refer to Screen switching overview on page 36. 2 Touch . 1 2 3 4 1 Repeating play Each touch of [Repeat] changes the setting as follows: ! Disc - Repeats the current disc ! Track - Repeats just - Pioneer AVIC-Z110BT | Owner's Manual - Page 115
compressed audio files using the built-in drive of the navigation system. This section describes these operations. p In the following menu to display the "ROM" screen. = For details concerning operations, refer to Screen switching overview on page 36. 3 Use this ROM screen to play the disc. = For - Pioneer AVIC-Z110BT | Owner's Manual - Page 116
: CD (audio data (CD-DA)) - ROM (compressed audio file) - DivX (DivX video files) p This touch panel key appears only when playing a disc containing a mixture of track you want to play. p To cancel the list screen, touch [Detail]. Using the "Function" menu 1 Touch [Disc] on the "AV Source" menu - Pioneer AVIC-Z110BT | Owner's Manual - Page 117
using ROM, the tracks in the current repeat play range are randomly played. p If you turn [Random] to [On] when the repeat play range is set to [Track], the repeat play range changes to [Folder] automatically. 3 Scan folders and tracks Scan play lets you hear the first 10 seconds of each - Pioneer AVIC-Z110BT | Owner's Manual - Page 118
Chapter 19 Playing a DVD-Video You can play a DVD-Video using the built-in drive of the navigation system. This section describes operations for playing a DVD-Video. Using the touch panel keys Playback screen (page1) 1 Reading the screen 12 3 4 56 7 8 9 ab 1 Source icon Shows which source has - Pioneer AVIC-Z110BT | Owner's Manual - Page 119
other than DTS. p Display indications such as MPEG-A and Mch indicate the audio system recorded on the DVD. Depending on the setting, playback may not use the same audio system as that indicated. Resuming playback (Bookmark) The Bookmark function lets you resume playback from a selected scene - Pioneer AVIC-Z110BT | Owner's Manual - Page 120
Chapter 19 Playing a DVD-Video % Touching [BookM.]: You can bookmark one point for each of panel keys to operate the DVD menu. p If you touch the screen while is dis- played, the touch panel keys will not be dis- played. 1 Touch the screen to display the touch panel keys. 2 Touch [Top Menu] or - Pioneer AVIC-Z110BT | Owner's Manual - Page 121
Video 1 Touch [a], [b], [c] or [d] to select the desired menu item. p If the touch panel keys for DVD menu selection disappear, touching anywhere on the screen . 1 2 3 1 Repeating play Each touch of [Repeat] changes the setting as follows: ! Disc - Plays throughout the current disc ! Title - - Pioneer AVIC-Z110BT | Owner's Manual - Page 122
Chapter 19 Playing a DVD-Video p If you perform chapter (title) search, fast forward, fast reverse [L/R Select] repeatedly until the desired audio output appears in the display. Each touch of [L/R Select] changes the settings as follows: ! L+R - Left and right ! L - Left ! R - Right ! Mix - Mixing - Pioneer AVIC-Z110BT | Owner's Manual - Page 123
can play a DVD-VR (DVD Video Recording Format) disc using the built-in drive of the navigation system. This section describes operations for DVD-VR discs. Reading the screen 12 3 4 56 Using the touch panel keys Playback screen (page1) 1 2 3 4 5 6 7 8 9a Playback screen (page2) 1 7 8 9a 1 Source - Pioneer AVIC-Z110BT | Owner's Manual - Page 124
Touching [Hide] hides the touch panel keys. Touch anywhere on the LCD screen to display the touch panel keys again. 8 Display the title list Displays and Mch indicate the audio system recorded on the DVD. Depending on the setting, playback may not use the same audio system as that indicated. c Skip - Pioneer AVIC-Z110BT | Owner's Manual - Page 125
function This function enables you to skip over your specified interval on the video playback. This is useful to skip commercials on your recorded DVD-VR play the title you want from the list. 1 Touch [List] on the playback screen. 2 Touch the title to play from the list. p Touching or switches the - Pioneer AVIC-Z110BT | Owner's Manual - Page 126
overview on page 36. 2 Touch the screen to display the touch panel keys. 3 Touch . Function menu 3 DVD setup adjustments = For details, refer to Displaying DVD/ DivX® Setup menu on page 130. 1 2 3 1 Repeating play Each touch of [Repeat] changes the setting as follows: ! Title - Repeats just the - Pioneer AVIC-Z110BT | Owner's Manual - Page 127
Playing a DivX video Chapter 21 Playing a DivX video You can play a DivX disc using the built-in drive of the navigation system. This section describes that operations. Reading the screen 12 3 4 56 7 8 9a 1 Source icon Shows which source has been selected. 2 Folder number indicator Shows the - Pioneer AVIC-Z110BT | Owner's Manual - Page 128
Chapter 21 Playing a DivX video Touching [p] skips to the start of the next file. Touching 6 Hide the touch panel keys Touching [Hide] hides the touch panel keys. Touch anywhere on the LCD screen to display the touch panel keys again. 7 Display the title list Displays the title list recorded on the - Pioneer AVIC-Z110BT | Owner's Manual - Page 129
return to the previous screen, touch [List]. 3 Touch . Function menu 1 2 1 Repeating play Each touch of [Repeat] changes the setting as follows: ! File audio files and audio data (CD-DA), repeat play is performed within DivX videos even if [Disc] is selected. 2 DVD setup adjustments = For details - Pioneer AVIC-Z110BT | Owner's Manual - Page 130
Video, DVD-VR or DivX. 2 Touch [Disc] on the "AV Source" menu to display the normal playback screen. = For details concerning operations, refer to Screen displayed and the currently set language is selected. Setting the aspect ratio There are two kinds of displays. A wide screen display has a width- - Pioneer AVIC-Z110BT | Owner's Manual - Page 131
which normal playback resumes. For details, refer to the disc's instructions. p If you forget the registered code number, touch 10 times on the number input screen. The registered code number is canceled, letting you register a new one. Setting "Auto Play" When a DVD disc with DVD menu is inserted - Pioneer AVIC-Z110BT | Owner's Manual - Page 132
Chapter 22 DVD-Video, DVD-VR, DivX setup 1 Display the "DVD/DivX® Setup" screen. = For details, refer to Displaying DVD/DivX® Setup menu on page 130. 2 Touch [Auto Play]. Touching [Auto Play] switches this setting between [On] and [Off]. p When [Auto Play] is set to [On], the repeat range is - Pioneer AVIC-Z110BT | Owner's Manual - Page 133
DVD-VR, DivX setup Chapter 22 DVD-Video, DVD-VR, DivX setup Language code chart for DVDs Language (code), input code Japanese (ja), 1001 English (en), 0514 French (fr), 0618 Spanish (es), 0519 - Pioneer AVIC-Z110BT | Owner's Manual - Page 134
[SD] on the "AV Source" menu to display the "USB" or "SD" screen. p Playback is performed in order of folder numbers. Folders are skipped if they contain Mass Storage Class. For details about the USB Class, refer to the manual supplied with the USB storage device. 1 Source icon Shows which source - Pioneer AVIC-Z110BT | Owner's Manual - Page 135
the "Function" menu = For details, refer to Using the "Function" menu on the next page. 2 Switch the operation screen Touching this key switches between the screen to operate music files and the screen to operate video files. This touch panel key is available only when there are both audio and - Pioneer AVIC-Z110BT | Owner's Manual - Page 136
"AV Source" menu to display the "USB" or "SD" screen. = For details concerning operations, refer to Screen switching overview on page 36. 2 Touch . Scan play lets you turn [Scan] to [On] while the repeat play range is set to [Track], the repeat play range changes to [Folder] automatically. 1 2 - Pioneer AVIC-Z110BT | Owner's Manual - Page 137
Storage Class. For details about the USB Class, refer to the manual supplied with the USB storage device. 1 Source icon Shows which source . 2 Switch the operation screen Touching this key switches between the screen to operate music files and the screen to operate video files. This touch panel key - Pioneer AVIC-Z110BT | Owner's Manual - Page 138
Chapter 24 Playing video files (from USB or SD) Touching [p] skips to the start of the list You can select and play the title you want from the list. 1 Touch [List] on the playback screen. The contents of the folder in which the currently playing file is located are displayed. # Touch and hold [ - Pioneer AVIC-Z110BT | Owner's Manual - Page 139
to "Folder". 2 Changes the screen size of video If a video file is played, you can select the display mode between normal and full screen. Each touch of [Video Output Setting] changes the setting as follows: ! Normal - Video files appear in normal size. ! Full - Video files appear in a fullscreen - Pioneer AVIC-Z110BT | Owner's Manual - Page 140
"AV Source" menu. = For details concerning operations, refer to Screen switching overview on page 36. p No video output if iPod is selected as AV source, check the setting in "AV1 Input" on the "AV System Settings" menu. = For details, refer to Setting video input 1 (AV1) on page 162. Reading the - Pioneer AVIC-Z110BT | Owner's Manual - Page 141
only when there are both audio and video file in your iPod. p If iPod fifth generation is connected, the following settings are automatically changed when the operation screen is switched to the screen to operate video files. ! [Repeat] is set to [All]. ! [Shuffle] is set to [Off]. 5 Display the top - Pioneer AVIC-Z110BT | Owner's Manual - Page 142
Mode] is set to [iPod], following functions are available from this navigation system. ! Playback and Pause ! Fast reverse or forward ! Skip forward or backward ! Adjusting the volume Starting the video playback This navigation system can play video if an iPod with video capabilities is connected - Pioneer AVIC-Z110BT | Owner's Manual - Page 143
Touching [Hide] hides the touch panel keys. Touch anywhere on the LCD screen to display the touch panel keys again. Browsing for a video Touching the item on list allows you to search for a video and play it in your iPod. Narrowing down a video with the list 1 Touch [MENU] or [Top Menu]. The search - Pioneer AVIC-Z110BT | Owner's Manual - Page 144
options. 5 On the video list, touch the video you want to play. Using the "Function" menu p If [Change Control Mode] is set to [iPod], only the setting of [Change Control Mode] is available. 1 Touch [iPod] on the "AV Source" menu to display the control screen for "iPod". = For details concerning - Pioneer AVIC-Z110BT | Owner's Manual - Page 145
available only during the video operation. 5 Setting iPod control mode While the control mode is set to "iPod", you can operate iPod function from the connected iPod. Each touch of [Change Control Mode] changes the setting as follows: ! Navi - This navigation system's iPod function can be operated - Pioneer AVIC-Z110BT | Owner's Manual - Page 146
/Video Remote Control Profile): Playing back, pausing, selecting songs, etc., are possible. p Since there are a number of Bluetooth audio players available on the market, operations with your Bluetooth audio player using this navigation system vary greatly in range. Please refer to the instruction - Pioneer AVIC-Z110BT | Owner's Manual - Page 147
Audio] on the "AV Source" menu to display the "Bluetooth Audio" screen. = For details concerning operations, refer to Screen switching overview on page 36. 2 Touch . 1 2 1 Repeating play Each touch of [Repeat] changes the setting as follows: ! All - Repeats all compressed audio files in the - Pioneer AVIC-Z110BT | Owner's Manual - Page 148
navigation system which differs from that described in the XM tuner's operation manual. The following XM satellite digital tuner units cannot be connected: GEX-P900XM, GEX-P910XM Reading the screen station in the future may not be supported by the navigation system, and may cause the unit to display - Pioneer AVIC-Z110BT | Owner's Manual - Page 149
menu to display the "XM" screen. = For details concerning operations, refer to Screen switching overview on page 36. ALL Touch to recall the preset channel. 4 Perform manual tuning The channels move up or down one at Preset key for receiving the traffic audio service = For details, refer to Using - Pioneer AVIC-Z110BT | Owner's Manual - Page 150
MODE. To switch the channel mode, touch [Mode]. 1 Touch [List]. XM channel list appears in the display. Each touch of [List] changes the screen as follows: Detail information display or Preset list display - CH Name List (Channel name) - Song Title List (Song title) - Artist Name List (Artist - Pioneer AVIC-Z110BT | Owner's Manual - Page 151
or when [Off] is selected on [Alert] on "Memo Edit" screen, no alert will be provided. = Refer to Setting the memorized songs on the next page. p Notification may not be provided depend- ing on the status of the navigation system. p If there is even a slight difference between the memorized title - Pioneer AVIC-Z110BT | Owner's Manual - Page 152
songs Selecting the songs to alert The list of song titles memorized for the MyMix Function (MyMix list) is displayed. You can change the notification setting when the song is broadcast again. You can enable or disable notification for each song. 1 Touch [Memo Edit]. 2 Touch the song title that you - Pioneer AVIC-Z110BT | Owner's Manual - Page 153
universal tuner (sold separately) with this navigation system, Pioneer SIRIUS BUS INTERFACE is required. For details concerning operation, refer to the owner's manual of Pioneer SIRIUS BUS INTERFACE and SiriusConnect universal tuner. Reading the screen ALL CH MODE 12 3 4 5 6 7 CATEGORY MODE - Pioneer AVIC-Z110BT | Owner's Manual - Page 154
4 Recalling channels from the preset Touch to recall the preset channel. 5 Perform manual tuning The channels move up or down one at a time. p If you switching the preset. 7 Preset key for receiving the traffic audio service = For details, refer to Using the direct traffic announcement function on - Pioneer AVIC-Z110BT | Owner's Manual - Page 155
will be provided even when that song is broadcast. = For details, refer to Setting the memor- ized songs on the next page. p Notification may not be provided depend- ing on the situation of the Navigation System. = For details, refer to Selecting the songs to alert on the next page. Using - Pioneer AVIC-Z110BT | Owner's Manual - Page 156
selected channel and the memory capacity of Pioneer SIRIUS BUS INTERFACE). 1 Touch [Instant Replay] on the SIRIUS screen to activate the "Instant Replay" prior to the beginning of stored data. 2 Touch . 1 2 3 1 Setting the memorized songs = For details, refer to this page. 2 Using the Game - Pioneer AVIC-Z110BT | Owner's Manual - Page 157
then try again. Changing the alert setting You can enable or disable the provided depending on the status of the navigation system. Displaying Game Information An alert will be information which is registered. p The game score will be updated automatically. p Touch [Tune To] to switch to the channel - Pioneer AVIC-Z110BT | Owner's Manual - Page 158
" output by AV1 Input or AV2 Input to the screen of the navigation system. For details of the connection method, refer to "Installation Manual". CAUTION For safety reasons, video images cannot be viewed while your vehicle is in motion. To view video images, you must stop in a safe place and apply - Pioneer AVIC-Z110BT | Owner's Manual - Page 159
navigation system. When two external units are connected, the navigation system allocates them as external unit 1 or external unit 2. For details of the connection method, refer to the Installation Manual by transmitting the operating commands set to F1 - F4. p The operating commands set to F1 - F4 - Pioneer AVIC-Z110BT | Owner's Manual - Page 160
Source" menu. Each touch of [Rear Screen] changes the settings as follows: ! Mirror AV - The video on the front screen of the navigation unit is output to the "Rear display" ! iPod - The video and sound of the iPod are output to the "Rear display" ! Disc - The video and sound of the DVDs are output - Pioneer AVIC-Z110BT | Owner's Manual - Page 161
video and navigation map display. p The setting contents can be memorized separately for the following screen and the "Video image". - AM/FM/CD/ROM/iPod(Music)/SD (audio)/USB(audio)/Bluetooth Audio/ XM/SIRIUS/Digital Radio screen - AV1 and iPod(Video) - DVD-V, DVD-VR, DivX - SD(Video) and USB(Video - Pioneer AVIC-Z110BT | Owner's Manual - Page 162
Interface cable for iPod (CD-IU50V) ! Video - External video component ! Off - No video component is connected p Use AV1 Input when connecting CD-RM10 (sold separately) through the external video component. Switching the auto antenna setting If the blue lead of the navigation system is connected - Pioneer AVIC-Z110BT | Owner's Manual - Page 163
! iPod p When video is viewed in a wide screen mode that does not match its original aspect ratio, it may look strange. p Remember that use of this system for commercial or public viewing purposes may constitute an infringement on the author's rights protected by the Copyright Law. p The navigation - Pioneer AVIC-Z110BT | Owner's Manual - Page 164
- When you use a cellular phone via Bluetooth technology (dialing, talking, incoming call). - setting according to your usage. The navigation system starts acquiring/cataloging music information (1) when the iPod is connected or when the system boots up while the iPod is connected and (2) when iPod - Pioneer AVIC-Z110BT | Owner's Manual - Page 165
"VR Catalog Mode". # Touch [Cancel]. Stops the cataloging of iPod. If you want to restart the cataloging of iPod, touch [Restart]. Displaying your DivX VOD registration code In order to play DivX VOD (video on demand) content on this navigation system, you first need to register the unit with your - Pioneer AVIC-Z110BT | Owner's Manual - Page 166
. "Front:15" to "Rear:15" is displayed as the front/rear speaker balance moves from front to rear. Setting "Front:" and "Rear:" to "0" is correct when using a two speaker system. 3 Touch [c] or [d] to adjust left/right speaker balance. Each time you touch [c] or [d], the left/right speaker balance - Pioneer AVIC-Z110BT | Owner's Manual - Page 167
curve will be updated. ! The adjusted iPod and USB. ! When [Flat] is selected, no supplement or correction is made to the sound. This is useful to check the effect of the equalizer curves by switching alternatively between [Flat] and a set equalizer curve. 1 Touch [EQ] on the "AV Sound Settings - Pioneer AVIC-Z110BT | Owner's Manual - Page 168
- Mid - High Using subwoofer output The navigation system is equipped with a subwoofer output mechanism, which can be turned on or off. p Only when "Sub Woofer" is [On], you can adjust "Phase", "Level" and "Frequency(Hz)". 1 Touch [Sub Woofer] on the "AV Sound Settings" menu. = For details, refer to - Pioneer AVIC-Z110BT | Owner's Manual - Page 169
DVD-VR ! CD, ROM, DivX ! EXT1 and EXT2 ! AV1 and AV2 ! SD and USB ! XM and SIRIUS p The different source volume level can be set between iPod and USB. Enhancing bass (Bass Booster) The "Bass Booster" enhances bass sounds, which can be muted by driving noise. 1 Touch [Bass Booster] on the "AV - Pioneer AVIC-Z110BT | Owner's Manual - Page 170
necessary. 6 The requested operation will be carried out. p The voice operation may not be operable for a minute after the navigation system has booted up. p Voice operation will be activated 30 seconds after the map screen is displayed. If the VOICE button does not respond, display the disclaimer - Pioneer AVIC-Z110BT | Owner's Manual - Page 171
and set it as your destination. 1 Press the MODE button to display the map screen or the AV operation screen. 2 iPod connected to the navigation system. p To use the content/data on the iPod for voice operation, transfer the data to this system first. = For details, refer to Acquiring/Cataloging iPod - Pioneer AVIC-Z110BT | Owner's Manual - Page 172
song of "Pioneer". Available Basic Voice Commands The navigation system can also recognize the words in the following list. Basic commands Voice commands and operations Back d The previous screen returns. Cancel d Cancels the voice operation. Help d Outputs the brief operating instruction by voice - Pioneer AVIC-Z110BT | Owner's Manual - Page 173
the genre d Displays the song list of the selected genre list together with sub-screen to continue the voice operation. d Say the desired voice commands. Play more music artist d is available only when the selection list is displayed. Operating Your Navigation System with Voice En 173 - Pioneer AVIC-Z110BT | Owner's Manual - Page 174
Chapter 33 Operating Your Navigation System with Voice Voice operation for AV source (other than iPod) AV source selection Voice source to USB. Change Source to iPod d Switches the AV source to iPod. Change Source to Bluetooth Audio d Switches the AV source to Bluetooth Audio. Built-in DVD drive, - Pioneer AVIC-Z110BT | Owner's Manual - Page 175
featuring Bluetooth wireless technology is being paired with the navigation system. confirming whether to dial d Say Yes d The system starts dialing to the number. Make a call to dial d Say Yes d The system starts dialing to the number (*2). List on the entry, the system may suggest you other phone numbers - Pioneer AVIC-Z110BT | Owner's Manual - Page 176
Chapter 33 Operating Your Navigation System with Voice Tips for Voice Operation For your voice commands from outside the vehicle can interfere with voice operation. Position the microphone carefully For optimum pick-up, the microphone should be fixed at a suitable distance directly in front of the - Pioneer AVIC-Z110BT | Owner's Manual - Page 177
the back-up lead is cut after the password is set, the navigation system prompts for the password at the time of next boot up. Setting the password 1 Press the HOME button to display the "Top Menu". 2 Touch [Settings]. The "Settings Menu" screen appears. 3 Touch Area1, followed by Area2, and then - Pioneer AVIC-Z110BT | Owner's Manual - Page 178
the default setting Resets various settings registered to the navigation system and restores them to the default or factory settings. p Some data remains. Be sure to read Return- ing the navigation system to the default or factory settings first. 1 Display the "System Settings" screen. = For details - Pioneer AVIC-Z110BT | Owner's Manual - Page 179
the last map scale, the last status of AV operation screen, etc. - : The setting will be retained. 1: The setting will be cleared and returned to the default or factory settings. Navigation functions Method 1 View mode and scale setting on the map - Map function Direction of the map - Last - Pioneer AVIC-Z110BT | Owner's Manual - Page 180
Chapter 34 Other functions Navigation functions [Phone Menu] menu All settings Other functions Anti-theft password AV functions Volume [AV Settings] [AV Sound] Function menu of each AV source Other functions All settings All settings All settings [Picture Adjustment] Tilt Method 1 - - Method - Pioneer AVIC-Z110BT | Owner's Manual - Page 181
Appendix Troubleshooting If you have problems operating your navigation system, refer to this section. The most common problems are listed below, along with likely causes and solutions. If a solution to your problem cannot be found here, contact your dealer or the nearest authorized Pioneer service - Pioneer AVIC-Z110BT | Owner's Manual - Page 182
error. the reception of GPS signals. Snow buildup can also degrade the signals. Signals from the vehicle's speed Check that the cables are properly connected. pulse are not being picked up prop- If necessary, consult the dealer that installed erly. the system. The navigation system may not be - Pioneer AVIC-Z110BT | Owner's Manual - Page 183
the navigation system back on. Problems in the AV screen iPod. cable for iPod is incorrect. cable side. (If only one of these connection has been made, the iPod will not work prop- erly.) (Page 33) The audio or video skips. The navigation system is not firmly Secure the navigation system - Pioneer AVIC-Z110BT | Owner's Manual - Page 184
for iPod. ! Update the iPod software version. ! Reconnect the iPod with the USB interface cable for iPod. ! Park your vehicle in a safe place, and turn off the engine. Turn the ignition key back to "Acc off". Then start the engine again, and turn the power to the navigation system back on. ! Update - Pioneer AVIC-Z110BT | Owner's Manual - Page 185
is out of range for ser- Retry after re-entering the range for service. vice. The connection between the cellular Perform the connection process. phone and the navigation system cannot be established now. If the screen becomes frozen... Park your vehicle in a safe place, and turn off the engine - Pioneer AVIC-Z110BT | Owner's Manual - Page 186
messages may be displayed by your navigation system. Refer to the table below to identify the problem, then take the suggested corrective action. There are occasions when you may see error messages other than those shown here. In such a case, follow the instructions given on the display. Messages - Pioneer AVIC-Z110BT | Owner's Manual - Page 187
and accept the connection request from the navigation system. (Furthermore, check the connection settings on your cellular phone.) The target is not too far. The cellular phone's Bluetooth wire- Keep turning the target phone's Bluetooth less technology is turned off during wireless technology - Pioneer AVIC-Z110BT | Owner's Manual - Page 188
problem, then take the suggested corrective action. If the error persists, record the error message and contact your dealer or your nearest Pioneer service The temperature of the navigation system is out of video can- Create playable one and retry. NOT PLAYABLE-HIGH DEF) not be played. SD/USB/iPod - Pioneer AVIC-Z110BT | Owner's Manual - Page 189
is restricted because the navigation system is trying to acquire the information needed to operate iPod with voice commands from the iPod currently connected. • Wait on the iPod basic screen (Music) until "iPod VR Dictionary updated" appears. • Switch the screen to another screen to cancel the - Pioneer AVIC-Z110BT | Owner's Manual - Page 190
on the vehicle model. For details, consult your authorized Pioneer dealer or an installation professional. p Some types of vehicles may not output lot. How do GPS and "Dead Reckoning" work together? For maximum accuracy, your navigation system continually compares GPS data with your estimated - Pioneer AVIC-Z110BT | Owner's Manual - Page 191
Map matching As mentioned, the positioning systems used by this navigation system are susceptible to certain errors. Their calculations may, on occasion, place you in a location on the map where no road exists. In this situation, the processing system understands that vehicles travel only on roads - Pioneer AVIC-Z110BT | Owner's Manual - Page 192
, such as the state of the road you are traveling on and the reception status of the GPS signal, the actual position of your vehicle may differ from the position displayed on the map screen. ! If you make a shallow turn. ! If you drive in zigzags. ! If the road has a series of hairpin - Pioneer AVIC-Z110BT | Owner's Manual - Page 193
road with many height changes. ! If trees or other obstacles block the GPS signals for a considerable period. ! If you enter or exit a multi- immediately after starting the engine. Route setting information Route search specifications Your navigation system sets a route to your destination by - Pioneer AVIC-Z110BT | Owner's Manual - Page 194
navigation system while taking the type of streets or traffic regulations into account. It is not necessarily an optimum route. (In some cases, you may not be able to set the screen may differ from the actual number of roads. Route highlighting ! Once set, the route is highlighted in bright color on - Pioneer AVIC-Z110BT | Owner's Manual - Page 195
. Consider it to be normal wear and tear. Playable discs DVD-Video and CD DVD and CD discs that display the logos shown below generally can be played on this built-in DVD drive. DVD-Video CD Appendix ! Condensation may temporarily impair the built-in drive's performance. - Pioneer AVIC-Z110BT | Owner's Manual - Page 196
can lead to playback problems on this navigation system. In some cases, navigation system. ! Please refer to the manufacturer for more detailed information about DualDiscs. Dolby Digital AVIC-Z110BT the vehicle. DVD-Video discs ! DVD-Video discs that have , or writing software. ! The following logo - Pioneer AVIC-Z110BT | Owner's Manual - Page 197
be possible, depending on the recording device, writing software, their settings, and other environmental factors. ! Please record with the , this navigation system may not recognize the storage device or files may not be played back properly. ! The text information of some audio and video files may - Pioneer AVIC-Z110BT | Owner's Manual - Page 198
. ! DivX VOD file playback requires supplying the ID code of this navigation system to the DivX VOD provider. Regarding the ID code, refer to Displaying ! For materials that use a high transfer rate, the subtitles and video may not be completely synchronized. ! If multiple subtitles are programed to - Pioneer AVIC-Z110BT | Owner's Manual - Page 199
Media CD-R/-RW DVD-R/-RW/-R DL File extension .wma Bit rate 5 kbps to 320 kbps (CBR), VBR Sampling frequency 8 kHz to 48 kHz Note: The navigation system is not compatible with the following: Windows Media™ Audio 9 Professional, Lossless, Voice USB storage device SD memory card En 199 - Pioneer AVIC-Z110BT | Owner's Manual - Page 200
compatibility Media CD-R/-RW DVD-R/-RW/-R DL File extension .m4a Bit rate 8 kbps to 320 kbps (CBR) Sampling frequency 8 kHz to 44.1 kHz Note: The navigation system plays back AAC files encoded by iTunes. USB storage device SD memory card 8 kHz to 18 kHz 200 En - Pioneer AVIC-Z110BT | Owner's Manual - Page 201
) cannot be played. Maximum image size 720 pixels × 576 pixels Maximum file size 4 GB Notes: ! The navigation system is not compatible with the following: DivX Ultra format, DivX files without video data, DivX files encoded with LPCM (Linear PCM) audio codec ! Depending on the file information - Pioneer AVIC-Z110BT | Owner's Manual - Page 202
the file and folder name. Depending on the display area, the navigation system may try to display them with a reduced font size. However other operations may be altered, depending on the encoding or writing software. ! Regardless of the length of blank section between the songs . Bluetooth 202 En - Pioneer AVIC-Z110BT | Owner's Manual - Page 203
are sold separately) can be controlled by this navigation system. Please inquire with your dealer or nearest authorized Pioneer service station regarding the satellite radio tuner that can be connected to this navigation system. Note: The system will use direct satellite-to-receiver broadcasting - Pioneer AVIC-Z110BT | Owner's Manual - Page 204
encoded by iTunes version 7.7. Detailed information regarding connectable iPods CAUTION ! Pioneer accepts no responsibility for data lost from an iPod, even if that data is lost while using the navigation system. ! Do not leave the iPod in direct sunlight for extended amounts of time. Extended - Pioneer AVIC-Z110BT | Owner's Manual - Page 205
long period of time, it will become very hot, resulting in possible damage to the LCD screen. When not using this navigation system, avoid exposing it to direct sunlight as much as possible. ! The LCD screen should be used within the temperature ranges shown in "Specifications". ! Do not use the LCD - Pioneer AVIC-Z110BT | Owner's Manual - Page 206
than 10 000 hours. However, it may decrease if used in high temperatures. ! If the LED backlight reaches the end of its product lifetime, the screen will become dimmer and the image will no longer be visible. In that case, please consult your dealer or the nearest authorized - Pioneer AVIC-Z110BT | Owner's Manual - Page 207
] [Hotel] [Spell Name] [Near Me] [Near Destination] [Around City] [AVIC FEEDS] [Favorites] [History] [Cancel Route] [MSN Direct] [Coordinates] [Route ] [GOOG-411] Settings Menu [Navi Settings] [System Settings] [AV Settings] [AV Sound] [Map Settings] [Bluetooth Settings] [Setting Replicator] Page 84 - Pioneer AVIC-Z110BT | Owner's Manual - Page 208
Current Location] Page 94 94 96 97 98 98 98 [Regional Settings] [Program Language], [Voice Language] [Time] [km / mile] [Speed] [Volume] [Splash Screen] [Back Camera] [Screen Calibration] [Illumi Color] [Service Information] [Restore Factory Settings] Page 99 99 100 100 100 101 101 102 103 103 - Pioneer AVIC-Z110BT | Owner's Manual - Page 209
Appendix Map Settings menu AV System Settings menu Appendix Appendix [Displayed Info] [Close Up View] [City Map] [City Map Barrier] [Show Traffic Incident] [Bluetooth Connected] [Current Street Name] [Favorites Icon] [3D Land Mark] [Show Manuever] [MSN Direct] [Quick Access Selection] [Overlay - Pioneer AVIC-Z110BT | Owner's Manual - Page 210
FAD/BAL] ([Balance]) [EQ] [Loudness] [Sub Woofer] [HPF] [SLA] [Bass Booster] [Staging] Page 166 166 168 168 168 168 169 169 [Connection] [Registration] [Device Name] [Password] [Bluetooth On/Off] [Echo Cancel] [Auto Answer Preference] [Refuse All Calls] [Clear Memory] [Firmware update] Page 82 79 - Pioneer AVIC-Z110BT | Owner's Manual - Page 211
screen. A regular display has an aspect ratio of 4:3. Wide screen video, including DivX 6. Favorites A frequently visited location (such as your workplace or a relative's home) that you can register to allow easy routing. GPS Global Positioning System. A network of satellites that provides navigation - Pioneer AVIC-Z110BT | Owner's Manual - Page 212
and other data. The contents can be freely edited using software with ID3 Tag editing functions. Although the tags are restricted video image compression standard. Multi-angle With regular TV programs, although multiple cameras are used to simultaneously shoot scenes, only images from one camera - Pioneer AVIC-Z110BT | Owner's Manual - Page 213
setting is done automatically by the system when you specify a destination. Set route The route marked out by the system to your destination. It is highlighted in bright color on the map. Title DVD-Video Voice guidance The giving of directions by navigation voice while in guidance. Waypoint A - Pioneer AVIC-Z110BT | Owner's Manual - Page 214
lbs) NAND flash memory 4 GB Navigation GPS Receiver: System L1, C/Acode GPS SPS (Standard Positioning Service) Reception system .......... 32-channel multi-channel reception system Reception frequency .... 1 575.42 MHz Sensitivity 143 dBm (typ) Position update frequency Approx. once per second - Pioneer AVIC-Z110BT | Owner's Manual - Page 215
kHz) (CD: 94 dB (1 kHz)) Distortion 0.008 % (1 kHz) Output level: Video 1.0 Vp-p/75 W (±0.2 V) Audio 1.0 V (1 kHz, 0 dB) Number of channels memory capacity 16 GB File system FAT16, FAT32 Decoding format MP3/WMA/AAC/WAVE/ H.264/MPEG4/WMV Bluetooth Version Bluetooth 2.0+EDR Output power 4 dBm - Pioneer AVIC-Z110BT | Owner's Manual - Page 216
ELECTRONICS OF CANADA, INC. 300 Allstate Parkway, Markham, Ontario L3R 0P2, Canada TEL: 1-877-283-5901 TEL: 905-479-4411 PIONEER ELECTRONICS DE MEXICO, S.A. de C.V. Blvd.Manuel Avila Camacho 138 10 piso Col.Lomas de Chapultepec, Mexico, D.F. 11000 TEL: 55-9178-4270 44號13 02) 2521-
-
 1
1 -
 2
2 -
 3
3 -
 4
4 -
 5
5 -
 6
6 -
 7
7 -
8
-
9
-
10
-
11
-
12
-
13
-
14
-
15
-
16
-
17
-
18
-
19
-
20
-
21
-
22
-
23
-
24
-
25
-
26
-
27
-
28
-
29
-
30
-
31
-
32
-
33
-
34
-
35
-
36
-
37
-
38
-
39
-
40
-
41
-
42
-
43
-
44
-
45
-
46
-
47
-
48
-
49
-
50
-
51
-
52
-
53
-
54
-
55
-
56
-
57
-
58
-
59
-
60
-
61
-
62
-
63
-
64
-
65
-
66
-
67
-
68
-
69
-
70
-
71
-
72
-
73
-
74
-
75
-
76
-
77
-
78
-
79
-
80
-
81
-
82
-
83
-
84
-
85
-
86
-
87
-
88
-
89
-
90
-
91
-
92
-
93
-
94
-
95
-
96
-
97
-
98
-
99
-
100
-
101
-
102
-
103
-
104
-
105
-
106
-
107
-
108
-
109
-
110
-
111
-
112
-
113
-
114
-
115
-
116
-
117
-
118
-
119
-
120
-
121
-
122
-
123
-
124
-
125
-
126
-
127
-
128
-
129
-
130
-
131
-
132
-
133
-
134
-
135
-
136
-
137
-
138
-
139
-
140
-
141
-
142
-
143
-
144
-
145
-
146
-
147
-
148
-
149
-
150
-
151
-
152
-
153
-
154
-
155
-
156
-
157
-
158
-
159
-
160
-
161
-
162
-
163
-
164
-
165
-
166
-
167
-
168
-
169
-
170
-
171
-
172
-
173
-
174
-
175
-
176
-
177
-
178
-
179
-
180
-
181
-
182
-
183
-
184
-
185
-
186
-
187
-
188
-
189
-
190
-
191
-
192
-
193
-
194
-
195
-
196
-
197
-
198
-
199
-
200
-
201
-
202
-
203
-
204
-
205
-
206
-
207
-
208
-
209
-
210
-
211
-
212
-
213
-
214
-
215
-
216
 |
 |

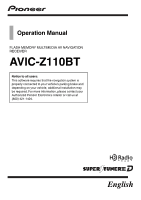
Operation Manual
FLASH MEMORY MULTIMEDIA AV NAVIGATION
RECEIVER
AVIC-Z110BT
Notice to all users:
This software requires that the navigation system is
properly connected to your vehicle
’
s parking brake and
depending on your vehicle, additional installation may
be required. For more information, please contact your
Authorized Pioneer Electronics retailer or call us at
(800) 421-1404.
English